How to Refinish Wood Chair
You can refinish a wood chair in a weekend by inspecting joints, tightening or reglueing loose parts, then removing the old finish with stripper or sanding to bare wood. Sand progressively (120–220 grit), clean dust, test stain on a hidden spot, then apply stain and two thin topcoats—lightly sanding between coats. Reassemble with labeled hardware and check stability. Follow proper safety and drying times for best results; keep going and you’ll find step‑by‑step tips and troubleshooting.
Quick Plan: Refinish a Chair in One Weekend
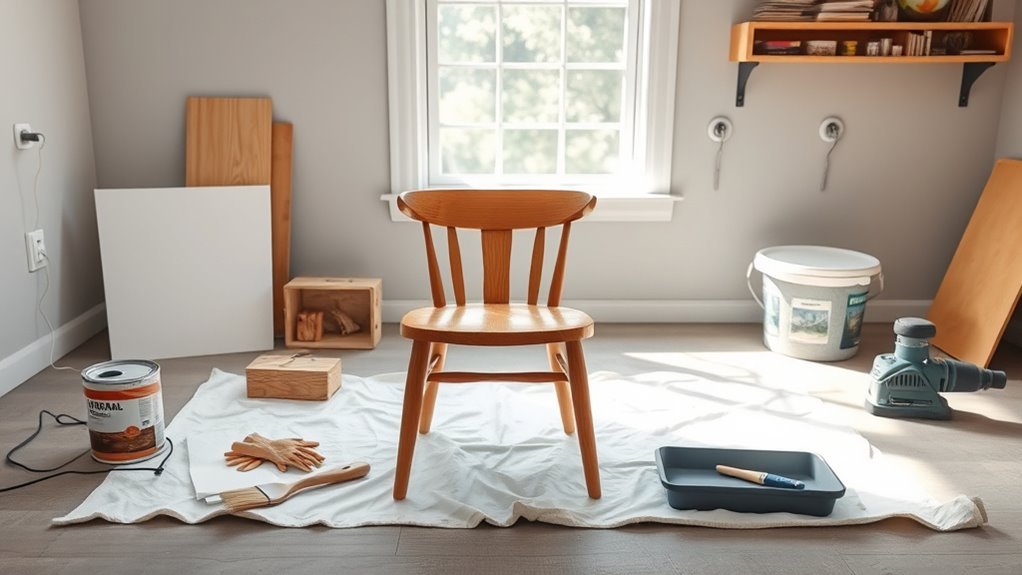
If you want a chair that looks fresh by Sunday, this weekend plan walks you through the steps so you can finish without rushing.
You’ll prep Friday evening: clear workspace, gather sandpaper, stripper, brushes, stain, and finish.
Prep Friday evening: clear your workspace and gather sandpaper, stripper, brushes, stain, and finish.
Saturday morning you’ll strip old finish or sand to bare wood, then clean dust.
Saturday afternoon you’ll sand progressively finer grits, wipe down, and test stain on an inconspicuous spot.
Sunday you’ll apply stain, let it dry, then seal with two thin coats of finish, sanding lightly between coats.
Allow final cure time, then reassemble and enjoy your refreshed chair.
What Refinishing a Chair Will Achieve
When you refinish a chair, you restore its appearance, strengthen the wood, and extend its useful life—removing scratches, stains, and worn finishes so grain and color can shine through again. You’ll reveal the chair’s natural character, fix minor surface damage, and create a durable finish that resists future wear.
Refinishing also lets you update tone or sheen without losing original material, keeping value and sentiment intact. With proper prep and finish, the chair becomes both beautiful and functional for years.
You’ll save money versus replacement and keep a piece that fits your space and taste.
- Renewed look and visible grain
- Improved durability
- Preserved original material
Refinish vs. Repaint vs. Replace: How to Decide
Although a fresh coat of paint can quickly brighten a chair, you should weigh cost, condition, and your goals before deciding whether to refinish, repaint, or replace.
If the finish is worn but the wood is sound and you want to showcase grain, strip and refinish—it’s more time-consuming but preserves value and character.
Repaint when structural integrity is fine, you prefer color over grain, or you need a fast, inexpensive update.
Replace if joints are loose beyond repair, wood is rotten, or restoration costs exceed buying new.
Match your choice to budget, desired look, and sentimental value.
Identify the Wood and Construction
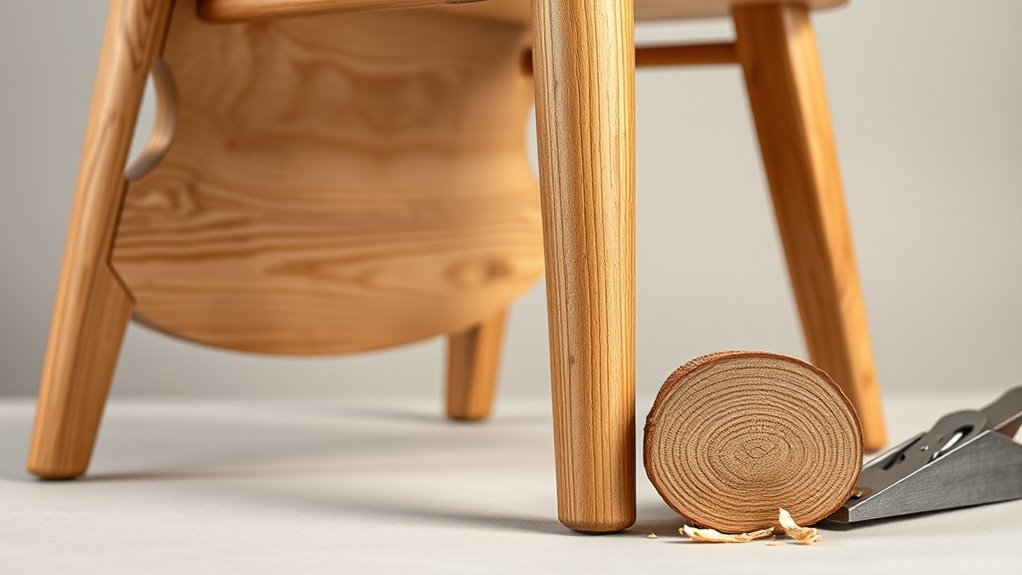
Curious what kind of wood you’re working with? You’ll examine grain, color, and weight to tell hardwoods (oak, maple) from softwoods (pine). Look at end grain and joinery to guess age and quality. Solid wood behaves differently from veneer or plywood when stripped or sanded, so identifying it guides your refinishing choices.
- Examine grain pattern and pores: open (oak) vs. tight (maple).
- Check edges and underside for veneer seams or uniform layers.
- Note construction: mortise-and-tenon, dowels, or visible screws — that affects disassembly and care.
Inspect and Fix Loose Joints and Damage
Now check each joint for wobble and play so you know which connections need attention.
You’ll repair loose mortises by cleaning old glue, re-gluing or pinning parts, and clamping until set.
Finally, address surface damage like dings or gouges before refinishing so the repair blends with the finish.
Check Joint Stability
Before you strip or refinish anything, check each joint for looseness and visible damage so you don’t seal in a problem that’ll get worse. Work systematically: sit the chair upright, press and twist each connection, and note creaks, gaps, or wobble.
Tighten accessible screws or bolts, and clamp temporarily to assess fit. If glue lines have separated, mark those areas for repair in the next step. Keep a record of which joints need attention so you don’t miss one during refinishing.
- Test legs, stretchers, and back posts for movement
- Listen for creaks and feel for play
- Mark and photograph problem joints
Repair Loose Mortises
How do you know when a mortise needs attention? If a leg wobbles or joints move under pressure, you’ll inspect the mortise and tenon. Remove loose glue, dry-fit the joint, and note worn wood or gaps. Use glue and appropriate shims or sliced veneer to rebuild thickness, clamp squarely, and let cure. For badly damaged mortises, drill to remove rot and fit a new hardwood plug or use epoxy repair compound. Test fit after curing and trim flush. Reinforce with discreet dowels only if necessary to maintain original appearance and strength.
| Symptom | Fix |
|---|---|
| Wobble | Glue + shims |
| Gap | Veneer or epoxy |
Address Surface Damage
What should you look for when inspecting surface damage? Check joints, splits, and finishes closely. Tap joints to find looseness, pry hidden glue chips, and trace cracks that run along grain. You’ll want to clean debris before repairs so adhesives bond well.
- Loose joints: regluing with clamps and dowels when needed
- Surface cracks: fill with matching wood filler or glue and sawdust mix
- Finish damage: sand feathered edges, stain to match, seal with varnish
Work methodically, letting glue and finishes cure fully. Reinspect after curing to ensure stability and a smooth appearance.
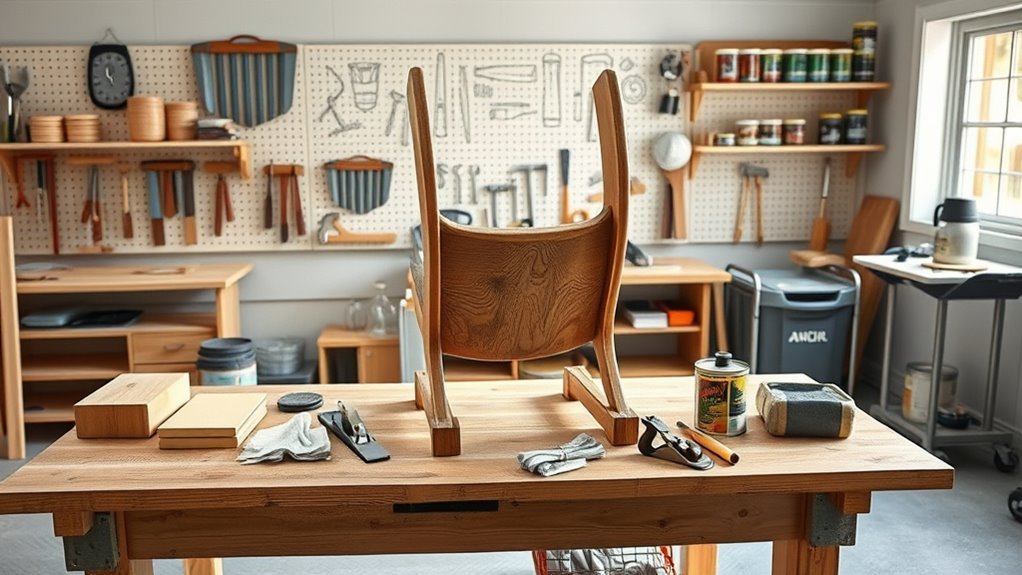
Tools, Materials, and Safety Gear You Need
When you’re ready to strip, sand, and refinish a wood chair, gather the right tools, materials, and safety gear so the job goes smoothly and safely.
When you’re ready to refinish a wood chair, gather proper tools, supplies, and safety gear first.
You’ll need chemical stripper or a heat gun, various grit sandpaper (80–220), a sanding block or orbital sander, a putty knife, wood filler, tack cloths, brushes or foam applicators, stain or paint, and a clear finish (polyurethane or lacquer).
For safety, wear chemical-resistant gloves, safety goggles, a respirator rated for solvents/dust, and long sleeves.
Have rags, a metal trash bin for disposal, and a first-aid kit nearby.
Choose quality supplies to save time and improve results.
Set Up Your Workspace for an Efficient Weekend
Before you bring any chemicals or power tools into the space, choose a well-ventilated, level area—garage with the door open, covered patio, or a workspace with cross-breeze—and clear enough room to move the chair pieces around without tripping.
Lay down drop cloths, set up a sturdy workbench or sawhorses, and arrange tools within reach so you won’t hunt for them.
Create zones: prep, stripping/sanding, and finishing.
Keep a trash bin and rags accessible. Protect finished surfaces from dust with plastic sheeting.
- Drop cloths, bench/sawhorses, clamps
- Lighting, extension cords, power strip
- Trash bin, rags, masking tape
Remove the Old Finish: Stripper vs. Sanding
While you can remove old finishes by hand, choosing between a chemical stripper and sanding depends on the finish type, the chair’s details, and your comfort with chemicals and dust.
Use stripper for carved areas, stubborn lacquer, or multiple coats—apply per instructions, work with scrapers and brushes, and neutralize residue.
Sanding suits flat surfaces and minor wear; start with coarse grit to remove finish, progress to finer grits for smoothness, and keep strokes with the grain.
For tight spots, use sanding sponges or detail files.
Ventilate, wear gloves and respiratory protection, and test a small area first.
Safely Disassemble the Chair
Before you start stripping or sanding, remove any cushions and take out visible screws, bolts, and brackets so the frame’s exposed.
Label and photograph each joint as you go to remember how pieces fit back together.
Put small hardware and labels into sealed bags and tape them to the corresponding parts.
Remove Cushions And Hardware
How do you take a chair apart without damaging the wood or accidentally tossing screws into the carpet? Begin by removing cushions: unzip or lift staples carefully, slide out foam or webbing, and set fabric aside. Keep protective pads under the chair legs while you work.
Next, remove visible hardware with the right screwdriver or hex key, turning gently to avoid stripping. Place each fastener, washer, and bracket into labeled containers so nothing gets lost. Check for hidden screws under trim or felt, then stop and reassess before forcing any joint.
- Use magnetic tray for fasteners
- Work on a soft, flat surface
- Protect finished edges with cloth
Label And Photograph Joints
Once cushions and visible hardware are off, label and photograph every joint so reassembly goes smoothly. Use small numbered stickers or masking tape to mark matching pieces—left/right, front/back, top/bottom—and note screw types and lengths.
Photograph each joint from multiple angles, including close-ups of dowels, corner blocks, and glue lines. Capture orientation marks and any unusual wear or damage.
Keep photos organized on your phone or a folder labeled with the chair part. If a joint resists, photograph before forcing it.
Clear labels and images save time and prevent mistakes when you dry-fit and glue the chair back together.
Store Parts In Bags
Where should small parts go so they don’t disappear? You’ll sort screws, washers, and brackets into clearly labeled resealable bags as you disassemble the chair. Seal each bag tightly, note the related joint or step on the label, and keep bags with matching photos or diagrams so reassembly’s straightforward.
- Bag per joint: seat, back, armrests
- Label with step number and orientation
- Attach photo or sketch to bag
Store bags in a box or tackle tray, avoiding damp areas. You’ll prevent loss, speed reassembly, and maintain organization throughout refinishing.
Sanding to Refinish a Chair: Grits and Direction
Before you start sanding, choose grits and a sanding direction that match the chair’s finish and wood species; using the wrong abrasive or sanding across the grain can leave visible scratches that show through your new finish.
Match your sandpaper grit and sanding direction to the chair’s finish and wood to prevent visible scratches.
Start with 80–120 grit to remove old finish on hardwoods; use 150–180 grit for softer woods or light smoothing.
Progress to 220 grit for final smoothing before stain or sealer.
Always sand with the grain on flat surfaces; on curved parts, follow the contour with light pressure.
Check often, clean dust, and avoid over-sanding thin edges to preserve shape and strength.
Fix Dents, Gouges, and Glue Loose Joints
After sanding has smoothed the surface and revealed any imperfections, inspect the chair for dents, gouges, and loose joints so you can address structural and cosmetic issues before finishing.
Fill small dents with wood filler or a damp cloth and iron—raise compressed fibers, then sand flush.
For deeper gouges, shape a matching wood patch or use epoxy putty, then sand.
Reglue loose joints: clean old glue, apply carpenter’s glue, clamp squarely until set.
Check screws and dowels; replace if stripped.
- Use filler or iron for dents
- Patch or epoxy for gouges
- Clean, glue, clamp loose joints
Choose Stain, Paint, or Clear Finish for Durability
When you’re deciding between stain, paint, or a clear finish, think about the chair’s use, the wood species, and how much protection you need—each option trades off appearance and durability differently.
If the chair sees heavy daily use, opt for a durable topcoat: polyurethane or conversion varnish resists scratches and moisture.
Stain enhances grain but needs a protective clear layer for wear.
Paint hides flaws and gives color but requires proper sanding and primer to prevent peeling.
For occasional use or decorative pieces, penetrating oil or wax highlights natural wood with moderate protection.
Prioritize maintenance needs and expected wear when choosing.
Test Stain Color and Glaze on Scrap Wood
Before you commit, grab a scrap piece that matches the chair’s wood so the test will reflect the real finish.
Apply the stain exactly as you plan to on the chair, then add the glaze to see how it alters tone and highlights grain.
Compare the samples in different lighting and note which combo gives the look and depth you want.
Choose Matching Scrap Wood
Since stain and glaze can look different on various species and finishes, pick scrap wood that matches your chair’s species, grain, and cut so your tests mirror the real piece.
Use pieces from the same lumber or reclaimed offcuts, matching grain direction and sap/heartwood proportions.
Keep the surface preparation identical: sand to the same grit and remove dust the same way.
Label each test with stain, glaze, and application notes.
Compare results under the same light where the chair will sit.
- Same species and cut
- Identical sanding and prep
- Labeled tests and consistent lighting
Apply Test Stain
Ready to see how your stain will actually look? Grab the matched scrap, sand it to the same grit as the chair, and wipe away dust.
Apply the stain in thin, even coats with a cloth or brush, following grain direction. Let each coat dry fully before judging—times vary by product.
If you plan to use a glaze, test it over the stained scrap, applying light passes to gauge translucency and depth. Note color, opacity, and drying time, and record product, coat count, and timing.
Repeat until you get the exact look you want.
Evaluate Glaze Effects
When you layer a glaze over your test-stained scrap, watch how it changes depth, sheen, and grain definition—glazes can warm, cool, mute, or highlight tones in subtle ways. You’ll compare sections: stain only, glaze only, and stain-plus-glaze.
Note how transparent glazes deepen grain while opaque glazes mask it. Test drying times, buffing, and topcoat compatibility. Record the exact mix ratios and application method so you can repeat the effect on the chair.
Choose the combination that matches your vision and the chair’s style before committing to the whole piece.
- Transparency versus opacity
- Warmth, coolness, and contrast
- Application method and ratio
How to Apply Stain Evenly: Wiping and Timing
If you want an even, professional-looking finish, work in manageable sections and wipe off excess stain promptly and consistently.
Apply stain with the grain using a cloth or brush, covering a small area at a time so you can control soak time. Let the stain penetrate for the manufacturer’s recommended interval, usually a few minutes.
Then remove surplus with a clean, lint-free rag in smooth, even strokes. Check edges and crevices for pooling and blend immediately.
For uniform color, keep timing consistent across all sections and do a light second coat only after the first has fully dried.
Paint a Chair: Primer, Brushes, and Smoothing Tips
Before you paint, pick a primer that matches the wood and final paint type so adhesion and durability are strong.
Use high-quality brushes and a few specialty tools—angled sash brushes for detail, foam rollers for flat surfaces, and a tack cloth to keep dust off.
Sand between coats with fine-grit paper and smooth any imperfections so each layer lays down evenly.
Choosing The Right Primer
Although it might seem like an extra step, choosing the right primer determines how well your paint will adhere, how durable the finish becomes, and whether the wood’s grain or previous stain will bleed through.
Pick a primer suited to the chair’s material: oil-based for tannin-rich woods, latex/ acrylic for easy cleanup and low odor, or shellac for stubborn stains and quick sealing.
Test compatibility with your chosen topcoat on a scrap.
Apply thin, even coats and sand lightly between coats for smoothness.
Proper priming saves time and prevents peeling or blotching later.
- Seal stains and tannins
- Improve adhesion
- Create uniform base
Best Brushes And Tools
When you pick the right brushes and tools, painting a chair goes faster and the finish looks professional—you’ll want a small angled brush for tight joints, a high-quality synthetic brush for latex or acrylic primer, and a natural-bristle brush for oil-based products. Choose a foam roller for flat surfaces, a detail brush for spindles, and disposable trays to avoid contamination. Keep tack cloths and lint-free rags handy for dust pickup between coats. Use a good-quality painter’s tape to protect areas. Replace worn brushes; they’re cheaper than repairing drips or brush marks.
| Tool | Use |
|---|---|
| Angled brush | Tight joints |
| Synthetic brush | Latex primer |
| Natural brush | Oil primer |
| Foam roller | Flats |
| Detail brush | Spindles |
Sanding And Surface Smoothing
Since a smooth surface makes paint stick and look its best, start by sanding every area you’ll prime or paint, using the right grit for each stage. You’ll remove old finish, feather edges, and create a consistent texture for primer to bond.
Begin with 80–120 grit for stripping or rough defects, move to 150–180 grit to level, and finish with 220 grit for a fine, paint-ready surface.
Sand with the grain, use a sanding block or orbital sander for flat areas, and detail-sand curves by hand.
Wipe dust with a tack cloth before priming.
- Start coarse, finish fine
- Sand with the grain
- Clean dust thoroughly
Choose and Apply a Topcoat (Poly, Lacquer, Oil)
Before you pick a topcoat, decide what you want from the finish—durability, sheen, ease of repair—and match those priorities to poly, lacquer, or oil.
Choose polyurethane for tough, water-resistant protection on seats and arms; use thin coats and sand lightly between them for adhesion.
Pick lacquer if you want fast build and a smooth, glossy look; spray or thin-brush in light passes to avoid runs.
Select oil (like tung or Danish) to deepen grain and allow easy spot repairs; wipe on, let penetrate, then buff.
Always clean dust before coating and follow safety precautions for ventilation and disposal.
Drying, Recoat Times, and Ideal Conditions
Once you’ve applied your chosen topcoat, let the piece cure in the right conditions so each layer bonds and the finish performs as expected. Monitor temperature (65–75°F) and humidity (40–50%); extremes slow curing or cause cloudiness.
Follow manufacturer recoat windows: some oils need 24–48 hours, lacquers can recoat within hours, polyurethanes often require 24+ hours.
Lightly sand between coats if recommended, remove dust, and apply thin, even layers.
Avoid stacking or heavy use until full cure (days to weeks depending on product).
- Ideal environment: warm, dry, well-ventilated
- Recoat: thin coats, respect label times
- Cure test: gentle fingernail press
Reassemble and Fasten the Chair for Stability
When you reassemble the chair, make sure each piece lines up precisely so joints sit flush and gaps are even.
Use the proper fasteners—screws or bolts sized and rated for furniture—to hold components securely.
Tighten everything evenly and check for wobble before finishing.
Align Parts Precisely
How do you make sure each piece lines up so the chair sits true and feels solid? You test-fit components dry, orienting joints and checking gaps. Use clamps and a square to hold alignment while you mark reference points.
Work methodically from major frames to minor parts, inspecting seat level and back rake.
- Clamp and check with a carpenter’s square to confirm right angles.
- Mark matched joints with pencil or tape so pieces return to correct positions.
- Shim uneven contact points temporarily to achieve consistent seating before final fastening.
Secure With Proper Fasteners
Although alignment gets the parts in the right places, you need the right fasteners and techniques to lock everything solidly—you’ll want glue for joints that rely on bonding, screws or bolts where mechanical strength is required, and tightly fitted dowels or tenons for long-term shear resistance. Reassemble in stages, clamp glued joints until cured, and use pilot holes to prevent splitting. Choose stainless or brass for corrosion resistance. Torque bolts evenly. Check for wobble and shim where needed. Final sanding blends fastener access points; touch up finish after confirming stability.
| Fastener | Use | Tip |
|---|---|---|
| Glue | Bonding | Clamp |
| Screw | Mechanical | Pilot hole |
| Dowel | Shear | Tight fit |
| Bolt | Heavy loads | Even torque |
| Shim | Adjust | Thin slices |
Common Finishing Mistakes and Quick Fixes
If you rush the prep or skip a step, you’ll often see problems like blotchy stain, drips, or tacky varnish that ruin the look and durability of a chair.
You can fix most issues without starting over. Sand lightly to even blotches, then reapply conditioner or thin coats of stain.
Remove drips with fine sandpaper once dry, then blend and recoate.
For tacky finish, wait longer, improve ventilation, or thin the topcoat next time.
Clean dust between coats and use proper brushes or foam pads to avoid brush marks.
- Sand and recoat thinly
- Sand out drips, blend
- Improve ventilation and tools
Time and Budget: Realistic Estimates for One Chair
When you plan realistically, refinishing one wooden chair usually takes a weekend and a modest budget: expect 6–10 hours of actual work spread over two days and $25–$75 for materials depending on finish quality. You’ll spend time on sanding, minor repairs, staining or painting, and sealing. Pick tools and finish wisely to avoid repeats. If you’re experienced, aim lower on time and cost; if it’s your first piece, allow extra for prep and drying. Track costs and steps so you improve each project.
| Task | Typical Cost/Time |
|---|---|
| Sanding/Prep | 2–3 hrs / $5–$15 |
| Finish application | 3–5 hrs / $15–$50 |
Care and Maintenance to Keep the Refinish New
You’ve just finished the refinish, and proper care will keep that chair looking fresh for years. You should let finishes cure fully, avoid direct sunlight, and use pads under hot or wet items. Regular gentle cleaning prevents grime buildup and reduces wear.
- Wipe weekly with a soft, damp cloth; dry immediately.
- Reapply a maintenance coat (paste wax or compatible finish) yearly or as needed.
- Use felt pads and rotate seat cushions to distribute wear.
Treat spills quickly, avoid harsh chemicals, and inspect joints periodically so small repairs stop bigger damage.
Frequently Asked Questions
Can I Refinish a Chair With Children or Pets in the House Safely?
Yes—you can refinish a chair safely if you isolate the workspace, ventilate well, use low-VOC or water-based products, keep kids and pets out, wear protection, and store chemicals securely until finishes cure fully.
Will Refinishing Change the Chair’s Resale or Insurance Value?
Yes — refinishing can change resale or insurance value. If you restore or improve condition, you’ll likely raise resale value; if you alter originals on antiques, you might reduce value. Document work to support insurance claims.
Are There Eco-Friendly or Low-Voc Alternatives to Common Finishes?
Yes — you can choose eco-friendly, low-VOC options like water-based polyurethanes, plant-based oils (linseed, tung), milk or shellac finishes, and low-VOC stains; they’re safer, emit fewer fumes, and still protect wood effectively.
How Do I Match a New Finish to Existing Room Furniture Exactly?
You’ll start by comparing existing finish samples under room lighting, then mix stains and topcoats on scrap until color, sheen, and undertone match; record ratios, test in place, and adjust for absorption and aging.
Can I Refinish Cane, Rush, or Upholstered Seats Without Replacing Them?
Yes — you can refinish cane, rush, or upholstered seats without replacing them: you’ll clean, repair breaks, strip old finishes or fabrics as needed, stabilize fibers, then sand/prime and apply compatible stain, sealant, or reupholstery techniques.
Conclusion
You’ve got a clear plan and the skills to bring that chair back to life this weekend. By identifying the wood, tightening joints, and choosing the right finish, you’ll save money and preserve a piece with character. Take your time on prep, sand carefully, and fix mistakes as you go. Once reassembled and sealed, maintain it with gentle cleaning and periodic touchups so your refinished chair stays beautiful for years.