How to Make Cherry Wood Furniture Look Modern
You can modernize cherry furniture fast by simplifying lines, cooling the tone, and updating hardware—swap ornate knobs for matte black or slim brass, remove bulky feet, and streamline drawer fronts. Lighten the wood with a pickling wash, oxalic treatment, or water‑based stain, then seal with a clear waterborne poly for minimal ambering. Use sparse, sculptural accessories and cool wall colors to balance warmth. Keep going and you’ll find step‑by‑step refinishing and styling tips.
Quick Wins: Modernize Cherry Furniture Fast
Want a faster way to update your cherry pieces? Swap ornate knobs for sleek metal or matte black hardware to change their attitude instantly.
Lighten finishes with a diluted whitewash or pickling stain to mute red tones without stripping depth.
Replace dated drawer liners and add soft-close slides for a contemporary feel.
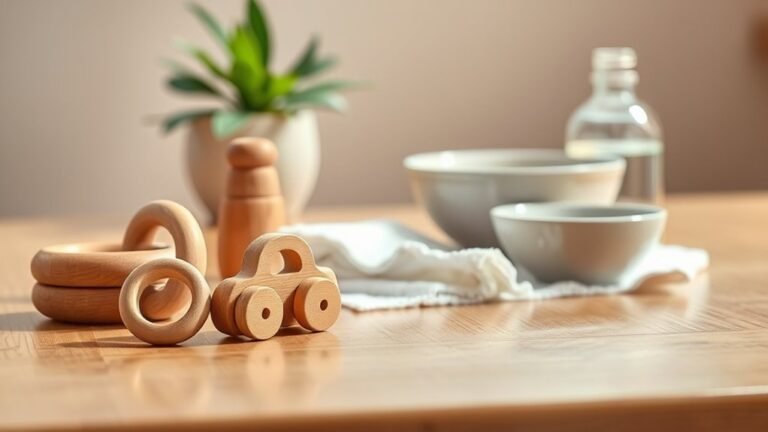
Pair pieces with minimal decor—think a single sculptural vase or geometric lamp—to let lines breathe.
If you’re handy, remove bulky feet for straight or tapered replacements.
Small changes like these refresh appearance quickly, cost-effectively, and preserve the wood’s character while shifting style.
Why Update Cherry Furniture? Benefits and Goals
Although cherry furniture has timeless appeal, updating it helps you match changing tastes and modern interiors without buying new pieces. You’ll preserve quality wood while giving rooms a fresher, lighter feel. Updating saves money versus replacement and reduces waste, so it’s practical and eco-friendly.
You’ll tailor pieces to current color palettes and scale, improving harmony with contemporary lighting and fabrics. Modernizing can increase resale value and prolong usefulness, letting heirlooms stay relevant.
Ultimately, your goal is functional beauty: keep the craft and structure you love while making finishes, hardware, and styling speak to today’s design language.
Decide First: Refinish, Tone, or Accessorize Cherry Pieces
First decide whether to refinish for clean lines, tone down the cherry to modern shades, or simply accessorize with minimal hardware.
You’ll get the sharpest update by stripping and refinishing, a softer modern look by toning the stain, or an easy change with new handles and legs.
Pick the approach that matches how bold and how permanent you want the transformation to be.
Refinish For Clean Lines
Before you strip, tone, or add modern hardware, decide what your end goal is: do you want a sleek, minimalist silhouette or a warmer midcentury look? If you choose refinish, focus on clean lines: remove ornamentation, sand edges smooth, and fill gaps before sealing. Use matte or satin finishes to reduce shine and emphasize form. Keep visible grain subtle; don’t overwork it. Replace bulky moldings with streamlined trim. Test finishes on scrap. Maintain structural integrity while simplifying profiles so the piece reads contemporary without losing cherry’s character.
| Step | Action |
|---|---|
| Prep | Sand & fill |
| Finish | Matte/satin |
Tone To Modern Shades
Once you’ve simplified profiles and chosen a finish sheen, decide whether toning will bring the cherry into the modern domain or if you should stop at the clean refinish. You’ll weigh color goals, room palette, and how much natural warmth you want to keep.
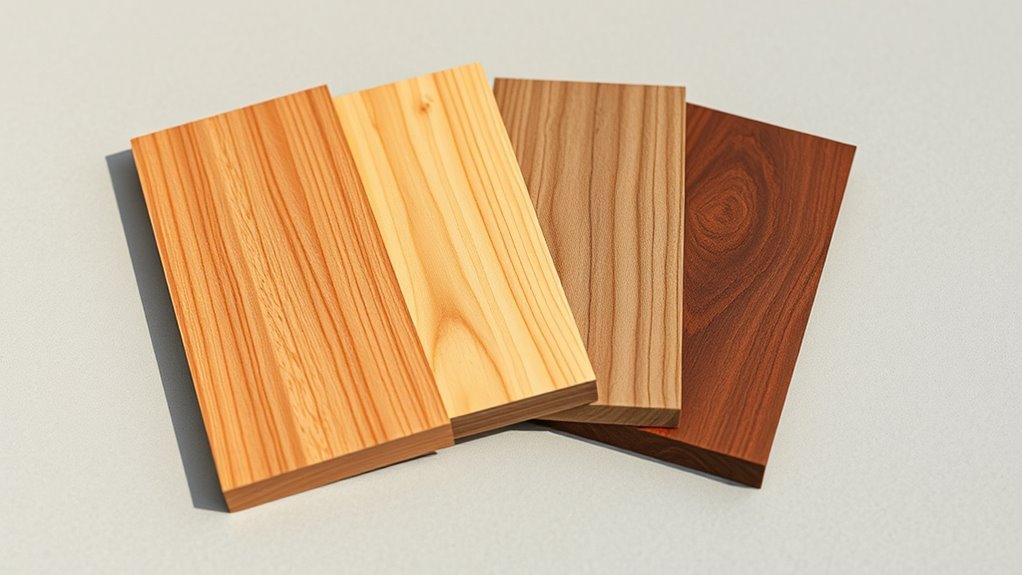
Test stains and glazes on scrap or hidden areas, starting light and building depth. Consider translucent gray, warm taupe, or blackened walnut to mute orange-red tones without hiding grain.
- a faded gray wash that reads crisp against white walls
- a low-contrast taupe that keeps wood character
- a deep, almost-black walnut for drama
Accessorize With Minimal Hardware
If you’re leaning toward a modern look, decide whether to refinish or tone the cherry before picking hardware so the metal and scale will read correctly; minimal hardware can either complete a restrained update or compete with a busy stain. You’ll want slim profiles, discrete pulls, or edge pulls in matte black, brushed nickel, or brass with low sheen. Install fewer pieces, favoring functionality. Test one drawer first to confirm proportion. Keep screws concealed and spacing consistent to preserve clean lines.
| Style | Finish |
|---|---|
| Slim bar | Matte black |
| Edge pull | Brushed nickel |
| Recessed | Low-sheen brass |
How Cherry Wood Reacts to Treatments (Color & Grain)
When you treat cherry wood, expect its warm red tones to deepen over time as the natural color shifts with light and finish.
You can enhance the grain with stains, glazes, or a light whitewash to highlight figuring without hiding the wood’s character.
Test treatments on a scrap or an inconspicuous spot so you know exactly how color and grain will respond.
Natural Color Shift
Although cherry wood ages and reacts to finishes in predictable ways, you’ll still see surprising shifts in both color and grain as you treat it.
You’ll notice warm amber tones deepen to reddish-brown with sunlight or oil; clear finishes can amplify figure, while stains mute brightness.
Expect variation across boards; lighter sapwood responds differently than heartwood.
Test patches first and monitor over days.
- a sunlit board glowing honey, edges darkening
- a freshly oiled tabletop turning richer, veins popping
- a faded drawer front slowly warming to match new finish
Adjust expectations—natural shift is part of cherry’s charm.
Grain Enhancement Techniques
Those natural color shifts give you a starting point for enhancing cherry’s grain, so think about how different treatments will amplify or soften those features. You can use dye stains to deepen contrasts and make figure pop, or thin glazes to mute color while keeping texture visible.
Open-grain fillers highlight rays and pores; pigmented fillers reduce them. Sanding level changes reflectivity—finer sanding yields satin, coarser yields more pronounced grain.
Oil finishes warm tones and enrich depth; water-based finishes retain lighter hue and clarity.
Test on scraps, note how each method alters grain, then choose what matches your modern vision.
Lighten Cherry: Safe Bleaching and Stripping Options
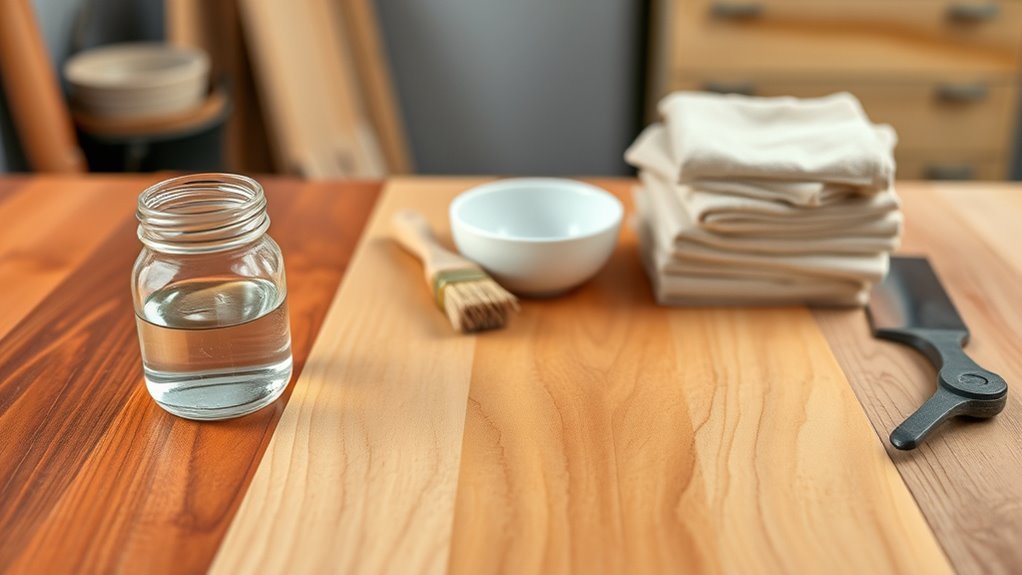
If you want to lighten cherry wood without losing its grain or damaging the piece, choose safe bleaching and stripping methods that target finish and dye rather than the wood itself. Test in an inconspicuous spot. Work outdoors with gloves and respirator.
Remove lacquer or varnish with a water-based stripper, then neutralize and sand gently.
Strip lacquer or varnish using a water-based stripper, neutralize, then sand gently for a soft, even base
Use oxalic acid to lift stains and mellow red tones; rinse and dry thoroughly.
Follow with fine sanding and sealing.
- pale, even surface after gentle stripping
- softened red tones after oxalic lifting
- preserved grain, ready for sealing or finishing
Tone Cherry Furniture: Stains, Dyes, and Tinted Finishes
Now that you’ve achieved a pale, even base, you can control cherry’s color with stains, dyes, and tinted finishes to get a modern look. Choose water-based stains for subtle, even tinting; oil-based stains deepen grain and suit warmer palettes.
Use aniline dyes for translucent, layered color without obscuring figure. Test samples on scrap, then apply thin coats, wiping excess to avoid blotching.
For contemporary cool tones, add gray or black tint to clear finishes rather than heavy pigments. Seal with a waterborne polyurethane for clarity and durability.
Light sanding between coats guarantees a sleek, professional result.
When to Keep Cherry Natural: And When to Change It
Keep cherry natural when you want to preserve its rich, warm glow that adds depth and character to a space. Match the finish to your room’s style—leave it raw for traditional or midcentury looks, or tone it lightly for modern palettes.
Refinish or alter the color when you need contrast with lighter walls or contemporary furnishings.
Preserve Rich Warmth
While cherry’s natural tones bring instant warmth and depth to a room, you should only preserve them when you want that rich, living color to anchor your design. Otherwise, consider lightening or staining to suit cooler, more contemporary schemes.
Preserve the wood when you want a cozy focal point, balanced with minimalist forms and muted textiles. Let the grain speak by keeping finishes thin and satin. Or switch finishes if you need contrast.
- Honeyed cabinet glowing under soft lamp light
- Deep grain against neutral linen and concrete
- Small dining table warming a monochrome kitchen
Match Room Style
If your room leans modern-minimal, you’ll want cherry that’s been toned down or streamlined. Decide based on surrounding finishes: keep natural cherry when warmth complements muted palettes, soft textiles, and light metals.
Change it when your space uses cool grays, black accents, or industrial elements—lighter or desaturated tones blend better. Consider scale and form: ornate pieces suit traditional rooms; clean-lined cherry fits contemporary spaces.
Also weigh existing wood across the room for cohesion. Match intensity: contrast boldly in eclectic rooms, harmonize in serene ones. Let the room’s dominant style guide whether to keep or alter cherry.
Refinish For Contrast
Once you’ve decided whether the room calls for natural cherry or a changed look, think about refinishing to create intentional contrast. You’ll choose highlights that pull focus: keep warm panels natural to preserve depth, or sand and stain select faces for contemporary punch. Use finishes to balance scale and light.
- Satin black legs against glossy cherry tops for sleek silhouettes.
- Pale ash-painted drawers next to rich cherry frames for airy contrast.
- Distressed white apron paired with polished cherry doors to modernize traditional lines.
Refinishing selectively lets you modernize while respecting cherry’s character—plan areas to alter, not overwhelm.
Sanding Strategy: How Far to Sand for a Modern Look
How smooth should you sand cherry wood to achieve a modern look? You’ll aim for a crisp, even surface without erasing character.
Start with 120–150 grit to level flaws, move to 180 to refine, then finish at 220 grit for a tactilely smooth, contemporary feel. Don’t over-sand into glassiness; that can flatten grain and reduce depth.
Start with 120–150 grit, refine with 180, and finish at 220—avoid over-sanding into a glassy, flattened grain.
Sand with the grain, keep consistent pressure, and check frequently under light to spot unevenness. Feather edges for clean gradations.
If you plan subtle distressing or contrasting techniques later, leave small natural variations rather than creating a perfectly uniform plane.
Choose a Finish: Matte, Satin, and Water‑Based Poly
After you’ve achieved that smooth, even surface, pick a finish that complements the modern look without hiding cherry’s warm tone. You’ll choose between matte for understated depth, satin for subtle sheen, or water‑based poly for clear protection. Each changes appearance and feel, so test on scrap.
- Matte: soft, contemporary, hides imperfections, low reflectivity
- Satin: gentle glow, balances warmth and modern crispness
- Water‑based poly: dries clear, minimal ambering, durable finish
Apply thin coats, sand lightly between layers, and let finishes cure fully before use so your modern cherry stays true and functional.
Whitewashing and Pickling to Soften Red Tones
If you want to tone down cherry’s strong red without hiding the grain, whitewashing or pickling gives you a soft, modern look by laying a dilute white or pale stain over the wood and wiping back to reveal texture.
You’ll sand to bare wood, apply a water‑based white stain or thinned latex, then immediately wipe with a lint‑free cloth to control opacity. Work in small sections, following grain direction.
Seal with a clear, low‑sheen water‑based topcoat to preserve the pale tone. Test on scrap first to adjust dilution and wiping pressure for the exact softness you want.
Partial Paint: Reveal Grain While Adding Color
Start by thoroughly prepping and sanding the cherry so the thin paint adheres evenly and the surface is smooth.
Use heavily thinned paint or a stain-like wash and apply sparingly so the color settles into pores instead of obscuring texture.
Let the grain remain visible by wiping excess paint away and finishing with a clear sealer.
Prep And Sand Properly
Before you lay down any paint, get the surface right: thoroughly prep and sand the cherry so the partial paint will sit evenly and the natural grain can still show through. Start by cleaning with a tack cloth and mild solvent so dust and oils won’t lift paint.
Remove old finish where needed, feather edges for smooth progressions. Sand progressively: open the pore without glazing the wood.
- A palm sander smoothing a tabletop, fine dust floating
- Sandpaper worn to a soft, satiny feel in your hand
- Clean, bare wood with subtle grain peaks ready for color
Wipe, inspect, and tack before painting.
Thin Paint, Let Grain Show
When you thin your paint and work in light coats, the cherry’s grain becomes part of the finish instead of hiding beneath it. Thin paint with a compatible reducer or water until it’s translucent; test on scrap.
Brush or spray in several feathered passes, letting each coat dry so the pore pattern reads through. Target 30–70% opacity to tint without masking.
Sand very lightly between coats with fine grit to keep edges crisp. Seal with a clear topcoat—matte or satin modernizes while protecting.
The result keeps cherry’s warmth and character while giving a fresh, contemporary color.
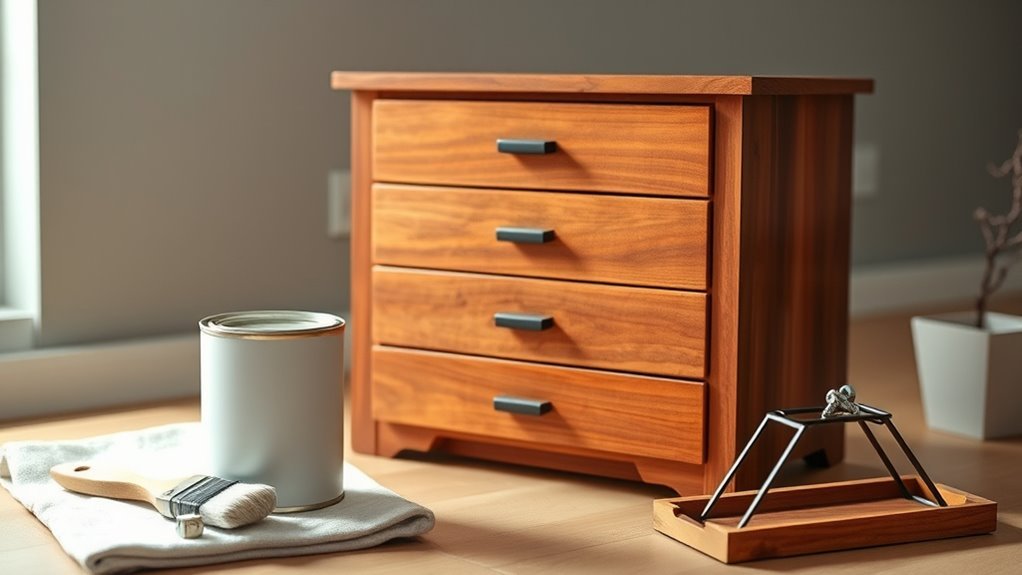
Swap Hardware to Modernize Instantly
Looking to update the look without sanding or refinishing? Swap dated knobs and pulls for sleek, modern hardware to transform cherry furniture instantly.
Choose finishes that contrast warmly: matte black, brushed brass, or satin nickel. Remove old pieces, size new screws, and align mounts for a clean fit.
Visualize the change:
- Slim bar pulls drawing the eye horizontally across a dresser
- Circular matte black knobs punctuating warm cherry tones
- Brushed brass cup pulls adding refined, mid-century flair
You’ll refresh cabinets, dressers, and nightstands quickly, keeping the wood’s richness while achieving a contemporary vibe.
Change Legs and Bases for a Big Style Shift
If swapping hardware gave your piece an instant update, changing legs and bases will alter its whole posture and style.
You can replace bulky, traditional legs with tapered midcentury-style ones to lift and lighten the silhouette. For a more industrial edge, swap in slender metal hairpin legs. For Scandinavian simplicity, choose straight, squared wooden legs stained lighter than the cherry.
Consider removing an ornate skirt and mounting the cabinet on a plinth or exposed base to modernize mass. Make sure new mounts align with weight and joinery; reinforce attachment points and test stability.
A simple leg change delivers a dramatic, contemporary transformation.
Mix Metals and Finishes for a Contemporary Feel
Because mixing metals and finishes lets you balance cherry’s warm richness with crisper, contemporary accents, start by choosing two or three complementary tones—think brushed brass for warmth, matte black for contrast, and polished chrome for shine—and use them sparingly so each element reads intentional.
Mix two or three complementary metal tones—brass, black, chrome—used sparingly to highlight cherry’s warm richness.
You’ll modernize without masking wood character: swap hardware, pick a lamp or mirror, and layer finishes for depth.
Visualize combinations:
- Brass pulls on a streamlined dresser against matte-black legs.
- Chrome lamp reflecting clean lines beside a satin cherry table.
- Black-framed mirror anchoring warm wood and small brass accents.
Be deliberate; less is more.
Simplify Trim and Moldings on Ornate Cherry Pieces
After you’ve balanced metals and finishes, pare back ornate trim and moldings to keep cherry pieces feeling fresh and modern. You can gently remove excess appliqués, rosettes, or heavy crown elements, then sand and refinish the exposed edges for a seamless look.
If removal isn’t possible, selectively trim or flatten profiles to reduce visual weight. Swap overly fussy drawer fronts for cleaner alternatives that keep original structure intact.
Preserve key historical details sparingly—retain a single focal motif rather than every flourish. These restrained edits let the wood’s grain and tone speak without competing ornamentation, updating the piece subtly.
Minimalist Styling for Cherry Furniture
When you lean into minimalist styling, cherry furniture becomes a striking focal point rather than a crowded statement—clean lines, sparse accessories, and purposeful placement let the wood’s warmth and grain take center stage.
You choose restraint: one statement piece, neutral walls, and plenty of negative space so the cherry reads modern, not heavy.
Pair with simple fabrics, matte metals, and understated lighting to emphasize form.
Arrange pieces with breathing room, keep surfaces nearly bare, and let natural light reveal color depth.
Visualize:
- a lone cherry console against a pale wall
- a single sculptural vase on an uncluttered tabletop
- roomy seating with clear sightlines
Midcentury Cues That Pair Well With Cherry
If you want cherry to read retro yet refined, lean into midcentury cues—tapered legs, clean silhouettes, and warm brass or matte-black accents complement the wood’s reddish tone without overwhelming it.
Choose furniture with gentle curves and low profiles to preserve cherry’s richness while signaling midcentury restraint. Opt for exposed joinery or simple recessed pulls instead of ornate hardware.
Favor gently curved, low-profile pieces and exposed joinery or recessed pulls to highlight cherry’s warmth with midcentury restraint
Pair walnut-tinged cherry pieces with sculptural lamps and geometric ceramics to reinforce period charm.
Keep proportions balanced: slim legs lift visual weight, uncluttered surfaces emphasize grain, and selective metallic touches add polish without detracting from the wood’s natural warmth.
Colors and Textiles That Neutralize Cherry’s Warmth
Though cherry’s warm red tones give a room instant richness, you can cool and modernize the look by pairing it with careful color and textile choices. Choose muted, cool hues—soft grays, slate blues, and sage greens—to counteract red undertones.
Lean on textiles with crisp textures and restrained patterns to add contrast without competing.
- a slate-gray linen sofa against a cherry sideboard
- pale blue throw pillows with minimal geometric prints
- a sage-green wool rug, low pile and matte
Keep finishes matte or satin, and use neutral metallics like brushed nickel to reinforce a contemporary, balanced palette.
Lighting and Placement Tips to Reduce Warm Tones
Use cool white bulbs to counteract cherry’s red undertones and keep the room feeling crisp.
Position pieces near windows or under directional lighting so grain and form read cleanly instead of glowing warm.
You can also place furniture against cooler-colored walls or beside metal and glass accents to neutralize warmth.
Cool White Lighting
Because warm amber light enhances cherry’s reddish tones, switching to cool white bulbs helps neutralize that warmth and makes grain and finish read more contemporary. You’ll want bulbs around 4000K–5000K for accurate color and crisper contrast.
Position lamps so light grazes the surface, revealing texture without glare. Use dimmers to balance brightness.
- a slim LED floor lamp casting even, vertical light along a cabinet
- a recessed fixture that washes a dining table with steady, neutral illumination
- adjustable track lights highlighting grain without creating hot spots
These choices keep cherry looking refined, clean, and more modern.
Strategic Furniture Placement
Want to tone down cherry’s natural warmth without repainting or refinishing? Place pieces where cooler light reaches them—near north-facing windows or under cool white fixtures—to neutralize red undertones.
Move large units away from direct sunlight and warm-colored walls that amplify warmth. Pair cherry with pale rugs, light upholstery, or glass and metal accents to create contrast and break up expanses of wood.
Leave breathing space around each item; clustered cherry reads richer and warmer. Angle surfaces to catch diffuse light rather than glare, and use mirrors strategically to reflect cooler tones back onto the wood for a more modern, balanced look.
Budget Fixes: Decals, Adhesive Veneer, Hardware Kits
If you’re on a tight budget but still want a fresh, modern look, decals, adhesive veneer, and new hardware can transform cherry pieces fast and affordably. You’ll choose simple, geometric decals to break up warm grain, or peel-and-stick matte veneer to mute color and add texture.
Swap knobs and pulls for slim, black or brass hardware to modernize profiles without refinishing. Measure carefully, work slowly, and use high-quality adhesive products to avoid bubbling or misalignment.
Visualize the final piece by combining elements from this list:
- a matte charcoal veneer on drawer fronts
- slim brass bar pulls
- a single contrasting geometric decal strip
Temporary, Reversible Updates to Try First
When you’re not ready to commit, start with temporary, reversible updates that let you test a modern look without sanding or staining. Swap out hardware for sleek pulls or matte knobs—it’s fast and transforms proportions.
Add removable contact paper on drawer fronts for a matte or textured finish; align patterns for cohesion. Use peel-and-stick legs or metal caps to change silhouette.
Layer neutral or geometric slipcovers, runners, or trays to shift style seasonally. Experiment with adhesive felt pads in contrasting tones for subtle edge definition.
Live with changes for weeks, then tweak until the result feels confidently modern.
When to Hire a Pro: Veneer, Structure, Complex Finishes
If the veneer is lifting, missing, or badly cracked, you’ll want a pro who can match grain and repair or replace sheets cleanly.
Have someone check wobbly joints or hidden damage so you don’t worsen structural problems by working on a compromised piece.
And when the finish involves multiple layers, glazing, or color-matching, hire an expert to avoid uneven results or costly mistakes.
Assess Veneer Damage
Curious how badly the veneer is damaged and whether you can fix it yourself? Inspect peeling edges, bubbles, and missing chips. Light surface scratches or small lifts you can often glue and clamp; large areas, deep delamination, or veneer missing around corners usually mean calling a pro.
- thin curling edges flaring like paper
- blistered patches that pop with a fingernail
- chunks gone, showing substrate beneath
You’ll want to try simple glue-and-weight fixes only when veneer is intact and stable. If damage spreads, grain mismatches are obvious, or repairs would change the piece’s shape, hire a specialist to refinish or re-veneer.
Structural Integrity Check
Before you start cosmetic fixes, check whether the piece is truly sound—you’re looking for loose joints, warped panels, sagging drawers, or a compromised frame that glue and veneer can’t hide. Tap joints, wiggle legs, and open drawers to test alignment and movement.
Inspect underside and corner blocks for rot or insect damage. If structural fasteners are missing, cracks run through rails, or the carcass twists, plan for professional repair—modern finishes won’t help a failing skeleton.
A pro can evaluate regluing, spline reinforcement, or partial rebuilds so your updated cherry looks good and lasts.
Evaluate Finish Complexity
When you’re deciding whether to tackle a cherry piece yourself or call a pro, size up the finish and construction. Check for veneer, inlaid details, or multiple lacquer layers that need specialist tools or skills. If surface work hides delicate edges, don’t underestimate removal risks.
- thin veneer peeling at corners, delicate curl
- glossy catalyzed lacquer with orange peel texture
- built-up shellac over carved molding
You can sand and restain solid, simple pieces, but layered, glued, or intricately detailed finishes often demand a pro to avoid damage and uneven results.
Choose expertise when restoration risks outweigh DIY savings.
Care and Common Mistakes to Avoid After Updating
After you’ve updated your cherry wood piece, keep up a simple care routine to preserve the finish and prevent common mistakes—wipe spills immediately with a soft, slightly damp cloth, dust regularly with a lint-free cloth, and avoid harsh cleaners or abrasive pads that strip or dull the surface. You should use coasters, avoid direct sun, and reapply a compatible finish when wear appears. Don’t drag objects or place hot items directly on the wood. Check joints and hardware periodically and tighten as needed. Quick attention prevents costly repairs and keeps the modern look you worked to achieve.
| Issue | Action | Frequency |
|---|---|---|
| Spills | Blot, then wipe | Immediate |
| Dust | Soft cloth | Weekly |
| Sun fade | Use shades | As needed |
| Scratches | Touch-up pen | When noticed |
Frequently Asked Questions
Can Cherry Furniture Be Sanded and Refinished More Than Once Safely?
Yes — you can sand and refinish cherry multiple times safely, provided you remove only thin layers, avoid sanding into veneer, and keep grain direction consistent; you’ll preserve structural integrity and achieve fresh finishes with care.
Will Modern Finishes Affect Cherry’s Resale Value?
Yes — modern finishes can raise or lower cherry’s resale value depending on buyer taste; you’ll attract contemporary buyers with lighter stains, matte or clear finishes, but risk losing traditionalists who prefer warm, classic cherry tones.
Can I Modernize Cherry Antiques Without Lowering Their Historical Value?
Yes — you can modernize cherry antiques without lowering historical value if you make reversible, minimal changes, preserve original hardware and joinery, document alterations, use conservation-grade materials, and consult a conservator for significant interventions.
Are There Low-Voc Finish Options Safe for Indoor Use?
Yes — you can choose low-VOC finishes safe for indoor use. Look for water-based polyurethanes, hardwax oils, shellacs labeled low-VOC, and zero-VOC tung/alekyd blends; ventilate while applying and cure fully before regular use.
How to Match Modern Upholstery to Cherry’s Undertones?
Match modern upholstery by choosing fabrics that either complement cherry’s warm red undertones—think deep charcoal, navy, or muted olive—or contrast with cool neutrals like dove gray or slate; pick matte textures and simple geometric patterns.
Conclusion
You can give cherry furniture a fresh, modern look without losing its character. Start by deciding whether you want a full refinish, a gentle tone change, or simple swaps like new hardware and upholstery. Test treatments on hidden areas, use safe lightening or peel-and-stick options if you’re budget-minded, and try reversible updates first. Call a pro for veneer or structural work. Maintain finishes and avoid harsh cleaners to keep your updates looking great.