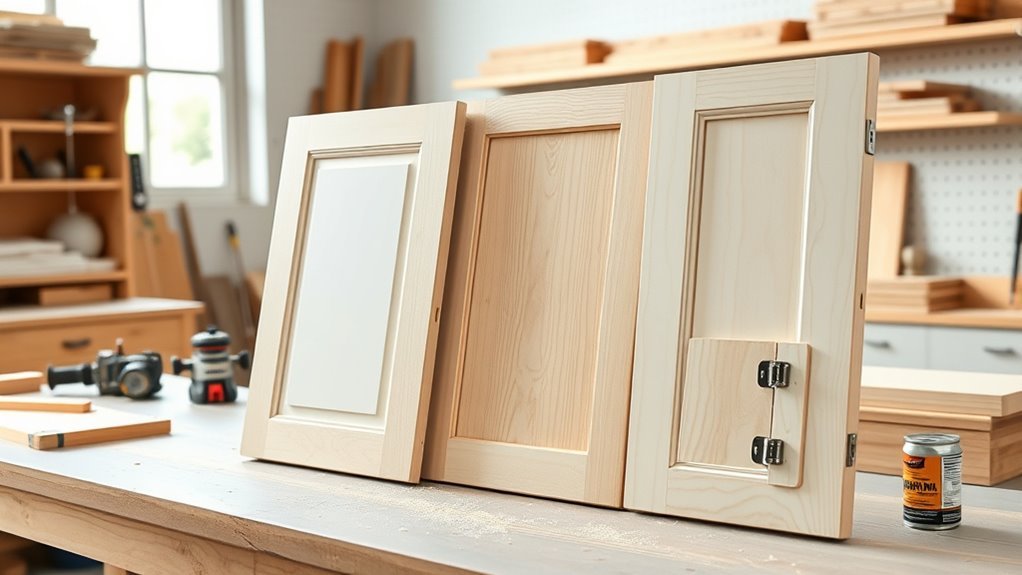
How to Make Cabinet Doors
You can make cabinet doors in a weekend by measuring openings precisely, choosing solid wood, MDF, or plywood, and cutting parts with a table saw and miter or sled for square ends. Use cope-and-stick, mortise-and-tenon, or biscuits for frames, router grooves for panels, and sand then finish before fitting concealed hinges. Take care with grain direction and allow panel expansion. Keep tools sharp and test profiles on scrap, and you’ll find step‑by‑step techniques and tweaks ahead.
Quick Answer: Build Cabinet Doors in a Weekend
Want to get new cabinet doors installed by Sunday? You can. Pick a simple design, gather plywood or hardwood, hinges, screws, and finish.
Measure openings precisely, cut panels and rails to fit with a consistent reveal, then sand edges.
Measure openings precisely, cut panels and rails for a consistent reveal, then sand all edges smooth.
Assemble frames with glue and clamps, secure panels, and test dry-fit on cabinets.
Apply stain or paint and a protective topcoat, letting each coat dry fully.
Mount hinges on doors, transfer marks to cabinet faces, and hang doors, adjusting alignment and gaps.
With focused effort and basic tools, you’ll finish functional, attractive doors in a single weekend.
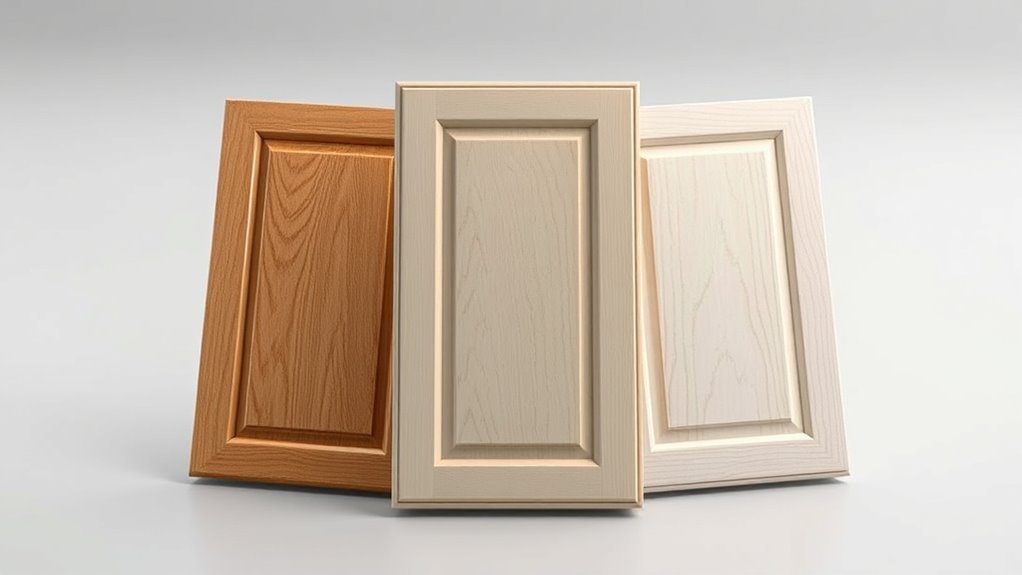
Frame-and-Panel vs Slab Cabinet Doors: Pros and Cons
When you’re choosing cabinet doors, the main decision is whether to go with frame-and-panel or slab construction — each has clear strengths. You’ll pick frame-and-panel for classic looks, stability with seasonal movement, and easy repairs; choose slab for a sleek modern aesthetic, simpler fabrication, and lower cost. Consider profile, durability, and installation ease when deciding. Use solid wood panels with frames for traditional kitchens; go MDF or plywood slabs for painted, contemporary doors. Compare features:
| Type | Look | Maintenance |
|---|---|---|
| Frame-and-panel | Traditional | Repairable |
| Slab | Modern | Low-maintenance |
What Measurements to Take Before Buying Wood
After you pick frame-and-panel or slab doors, measure the rough openings and door styles so you buy the right wood sizes and quantities. You’ll take precise dimensions: door width, height, and thickness, plus reveal/gap allowances for hinges and drawer clearances.
Note grain direction and edge routing length to match panels. Record cabinet face-frame or frameless mounting type and overlay amounts. Measure multiple openings; don’t assume uniformity. Estimate waste for mistakes and matching pairs.
Prioritize these three checks:
- Door width, height, thickness
- Hinge/overlay clearances
- Grain direction and waste allowance
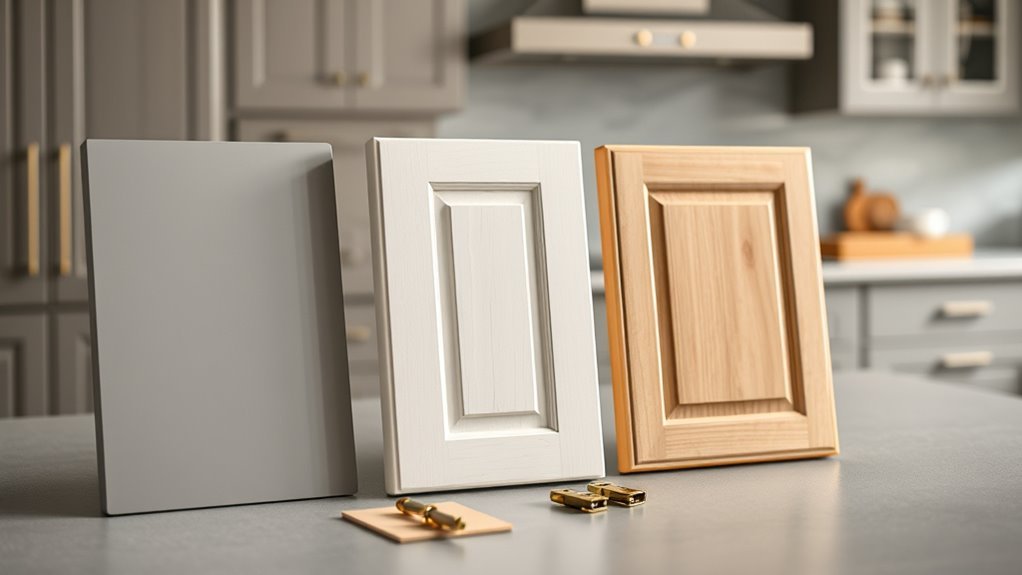
How to Choose: Solid Wood, MDF, or Plywood for Doors
When choosing door material, you’ll weigh solid wood’s beauty and repairability against its tendency to warp and higher cost.
MDF gives you a smooth, stable surface great for painted styles but doesn’t hold screws or resist moisture like wood.
Plywood offers strength and lighter weight for a lower price, making it a good middle ground depending on your budget and finish.
Solid Wood Pros/Cons
A clear advantage of solid wood doors is their natural beauty and strength. You’ll get longevity, easy repairs, and an heirloom feel, but they change with humidity and cost more than engineered options. You should consider grain, species, and finish to match your space.
- Expect higher price, strong aesthetics, and durability.
- Prepare for seasonal movement—expansion, contraction, and potential gaps.
- Know you can sand, refinish, and repair dents more easily than with veneers.
If you want warmth and can manage maintenance and cost, solid wood is a strong choice.
MDF Characteristics And Uses
Although it doesn’t have the grain or warmth of solid wood, MDF gives you a stable, smooth substrate that’s easy to paint and shape, making it a popular choice for modern cabinet doors.
You’ll appreciate its uniform density—no knots or tear-out—so routed profiles and CNC work come out clean.
MDF resists warping and holds edges well, so doors stay flat in variable humidity if sealed properly.
It’s economical compared with solids, and you can veneered or lacquered for different finishes.
Cut with sharp carbide blades, seal all edges, and avoid prolonged moisture exposure to keep panels sound.
Plywood Strength And Cost
How strong do you need your cabinet doors to be, and how much are you willing to spend? Plywood balances strength, stability, and cost. It resists warping better than solid wood in humid kitchens and holds screws well for hinges. Face veneers let you match grain affordably, while higher-grade cores improve strength.
- Low-grade plywood: cheapest, useful for painted interiors.
- Cabinet-grade Baltic birch: strong, durable, more expensive.
- Structural hardwood plywood: premium strength for heavy doors.
Choose plywood if you want stable, cost-effective doors that perform reliably without the expense of solid hardwood.
Essential Tools for a Weekend Cabinet-Door Build
When you tackle cabinet doors over a weekend, the right tools keep the work fast, accurate, and safe, so gather a reliable drill, a circular saw or track saw, a router with straight and round-over bits, and clamps that hold pieces firmly without crushing them. You’ll also want a tape measure, square, sanding block or random-orbit sander, and safety gear. Organize workspace, set fences, and test cuts on scrap. Work methodically: measure twice, cut once, rout profiles in stages, and clamp while glue sets. Good setup saves time and yields doors that fit and finish well.
| Tool | Purpose | Tip |
|---|---|---|
| Drill | Fasten | Use sharp bits |
| Saw | Cut panels | Use guide |
| Router | Profile edges | Multiple passes |
| Clamps | Hold parts | Protect faces |
| Sander | Smooth surfaces | Start coarse |
Materials Checklist: Wood, Glue, Hardware, Finishes
Before you start cutting, gather the right materials so you won’t have to improvise mid-build: pick stable, straight boards (solid wood or plywood) sized for your door style, a good-quality wood glue rated for cabinet work, matching hinges and fasteners, and your chosen finish—stain, paint, or clear coat—plus any filler, sandpaper, and application tools you’ll need.
Choose wood with consistent grain and moisture content. Match hinge type to door weight. Keep sealers and topcoats compatible with stain or paint. Store glue and finishes at recommended temperatures.
Bring these essentials:
- Wood, glue, sandpaper
- Hinges, screws, catches
- Finish, brushes, filler
Choose a Door Style That Matches Your Cabinets
Wondering which door style will best suit your cabinets and room? Pick a style that complements your furniture, architecture, and daily use.
Shaker doors are clean and versatile; raised panels feel traditional and formal; flat panels suit modern, minimalist spaces.
Match detailing—moulding, beadwork, or slab—to existing trim and hardware for cohesion.
Consider scale: ornate profiles suit larger rooms, simple doors fit small spaces.
Think about maintenance and wear: intricate grooves trap dust, smooth surfaces wipe clean.
Trust visual balance: doors should enhance cabinet function and room character without overwhelming the overall design.
Calculating Overlay, Inset, and Reveal Correctly
After you pick a door style, you’ll need to figure the door’s relationship to the cabinet frame: overlay, inset, or reveal. You’ll measure cabinet face frame width, door thickness, and gap tolerance. Decide how much edge will cover or sit inside the frame, then calculate door size.
- Measure: face frame opening minus desired gaps.
- Subtract: twice the gap tolerance from opening for inset doors.
- Add: overlay amount to opening dimension for full or partial overlays.
Mark dimensions on your shop drawing, check hinge specifications, and cut to fit. Verify clearances before finishing.
Layout Parts and Optimize Material Yield
Start by laying out all door, stile, and rail parts on your sheet stock so you can see how they nest and where waste will occur.
Measure each part precisely, account for saw kerf, and mark grain direction for plywood or veneer.
Group identical parts to minimize setup changes, and rotate pieces to fit odd gaps.
Leave reference edges for straight cuts and plan full-sheet layouts before ripping.
Note defect zones and reserve them for smaller pieces.
Calculate yield: sketch, tally parts per sheet, and decide when to flip grain or match pairs to keep material use efficient and consistent.
Cut Stiles and Rails for Cabinet Doors Accurately
Because accurate stiles and rails set the fit and appearance of the whole door, you’ll cut them with care, checking measurements, grain, and saw setup before each pass. Mark faces and edges, note grain direction, and joint edges straight. Use a reliable fence and stop block for repeatability.
Cut both stiles, then rails, verifying lengths against your layout. Test-fit with clamps before joinery. Keep edges square and consistent for clean glue lines and tight seams.
- Use a calibrated fence.
- Cut long pieces first for stability.
- Re-measure after each setup change.
Size and Trim a Slab Cabinet Door From One Panel
First, measure and mark the panel precisely so your door will fit the opening.
Then cut and trim to your marks, keeping edges square and checking fit as you go.
Finish by sanding smooth and applying your chosen finish before hanging.
Measure And Mark
When you’re ready to size and trim a slab cabinet door from one panel, measure the opening carefully and transfer those dimensions to the panel, marking both length and width plus any hinge or overlay allowances. Use a straightedge and pencil for clear lines, note grain direction, and allow clearance for paint or finish.
Verify squareness at corners with a try square. Double-check hinge locations against hardware. Mark which face is exterior. Label top/bottom and left/right to avoid confusion. Record measurements on scrap.
Follow this checklist before cutting:
- Confirm overall width/height
- Mark hinge/overlay offsets
- Note grain and face orientation
Cut And Trim
Ready to make the cut? You’ll rip the panel to final width with a table saw, using a featherboard and push stick for safety.
Crosscut to length at the miter saw or with a sled, keeping ends square.
Trim edges with a router and a straight bit to clean tearout and achieve precise dimensions.
If you need inset clearance, remove small amounts from the back edge.
Chamfer or round front edges lightly with a round-over bit for durability.
Check fit frequently, making incremental cuts until the slab seats smoothly in its opening without binding.
Sand And Finish
After you’ve confirmed the slab fits the opening, sand all faces and edges progressively—start with 120-grit to remove mill marks, move to 180-grit to smooth joint lines, and finish with 220-grit for a uniform surface ready to accept finish. Work with the grain, keep pressure light, and check edges for crispness.
Prepare for finish: remove dust, tack with a microfiber cloth, and test stain on an offcut. Choose finish based on use—durable for kitchens, satin for living areas. Remember these steps:
- Clean and tack dust.
- Apply stain or sealer evenly.
- Topcoat and sand between coats.
Routing the Panel Groove for Frame-and-Panel Doors
Before you rout, set up a reliable guide and test the bit depth on scrap so the groove will seat the panel snugly without binding.
Use a straight or rail bit sized to accept the panel thickness plus clearance; adjust depth for panel movement with seasonal humidity.
Clamp rails or use a router table fence to keep cuts straight.
Rout both stile and rail grooves in pairs to maintain alignment.
Make multiple shallow passes rather than one deep cut to prevent tearout.
Clean the groove with a chisel or scraper if needed, then dry-fit the panel before final assembly and finishing.
Joinery Options: Cope-and-Stick, Mortise-and-Tenon, Biscuit
When you pick a joinery method for frame-and-panel doors, consider strength, appearance, and how much setup you’re willing to do:
When choosing frame-and-panel joinery, weigh strength, appearance, and the setup effort you’re willing to invest
cope-and-stick is fast and produces clean profiles with router bits.
mortise-and-tenon gives the strongest, most traditional joint for heavy or load-bearing doors.
and biscuits offer quick alignment and decent strength with minimal tooling.
Choose based on door size, tool access, and finish.
cope-and-stick suits repeat work,
mortise-and-tenon excels for durability,
biscuits speed assembly.
Consider glue type, clamp strategy, and grain orientation.
Prioritize joint stiffness where hardware will bear load.
- Strength
- Speed
- Simplicity
Cut Cope-And-Stick Profiles With Router Bits
If you’re using cope-and-stick joinery, router bits are the fastest way to cut matching profiles on rails and stiles so the frames fit together snugly and look consistent.
Choose a matched set: a sticking bit for the stile face and a coping bit for rail ends.
Use a router table with a fence, set bit heights precisely, and make test cuts on scrap.
Feed direction and multiple light passes prevent tearout.
Secure parts with featherboards and hold-downs.
Check fit frequently and adjust depth or fence as needed.
Sand profiles lightly and remove any burrs before assembly.
Cut Mortises and Tenons by Hand and With a Jig
Now you’ll mark mortise locations precisely, transferring layout lines and shoulder marks so everything fits.
You’ll cut tenons by hand with saw and chisel using gauges and pins for consistent shoulders, or set up a simple jig to rout repeatable, clean cheeks.
We’ll cover jig setup, fence and bit choices, and routing technique so your joints are snug and square.
Mortise Layout And Marking
Because clean, accurate mortises start with careful layout, you’ll spend more time marking than cutting—especially when you’re working by hand or setting up a jig. Start by scribing centerlines and shoulder lines from your rail and stile faces. Transfer measurements with a marking knife, and use a square to confirm 90° alignment. Verify depth with a marked gauge.
When using a jig, clamp and register parts consistently before marking.
- Mark clearly: knife for crisp edges.
- Verify: dry-fit and re-measure.
- Protect: use tape to prevent tear-out.
Accurate layout prevents fit issues and saves rework.
Hand-Cut Tenon Techniques
With your mortise layout nailed down, it’s time to cut the matching tenons—by hand when you want control and with a jig when you want repeatability.
For hand-cut tenons, saw to your shoulders on the waste side, pare cheeks with a sharp chisel, and test-fit frequently. Keep consistent cheek thickness and square shoulders; clamp the rail vertically to steady cuts.
When using a dedicated tenon jig, set the fence for cheek thickness and make multiple passes to avoid tearout, but don’t rely on the jig for final fitting.
Always finish by cleaning corners and checking alignment before glue-up.
Jig Setup And Routing
Ready to move from layout to execution? Set your jig square, secure workpieces, and confirm router bit depth before cutting mortises and tenons. You’ll save time and get consistent joints when you calibrate guides and test on scrap.
Follow safe routing practices: clamp, wear eye and ear protection, and feed against the bit.
- Check alignment: fence, stop blocks, and bit height.
- Test cut: adjust depth and pass frequency on scrap.
- Clean up: square corners with chisel and light sanding.
Use the jig for repeatability; finish-fit tenons by trimming incrementally for tight, reliable joints.
Use Biscuits and Pocket Holes for Fast Assembly
When speed matters, use biscuits and pocket holes to align and join cabinet door parts quickly and accurately. You’ll cut biscuit slots with a plate joiner at matching locations on rails and stiles, glue and insert biscuits, then clamp.
For hidden strength and rapid alignment on face frames or panels, drill pocket holes with a jig and fasten with pocket screws; use glue for permanence. Space joinery evenly, pre-check fit, and avoid over-tightening screws to prevent split stock.
This combo saves time while keeping edges flush and square before you move on to sanding, finishing, and hardware installation.
Assemble Door Frames Square and Gap-Free
Because a square, gap-free frame determines how the door will sit and operate, you should assemble rails and stiles carefully using clamps, a reliable square, and dry-fit checks before glue goes on.
You align joints, check diagonals, and test mating faces so gaps vanish. Use cauls to distribute clamping pressure and tighten incrementally while rechecking squareness.
If biscuits or pocket holes were used, guarantee hardware doesn’t introduce twist.
After glue, remove squeeze-out and let full cure before sanding.
Follow this quick checklist:
- Verify diagonal measurements match.
- Clamp with cauls for even pressure.
- Dry-fit, adjust, then glue.
Install a Floating Panel for Seasonal Movement
You’ll need to leave a small gap around the panel to allow for seasonal expansion and contraction.
Pick floating hardware that lets the panel shift without rattling or binding.
Use simple center stops or clips to keep the panel centered while still permitting movement.
Allow For Seasonal Expansion
Since wood expands and contracts with humidity, plan your cabinet doors so the center panel can float inside the frame; that lets the panel move without cracking paint or stressing glue joints.
Allow a gap around the panel—typically 1/16″ to 1/8″—and use grooves that are slightly wider than the panel thickness so it won’t bind.
Use floating tenons or loose tongues rather than rigid glue across the whole joint.
Remember to:
- Leave consistent clearance around the panel.
- Keep glue off panel edges that sit in grooves.
- Orient grain to minimize cupping and seasonal movement.
Choose Floating Hardware
With the panel free to float in its groove, you’ll need hardware that lets the panel expand and contract without lifting or rattling. Choose clips or slides that grip frames, not the panel, and allow lateral movement. Test for smooth travel and minimal play. Use corrosion-resistant finishes in humid areas. Install fasteners in elongated holes so the frame can shift slightly. Check alignment after seasonal cycles and adjust only the frame retainers.
| Hardware Type | Benefit |
|---|---|
| Floating Clips | Secure frame, free panel |
| Sliding Brackets | Smooth lateral movement |
| Elongated Screws | Allow controlled shift |
| Stainless Options | Resist humidity |
| Tested Fit | Prevents rattle |
Secure Panel Centering
When you install a floating panel, center it so it can expand and contract without rubbing the frame or shifting out of alignment. You’ll set the panel slightly proud of the groove depth, then secure with appropriate clips so movement stays centered. Measure gaps evenly and test movement before final assembly.
- Check face clearance: leave 1/16″–1/8″ per side.
- Use shorter clips at ends, longer at middle to allow travel.
- Verify seasonal expansion by clamping lightly and running a bead of lubricant in the groove.
Recheck after finishing; small adjustments prevent rattles and binding.
Edge Profiling and Routing Tips
Although routing edges can seem tricky at first, you’ll get clean, consistent profiles by choosing the right bit, setting accurate depth, and feeding the router steadily. Test on scrap, secure the door, and rout with the grain to avoid tear-out. Use a bearing-guided bit for repeated profiles and a fence for straight runs. Light passes reduce burn and chipping; sand minimally afterward. Keep hands clear and use clamps or a push block. Clean bit and check for dullness regularly.
| Bit Type | Use | Feed Rate |
|---|---|---|
| Roundover | Edges | Moderate |
| Ogee | Decorative | Slow |
| Straight | Grooves | Steady |
Shaker, Raised-Panel, and Hybrid Door Overviews
Now you’ll compare the clean, flat-panel look of Shaker doors with the more ornate raised-panel styles and practical hybrid options.
You’ll see how Shaker’s simple rails and stiles make construction and finishing straightforward.
Then you’ll contrast that with raised panels’ depth and hybrid designs that blend tradition and simplicity so you can pick the best fit for your project.
Shaker Door Characteristics
Curious what makes a Shaker door distinct? You’ll notice clean lines, a flat recessed panel, and minimal ornamentation that suit many styles. You’ll build frames with simple rails and stiles, relying on tight joinery for strength. The profile stays subtle—square edges or a slight bevel—so hardware and finish define the look.
- Construction: frame-and-panel, usually five-piece.
- Appearance: flat center panel, simple perimeter.
- Versatility: adapts to paint, stain, and modern or traditional rooms.
You’ll appreciate how durability, ease of construction, and timeless restraint make Shaker doors practical and elegant.
Raised & Hybrid Comparison
When choosing between Shaker, raised-panel, and hybrid cabinet doors, think about how profile, construction, and visual weight will change a room’s feel.
Shaker doors keep things clean and understated. They are ideal for modern simplicity, easy painting, and minimal shadow lines.
Raised-panel doors add depth and formality with contoured profiles. They emphasize craftsmanship, wood species, and richer finishes.
Hybrids blend elements to give you a tailored middle ground that suits both traditional and evolving designs. Opt for hybrids when you want subtle ornamentation without full formality.
Consider hardware scale, framing width, and installation tolerance for the final look.
Build a Shaker-Style Cabinet Door Step by Step
Ready to build a clean, classic Shaker-style cabinet door? You’ll cut stiles and rails from hardwood, rip a flat panel slightly recessed, and assemble with glue and clamps. Keep joints square and gaps consistent. Sand, fill small defects, then prime or seal before finishing. Use simple joinery—mortise and tenon or pocket screws—for strength without fuss. Remember accurate layout and measured cuts make the difference.
- Measure twice, cut once.
- Match grain direction for rail/panel continuity.
- Test-fit before glue.
Finish with thin coats, sanding between; hang with concealed hinges for the Shaker look.
Make Raised-Panel Doors With a Router or Shaper
When you make raised-panel doors you’ll pick either a router or a shaper based on the panel size, cutter availability, and how much production you need.
Choose cutters that match the profile you want and set fences and guards for consistent, safe runs.
Then test on scrap and fine-tune feed rate and depth to get crisp, repeatable panel profiling.
Tool Selection
Although a shaper and a router can both cut raised panels, you’ll want to choose the tool that matches your production scale, budget, and tolerance for setup time. You’ll weigh speed, repeatability, and cutter cost.
A shaper runs larger cutters for heavy production; a router is cheaper and more versatile for small shops. Consider fence systems, cutter availability, and dust collection. Match motor power to panel size and wood species.
Prioritize safety features like guards and power feeds. Decide based on how many doors you’ll make and how consistent you need results to be.
- Speed
- Cost
- Consistency
Panel Profiling
How you shape the raised panels — with a router or a shaper — depends on the profile you want, the cutters you have, and how much repeatability you need.
Choose a shaper for heavy production and larger cutters; it runs cooler and yields smoother cuts on hardwood.
Use a router with panel-cutting bits for flexibility and lower cost; jigs and multiple passes control tearout.
Always test on scrap to dial in cutter depth and fence settings.
Feed panels consistently against cutter rotation, support edges to avoid blowout, and sand minimally after profiling to preserve crisp bead and ogee details.
Trim and Sand Slab Doors for a Perfect Fit
Because slab doors rarely match your opening perfectly right out of the box, you’ll need to trim and sand them for a snug, even fit. Measure gaps around the frame, mark high spots, and remove material gradually.
Slab doors seldom fit perfectly—measure gaps, mark high spots, and remove material slowly for a snug, even fit.
Use a circular saw or router with a straight edge for clean cuts, then file corners smooth. Sand with a block and progressively finer grits until edges align and surfaces are flat.
Check fit repeatedly, adjusting as needed. Pay attention to reveal consistency on all sides.
Follow this quick checklist:
- Measure and mark accurately.
- Cut or plane incrementally.
- Sand progressively to final fit.
Prepare Doors for Hardware: Hinge Spacing and Holes
Before you drill, lay out hinge positions on both the door and frame so mounting holes line up perfectly. Consistent hinge spacing prevents sag and guarantees smooth operation.
Measure from the top and bottom edges to place hinges—common spacing is 3–4 inches from each end with any additional hinges evenly spaced.
Mark screw centers, use a square to keep lines perpendicular, and transfer marks to the cabinet face.
Pilot-drill holes slightly smaller than screws to avoid splitting.
If using wood plugs or reinforcement plates, mark their locations now.
Double-check alignments before cutting or drilling to ensure precise, repeatable results.
Mortise and Install Concealed Hinges Accurately
When you fit concealed hinges, start by laying out their cup positions precisely on the door—accurate placement is the foundation of smooth, gap-free operation. Mark centers, check setback, and scribe outlines.
Drill cup holes with a forstner bit in a drill press or jig for depth control. Chisel shallow relief if needed, then test-fit cups.
Mount plates on the cabinet frame, align vertical positions, and clamp before final screws. Use the hinge adjustments to fine-tune reveal and planarity.
Remember these quick checks:
- Cup depth equals hinge spec.
- Lateral alignment avoids binding.
- Vertical spacing matches adjacent doors.
Sanding Sequence and Common Defect Repairs
Start by planning your sanding sequence so each step builds on the last: begin with coarser grits to remove machine marks and level joints, then move progressively finer to eliminate scratches and prepare the surface for finish.
Work along grain, keep tools moving to avoid dips, and check edges and profiles with light at low angles.
Repair defects before final sanding: fill gaps and nail holes with matched wood filler, clamp and glue open joints, and scrape glue squeeze-out once tacky.
For dents, use steam to raise fibers then sand smooth.
Finish with tack cloth to remove dust before finishing.
Finish Choices: Paint, Stain, or Clear Coat for Doors
Although the finish you choose will define the look and durability of your cabinet doors, it should match both the wood and the room’s use.
Paint hides grain and offers color uniformity. Stain enhances natural character. Clear coats protect while showing the wood.
Paint conceals grain for uniform color; stains reveal wood character, and clear coats protect while showcasing natural beauty.
You’ll pick based on wear, maintenance, and style. Paint resists stains and cleans easily. Stain plus clear coat highlights grain. Clear coat alone suits high-grade woods.
Consider sheen: satin hides imperfections, gloss cleans easily.
Decide on solvent or water-based products for odor and drying time.
Apply Primer and Paint for a Factory-Smooth Look
Want a factory-smooth finish? Start by sanding to 220 grit, then clean thoroughly with a tack cloth.
Apply a high-quality, adhesion-promoting primer in thin, even coats—spray for best results or use a foam roller for large panels.
Sand lightly between coats with 320–400 grit to remove imperfections.
Choose a low-VOC acrylic or urethane paint formulated for cabinets; thin coats build up smoother than one heavy application.
Maintain wet edges, use a high-density foam roller or spray, and allow full dry times per manufacturer.
Finish with two to three coats, sanding very lightly between them for a flawless surface.
Stain and Seal Wood Doors Without Blotching
To avoid blotching, start by choosing the right wood conditioner for your door’s species and grain. Apply the conditioner and stain in thin, even coats, wiping off excess quickly so the color soaks uniformly.
Once the stain’s dry, seal with a compatible finish applied in light, consistent layers.
Choose The Right Conditioner
How do you prevent blotchy, uneven stain on soft or open-grained woods? You choose a conditioner formulated for the wood species and designed finish. Oil-based conditioners penetrate deeply; water-based ones suit waterborne stains.
Test on a scrap, follow manufacturer’s dwell time, and wipe off excess. Apply evenly with a lint-free cloth or brush, and sand lightly between conditioner and stain only if instructed.
- Match conditioner type to stain and wood species.
- Test on scrap for absorption and color.
- Follow label times precisely to avoid sealant interference.
Proper selection guarantees even stain absorption and predictable results.
Apply Thin, Even Coats
With the conditioner doing its job, you’ll want to apply stain and seal in thin, even coats to avoid blotches and runs. Work in manageable sections, wiping excess stain with a clean cloth along the grain.
Use a high-quality brush or foam applicator, keeping strokes light and consistent. Let each coat dry fully per manufacturer instructions before sanding lightly with fine grit to remove raised grain.
Apply subsequent coats sparingly—two to three thin layers build depth without pooling.
Finish with a thin, even topcoat of clear sealer, watching for drips and smoothing them immediately for a flawless surface.
Hang Doors and Adjust for Consistent Gaps
Ready to hang the doors? You’ll mount hinges, align each door, and tweak until gaps are uniform. Start with one door fully installed to set your reference. Use shims or hinge adjustments to fine-tune spacing.
- Measure top, bottom, and side gaps with a feeler gauge or ruler.
- Adjust hinge screws: depth, lateral, then height, testing after each tweak.
- Check swing clearance and make small corrections so doors close freely.
Work progressively across doors, matching gaps to the reference. Recheck after tightening screws; minor final tweaks keep gaps consistent and doors operating smoothly.
Top Causes of Sticking, Sagging, and Gaps
After you’ve set reference doors and adjusted hinges, you’ll want to know why some doors still stick, sag, or show uneven gaps. Common causes include warped door panels from moisture or heat, improperly trimmed stiles or rails, and uneven cabinet frames or carcases that twist.
Weak or misaligned hinge screws, overloaded doors from heavy hardware, and worn hinge cups contribute to sagging. Inconsistent panel thickness or paint buildup at mating edges creates sticking.
Finally, poor substrate or filler under mounting plates shifts alignment over time. Identifying these root causes prevents recurring problems before you move to fixes.
Troubleshooting Fit Issues and Quick Fixes
If a door sticks, sags, or leaves gaps, start by adjusting the hinges to square the door in the frame.
If edges rub or catch, trim them carefully and sand for a smooth fit.
For persistent gaps, use thin shims or filler to level the strike and stop surfaces.
Adjust Hinges Properly
When cabinet doors don’t sit right, you’ll usually fix them by tweaking three hinge adjustments—depth, side-to-side, and height—so take time to identify which movement is off before you start turning screws.
Start by loosening mounting screws, then test each adjustment separately.
Use a screwdriver to:
- Adjust depth to close gaps without binding.
- Shift side-to-side to align edges with adjacent doors or frame.
- Raise or lower the door for uniform reveal height.
Tighten screws while holding the correct position, check swing and latch engagement, and make micro-adjustments until doors close smoothly and sit evenly.
Trim Door Edges
Sometimes hinge tweaks won’t fully correct rubbing or uneven gaps, so you’ll need to trim the door edges for a clean fit. Mark the high spots with a pencil and remove the door.
Use a straightedge and square to draw a reference line where material must come off. Take light passes with a plane, block plane, or cabinet scraper, keeping the cut parallel to the face.
Sand edges smooth and test-fit frequently to avoid overcutting. For painted doors, seal exposed wood with primer.
Rehang the door, check clearances, and repeat tiny adjustments until gaps are uniform and the door swings freely.
Fill And Shim Gaps
Although precision trimming and hinge tweaks should solve most alignment problems, you’ll still encounter small gaps or uneven reveal that call for filling and shimming. Start by identifying tight and loose spots, then choose between thin shims, wood filler, or paintable caulk for minimal visibility.
Shim behind hinges or strike plates to correct twist; trim shims flush and seal. Use filler for hairline gaps, sanding smooth before finish.
For wider gaps, glue a tapered shim strip, clamp, then plane or sand.
Remember:
- Shim where twist exists.
- Fill hairlines.
- Refinish after sanding for a seamless look.
Cost Comparison: DIY vs Premade or Custom Doors
If you’re watching your budget, the choice between building your own cabinet doors and buying premade or custom ones comes down to materials, labor, and long-term value.
DIY saves money on straightforward slab or shaker doors if you already own tools and can spend time; expect lower material costs but factor in mistakes and finish supplies.
Premade doors offer consistent quality and quick installation for moderate prices.
Custom doors cost more but match exact sizes, profiles, and high-end materials.
Compare per-door pricing, shipping, and your hourly labor value.
Choose DIY when savings exceed your time and risk tolerance.
Shop Jigs That Save Time on Door Builds
Once you decide to build your own doors to save money or get a custom look, using the right shop jigs will speed the work and improve consistency. Jigs keep cuts repeatable, reduce setup time, and let you focus on finish quality.
Start with a simple router fence for stile and rail profiles, then add a mortise jig for hinges and a crosscut sled for repeatable end cuts. Use these three essentials to streamline builds:
- Router fence/jig for profiles and coping
- Mortise or hinge jig for accurate hardware placement
- Crosscut sled for consistent length and square ends
Invest time in jig setup once.
When to Call a Pro: Limits of DIY Cabinet Doors
When your project needs perfect gaps, complex joinery, specialty veneers, or guaranteed warranty work, call a pro—DIY doors work for basic frames and styles, but pros handle tight tolerances, exotic materials, and tasks like spray-finishing or custom hardware routing that demand specialized tools and experience. You should hire a pro when you can’t get accurate reveals, when finish quality must be showroom-grade, or when warranty and liability matter. Below is a quick checklist to weigh your options.
| Situation | Action |
|---|---|
| Tight tolerances | Pro |
| Exotic veneer | Pro |
| Spray finish | Pro |
| Simple shaker door | DIY |
Frequently Asked Questions
Can I Use Reclaimed or Pallet Wood for Cabinet Doors?
Yes, you can use reclaimed or pallet wood for cabinet doors, but you’ll need to inspect, clean, de-nail, flatten, and stabilize it, and be prepared to address variable thickness, potential contamination, and finish differences for consistent results.
How Do I Finish Doors for Outdoor or Humid Environments?
You should use exterior-grade materials, seal all surfaces with a marine or spar varnish plus epoxy where possible, tape joints, add waterproof glue, sand between coats, and let cures fully so the doors resist moisture and UV outdoors.
Can I Paint Over Existing Veneer or Laminate Doors?
Yes — you can paint over veneer or laminate doors if you properly prep them: sand lightly, clean, degrease, scuff with fine-grit, apply a quality bonding primer, then use compatible paint for durable, even coverage and adhesion.
What Safety Gear Is Essential for Routing and Assembly?
You need safety goggles, a dust mask or respirator, hearing protection, and snug work gloves; wear long sleeves, avoid loose jewelry, use a push stick or featherboard with routers, and guarantee sturdy clamps and proper ventilation while you’re assembling.
How Long Should I Let Finish Cure Before Rehanging Doors?
Wait at least 24–72 hours for most finishes to dry, but cure fully for 7–30 days depending on product. I’d recommend 48–72 hours before rehanging for light handling; follow manufacturer’s cure times for best results.
Conclusion
You can definitely tackle cabinet doors over a weekend if you plan well, pick the right materials, and have a few basic tools and jigs. Measure carefully, expect some trial-and-error with fit, and choose frame-and-panel for a classic look or slab for simplicity. DIY saves money compared with custom doors, but don’t hesitate to call a pro for complex profiles or finicky fits. With patience and the right approach, you’ll end up with doors you’re proud to install.