How to Make a Climbing Rose Trellis
You can build a climbing-rose trellis in a weekend using posts, horizontal supports or wire, and corrosion-resistant fasteners. Position it where roses get six-plus hours of sun and good airflow, set posts 2–3 ft deep, and space crossbars or wires 8–12 inches apart. Anchor securely with concrete or braces, train canes into a fan or horizontal pattern, and use soft ties while pruning for air and blooms. Keep going to learn sizing, materials, and seasonal care.
How a Trellis Transforms Small Gardens
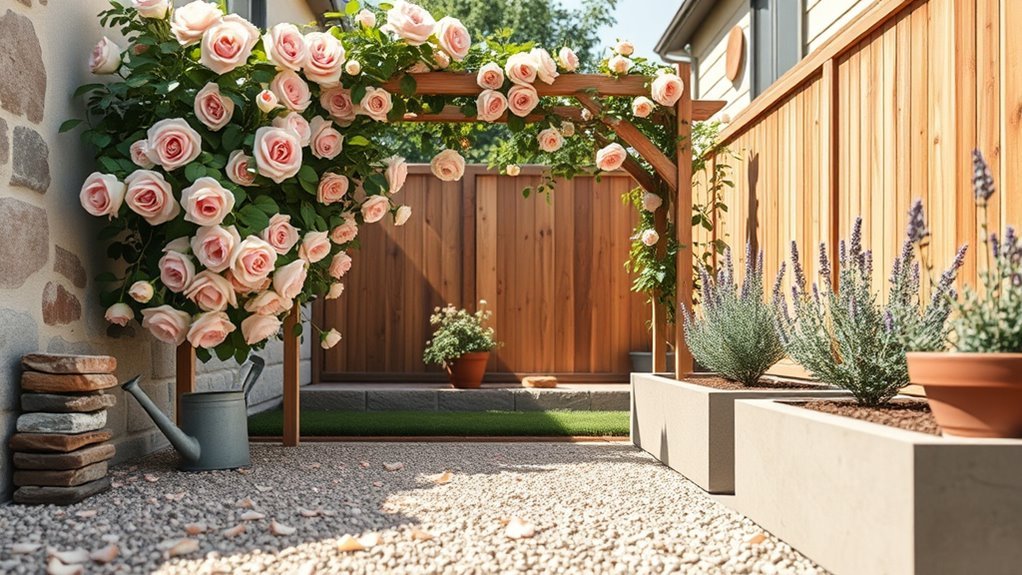
When you add a trellis to a small garden, it instantly frees up ground space by sending your climbing roses upward instead of letting them sprawl. You’ll gain layered height, creating visual interest without widening the footprint.
Mobility for other plants improves as beds open, letting you plant perennials or edibles beneath the canopy. Sunlight reaches lower foliage better, reducing mildew and boosting bloom health.
Maintenance becomes easier: pruning, tying and inspecting are at reachable heights. A trellis also defines pathways and focal points, making the garden seem larger and more intentional while maximizing floral display in limited square footage.
Which Climber Roses Thrive on a Trellis
Because different climbers vary in growth habit, flowering style and hardiness, you’ll want to pick varieties that suit your trellis and climate—ramblers for quick coverage and massed blooms, repeat-flowering climbers for long season interest, and large-flowered hybrids if you prefer showy focal blooms.
You’ll choose by size, vigor and bloom cycle so your trellis won’t be overwhelmed or sparse. Consider disease resistance and winter hardiness for reliable performance.
Think about scent and color to amplify mood.
Examples to inspire:
- Rugosa types — rugged, fragrant, nostalgic.
- Hybrid teas trained as climbers — dramatic, formal.
- Noisette and Bourbon — lush, old-rose charm.
Choose the Right Trellis Style for Your Yard
Think about the space you have and pick a trellis shape that fits the area without crowding other plants or pathways.
Match the trellis size to the rose’s mature spread so the canes have room to grow.
Also check materials and construction so the trellis can support the weight of mature blooms and woody canes.
Match Trellis To Space
As you plan where to train your climbing rose, match the trellis style to the space’s size, shape, and purpose so the structure complements both the plant and your yard. Think about sightlines, access, and the mood you want—romantic, formal, or wild. Choose something proportionate so the rose won’t overwhelm or disappear.
- Small nook: a narrow fan or obelisk brings intimacy and charm.
- Pathway or entry: an arch creates drama and invites you through.
- Large wall or fence: a wide lattice or panel offers grandeur and backdrop depth.
Let the trellis enhance the setting and your daily joy.
Consider Support Strength
Once you’ve picked a trellis that suits the space, check how much structural support your rose will need—different varieties and training styles put very different loads on a frame. You’ll assess vine weight, wind exposure, and attachment points. Choose sturdy posts for heavy climbers, lighter lattices for ramblers, and reinforced anchors where wind’s strong. Inspect materials for rot resistance and secure fastenings. If unsure, overbuild slightly—it’s cheaper than replacing a collapsed trellis. Refer to the quick guide below to match plant habit to support.
| Habit | Suggested Frame | Notes |
|---|---|---|
| Ramblers | Heavy posts | Spread weight |
| Climbers | Stout lattice | Moderate support |
| Small climbers | Light trellis | Less load |
| Windy sites | Anchored posts | Add guy wires |
Compare Trellis Materials: Wood, Metal, PVC
When choosing a trellis you’ll confront three common options—wood, metal, and PVC—each with distinct strengths and trade-offs in durability, cost, maintenance, and look. You’ll feel differently about each as you imagine years of blooms and repairs. Consider practical and emotional cues:
- Wood: Warm, natural, and sturdy at first; it ages beautifully but needs sealing or replacement, which can feel like ongoing care.
- Metal: Sleek and long-lasting; it conveys strength and permanence, though it may rust and feel cold without powder-coating.
- PVC: Cheap and low-maintenance; it’s light and cheerful but can warp and lack the charm of natural materials.
How to Size a Trellis for Mature Roses
Choosing the right material helped narrow your aesthetic and upkeep needs; now decide on size so the trellis actually supports a mature rose.
Measure the mature spread and height of your chosen variety—many climbers reach 6–12 feet high and 4–8 feet wide.
Measure your rose’s mature size—many climbers top 6–12 feet and span 4–8 feet—plan accordingly.
Add 1–2 feet of clearance above the expected top for training and seasonal growth.
Space supports and crossbars to match cane thickness; stronger canes need wider spacing.
If you plan to fan or weave canes horizontally, provide extra width.
Make the base sturdy and deep-set so the full mature plant won’t tip or strain the frame.
Where to Place Your Trellis for Sun and Airflow
Although climbers tolerate a bit of shade, place your trellis where the roses will get at least six hours of direct sun and steady air movement so blooms stay healthy and mildew-free. Choose a spot visible from seating or a path so you’ll enjoy blooms and scent daily. Keep taller plants or structures to the north or west to avoid late-day shading. Confirm nearby fences or walls don’t block prevailing breezes.
- Pick a sunny, breezy location that feels uplifting.
- Position for morning sun to boost fragrance and vigor.
- Orient to reduce damp, musty feelings and disease.
Check Soil and Drainage Before Installing a Trellis
Sun and airflow matter, but soil and drainage determine whether your climbing rose will thrive at that spot. Dig a 12–18 inch hole to check texture and depth; roots need friable loam that drains well. If water pools or the soil compacts, amend with compost and coarse sand or create a raised bed to improve drainage.
Test pH; roses prefer slightly acidic 6.0–6.8—adjust with lime or sulfur as needed. Confirm you can improve poor sites before installing the trellis.
Proper soil preparation saves time and prevents root rot, ensuring healthier growth and easier training.
Tools and Materials Checklist for Trellis Projects
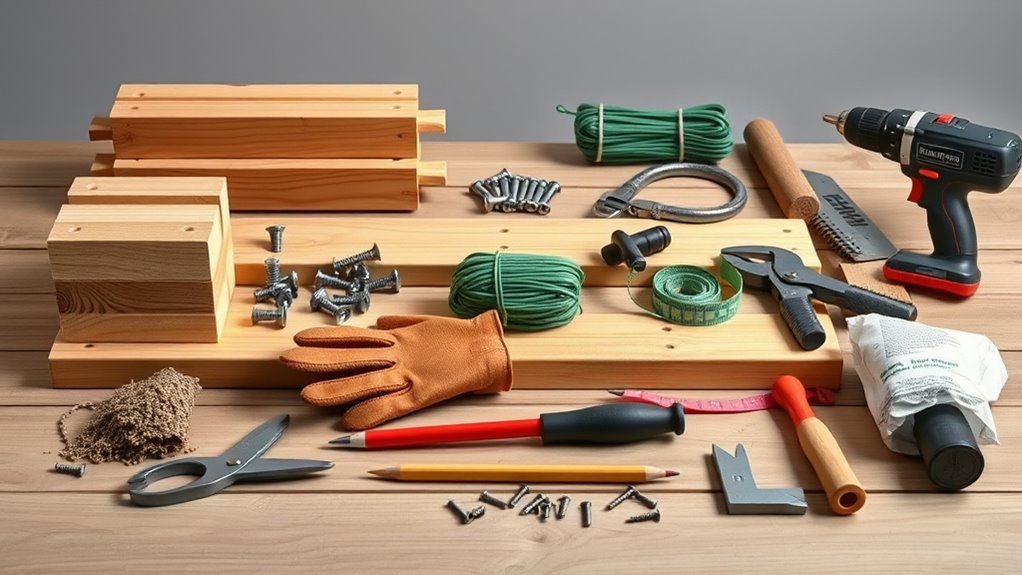
Before you start, gather the essential tools and materials so you won’t be stopped halfway through the job. You’ll need sturdy posts, trellis panels or wire, and weatherproof fasteners. Pick treated or rot-resistant wood, rustproof screws, and outdoor-grade twine or ties. Choose posts long enough for depth and clearance, and panels that suit your rose’s vigor.
Include a post-hole digger, level, drill, and heavy-duty stapler or fencing pliers. Wear gloves and safety glasses. Keep extra screws and replacement ties on hand so you can finish without frustration.
- Posts — strong, lasting, dependable
- Fasteners — secure, rustproof, reliable
- Tools — safe, precise, ready
Budgeting: DIY vs. Prebuilt Trellis Costs
You’ll want to compare material costs side-by-side—wood, metal, or recycled options can change the price a lot.
Factor in your time: building saves money if you’re willing to spend hours, while a prebuilt unit buys convenience.
Also account for long-term maintenance expenses like staining, rust prevention, or replacement parts when weighing true cost.
Material Cost Comparison
One clear way to budget for a climbing rose trellis is to compare the upfront and long-term costs of building it yourself versus buying a prebuilt unit, since materials, tools, and durability all affect total expense. You’ll weigh lumber, fasteners, paint, and hardware against a finished product’s price.
Consider maintenance: rot-resistant wood or metal costs more now but saves replacement money. Think about aesthetics and lifespan when choosing materials so you don’t regret a cheap buy.
- Wood: warm, customizable, needs sealing.
- Metal: durable, pricier, sleek.
- Composite: low upkeep, highest upfront.
Labor Time Investment
Having compared material costs, you should next factor in labor time—DIY builds demand hours for measuring, cutting, assembly, finishing, and installation.
A prebuilt trellis mostly requires delivery and mounting time. Decide whether your schedule and skills justify the DIY hours; estimate design, tool setup, and potential rework.
For a simple wooden trellis expect several afternoon sessions; a metal or custom design can take longer.
Prebuilts save time but add coordination and possible adjustments.
Tally your hourly value against price differences to see which option actually costs less when labor is included.
Long-Term Maintenance Expenses
Because maintenance stretches the trellis’s true cost over years, factor routine care, repairs, and eventual replacement into your budget. You’ll weigh DIY savings against time and unexpected repairs: rot, loose supports, and repainting.
Prebuilt options cost more upfront but often need less frequent intervention; DIY lets you choose durable materials to cut long-term expenses. Consider how much you value time versus money, then calculate yearly upkeep.
- Frustration: fast fixes drain patience and funds.
- Relief: sturdy materials reduce visits and worry.
- Pride: repairing your own trellis strengthens attachment.
Quick DIY Lattice Trellis You Can Build in a Weekend
If you want a sturdy trellis without a week of fuss, this quick DIY lattice is the answer—you can build it in a weekend with basic tools and a few trips to the lumber yard.
Measure your planting area, cut pressure-treated 2x2s for vertical posts and 1×2 slats for the lattice.
Space posts 6–8 feet apart, set them in gravel for drainage, and screw a top and bottom rail.
Attach diagonal or crisscross slats at 4–6 inch centers, trimming cleanly.
Sand, seal, and anchor the base.
Train young canes horizontally as they grow to fill the lattice.
Build a Sturdy Wooden Arch
Want a graceful entryway that also supports your climbing roses? Build a sturdy wooden arch that lasts and looks romantic. Choose pressure-treated posts and rot-resistant lumber, anchor posts deep with concrete, and brace the curve for strength.
Want a romantic, long-lasting wooden arch—pressure-treated posts, deep concrete anchors, and braced curves to support climbing roses.
Train canes along horizontal slats, tie gently, and prune for airflow.
- Select strong wood that feels timeless.
- Set foundations solidly so the arch won’t sag.
- Finish with stain for protection and warmth.
You’ll create a welcoming focal point that holds blooms without collapsing, letting roses climb safely while enhancing your garden’s charm.
Build a Bolted Metal-Frame Trellis
When you need a durable, low-maintenance support for vigorous climbers, build a bolted metal-frame trellis that’s both strong and simple to assemble.
Choose galvanized steel or powder-coated square tubing for rust resistance. Cut uprights and crossbars to fit your space, drill matching holes, and bolt corners with carriage bolts and lock nuts.
Anchor uprights into concrete footings or use ground sleeves for removability.
Add horizontal or diagonal wire runs every 12–18 inches for canes to weave through.
Paint or powder-coat exposed bolt heads for protection.
Train roses gradually, tying canes to the grid with soft ties as they grow.
Make a Freestanding A-Frame for Narrow Beds
Because narrow beds limit how far a trellis can project, a freestanding A‑frame gives your climbing roses strong support without crowding paths or borders. You’ll build two identical triangles from treated lumber or bamboo, hinge them at the peak, and add horizontal rungs for tying canes.
Position the frame centered in the bed, with stakes or ground anchors through base plates for stability. Prune and train shoots upward, securing them loosely as they grow.
- You’ll feel pride watching stems find structure.
- You’ll love the tidy, vertical bloom display.
- You’ll enjoy easy maintenance and access.
Convert an Old Fence Into a Rose Support
Start by inspecting the fence for rot, loose boards, and sturdy posts so you know if it can safely bear climbing roses.
If the structure’s sound, plan where you’ll attach hooks, eye screws, or horizontal wires to guide and support the canes.
Use corrosion-resistant hardware and fasten into studs or solid rails to keep the roses secure as they grow.
Assess Fence Condition
Before you attach anything, walk the length of the fence and inspect its structure. Check for rot, leaning posts, loose boards, and rusted fasteners. You’ll want a safe, stable base before training roses.
Evaluate these emotional touchpoints:
- Safety — does the fence feel solid or worrying?
- Pride — can you restore it to something beautiful?
- Loss — are sections too damaged to save?
Mark weak spots, measure post spacing, and note areas where water pools or vines already cling.
If repairs are minor, plan them now; if major, consider replacing sections so your climbing roses have reliable, lasting support.
Attach Support Hardware
Now that you’ve identified weak spots and measured post spacing, it’s time to attach the support hardware that will actually hold your climbing roses. Choose galvanized eye screws, heavy-duty hooks, or trellis brackets to resist rust and bear weight.
Mark locations at consistent heights—bottom, middle, top—so ties run evenly.
Pre-drill holes for hardwood posts to prevent splitting.
Screw hardware firmly, using washers where needed for extra grip.
If you’re converting rails into horizontal supports, space wires or wooden slats 8–12 inches apart and tension wires with turnbuckles.
Test each point before training stems to avoid future failures.
Anchor Posts to Prevent Sagging and Failure
Because a climbing rose trellis puts constant outward and downward strain on its frame, you’ll need solid anchor posts set deep and braced so the whole structure won’t sag or pull loose over time. Dig posts at least 2–3 feet deep, use concrete for heavy soils, and choose rot-resistant wood or metal.
Brace diagonal supports to counter lateral forces and check alignment before concrete sets. Secure connections with galvanized bolts and washers so they won’t loosen.
Consider your soil and wind exposure to size posts correctly.
- Feel confident
- Protect your roses
- Enjoy lasting beauty
Install Horizontal Support Wires for Long Canes
Once your anchor posts are solid, run horizontal support wires at staggered heights to catch long canes as they grow. Use galvanized steel wire for strength and corrosion resistance, stretching it taut between posts and securing with turnbuckles.
Space wires vertically about 12–18 inches apart, adjusting for your rose variety and ultimate canopy height. Attach wires to posts with eye bolts or heavy staples, and add a slight outward angle at the ends to prevent wires from pulling toward the post.
Check tension seasonally and tighten as needed. These supports give structure and prevent sagging, making future training and pruning far easier.
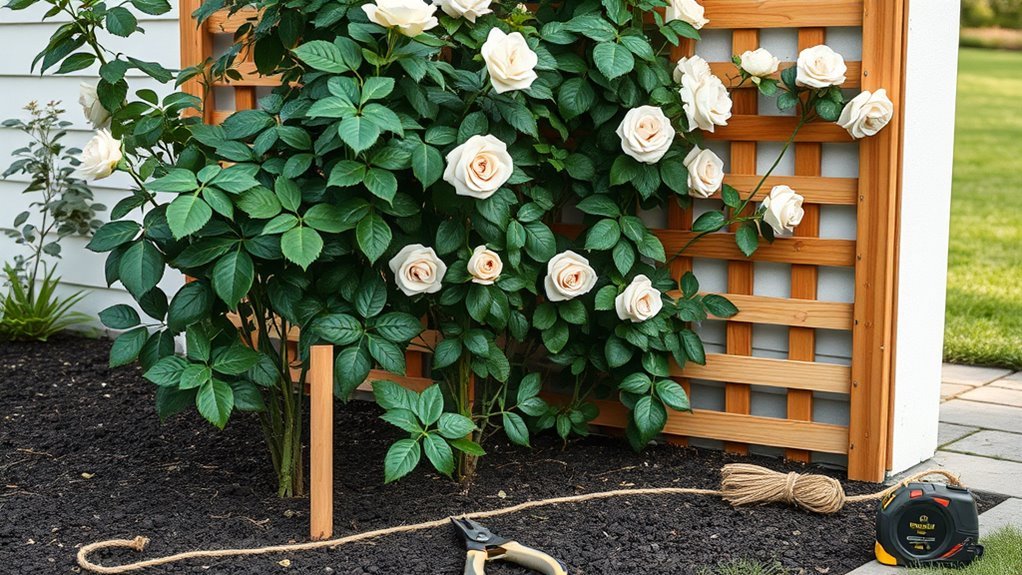
Training Basics: Tie and Secure Rose Canes
Before the canes get too long and heavy, start training them by gently tying each one to the horizontal wires with soft, flexible ties so you control direction and reduce breakage. You’ll work steadily along the trellis, rotating ties as canes grow and loosening to avoid girdling.
Before canes get heavy, gently tie them to horizontal wires—rotate and loosen ties as they grow to prevent girdling.
Secure canes at slight angles to encourage outward blooms and space for air circulation. Remove any crossing or inward-facing shoots. Tie where canes are young and pliable; use cloth, pantyhose, or purpose-made plant ties.
Small, consistent adjustments prevent damage and shape the plant into a graceful framework you’ll admire.
- Protect
- Guide
- Celebrate
Fan Training vs. Horizontal Layering: Choose One
Now that you’ve got canes tied and shaped, decide how you want the rose to grow: fan training or horizontal layering.
Fan training spreads canes like spokes against the trellis, improving air circulation and display. You’ll tie individual canes at gentle angles, keeping gaps so light reaches the center.
Horizontal layering encourages long laterals that bloom along their length. You’ll bend and secure main canes horizontally to stimulate abundant flowering buds.
Choose fan for structure and easy maintenance, horizontal for heavy repeat blooming. Pick one approach and be consistent so the plant develops the form and vigor you want.
Pruning Schedule for Climbing Roses on a Trellis
After you’ve trained the canes, set a clear annual pruning schedule so your climber stays healthy and blooms reliably. Prune in late winter when buds swell; remove dead, crossing, or weak wood, keeping main framework intact. Cut to outward-facing buds to encourage open structure and airflow.
After training canes, prune annually in late winter—remove dead or weak wood, cut to outward buds for open, healthy blooms
Light summer tidy to deadhead spent blooms and shape, avoiding heavy cuts (that’s for winter). Watch for disease and remove affected canes promptly.
- Relief: reclaim control when growth feels chaotic.
- Joy: reward is fuller, longer blooming.
- Pride: a trellis neatly framed by purposeful cuts.
Summer Care: Tie New Growth Safely
In summer, you’ll want to secure new shoots with soft garden ties so they don’t rub or snap.
Use flexible ties to avoid girdling as the canes thicken.
Gently train each cane along the trellis supports to encourage the shape you want.
Secure Soft Garden Ties
When new canes shoot out in summer, tie them loosely to the trellis with soft, flexible ties so they grow in the direction you want without being strangled. Use foam, twine covered in cloth, or purpose-made velcro that won’t cut bark.
Check ties weekly and adjust before they girdle stems. Replace weathered ties and remove ones that’ve become tight. Be gentle when looping to avoid bruising.
Let the plant breathe while keeping structure secure.
- Comfort — your careful touch protects new growth.
- Trust — consistent checks prevent damage.
- Pride — neat ties show your care.
Train Canes Along Supports
Because new canes can grow quickly and unpredictably, guide them gently along your trellis from the moment they reach it—secure each cane loosely to a support with soft ties, spreading them horizontally or fanning them out to encourage flowering and reduce wind damage.
Check ties weekly and adjust as growth continues, loosening before they constrict stems.
Anchor long laterals at multiple points to prevent sagging and to direct energy into flowering wood.
Remove inward-growing or crossing shoots to maintain airflow and reduce disease.
Use flexible twine, neoprene strips, or pantyhose; avoid wire.
Train gradually, patience pays with stronger structure and fuller blooms.
Winter Prep for Trellises and Rose Roots
Although temperatures haven’t plunged yet, you should start winter-proofing your trellis and rose roots now to prevent wind damage, desiccation, and freeze-thaw heaving. Loosen soil gently around roots, mulch 3–4 inches with straw or shredded bark, and secure loose trellis ties so canes don’t whip in storms. Wrap delicate canes with breathable burlap if exposed.
- Protect roots with insulation to soothe your worry.
- Anchor the trellis to calm anxiety about collapse.
- Trim only damaged growth to preserve strength and hope.
Act now; these simple steps keep vines safe and return beauty next spring.
Watering and Fertilizing Trellis-Grown Roses
Water the base of your trellis deeply and less often so roots grow downward toward moisture.
Adjust your feeding schedule by season—light, balanced feed in spring, higher phosphorus during bloom, and reduced nitrogen in late summer.
Check soil moisture and plant condition regularly to fine-tune watering and nutrient timing.
Deep Root Watering
When your climbing roses mature on the trellis, deep root watering gives them steady moisture down where they need it most, encouraging stronger roots and fewer surface scorch symptoms. You’ll water slowly and deeply—soak root zones 12–18 inches down—less often but more thoroughly than surface sprinkling.
Use drip lines, soaker hoses, or a slow-fill basin; mulch to retain moisture and check soil with a probe. Avoid wetting foliage to reduce disease. Watch for wilting recovery after watering as a success sign.
- Relief: roots drink deeply.
- Confidence: less frequent chores.
- Pride: vigorous, resilient blooms.
Seasonal Nutrient Plan
Start by matching feeding and watering to the rose’s growth stages so you give nutrients when the plant can use them most.
In spring, water deeply once a week as shoots emerge and apply a balanced granular fertilizer to encourage root and cane development.
During peak bloom, switch to a bloom-boosting feed higher in phosphorus and maintain consistent moisture; avoid wetting foliage.
After heavy flowering, cut back spent blooms, feed with a low-nitrogen formula to prepare for recovery, and reduce water slightly.
In late fall, stop fertilizing and taper watering to harden the plant for dormancy while preventing drought stress.
Manage Pests on Trellised Climbing Roses
Because trellised climbing roses create dense foliage and long canes, they can attract more pests than bush varieties, so you’ll want a clear, proactive plan to keep infestations small and manageable. Inspect weekly, focusing on new growth and undersides of leaves. Remove affected foliage and prune crowded canes to improve airflow. Encourage beneficials like ladybugs and lacewings.
Because trellised climbers hold dense growth, inspect weekly, prune for airflow, remove pests, and welcome beneficial insects.
Use targeted, low-toxicity controls—neem oil or insecticidal soap—only when thresholds are exceeded. Rotate treatments and follow label rates. Stay vigilant after bloom and during warm spells to prevent buildups.
- Act early — anxiety turns to control.
- Protect pollinators — compassion matters.
- Persist — victory feels rewarding.
Preventing and Treating Diseases on Trellised Roses
Keep your trellis layout tight on spacing so air moves freely through the canes and helps prevent fungal problems.
Choose disease-resistant rose varieties to cut down on sprays and make management easier.
Prune promptly and remove diseased foliage and canes to stop infections from spreading.
Proper Air Circulation
When you train climbing roses on a trellis, good air circulation is essential to prevent fungal diseases like black spot and powdery mildew. You’ll prune crowded canes, tie laterals horizontally, and space branches to let wind pass.
Remove lower foliage that traps moisture and routinely thin dense growth after flowering. Monitor sites for stagnant air and adjust plantings or trellis position as needed.
Clean fallen leaves promptly to reduce spores. Feel confident when you see drier leaves and fewer spots; breathability keeps blooms healthier and sweeter.
- Relief
- Pride
- Joy
Disease-Resistant Varieties
Looking for roses that stand up to pests and mildew can save you time and keep your trellis looking its best. Choosing disease-resistant varieties gives you a head start.
Pick cultivars labeled resistant to black spot, powdery mildew, and rust — modern hybrids and species roses often carry those traits.
Buy from reputable nurseries and check local trial recommendations so selections suit your climate.
Plant healthy stock, space canes for airflow, and monitor regularly for symptoms.
If disease appears, remove affected foliage promptly and use targeted organic or chemical controls as needed, following label directions to protect blooms and beneficials.
Prompt Pruning And Cleanup
If you spot diseased or dead canes, prune them out immediately to stop infections from spreading and to keep air flowing through the trellis.
You’ll clean up fallen leaves and spent blooms weekly, removing debris that shelters fungal spores. Sanitize tools between cuts to avoid passing pathogens.
Watch for early signs—spots, powder, wilting—and act fast with targeted fungicides or organic sprays.
Support canes so they don’t rub and wound. Your steady care prevents outbreaks and keeps blooms abundant.
Feel proud as your trellis stays healthy, vibrant, and resilient.
- Protect
- Act
- Enjoy
Seasonal Bloom-Boosting Techniques
Want bigger, more consistent blooms throughout the growing season? Feed your roses with a balanced fertilizer in early spring, then switch to a bloom-boosting formula when buds form.
Deadhead spent flowers regularly to encourage repeats, cutting back to healthy outward-facing buds.
Water deeply at the root zone once or twice weekly, keeping foliage dry to reduce disease.
Mulch to retain moisture and suppress weeds, revitalizing as needed.
Pinch back long, whippy laterals to concentrate energy into flowering canes.
Monitor for pests and treat promptly; healthy plants set more blooms.
Stagger fertilizer and deadheading for continuous display.
Repair Wood Trellises After Rot or Insect Damage
When rot or insects start to weaken a wood trellis, you can often save the structure with targeted repairs rather than replacing the whole thing. Inspect thoroughly, removing dead wood and scraping away soft, crumbly areas. Treat remaining wood with a borate preservative and let it dry.
Reinforce joints with stainless screws and exterior glue, and splice in new wood where posts or rails have lost strength. If decay is extensive, consider replacing affected sections only.
Restore finish with paint or stain to repel moisture and pests, and keep plants trained to avoid constant wetting.
Fix Bent or Rusted Metal Frames
Though metal trellises resist rot, they still bend and rust over years of wind and moisture. You can often restore them without buying a new frame.
Assess damage: tap joints, inspect welds, and note thin or flaky metal.
Straighten bends using a vice, pipe clamps, or a mallet on a supporting block—work slowly to avoid cracking paint.
Remove rust with a wire brush or rotary tool, then sand smooth.
Treat bare metal with rust converter, prime, and paint with exterior metal paint.
Tighten or replace damaged brackets; if a section is beyond repair, cut and splice a new piece.
Replace Support Wires and Fasteners Safely
Before you replace anything, inspect the old wires for fraying, rust, or stretched spots that could fail under the weight of the rose.
Remove damaged wire and choose new stainless or galvanized wire sized for the load, then anchor it tightly at both ends.
Use corrosion-resistant fasteners and secure them with proper tensioning and a final safety check.
Inspect Old Wires
Ready to tackle worn supports? You’ll check every wire for rust, fraying, and sag. Don’t assume strength—feel for weak spots and tap for hollow sounds. Note anchor points and nearby wood for rot; failing surroundings can doom a repair. Prioritize safety: wear gloves and eye protection, and work with a partner if lines are tensioned. Record what needs replacing so you won’t miss anything.
- Inspect visually and by touch for corrosion and broken strands.
- Look for stretching, kinks, or sharp bends that weaken the wire.
- Check adjacent posts and brackets for damage that stresses supports.
Secure New Fasteners
How will you fasten new supports so they hold up under tension? You’ll remove damaged fasteners, choose stainless steel or galvanized replacements, and mount them into studs or solid posts. Drive screws or anchors straight, tighten without crushing the wire, and use thimbles at bends to prevent wear. Space anchors evenly, test each run under load, and trim excess wire. Check knots or crimps periodically.
| Material | Size | Tip |
|---|---|---|
| Wire | 12–14 ga | Tension gradually |
| Screw Eye | 3–4 in | Use lag in studs |
| Thimble | Standard | Protect wire bends |
When and How to Relocate a Trellis and Roses
If your roses have outgrown their support or you need to move the trellis for site changes, you can relocate both successfully with careful timing and technique. Choose late winter or early spring when plants are dormant.
Prune long canes, label orientations, and detach ties slowly. Lift the root ball with minimal disturbance, or dig a wide trench to transfer soil intact.
Reposition the trellis, set plants at the same depth, and stake until roots reestablish. Water deeply and mulch.
Expect a recovery period; avoid heavy feeding in the first season.
- Relief — because space feels right.
- Pride — seeing tidy movement.
- Hope — for blooming ahead.
Styling: Pair Trellised Roses With Companion Plants
When you plant trellised roses, choose companions that highlight their form and fill gaps at different heights and seasons. Select lower-growing perennials—lavender, catmint, and geraniums—to hide the base, suppress weeds, and echo rose colors.
Plant trellised roses with low perennials—lavender, catmint, geraniums—to hide bases, suppress weeds, and echo color.
Mid-height shrubs like salvia or hardy fuchsia provide contrast without shading canes. Add climbers such as sweet pea or nasturtium sparingly on adjacent supports to layer bloom times.
Consider foliage texture: fine-leaved grasses soften stems; silver-leaved artemisia brightens dark roses. Match water needs and soil pH to avoid competition.
Plant in drifts and repeat species to create rhythm and cohesion.
Use Trellised Roses for Privacy and Shade
Because trellised roses grow upward and fill gaps, you can use them as an attractive living screen to block views and create cool, dappled shade. You’ll position the trellis where privacy’s most needed, training canes horizontally to thicken coverage. Choose repeat-bloomers and evergreen companions at the base for year-round shelter.
Prune to encourage density without blocking air. Enjoy softer light, reduced noise, and a fragrant barrier that feels intimate. Consider safety—secure the structure to resist wind.
- Imagine evenings shaded, scented, and secluded.
- Picture neighbors’ sightlines softened into green.
- Feel calm as sunlight filters through roses.
Low-Maintenance Trellis Designs for Busy Gardeners
A living screen can feel lavish, but you don’t have to spend hours fussing to get those results—low-maintenance trellis designs let you enjoy framed roses with minimal upkeep. Choose durable materials, simple shapes, and self-supporting plants. Install a sturdy freestanding arch or panel, train canes horizontally, and prune yearly. Use native climbers as companions and mulch to suppress weeds. Water deeply but infrequently.
| Feature | Benefit |
|---|---|
| Material: metal/cedar | Long lifespan |
| Design: arch/panel | Easy training |
| Plant: repeat-flowering | Fewer replacements |
| Mulch | Less weeding |
| Prune annually | Controlled size |
Safety for Tall or Public-Facing Trellises
If your trellis will rise above passersby or sit along a sidewalk, prioritize stability and safety from the start: secure footings, robust anchoring to walls or ground, and materials rated for outdoor load will prevent collapse.
Smooth finishes plus well-placed spacing will reduce snagging and injury. You’ll inspect fasteners annually, tighten bolts, and replace rusted parts.
Train roses to avoid heavy, unsupported clusters. Keep branches trimmed away from pedestrian paths. Post a visible sign if pruning or repairs are underway.
- Anchor firmly to resist wind.
- Keep surfaces snag-free.
- Maintain yearly inspections.
Choose Eco-Friendly Trellis Materials and Practices
When you choose eco-friendly materials and practices for your climbing rose trellis, you cut waste and lower environmental impact without sacrificing durability or beauty. Use reclaimed wood, sustainably sourced cedar, or metal salvaged from decommissioned structures.
Pick natural, non-toxic finishes—linseed oil or water-based stains—to protect wood and plants. Fasten components with stainless steel or galvanized hardware for longevity, reducing replacements.
Incorporate biodegradable twine or recycled-polyester ties rather than plastic zip ties. Plan for adaptability so the trellis can be moved or reused.
Compost plant prunings and avoid chemical pesticides to maintain a healthy, low-impact garden ecosystem.
Seasonal Maintenance Checklist for Trellises
Now that you’ve picked sustainable materials and finishes, keeping your trellis in peak condition through the seasons will extend its life and protect your roses. Inspect joints and anchor points each spring for looseness or rot; tighten or replace hardware promptly.
Winterize by clearing debris, applying a protective coat if needed, and ensuring vines are tied to reduce wind stress. Prune climbers after bloom to prevent heavy, unbalanced loads.
Watch for pests and fungal signs monthly and treat early. Record maintenance dates so you don’t forget.
Maintain gently, consistently, and lovingly to preserve structure and blooms.
- Check anchors
- Winterize
- Prune
Troubleshooting: Why Your Trellis Rose Isn’t Blooming
If your trellis rose isn’t blooming, check whether you pruned at the wrong time—cutting flowering canes in late winter or early spring will reduce blooms.
Also make sure the plant gets at least six hours of direct sun, since shade will stall bud formation.
Fixing pruning timing and improving light are the two most common quick remedies.
Pruning Timing Mistakes
Because roses set buds on specific growth cycles, mistiming your pruning can strip away the wood that would have flowered next, leaving your trellis bare.
You want blooms, so prune when growth is predictable: remove dead wood in late winter, thin congested canes after first flush, and tie long laterals for support without cutting flowering spurs.
If you prune too early or too harshly, you’ll lose the next season’s buds. Watch local climate cues and the plant’s leafing.
Mistakes feel discouraging, but adjusted timing restores blooms.
- Frustration
- Relief
- Joy
Insufficient Sunlight Exposure
Why isn’t your trellis rose blooming like it should? If it sits in shade most of the day, blooms will be sparse. Roses need at least six hours of direct sun; less weakens bud formation and invites disease.
Check sunlight patterns through seasons — nearby trees, fences, or new structures can cast unexpected shade.
If you can’t move the plant, prune or thin overhead branches, relocate reflective surfaces to boost light, or train canes to sunnier sides of the trellis.
Consider planting a more shade-tolerant variety as a last resort. Improve light, and flowering should return.
Extend Trellis Lifespan: 5–10 Year Care Plan
As you move from installation to long-term care, a clear 5–10 year plan will keep your trellis sturdy and your roses thriving. Inspect annually for rot, loose fasteners, and sagging; tighten bolts, replace damaged wood, and treat metal to prevent rust.
Plan for 5–10 years: inspect annually, tighten fasteners, replace damaged wood, and treat metal to prevent rot and rust
Prune climbers each winter to reduce weight and encourage healthy canes. Feed and mulch seasonally to sustain root vigor and reduce disease.
Protect posts at the ground line from moisture and soil contact.
- Yearly inspections restore confidence.
- Seasonal pruning lightens your load.
- Routine feeding rewards you with blooms.
Trellis Layout Ideas for Small, Medium, Large Yards
For a small yard, you can use narrow, vertical trellises or arbors to maximize bloom without taking up precious ground.
In a medium space, arrange multiple panels or a short pergola to create layers and walkways for wandering roses.
If you’ve got a large yard, plan sprawling installations like long fence trellises or arbors to create focal points and separate garden rooms.
Small Yard Strategies
Wondering how to fit a climbing rose trellis into a compact yard? You can create height without crowding ground space. Choose narrow obelisks, train roses upward on a wall, or use a slim A-frame against a fence. Focus on scale, light, and sightlines so blooms become focal points, not obstacles.
- Pick vertical structures to save floor space.
- Use reflective surfaces or mirrors to amplify bloom impact.
- Prune and thin regularly to maintain air and access.
Place seating near the trellis to enjoy scent and color; small yards can feel abundant with smart vertical choices.
Large Yard Installations
If you loved the space-saving tricks for small yards, think bigger now: large yards let you plan trellis systems that shape views, create rooms, and support heavier, more vigorous climbing roses.
In a big space, use multiple trellis types—arched walkways, long espalier walls, freestanding obelisks—to define paths, patios, and sightlines.
Space trellises to allow mature spread and airflow; orient for morning sun and wind protection.
Combine sturdy materials and deep, well-drained planting beds to anchor strong canes.
Plan for maintenance access and irrigation.
Stagger bloom times with varieties of different vigor to keep color continuous across the landscape.
Cheat Sheet: Build, Train, and Maintain Checklist
When you’re ready to build, train, and maintain your climbing rose trellis, use this compact checklist to stay organized and efficient; it covers materials, installation steps, training techniques, pruning and maintenance schedules, and seasonal reminders so you won’t miss a critical task.
Gather materials: treated posts, sturdy wire, anchors, gloves, loppers, and fertilizer.
Install solidly, level posts, tension wires, and test stability.
Train stems horizontally, tie gently, remove inward growth.
Prune annually and deadhead through season.
Track watering and feed schedule.
Remember safety and adjust for growth.
Follow this to keep blooms abundant and your trellis proud.
- Build
- Train
- Maintain
Frequently Asked Questions
Can Climbing Roses Be Trained Indoors on a Trellis?
Yes — you can train climbing roses indoors on a trellis if you provide bright light, good airflow, regular pruning, support for canes, and consistent watering and fertilizing; you’ll need compact varieties and patience for blooms.
Do Trellised Roses Attract Protected Wildlife Species?
Yes, trellised roses can attract protected wildlife species like nesting birds or butterflies; you should check local regulations, avoid disturbing nests, and manage planting practices to protect both roses and any legally protected animals visiting your garden.
How Do Trellis Installations Affect Home Insurance or Property Codes?
They can affect codes and insurance: you’ll need permits or HOA approval for significant structures, guarantee safe, code-compliant fixes, and notify insurers if installations change structural risk; failure to comply might void claims or trigger fines.
Can Trellis-Mounted Roses Damage Siding or Brick Over Time?
They can: roses and trellises may trap moisture, hold vines that abrade surfaces, and roots or fasteners can damage mortar or siding. You should install a gap, use proper fasteners, and prune to prevent problems.
Are There Fragrant Rose Varieties That Repel Mosquitoes?
No, roses alone won’t reliably repel mosquitoes, but you can plant fragrant varieties like lavender-scented ‘Gertrude Jekyll’ or citrusy ‘Rosa rugosa’ nearby; their scent might help a bit, though results aren’t guaranteed.
Conclusion
A trellis can turn a small yard into a vertical garden full of color and scent. Choose climbers that suit your climate, pick materials that match your style, and size the structure for mature growth. Train new canes gently, prune for air and blooms, and follow a simple 5–10 year care plan to prevent rot and pests. With regular checks and seasonal maintenance, your climbing roses will thrive and beautify your space for years.