How to Fix a Veneer Table Top Without Replacing It
You can fix a veneered tabletop without replacing it by diagnosing the damage, re-gluing lifts, filling chips, and matching stain and finish. Warm lifted areas with an iron or heat gun, inject thin wood glue, then clamp with padded cauls until cured. Patch missing bits with matched veneer or tinted epoxy, sand lightly, and blend color with markers or stains before sealing. Follow simple steps for lasting repairs, and keep going to learn techniques for tougher spots and perfect blending.
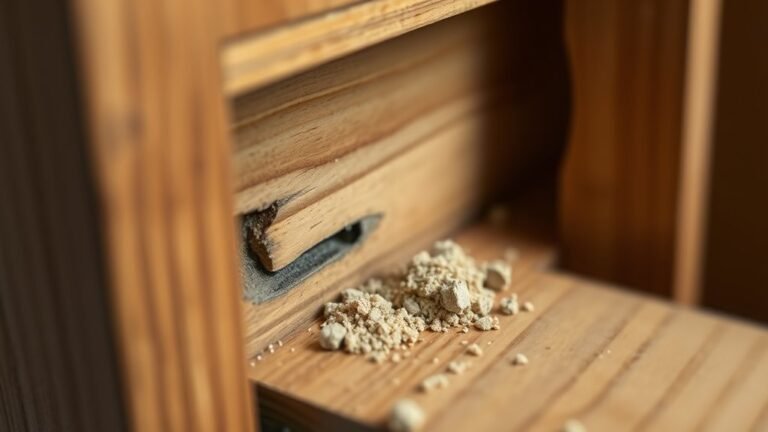
Diagnose the Exact Veneer Problem
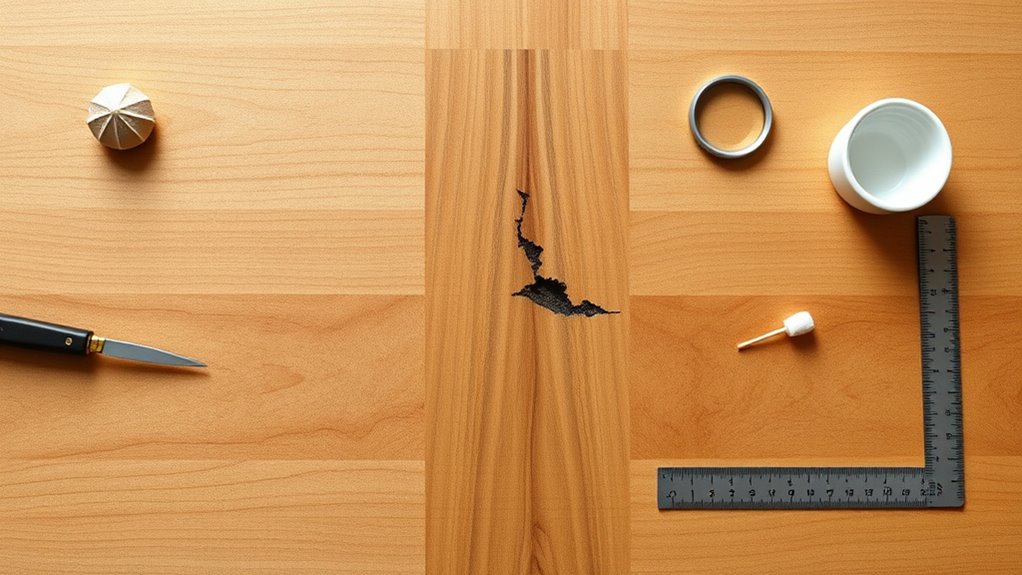
Before you grab glue or sandpaper, closely inspect the veneer to pinpoint the problem: is it lifting, cracked, bubbled, chipped, or missing entirely? Check edges, seams, and underside for glue residue or moisture.
Before grabbing glue, inspect veneer closely—identify lifting, cracks, bubbles, chips, or moisture to guide repairs.
Press gently with a fingertip to detect hollows or loose areas. Use a flashlight at a low angle to reveal hairline cracks and surface irregularities.
Note finish damage versus substrate issues — finish scratches won’t mean structural failure.
Measure affected area and photograph it for reference.
Identifying the precise defect guides whether you’ll reattach, fill, splice, or stabilize the veneer without unnecessary work.
Quick Fixes for Common Veneer Damage
When you spot minor veneer problems—small lifts, chips, hairline cracks, or finish scratches—you can often fix them quickly with a few basic tools and materials.
For lifted edges, gently lift, inject wood glue, and clamp with a caulking gun or weights until set.
Fill tiny chips or gaps with matching wood filler or a tinted wood putty, then sand lightly.
Hide hairline cracks by rubbing melted wood glue into the split, wiping excess, and pressing until cured.
For surface scratches, use a scratch repair marker or blended wax stick, buffing to match sheen.
Clean and finish the repaired area.
When to Repair Veneer vs Replace the Top
How do you decide whether to repair veneer or replace the entire top? You’ll weigh extent, cost, and outcome.
Minor lifts, small chips, and surface scratches are repairable; large missing sections, severe warping, or mold often mean replacement.
- Extent: If damage is localized and substrate is sound, repair saves time and money.
- Cost: Compare repair materials and labor to replacement; sometimes a new top is more economical for extensive damage.
- Desired result: If you want a flawless, uniform finish, replacement may be best; if character and preservation matter, repair will suffice.
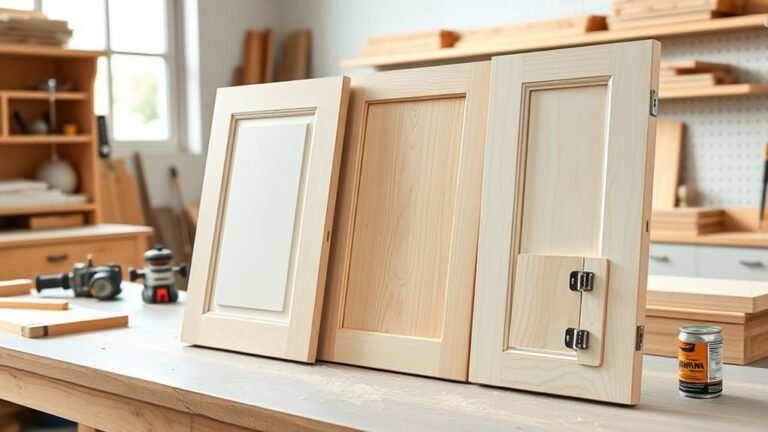
Identify Veneer Type and Thickness
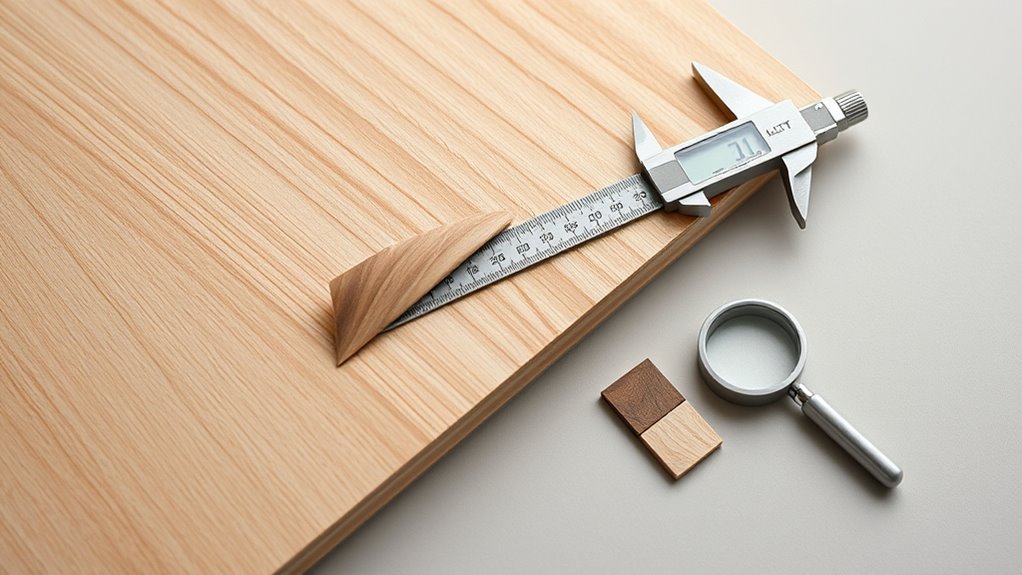
Start by identifying what kind of veneer you’re working with—real wood, reconstituted, or a laminate—since material affects repair options.
Measure the veneer thickness with calipers or a sharp utility knife to expose a cross-section; thin veneers (under 1/32″) need gentler techniques than thicker slices.
Finally, check the backing and glue type by looking under lifted edges to see if it’s paper, MDF, or plywood and whether the adhesive is animal, casein, or modern PVA.
Determine Veneer Material
Before you do any repairs, identify the veneer’s species and thickness so you can choose compatible adhesives, fillers, and finish techniques. Start by examining grain, color, and pore pattern under good light; compare to online photos or a sample book. Smell freshly sanded edges—some species have distinctive scents. Check backing: paper, cloth, or wood indicates manufacture method. If unsure, test a discreet scrap with a drop of denatured alcohol to see finish behavior.
- Use visual ID: grain and color.
- Note backing and construction.
- Seek expert confirmation if needed.
Measure Veneer Thickness
Measure the veneer thickness with care so you can classify it as raw, rotary-cut, sliced, or reconstituted and pick the right repair approach.
Use a caliper or thin gauge to measure at an exposed edge or where damage reveals the cross-section; hold tools steady and take multiple readings.
Typical thicknesses: paper-thin reconstituted veneers under 0.3 mm, sliced or rotary between 0.3–2 mm, and solid veneer up to 3 mm or more.
Note grain appearance and pattern repeat to confirm type.
Record measurements and photos; this lets you choose fillers, adhesive strength, and sanding limits without guessing.
Inspect Backing And Glue
When you flip the tabletop over and examine the underside, look for clues in the backing and glue that reveal the veneer type and how it’s been applied. You’ll identify whether it’s a thick solid slice, thin rotary-cut, or engineered laminate by inspecting layers and glue lines.
Check for cloth or paper backing, resin spots, and whether adhesive is animal hide, PVA, or contact cement. Note how flexible the veneer is and how firmly it adheres.
- Observe backing material and layer count.
- Spot glue type and pattern.
- Test flexibility and adhesion gently.
Locate Seams, Joints, and Substrate Edges
Start by running your fingers and eyes along the surface to find seams and joints where the veneer pieces meet. Mark those seams.
Then tap or press near edges to map the substrate underneath so you know where the core ends and the veneer may be unsupported.
Knowing these locations helps you plan repairs and avoid causing further damage.
Find Seams And Joints
Before you lift a loose veneer, take a close look for seams, joints, and the substrate edges so you know where repairs must begin. You’ll trace glue lines and tiny gaps with good light and a bright flashlight.
Gently press suspected areas to find movement and listen for hollow sounds. Note any finish breaks that indicate a seam.
- Mark visible seams with removable tape.
- Test joint tightness by applying gentle fingertip pressure.
- Record gaps and lifts with a phone photo.
These steps pinpoint where you’ll inject adhesive and clamp without guessing.
Map Substrate Edges
Because the veneer’s behavior depends on what’s underneath, you’ll need to map the substrate edges precisely so you know where seams and joints lie. Run your hand lightly to feel shifts, and use a straightedge or thin ruler to detect slight height changes. Tap the surface with a fingernail to listen for hollow sounds over gaps.
If edges are invisible, apply thin chalk or a pencil rub to reveal seams. Mark detected edges lightly with removable tape or a pencil outline, noting direction and spacing. Accurate mapping prevents glue seepage and guides repairs, so take time and be methodical.
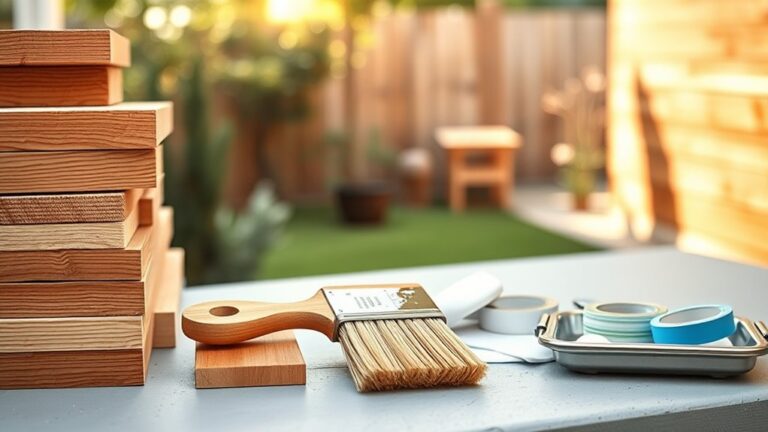
Tools and Materials for Veneer Repairs
When you tackle veneer repairs, having the right tools and materials makes the job faster and prevents mistakes. You’ll need adhesives, clamps, filler, sharp cutting tools, sandpaper, and finishing supplies chosen for your veneer type and damage.
Gather quality wood glue or veneer cement, CA glue for small chips, and veneer repair paste. Use a veneer saw or sharp utility knife, a thin putty knife, and masking tape for lifts. Sandpaper grits from 120 to 320 suit most touch-ups.
Gather quality glues and repair paste; use a sharp blade, thin putty knife, masking tape, and 120–320 grit sandpaper.
Finish with compatible stain, sealer, and topcoat. Keep clamps, wax paper, and clean rags handy.
- Adhesives
- Cutting tools
- Finishing supplies
Safety Tips and Workspace Setup
Before you start, make sure you’ve got the right protective gear—gloves, eye protection, and a respirator for glue fumes.
Clear your workspace of clutter so you have room to work and keep tools organized.
Work in a well-ventilated area or use a fan to move fumes away from your face.
Protective Gear Essentials
Even if the repair seems simple, you should suit up and prepare your workspace so dust, fumes, and sharp edges don’t become hazards. Wear safety glasses, a respirator or dust mask, and gloves before you start.
Choose gloves that let you handle delicate veneer without crushing edges. Use hearing protection for power sanding and vibration tools.
Keep a first-aid kit nearby in case of small cuts or splinters. Follow this quick checklist:
- Safety glasses, respirator/dust mask, and nitrile or thin leather gloves.
- Hearing protection and splash-resistant apron.
- First-aid kit, clean rags, and waste container.
Clear, Ventilated Workspace
Set up a clear, well-ventilated workspace so you can work safely and see what you’re doing. Clear clutter, position the table near a window or use a fan to move fumes away, and guarantee even lighting. You’ll want stable supports and a flat surface to prevent slips. Keep solvents, adhesives, and tools organized and within reach. Take breaks to air the room if you smell strong fumes. Lock pets and kids out. Review labels for solvent VOCs and follow respirator guidance when needed.
| Item | Purpose | Placement |
|---|---|---|
| Fan | Ventilation | Window |
| Mask | Filter fumes | On bench |
| Tray | Tools | Right side |
Preventive Care Before You Start Repairing
While you gather tools and materials, take a moment to protect the rest of the piece: move loose objects off the table, slide a drop cloth underneath, and mask surrounding finish with painter’s tape so glue or stain won’t damage adjacent surfaces.
Inspect the veneer for loose areas, dust, or old finish residue, and note damage locations.
Prepare ventilation and wear gloves and eye protection.
Keep solvents and adhesives labeled and separate.
Follow a simple checklist:
- Clean surfaces with a gentle solvent.
- Secure fragile edges with tape.
- Organize tools and test adhesive compatibility on scrap.
Fix Veneer Lifting Edges With Heat and Glue
First, you’ll assess how far the veneer has lifted and whether the substrate is sound.
Then you’ll apply heat carefully to soften old glue without scorching the veneer.
Finally, you’ll inject a thin bead of glue under the edge and clamp it until the bond sets.
Assess The Lift
How badly is the veneer lifting — just a loose edge or a bubble across the surface? You’ll want to inspect size, location, and attachment before proceeding. Check these points:
- Measure extent: note length and width of lifted area to decide repair scope.
- Test adhesion: gently press with a fingertip or a flat tool to see if it re-bonds or stays raised; listen for hollow sounds.
- Look for damage: check for cracks, missing veneer, or glue residue that could affect success.
Record your findings and take photos. That lets you choose the right glue, clamp method, and whether a heat approach is appropriate.
Apply Heat Carefully
Want to loosen old glue without scorching the veneer? Use a low heat source—a household iron on low or a heat gun on its lowest setting—kept moving to avoid hotspots. Protect the surface with a thin cloth or silicone pad, and test a hidden spot first.
Warm the lifted edge gradually until the glue softens; you’ll feel slight give when you press gently. Don’t overheat: bubbling, darkening, or a burnt smell mean stop immediately.
Work in short bursts, letting the veneer cool between passes. Once pliable, you can proceed to lift and prepare the joint for repair.
Inject And Clamp Glue
Once the veneer’s edge is warmed and loosened, you’ll inject a thin, high-quality wood glue into the gap and clamp it firmly to restore contact and alignment.
Use a syringe or fine-tip applicator to push glue deep without overfilling; blot excess immediately.
Position cauls or padded blocks to distribute pressure and protect the veneer.
Check alignment before tightening clamps and wipe squeeze-out with a damp cloth.
- Apply glue sparingly along the lifted section.
- Use even clamping pressure, avoiding high spots.
- Let cure fully per glue instructions before sanding or finishing.
Release clamps only when the bond is solid.
Fix Veneer Lifting Edges With Clamps and Adhesive
If the veneer is peeling only at the edges, you can usually repair it yourself by lifting the loose area, applying glue, and clamping it back down until the adhesive cures.
Gently pry the lifted edge with a thin spatula, clean dust from beneath, and spread a thin, even bead of wood glue or veneer adhesive.
Gently lift the veneer edge, clear debris, and apply a thin, even bead of adhesive.
Press the veneer into place, remove excess squeeze-out with a damp cloth, and protect the surface with wax paper or scrap wood.
Use appropriate clamps or weighted blocks to hold the edge flat and aligned.
Check alignment before the glue sets, then leave undisturbed until firmly bonded.
Clamp Pressure and Drying Times for Veneer Repairs
You’ll want firm, even clamp pressure—enough to close gaps but not so much that the veneer crushes.
Allow the adhesive to cure for the manufacturer’s recommended time, usually 24 hours for PVA or longer for epoxy, before removing clamps.
Always protect the veneer surface with cauls or a soft barrier to prevent dents and glue marks while it dries.
Optimal Clamp Pressure
When gluing veneer, applying the right clamp pressure is essential: too little and the adhesive won’t form a full bond, too much and you’ll squeeze out glue or crush the delicate veneer. You should aim for even, moderate pressure across the repair. Use cauls to distribute force and protect the surface. Check edges for full contact without bulging glue lines.
- 20–40 psi for thin veneers (use padded clamps).
- 40–60 psi for medium veneers (firm but careful).
- 60–80 psi only for thick laminated veneers (monitor closely).
Adjust based on veneer thickness and glue type; avoid overtightening.
Recommended Drying Times
Once you’ve set the clamps to the recommended pressure, allow the adhesive adequate time to cure before removing them.
Generally, plan on 24 hours for PVA glues at room temperature. Epoxy often needs 8–12 hours to set and a full 24 hours to reach strength. Cold or damp conditions will slow curing—add extra time or raise ambient temperature slightly. Avoid stressing the joint during cure.
If you used hide glue, give it 12–24 hours depending on thickness. After initial cure, wait another 24 hours before light sanding or handling to guarantee full bond development and stability.
Protecting Veneer Surface
Because veneer is thin and fragile, you must balance clamp pressure carefully and respect proper drying times to avoid crushing or misbonding the surface. You’ll protect the face by using cauls or soft pads between clamp jaws and applying even, moderate pressure. Follow adhesive manufacturer times, but factor in temperature and humidity—cold or damp slows cure.
- Use light, even clamping; check after 10–15 minutes and retighten if gaps remain.
- Keep clamps for full recommended cure plus a safety window (usually 30–60 minutes extra).
- Remove clamps gently, then let the piece rest before sanding or finishing.
Repair Bubbled Veneer Caused by Moisture
Notice the raised, blistered areas on your tabletop? Act quickly: moisture trapped under veneer causes bubbles. Pry a small vent hole at a bubble’s edge with a utility knife to release dampness and let it dry completely—use a fan or low-heat hair dryer.
Mix powdered wood glue or carpenter’s glue with a little water to a thin but not runny consistency. Inject glue under the lifted veneer using a syringe or toothpick, press down, and wipe excess.
Clamp with cauls and light pressure until cured, typically 24 hours. Sand lightly, stain to match, and finish to seal.
Reinforce Loose Veneer Over Weak Substrate
First, check the substrate to see if it’s soft, delaminated, or missing in spots so you know how much support the veneer needs.
If the veneer is loose but salvageable, you’ll clean the area and re-glue it with a thin, even adhesive and clamp it until set.
Where the substrate is weak or has holes, stabilize the panel with backing inserts or filler patches before final gluing to prevent the veneer from failing again.
Assess Substrate Condition
When you find veneer lifting but the underlying substrate feels soft, lightweight, or crumbly, you’ll need to reinforce that substrate before re-gluing the veneer; otherwise repairs won’t hold.
Inspect by probing gently with a screwdriver, looking for delamination, powdery fiberboard, or voids. Measure the depth of damage and note the span needing support.
Choose a reinforcement method that matches the extent of the damage:
- Inject thin epoxy or consolidant into soft areas to harden and bond.
- Patch voids with stabilized wood filler or epoxy putty, feathering to solid substrate.
- Add discrete backing strips or thin plywood beneath for structural support.
Document findings before proceeding.
Re-glue Loose Veneer
Because the substrate is weak, you’ll need to both bond the veneer and shore up the backing so the repair holds long-term.
Start by carefully lifting edges to inspect delamination; don’t force brittle veneer. Clean old glue with a damp cloth and a scraper, then lightly sand the substrate for better adhesion.
Inject a high-quality wood glue or epoxy into gaps, working it under veneer with a thin nozzle or syringe. Press veneer flat using cauls and clamps or vacuum bagging, wiping squeeze-out.
After curing, fill any voids with colored wood filler and sand smooth before finishing to match surrounding surface.
Stabilize With Inserts
If the backing is too weak to hold glue alone, reinforce it by installing discreet inserts beneath the veneer so the surface stays flat and stable. You’ll access the area through small drilled holes or a sliced seam, then slide thin shim-like supports—strips of hardwood, plywood, or composite—under the veneer where the substrate fails.
Secure them with epoxy or wood glue to bond to both insert and substrate. Press and clamp until cured, filling entry points afterward. Use matching veneer filler or stain to hide repairs. Check stability before refinishing; inserts prevent future bubbling and distribute load evenly.
- Choose thin, rigid inserts
- Glue and clamp firmly
- Fill and finish seamlessly
Replace Missing Veneer Chips With Matching Veneer
Before you glue anything down, match the missing chips to replacement veneer that duplicates the grain, color, and thickness so the repair blends seamlessly.
Match replacement veneer to the original’s grain, color, and thickness before gluing so the repair blends seamlessly.
Select veneer from remnants or a supplier, holding samples against the table under the same light. Note the direction of the grain and the presence of sapwood.
If dye or toner will be needed, test tiny patches on scrap to confirm hue and absorption.
Choose an adhesive suited to your veneer type—PVA for many jobs, hide glue for period pieces—and plan for clamp or weighted pressure.
Keep replacement pieces slightly oversized for trimming later, ensuring accurate alignment when you set them.
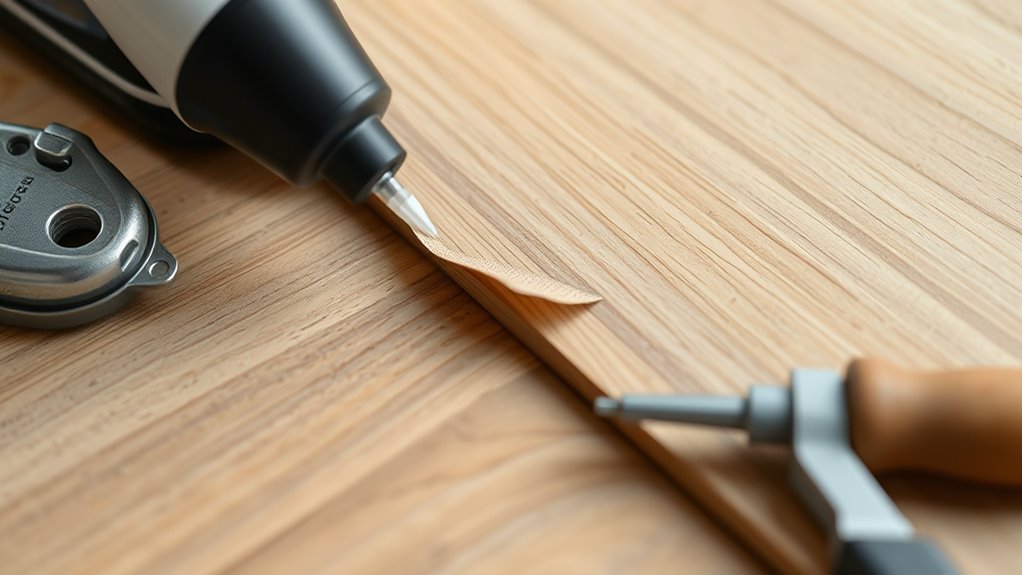
Cut and Shape Replacement Veneer Pieces
Measure and mark the replacement veneer precisely so your cuts follow the grain.
The piece should sit flush. Use a sharp blade or fine-tooth saw to trim the veneer, making small adjustments until it fits the gap snugly.
Dry-fit the piece and check edges before gluing to avoid gaps or overhangs.
Measure And Mark Accurately
Once you’ve removed the damaged veneer, take precise measurements of the voids and trace their outlines onto your replacement sheet, accounting for grain direction and a small 1/16″–1/8″ allowance for trimming; this guarantees the piece will sit flush once glued. You’ll want clean, repeatable marks and reference points so alignment’s foolproof.
- Use a steel ruler and sharp pencil to record length, width, and corner radii.
- Transfer grain lines and match pattern flow with light overlay tracing.
- Mark a trimming margin and reference arrows for wood direction.
Check measurements twice before cutting.
Trim And Fit Veneer
When you cut the replacement veneer, use a sharp blade and steady support so the edges stay clean and the grain lines stay continuous; score along your pencil marks with a utility knife, then finish the cut with a straightedge and a veneer saw or fine-tooth pull saw for accuracy. Fit pieces dry first, trim in small increments, and sand edges lightly to match thickness. Clamp with cauls to avoid dips. Test grain alignment and adjust before gluing. Use matching patches for irregular areas and keep offcuts for future repairs.
| Step | Tip |
|---|---|
| Cut | Sharp blade, steady support |
| Test fit | Dry clamp, check grain |
| Trim | Small passes, sand edges |
| Glue | Align, use even pressure |
Glue and Clamp Replacement Veneer Correctly
Before you start clamping, spread a thin, even layer of wood glue over the substrate and the back of the replacement veneer so the adhesive contacts fully without squeezing out in globs. Position the veneer carefully, register edges, then remove excess glue with a damp cloth. Use cauls to distribute pressure and protect the surface.
Spread a thin, even layer of glue, position veneer precisely, wipe squeeze-out, and use cauls before clamping.
- Apply even clamping pressure with parallel clamps, spacing them every 4–6 inches.
- Check alignment, wipe squeeze-out, and add protective pads under clamps.
- Allow recommended cure time (usually 24 hours) before sanding or finishing to avoid joint failure or surface distortion.
Use CA (Super) Glue for Tiny Veneer Repairs
If a small corner or hairline split lifts up, CA (super) glue is a fast, reliable fix you can apply without removing the whole veneer. Clean the area, remove dust, and dry any moisture.
Slip a thin needle or syringe of cyanoacrylate under the lifted edge; capillary action pulls glue into the gap. Press the veneer down, align it precisely, and hold or clamp lightly. Use an accelerator spray for instant set if needed.
After curing, sand any excess carefully with fine grit and blend with a matching finish or touch-up marker to hide the repair.
Patch Small Chips With Wood Filler or Putty
Though small chips don’t ruin a table, you can make them disappear quickly with the right wood filler or putty. Choose a matching color or tintable filler, clean the chip, and slightly roughen edges for adhesion.
Press filler into the void, overfill a bit, and let it cure fully. Sand smooth with fine grit, feathering into the surrounding veneer, then wipe dust away before finishing.
- Pick a compatible, shrink-resistant filler.
- Apply carefully, building layers if deep.
- Sand, clean, and touch up with stain or finish to blend.
Fill Hairline Cracks Without Sanding Through
When hairline cracks appear in veneer, you can repair them without sanding through by using a thin, flexible filler and precise application techniques.
Clean the crack with compressed air or a soft brush, then wipe with a damp cloth and let it dry.
Use a syringe or fine-tipped applicator to inject a flexible wood-conserving adhesive or grain-filling acrylic into the crack; avoid excess.
Press the crack gently with a soft roller or blunt tool to seat the filler, then wipe away surplus with a damp cloth.
Once cured, lightly buff the area with a very fine abrasive pad and blend finish as needed.
Repair Deep Gouges With Colored Wood Filler
Because deep gouges remove both veneer and substrate, you’ll need a colored wood filler that matches grain and takes finish. Then build the damaged area in thin layers so it stays stable and invisible. Prepare by cleaning debris and roughening edges so filler bonds.
Mix tint into filler to approximate tone before application. Apply thin layers, curing and sanding between coats until level with surrounding veneer. Finish-sand with fine grit and remove dust. Seal to protect.
- Choose a filler that accepts stain and sands well.
- Layer, cure, and sand thinly for stability.
- Match color before final finish.
Blend Filled Areas With Veneer Stain and Dye
After the filler’s cured and sanded smooth, you’ll blend the repair into the surrounding veneer using stains and dyes that match tone and grain. Test small spots first, apply thin coats, and build color gradually. Use a fine brush or cotton swab to target edges, feathering outward so gradations disappear. Allow each layer to dry before evaluating under good light. Seal lightly with compatible finish to lock color. If needed, micro-sanding between coats refines texture. Keep samples and notes for future touch-ups.
| Tool | Product Type | Purpose |
|---|---|---|
| Brush | Dye | Precision |
| Cloth | Stain | Blending |
| Sandpaper | Fine grit | Smooth gradations |
Match Stain Color to Existing Veneer Grain
Start by comparing several small swatches of stain against an inconspicuous area of the veneer so you can see how each reacts with the wood’s natural tone and grain.
Start by testing small stain swatches on an inconspicuous veneer area to observe tone and grain response.
Match color by eye, then refine with mixes: add tiny amounts of lighter or darker stain until the hue aligns with surrounding grain.
Test each mix on scrap, let dry fully, and view under the room’s lighting.
When satisfied, apply thin coats to the repaired spot, wiping excess along the grain.
Repeat as needed for depth.
Keep notes of ratios and brands so you can recreate the exact match later.
- Test
- Mix
- Document
Choose Touch-Up Markers, Pencils, and Dyes
When you need a quick, precise color fix, touch-up markers, pencils, and liquid dyes each offer strengths: markers are fast for narrow scratches, pencils fill deeper gouges and can be blended, and dyes penetrate grain for a more permanent blend.
Choose a marker matched to the veneer shade and test on an inconspicuous spot; use thin, even strokes and wipe excess immediately.
For pencils, select a wax or blendable resin type, apply light layers, then scrape flush with a plastic card.
Dyes require dilution trials and controlled application with a cotton swab.
Always finish with a compatible clear coat.
Blend Repairs Using Grain Direction and Figure
With color matched and filled, you’ll want your repair to follow the wood’s natural grain and figure so it disappears at a glance. Study the surrounding pattern and work in short, confident strokes that mimic direction, width, and curvature. Build contrast subtly, layering thin glazes rather than heavy pigment.
- Match stroke length and angle to adjacent grain.
- Use a fine brush or micro-tip pencil for growth rings and rays.
- Step back often, blending edges with feathered strokes and tiny highlights.
Finish with a light satin coat to unify sheen, checking in different light to guarantee seamless integration.
Hide Seams With Veneer Tape and Edge Banding
Although seams are inevitable on repaired or joined veneer tops, you can make them disappear by applying veneer tape and edge banding precisely. Match tape grain and color, then iron it on from the back to tighten the joint; trim flush with a sharp blade.
For visible edges, choose adhesive-backed edge banding that matches veneer thickness and pattern. Apply heat or contact adhesive per instructions, press firmly, and trim with an edge trimmer or chisel.
Sand lightly with fine grit to blend progressions, then finish with stain or topcoat to unify sheen. Clean excess adhesive promptly to avoid marks.
Repair Veneer Corners and End-Grain Chips
Start by evaluating the damage and prepping the area so you know whether you’re dealing with a small chip or a corner that needs rebuilding.
Use a suitable filler or veneer patch to fill missing material, then sand carefully to match the surrounding profile.
Finally, blend the repair with stain and finish so the repair disappears into the existing veneer.
Assess Damage And Prep
Before you glue anything down, closely inspect each damaged corner and end-grain chip so you know what you’re fixing and why. Note loose edges, missing veneer, and underlying substrate condition. Measure gaps and photograph for reference.
Clean dust and old adhesive with a soft brush and solvent-safe cloth so surfaces bond properly.
Plan repairs: prioritize structural stability, match grain direction, and decide whether splints or patch pieces work best.
- Remove loose fragments and save usable pieces.
- Test-fit replacement veneer or backing splint dry.
- Prepare clamps, wax paper, and appropriate adhesive.
Confirm your prep before proceeding to filling and sanding.
Fill, Sand, And Blend
With the area clean and dry, you can begin filling the missing veneer and end-grain chips so the repairs become seamless.
Mix a two-part epoxy or wood filler tinted to match the veneer; press it into voids with a small spatula or palette knife. Overfill slightly, let it cure fully, then sand flush with fine-grit paper (220–320).
Feather the edges into surrounding veneer to avoid abrupt shifts. If grain’s visible, scribe light lines or use a wood-stain pencil before finishing.
Clean dust, apply matching stain and a thin topcoat, and buff gently for an even sheen.
Repair Water Rings and Light Surface Stains
If water rings or light stains mar your veneer, you can often remove them without sanding or refinishing the whole top. Act quickly and test any method in an inconspicuous spot first. Try these simple steps:
If water rings or light stains mar your veneer, act quickly—test first and try gentle cleaning and polishing.
- Dab a soft cloth with a mild solution of dish soap and water, blot stains, then dry immediately.
- Rub gently with a paste of baking soda and water or non-gel toothpaste; wipe clean and dry.
- Apply a small amount of mineral oil or specialized veneer polish to restore sheen, buffing lightly.
Repeat cautiously; stop if the veneer darkens or peels.
Remove Dark Water Stains Without Stripping
Wondering how to tackle dark water stains without stripping the veneer? Start by cleaning the area with a mild detergent and dry it thoroughly.
Test a poultice: mix baking soda and water to a paste, apply over the stain, cover with plastic, and leave a few hours to draw out moisture-tannin discoloration. If that helps, repeat until faded.
For stubborn marks, try a diluted hydrogen peroxide gel applied briefly, then blot and rinse; always test hidden spots first.
Finish by lightly polishing with a suitable paste wax to even sheen.
If stains persist, consult a pro before sanding or replacing veneer.
Reduce Heat Marks and Scorch Discoloration
Check the heat damage by inspecting the veneer for raised grain, blistering, or white-gray scorch rings so you know how deep the problem goes.
If the damage is surface-level, you can often lighten marks with gentle cleaning and rubbing with a mild abrasive like baking soda paste or a non-gel toothpaste.
For more stubborn discoloration, test a small area with a fine abrasive pad and a light solvent before treating the whole spot.
Heat Damage Assessment
How bad is the heat damage and where exactly is it located on the veneer? You’ll inspect color changes, raised seams, and surface hardness to judge severity.
Note: avoid chemical stain removal here — that’s next.
- Examine edges and seams: press gently to feel lift or bubbling; mark raised areas.
- Compare tones under different light: scorch looks brown/black, heat haze appears lighter or blanched.
- Test a small area with a fingernail: if finish flakes or feels brittle, damage extends beyond surface.
Record location, size, and depth of damage so you can choose the right repair method.
Gentle Stain Removal
If you’ve confirmed the damage is primarily surface-level, start with the gentlest cleaners and techniques to lift heat haze and light scorch discoloration without harming the veneer.
First, dust and wipe with a soft cloth and mild dish soap diluted in water; rinse and dry.
For persistent haze, apply a white vinegar-and-water mix (1:1) on a cloth, rub gently with the grain, then buff dry.
Use a non-gel toothpaste or baking soda paste sparingly for tiny spots; test invisibly first.
Finish with a light application of furniture oil or wax to restore sheen and protect the surface.
Fix Finish Crazing and Small Finish Cracks
When small cracks and a network of fine lines mar the finish—often from age, humidity changes, or stress—you can usually revive the surface without stripping the veneer. Lightly clean the area, dry it, then follow targeted steps to minimize visibility and stabilize the finish.
When fine cracks and crazing appear, gently clean, dry, and revive the finish with light sanding and thin coats.
- Sand very lightly with 400–600 grit to remove sheen; clean dust.
- Apply a thin coat of compatible finish (spray lacquer or wipe-on polyurethane) in even passes; let cure between coats.
- Rub out with 0000 steel wool and a fine polishing compound to blend sheen and soften crazing.
Test first in an inconspicuous spot.
When to Lift Finish and Refinish a Small Patch
If the damaged area is small and the surrounding finish is compatible, you can lift the finish and refinish just that patch.
Start by evaluating the size of the damage and testing a hidden spot to make sure new finish will bond.
Feather and blend the edges so the repair fades into the existing surface.
Assess Damage Size
Start by measuring the damaged area precisely: small hairline chips and surface scratches under about 1–2 square inches usually call for local refinishing rather than stripping the whole top.
You’ll inspect depth, veneer edge integrity, and surrounding finish to decide whether to lift finish just around the flaw. Follow a concise checklist:
- Measure area and depth — mark margins for patching.
- Check if veneer is cracked, missing, or merely marred.
- Test finish adhesion at the edge with a gentle scraper.
If the damage stays within that marked patch and veneer is sound, you can proceed to lift finish and refinish locally.
Check Finish Compatibility
How will the existing finish respond to a local lift-and-refinish? You’ll first identify the finish type—shellac, lacquer, varnish, or polyurethane—by using denatured alcohol, lacquer thinner, or acetone tests in a hidden spot.
If solvent softens the finish, you can lift and reapply that same finish. If it doesn’t, you’ll need a compatible material for bonding.
Match sheen and color; test on scrap veneer or an inconspicuous area. Small patches work when the finish layers and substrates match.
If the old finish is brittle, badly yellowed, or cross-linked, plan to lift a larger area or fully refinish for a seamless result.
Feather And Blend Edges
Once you’ve confirmed which finish you can lift and reapply, plan your patch so its edges will disappear into the surrounding finish; feathering keeps the repair from showing as a hard edge. Work small: lift only the finish around the flaw with solvent or heat, sand the veneer lightly, and apply matching stain.
Blend edges by feather-sanding and using thin coats of finish, building outward until transitions disappear.
- Prep: clean, lift finish minimally, sand edges smooth.
- Color: match stain in thin, graduated applications.
- Finish: spray or wipe thin coats, feather-sand between coats until seamless.
Spot‑Sand Veneer Safely Without Sanding Through
Need to remove a small ding without sanding through the thin veneer? Use light, controlled sanding and the right tools.
Mask the area with low-tack tape, leaving only the ding exposed to protect surrounding veneer.
Mask the ding with low‑tack tape, exposing only the flaw to shield the surrounding veneer.
Start with very fine grit (320–400) wrapped around a small foam sanding block or cotton wedge; sand only with the grain, using minimal pressure and short strokes.
Check progress frequently; stop as soon as the blemish blends.
For stubborn spots, switch to fine abrasive pads or micro-mesh rather than coarser paper.
Clean dust with a tack cloth before any filler or finish touch-up.
Apply a Thin Topcoat Over Repaired Veneer
After you’ve filled and feathered the repaired area, apply a thin topcoat to seal and blend the patch with the surrounding veneer. Work in thin layers to avoid drips and visible buildup. Use a high-quality synthetic brush or a lint-free microfiber pad, and sand lightly between coats with very fine grit.
- Choose a compatible clear finish (water‑based lacquer or polyurethane) that won’t raise the grain.
- Thin the finish slightly if manufacturer allows for smoother leveling.
- Apply two to three thin coats, drying fully between applications for durability and a seamless look.
Match Sheen and Gloss Across Repaired Areas
Because light reveals differences more than color does, you’ll want to match the sheen and gloss of the repaired area to the surrounding veneer so the fix disappears to the eye. Assess the existing finish under natural light, noting whether it’s matte, satin, or glossy.
Test small sample finishes on a hidden spot or scrap veneer to compare reflectivity. Use the same finish type and adjust with retarder or gloss modifiers rather than switching products.
Apply thin, even coats and let each dry fully before judging. If needed, blend edges subtly so the repaired patch reflects light like the original surface.
Sanding and Finishing Tips for Invisible Repairs
Start by feather sanding the repair edges so the patch blends smoothly into the surrounding veneer without visible ridges.
Test and match the finish sheen on a scrap or hidden spot, because even slight differences in gloss will reveal the repair.
Work in thin, even coats and check the sheen under different lighting as you go.
Feather Sanding Edges
When you feather-sand the edges of a veneer repair, you’re blending the new material into the old so the shift becomes invisible. Start with light pressure and small, controlled strokes.
Focus on the join, not the whole panel, and keep grit progression gentle to avoid gouging. Use a sanding block to stay flat and check frequently.
- Sand with 220 grit, then 320 to soften the ridge.
- Clean dust, inspect under good light, and repeat sparingly.
- Finish with a tack cloth, then test a small area before proceeding to full refinishing.
Matching Finish Sheen
Though the repair might be invisible at the grain level, a mismatched sheen will still catch the eye, so match surface gloss before you call the job done.
Check the surrounding finish: satin, semi-gloss, or gloss. Test on a hidden spot with the same topcoat, letting it cure fully, then compare under good light at different angles.
If sheen differs, lightly scuff the repaired area with fine abrasive, clean dust, and apply thin, even coats of the matched topcoat.
Sand between coats with very fine paper, then polish subtly to blend. Finish gradually until the repaired area disappears.
Repair Veneer on Plywood or MDF Substrates
If your veneer is glued to plywood or MDF, you’ve got a stable substrate but different failure modes than solid wood—delamination, swelling at edges, and glue-line separation are the most common—and they each call for slightly different fixes.
You’ll assess damage, clean surfaces, and choose adhesives suited to engineered cores. For small bubbles or lifted edges, inject glue and clamp; soaked edges need drying and edge sealing. When replacing tiny patches, match grain and thickness precisely.
Quick checklist:
- Probe delamination, inject PVA or epoxy, clamp till cured.
- Dry and trim swollen edges, seal with thin veneer.
- Patch with matched veneer, sand, finish.
Deal With Warped or Buckled Veneer Panels
Small, localized gaps or lifted edges usually stem from glue issues with plywood or MDF, but larger warping or buckling requires a different approach because it involves movement across the panel rather than just a failed bond. You’ll first assess whether moisture, humidity changes, or structural stress caused the distortion.
Flattening may work: gently steam the veneer to relax fibers, clamp flat over a caul or straight board, and let dry fully. For persistent buckles, remove stresses by loosening adjoining trim or railings, then rebond with flexible adhesive and clamps.
Finish with light sanding and touch-up stain to blend seams.
Reinforce Veneer Over Delaminated Substrates
When veneer peels because the substrate has delaminated, you’ll need to stabilize the core before reattaching the facing; otherwise the repair will fail again.
Assess the substrate: probe soft spots, remove loose material, and dry any moisture.
Reinforce weak areas from beneath or through access holes, then reattach veneer with proper adhesive and clamping.
- Inject or spread epoxy/wood glue into voids to bond and fill.
- Screw and plate—use small screws with backing plates to draw layers tight while glue cures.
- Add a thin plywood or hardboard patch glued to the underside for long‑term stiffness.
Test stability before finishing.
Prevent Glue Squeeze‑Out and Clean Adhesives
After you’ve stabilized the substrate and reattached the veneer, you’ll want to control glue squeeze‑out so cleanup is quick and the finish stays flawless. Work fast with a damp cloth to catch excess before it skins. Use thin glue layers, cauls or wax paper barriers, and even painter’s tape along seams to keep edges clean. If glue cures, soften with warm water or a little denatured alcohol and gently scrape with a plastic card. Finish the area lightly with fine sandpaper only if necessary.
| Calm | Careful | Proud |
|---|---|---|
| Breathe | Wipe | Smile |
Fast Cosmetic Fixes for Rentals or Temporary Repairs
If you need a quick, low‑cost fix that won’t upset a landlord or a future tenant, focus on reversible, non‑destructive solutions that tidy the look without rebuilding the piece. You can mask scratches, stabilize lifting edges, and refresh finish without major tools. Try these simple steps:
- Clean surface with mild detergent, then use a colored furniture marker or wax stick to fill scratches.
- Press lifted veneer gently, inject thin CA or wood glue sparingly, clamp with padding for an hour, then wipe excess.
- Apply a light coat of wipe-on poly or paste wax to even sheen and protect temporarily.
Long‑Term Repairs for Heirloom Furniture
Because heirloom pieces deserve repairs that last, you’ll take a more deliberate, restorative approach than the quick fixes used for rentals. Assess the veneer’s stability, underlying substrate, and join integrity before you begin.
Lift loose edges with slow, even heat and inject conservation-grade adhesive into gaps; clamp gently to avoid new damage. Replace missing veneer only when you can match grain and thickness; shave and blend seams carefully.
Stabilize delaminated areas with reversible adhesives and reinforce weak substrate from beneath if needed. Finish with thin, period-appropriate coatings, and document methods so future caretakers can follow your work.
Cost, Time Estimates, and Materials List
Now that you’ve stabilized the veneer and documented your methods, plan the cost, time, and materials so the job doesn’t stall mid‑repair.
Estimate parts: veneer patches, wood glue, clamps, sandpaper, finish—budget $20–$80 depending on quality.
Schedule tasks: prep (30–60 minutes), glue and clamp (overnight), sanding and touchups (1–3 hours across sessions).
Gather tools and consumables so you don’t interrupt curing.
- Materials: matching veneer, PVA or hide glue, filler, fine sandpaper.
- Tools: sharp knife, small clamps, roller, mixing sticks.
- Time/cost buffer: add 20% for surprises or replacements.
Finishing Checklist for Veneer Repair Jobs
When you reach the finishing stage, run a quick checklist to make certain the repaired veneer blends seamlessly and holds up over time. Confirm glue is fully cured and clamps removed.
At the finishing stage, check that glue is fully cured, clamps removed, and the veneer blends seamlessly.
Sand lightly with fine grit, feathering edges so blends are invisible. Clean dust with a tack cloth before applying finish.
Match stain or dye on a scrap piece, adjust tone, then test on an inconspicuous spot.
Apply thin, even coats of sealer or varnish, allowing proper drying and light sanding between coats.
Inspect under good light, touch for texture, and polish to match surrounding sheen.
Let cure fully before use.
Frequently Asked Questions
How Do I Transport a Repaired Veneer Table Safely After Fixing It?
You’ll wrap the repaired veneer in moving blankets, secure edges with foam or cardboard, tape lightly to avoid sticking, lift with helpers using straps or a dolly, keep it upright, and drive carefully to prevent jolts or moisture.
Can Veneer Repairs Withstand Heavy Daily Use and Children’s Activities?
They can if you repair thoroughly, use strong adhesive and sealer, and reinforce edges; expect some vulnerability—avoid heavy impacts, standing, or water. With routine care and protective coverings, they’ll survive regular family and kids’ use.
Will Repaired Veneer Off-Gas Harmful Chemicals After Using Adhesives or Fillers?
Repaired veneer can off-gas, but if you use low-VOC or water-based adhesives and fillers, vent well, and let the piece cure fully, you’ll minimize harmful emissions and make it safe for daily use.
How Do I Match Repairs on Exotic or Highly Figured Veneer Species?
You’ll match exotic or figured veneer by blending thin veneer patches, careful grain direction, and tinted dyes or pigments to mimic figure. Use fine sanding, feathered edges, and test finishes until the repair visually disappears.
Can I Repair Veneer on Curved or Bent Wood Tabletops Without Special Tools?
Yes — you can repair veneer on curved or bent wood tops without special tools. You’ll use clamps, cauls, sanding blocks, hide glue or PVA, thin veneer patches, and patience to clamp, fill, flush, and finish the repair.
Conclusion
You can fix most veneer issues without replacing the top if you first diagnose the problem—lifting, chips, cracks, missing pieces, or water damage—then choose a targeted repair. For quick fixes use glue, clamps, wood filler, or color-matched markers; for long-term repairs match veneer thickness, sand carefully, and refinish with compatible sealer. Weigh time and cost versus replacement for severe substrate damage. Follow the finishing checklist to guarantee a durable, nearly invisible repair.