How to Dry Wood Floor Quickly After Water Damage
Stop the water, cut power if needed, and remove standing water with a wet/dry vac or pump right away. Pull up rugs and move furniture onto blocks, then open doors and windows if safe. Run high-volume fans low, point air along the grain, and put a dehumidifier centrally to pull moisture out. Check seams and use a moisture meter often; lift baseboards if needed. Keep monitoring—the next steps cover targeted drying, hidden moisture checks, and repairs.
Who This Guide Is For And How To Use It
If you’ve just had a leak, flood, or spill that soaked your wood floors, this guide is for you—homeowners, renters, and small property managers who need clear, quick steps to dry and salvage hardwood or engineered wood.
You’ll learn what to check first, which actions to take immediately, and how to prioritize safety and cost-effectiveness. This isn’t a full restoration manual; it’s a practical, step-by-step reference to stabilize damage, prevent warping and mold, and decide when to call pros.
Use it as a checklist during the first 48–72 hours, and keep notes for insurance or contractor consultations.
Quick Answer: How To Dry A Wood Floor Fast After Water Damage
Act fast: remove standing water immediately using a wet/dry vacuum or mop so it doesn’t soak deeper into the wood.
Then speed drying with fans, dehumidifiers, and open windows to pull moisture out of the floor and subfloor.
If water was extensive or you see warping, call a pro to prevent long-term damage.
Remove Water Quickly
When standing water’s present, start by removing as much of it as you can—use a wet/dry vacuum, shop vacuum, or heavy towels to soak and lift water immediately. Work systematically from the edges toward drains or a door to prevent spreading moisture. Squeegees and mops help push pooled water into a collection point.
Remove rugs, furniture, and baseboards so you can access soaked areas. Empty and wring towels often; change vacuum filters so suction stays strong. If water soaked seams or gaps, lift boards gently where possible to let trapped water escape.
Act fast to limit warping and staining.
Accelerate Drying Process
Because speed matters, start by combining dehumidifiers, fans, and air movers to force moisture out of the floor and the air around it. Position fans low and dehumidifiers centrally; open doors and vents to create airflow paths. Lift baseboards if needed to expose joists, and check moisture with a meter. Move equipment as readings drop, and don’t forget to protect electronics. Monitor humidity until it’s stable below 50%. Once dry, refinish or repair promptly to prevent cupping and mold.
| Tool | Purpose |
|---|---|
| Dehumidifier | Extracts moisture |
| Fan | Circulates air |
| Air mover | Targets surface drying |
| Moisture meter | Confirms dryness |
| Heater | Speeds evaporation |
First 60 Minutes: Emergency Plan To Stop Damage And Start Drying
If water’s still flowing or pooling, stop the source, cut power to affected circuits, and get people and pets out of the area.
Then move quickly to remove standing water and damp items you can lift safely.
Then move quickly to remove standing water and lift out damp items you can safely carry.
Next, open windows and doors if weather allows to improve ventilation.
Use towels, a wet/dry vacuum, or buckets to clear water; mop and blot remaining dampness.
Pull up area rugs, cushions, and movable furniture to dry separately.
Elevate wet items on blocks to promote airflow.
Call your insurer and document damage with photos.
Arrange professional drying or rental equipment within the hour if saturation is significant.
How To Assess The Type And Source Of Water Damage
Now that you’ve stopped the flow, removed standing water, and documented the scene, start evaluating what kind of water you’re dealing with and where it came from. Check color, smell, and source: clean (pipe), gray (appliance), or black (sewage). Note obvious entry points—burst pipe, appliance leak, roof, or drain backup. That tells you cleanup urgency, safety gear, and whether professionals are needed.
| Indicator | Likely Source | Action |
|---|---|---|
| Clear, odorless | Domestic supply pipe | Dry, disinfect lightly |
| Cloudy | Washer/AC | Moderate cleanup |
| Foul-smelling | Sewage | Evacuate, call pros |
When To Turn Off Electricity And Utilities First
Before you start drying, cut power to the affected area to prevent shocks from wet floors and appliances.
If the water source is plumbing-related, shut off the main water supply to stop more damage.
Wear protective gear and only turn utilities back on after a qualified professional confirms it’s safe.
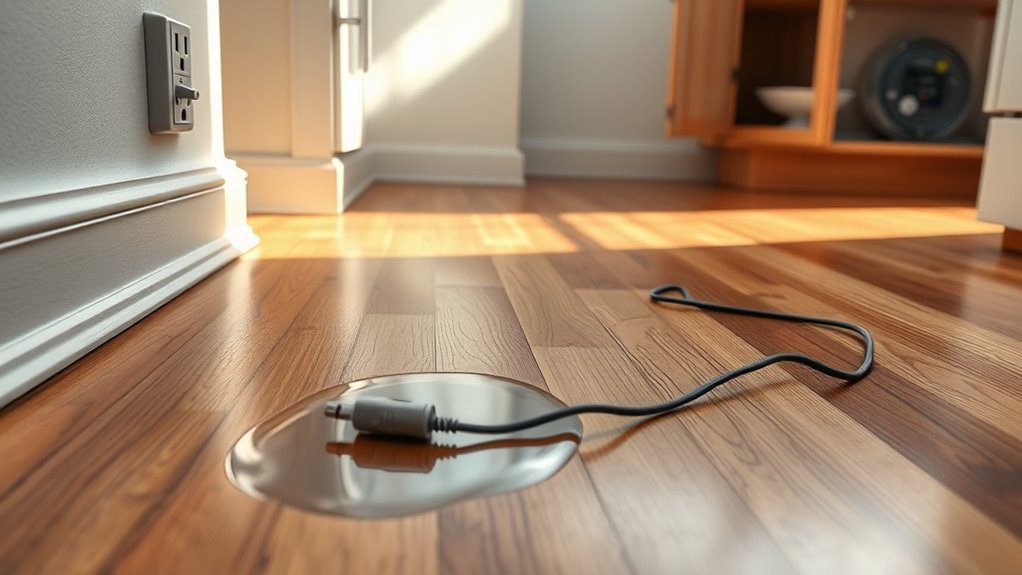
When To Cut Power
When water has invaded your floors, cut power to reduce shock and fire risks—especially in areas where outlets, appliances, or wiring are submerged or soaked. You should switch off breakers at the main panel before stepping into wet rooms, and avoid touching plugged-in devices. If breakers are inaccessible or you smell burning, leave and call emergency services. Wear rubber-soled shoes and use a nonconductive tool to open panels if necessary. After power’s off, label affected circuits for technicians and document conditions for insurance.
| Scene | Action |
|---|---|
| Submerged outlet | Turn breaker off |
| Running appliance | Unplug only if dry |
Shutting Off Water Supply
How do you stop more damage once you’ve shut off the power? After cutting electricity, locate and turn off the main water valve to stop incoming flow. If the leak’s from an appliance, shut its dedicated valve.
Close the house’s shutoff at the meter if needed. Notify occupants and post a warning so no one reactivates systems.
If you can’t find valves or the shutoff is stuck, call a plumber immediately.
Don’t reopen power until water is controlled and surfaces are dry or a professional confirms it’s safe.
Document closures for insurance and future repairs.
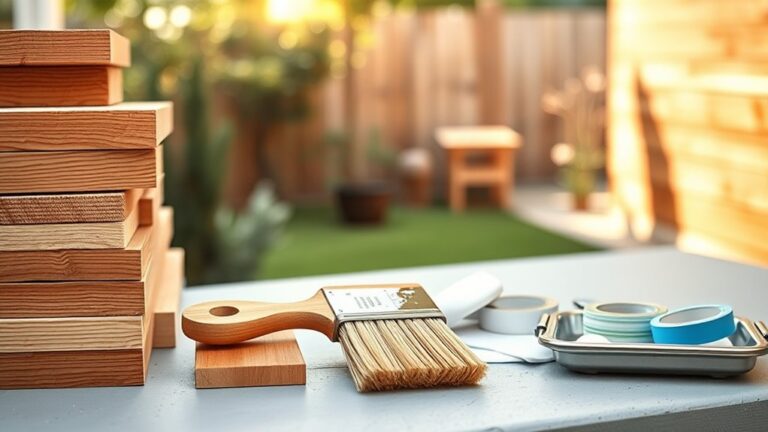
How To Protect Yourself Before Starting Cleanup
Ready to get your hands dirty? You’ll need gear and caution. Wear gloves, goggles, and an N95 or respirator to avoid contaminants. Put on rubber boots and waterproof clothing to stay dry. Turn off electricity to the affected area before entering if you suspect live power. Work with a partner when possible and keep a phone nearby. Dispose of heavily contaminated materials safely.
| Item | Purpose | When to Replace |
|---|---|---|
| Gloves | Protect skin | If torn or contaminated |
| Mask | Filter particles | When wet or damaged |
| Boots | Keep feet dry | If punctured |
| Goggles | Eye protection | If scratched |
| Partner | Safety support | Always |
Immediate Steps To Stop More Water Entering The Room
First, shut off the main water supply or the specific valve feeding the leak so no more water floods the room.
Then use towels, plastic sheeting, or caulk to temporarily seal obvious entry points like doors, windows, or gaps around pipes.
Acting fast on these two steps will limit further damage and buy you time to start drying the floor.
Turn Off Water Source
Because stopping the flow is your top priority, shut off the main water supply or the specific valve feeding the affected area immediately to prevent more damage.
Locate your home’s shutoff—often near the water meter, where the main line enters, or under sinks for localized issues—and turn it clockwise until it’s snug.
If you’re unsure, call your utility provider or building manager quickly.
After shutting water off, open nearby faucets to relieve pressure and confirm flow has stopped.
Keep a wrench or valve key handy for stubborn valves.
Don’t ignore leaks from appliances; switch their supply valves off too.
Seal Entry Points
After you shut off the water, stop any remaining flow into the room by sealing obvious entry points: close nearby doors, block gaps under exterior doors with towels or a door sweep, and stuff window frames or vents with plastic sheeting and tape.
Next, inspect the ceiling and walls for leaks or dripping pipes; place buckets or pans beneath active drips and wrap exposed piping with absorbent cloth to slow runoff.
Use temporary barriers like plastic and caulk to cover holes around pipes, and secure loose siding or flashing outside if accessible.
These quick actions limit additional moisture and speed drying.
Emergency Water Removal Tools
When water’s still standing on your floor, you need tools that move it out fast and safely. Start with a wet/dry vacuum or submersible pump to remove pooled water.
Then use squeegees and floor mops to push stubborn residues toward drains, and portable extractors to pull moisture from seams and joints.
Then bring industrial fans and low-profile air movers to speed evaporation without raising temperatures excessively.
Use dehumidifiers to lower ambient humidity and protect wood from swelling.
Have moisture meters and thermal cameras to prioritize drying.
Wear gloves and boots, and disconnect electricity in affected zones before operating equipment.
How To Mop And Blot Water Safely Without Damaging The Finish
If water’s still sitting on your wood floor, start by blotting and mopping with gentle, absorbent tools to avoid scrubbing away the finish or driving moisture into seams. Use microfiber cloths and a flat mop, pressing gently to lift water; change cloths often. Avoid steam mops and harsh detergents. Wring mops thoroughly and work with the grain. For edges, use a soft sponge or towel to soak up trapped water. Monitor for dark spots indicating deeper moisture and stop to reassess.
| Tool | Action | Tip |
|---|---|---|
| Microfiber pad | Blot and lift | Replace when saturated |
| Soft towel | Edge work | Press, don’t rub |
| Flat mop | Whole floor | Wring often |
When To Remove Area Rugs And Movable Items
You should pull up area rugs as soon as water reaches them to prevent trapped moisture and staining.
Move smaller furniture, lamps, and décor to a dry spot so you can access and dry the floor fully.
If any items are damp, wipe them down and set them in a well-ventilated area to dry before returning them.
When To Remove Rugs
Because water can soak through rugs and trap moisture against the floor, take up area rugs and any movable items as soon as floors are safe to walk on, ideally within the first few hours after drying equipment is in place.
Remove rugs to check for hidden dampness, mold, or warping beneath. Lift corners and feel the subfloor; if it’s cool or damp, continue drying before replacing coverings.
Roll and prop rugs to air them out and prevent mildew. Label damp or stained pieces for cleaning or disposal.
Don’t refit rugs until moisture meters show safe, consistent readings across the room.
Moving Smaller Items
When should you start moving smaller items? You should act as soon as standing water is removed and the floor is reachable. Move rugs, furniture legs, cushions, and decor to prevent trapped moisture and staining. Work quickly but carefully to avoid spreading water.
- Lift area rugs and hang them outside or prop for airflow.
- Remove small furniture and elevate remaining pieces on blocks.
- Take off cushions, fabric covers, and store them where they’ll dry.
- Gather breakables and electronics to a dry, safe spot.
Checking and relocating these items speeds drying and reduces long-term damage to your wood floor.
How To Lift And Prop Up Furniture To Dry Floors
If furniture’s still sitting on a wet floor, start by clearing small items and checking for structural damage so you can lift safely and avoid making the problem worse.
Work with a helper for heavy pieces; bend your knees, keep your back straight, and lift with your legs.
For heavy pieces, team up, bend your knees, keep your back straight, and lift with your legs.
Slide furniture onto moving straps or a plywood panel to distribute weight and prevent gouges.
Prop legs on plastic risers, folded cardboard, or thick shims to allow air circulation beneath.
Place moisture-resistant blocks at each corner and midpoints for long pieces.
Recheck stability before leaving; adjust props if wobble or sinking appears.
How To Open Doors And Windows For Controlled Ventilation
Start by checking wind direction so you can create a steady cross-breeze that moves moist air out of the room.
Open windows on the downwind side and stagger doors and upwind windows slightly to guide airflow without creating strong gusts that could lift loose boards or blow debris.
Adjust openings as drying progresses to maintain steady ventilation and protect the floor.
Assess Wind Direction
Although you want fresh air moving through the room, first check which way the wind’s blowing so you can open doors and windows for a controlled cross‑breeze. Stand outside briefly to feel wind direction, or watch flags, leaves, or smoke to confirm.
Aim to create a straight airflow path that pulls moist air out. Close windows on leeward sides you don’t want pulling in dirt or pests.
Use simple tools—phone weather apps, a ribbon, or tossed tissue—to verify gusts before committing.
- Use a ribbon at window to spot steady flow
- Check local wind on your phone
- Avoid gusty openings
- Prefer opposite-side vents
Staggered Door Opening
With wind direction confirmed, open doors and windows in a staggered pattern to create a steady, directed airflow that pulls moist air out without letting in dust or pests.
Begin by opening an exit point upwind and a slightly smaller intake downwind to steer airflow across the damaged area.
Partially open interior doors to channel air through hallways and rooms, avoiding fully open positions that reduce velocity.
Close or screen openings facing dust sources or pests.
Monitor humidity and adjust openings every hour, increasing exit size as moisture drops.
Combine with fans aiming toward exits for efficient, controlled drying.
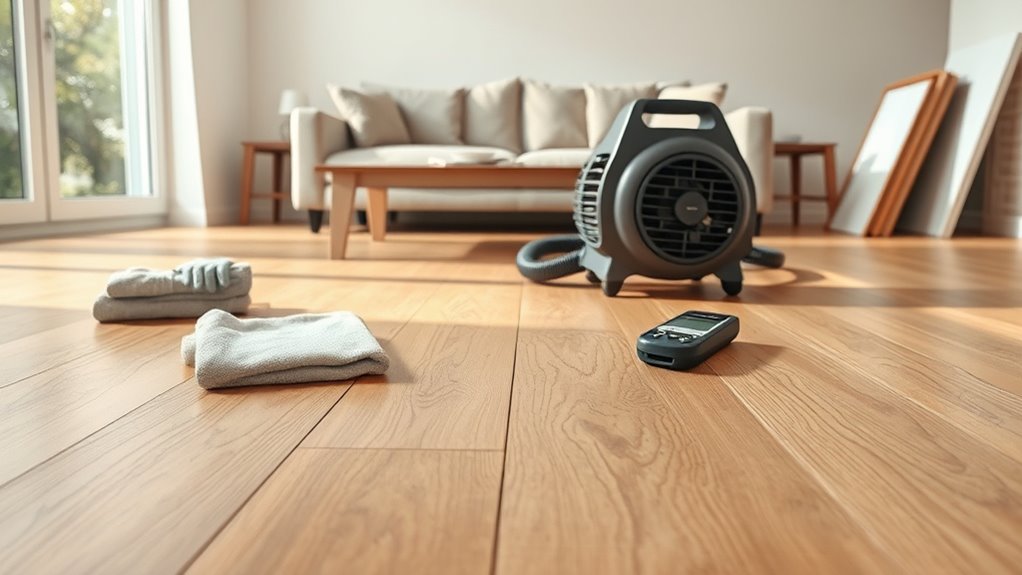
Use Fans To Dry Wood Floors Fast
If your wood floor’s gotten wet, set up high-powered fans to move lots of air across the planks and speed evaporation. Position fans to create crossflow, aiming along the grain and toward exits so moisture leaves the room. Keep windows or doors slightly open if weather allows to prevent humid recirculation.
Monitor the floor’s temperature and dryness frequently; stop fans once moisture readings normalize.
- Place fans at opposite ends for consistent airflow
- Elevate fans to target gaps between boards
- Use adjustable speeds and timers to control drying
- Check for cupping or warp daily and adjust fan placement
Set Up Air Movers And Axial Fans
After positioning standard fans, bring in air movers and axial fans to concentrate powerful, directed airflow right at the floor and along seams between boards.
Point air movers low and close to the surface to lift moisture from joints and gaps, angling them to push damp air toward an exhaust route.
Use axial fans for broad circulation to prevent stagnant pockets, alternating directions to speed evaporation.
Keep units spaced to cover the whole room without overlapping streams that cancel each other.
Monitor progress and adjust angles every few hours.
Wear hearing protection if units are loud and avoid directing airflow at delicate finish areas.
Where To Place Dehumidifiers For Fastest Drying
Because dehumidifiers remove moisture from the air rather than the floor directly, place them where they can pull damp air away from the wettest zones—near exterior walls, along seams or junctions, and close to any visible cupping or buckling.
Position units elevated on blocks or a low table so intake and exhaust clear baseboards, and keep doors open between affected rooms to create airflow paths.
Monitor humidity and move units as readings drop. Empty or hose-drain reservoirs regularly to maintain performance.
- Near exterior walls and window lines
- Along plank seams and thresholds
- Close to warped or cupped areas
- In the center of large affected rooms
Combining Heat And Ventilation Without Causing Warping
You’ll want to use controlled heat sources set to low, directed airflow from fans to move moisture toward dehumidifiers.
A strict moisture-monitoring plan is essential so the floor dries evenly without warping.
Don’t raise temperatures too quickly or aim fans directly at seams.
Place sensors in multiple spots to track progress.
Adjust heat and ventilation based on readings to keep drying steady and safe.
Controlled Heat Application
When you combine steady, moderate heat with directed airflow, you expedite moisture removal without stressing the wood. Aim for slow, even temperature increases (typically 80–95°F / 27–35°C) and keep humidity down with dehumidifiers and fans so boards dry from the surface inward instead of warping outward.
You’ll control heat to avoid rapid expansion, monitor moisture content with a meter, and raise temperatures gradually. Keep heat sources off direct contact with flooring and avoid high humidity spikes. Balance prevents cupping, splitting, or finish damage.
- Use thermostatic controls
- Monitor wood moisture hourly
- Maintain 40–55% RH
- Avoid spot heating
Directed Airflow Strategy
If you combine targeted ventilation with gentle heat, you can pull moisture out of boards evenly without creating hot spots that cause warping. Position fans to push air along the grain, not directly at one plank, and keep heaters on low, circulating warm air steadily.
Use cross-ventilation: intake near a floor edge and exhaust opposite to encourage uniform flow. Lift rugs and move furniture to expose damp areas, and angle vents toward gaps between boards to aid capillary drying.
Rotate fan locations every few hours to avoid prolonged pressure on one section. Stay attentive to visible cupping and reduce intensity if it appears.
Moisture Monitoring Plan
Because balancing heat and airflow can still overstress boards, you should pair any drying setup with a simple moisture-monitoring plan that tells you where, when, and how to check the floor so you can catch cupping or swelling early. You’ll map high-risk zones, set measurement intervals, and record readings so adjustments are timely. Use a moisture meter and visual inspections; don’t rely on time alone.
If readings rise or dimensional changes appear, reduce heat or increase ventilation. Consistent logs let you spot trends and avoid over-drying, keeping the floor stable while the subfloor finishes drying.
- Mark monitoring points across hot and cool zones
- Measure every 4–8 hours initially
- Log meter readings and visual notes
- Adjust heat/airflow based on trends
Monitor Drying With A Moisture Meter
Although fans and dehumidifiers show progress, you should use a moisture meter to know exactly where the wood stands; it gives fast, objective readings so you can track moisture levels in surface boards and subflooring. Check across the room: near walls, center, and joints. Take baseline readings, then measure every 4–8 hours while drying. Record values and note trends; if readings plateau, increase airflow or dehumidification. Use pin or pinless meters per manufacturer guidance. The table below helps you visualize typical check points and actions.
| Location | Frequency | Action |
|---|---|---|
| Center boards | Every 4–8 hr | Increase airflow if high |
| Edges | Every 8 hr | Monitor for slow drying |
| Subfloor | Daily | Consider lifting if saturated |
What Moisture Readings Mean For Different Wood Types
When you read moisture numbers, know that acceptable levels vary by species and installation. You’ll see oak, maple, and pine accept slightly different equilibrium moisture contents; engineered planks tolerate a bit more fluctuation than solid wood.
Use species-specific targets and account for subfloor type and HVAC conditions. Don’t assume one number fits all.
- Oak (solid): aim for 6–9% in conditioned homes; wider in humid climates.
- Maple: keep readings tight, often 6–8% to avoid cupping.
- Pine: tolerates 7–10%, but watch for shrinkage.
- Engineered: allow 1–2% higher than solid counterparts.
How Long Wood Floors Typically Take To Dry Fully
How long your wood floor takes to dry fully usually ranges from 24 hours for surface dampness to several days or even weeks for soaked boards.
The exact timeline depends on factors like wood species, plank thickness, room temperature, humidity, and how quickly you start drying.
Knowing these variables helps you set realistic expectations and choose the right drying tactics.
Typical Drying Time
Because drying time depends on several factors—type and thickness of the wood, how much water it absorbed, room temperature and humidity, and ventilation—you can expect a range rather than a single timeframe.
Typically, surface moisture can dry in 24–72 hours with good air movement.
Deeper saturation in hardwood can take 3–7 days, while engineered or thicker planks may need 1–3 weeks.
If adhesive or subfloor soaked, plan for longer.
- Quick surface drying: 24–72 hours
- Moderate soak (boards): 3–7 days
- Deep or glued layers: 1–3 weeks
- Severe saturation: consult pros
Factors Affecting Speed
Although drying time varies widely, several key factors determine how long your wood floor will take to dry fully. Your floor type (solid versus engineered) soaks and releases moisture differently; thicker planks and glued layers hold water longer. The finish and sealant quality affect evaporation.
Ambient conditions—temperature, humidity, and airflow—drive drying speed, so warmer, drier, well-ventilated spaces dry faster. Water depth and how long it sat influence saturation and potential wicking into subfloor or joists.
Prompt extraction, use of dehumidifiers and fans, and removing furniture speed drying. Structural damage or mold will extend the timeline and need professional assessment.
Signs Of Hidden Moisture Under Floorboards
When you can’t see damage on the surface, hidden moisture under floorboards still gives off clear clues you can spot early: persistent musty odors, buckling or warping planks, squeaks that weren’t there before, discolored seams, and a damp or spongy feel when you press down. Trust your senses and act fast.
Check transitions, baseboards, and closets for subtle signs. If you notice anything unusual, isolate the area and limit foot traffic to prevent spread.
- Localized musty smell near vents or walls
- Uneven floor height at seams
- New, persistent squeaks
- Darkened or swollen joint lines
How To Check Subfloor Moisture Without Removal
If you suspect moisture beneath your floorboards but don’t want to tear up the subfloor, you can still get reliable readings using noninvasive tools and simple inspections. Use a pinless moisture meter across seams, check relative humidity at floor level with a digital hygrometer, and inspect for soft spots or discoloration. Probe edges of closets or vents where water collects. Compare readings over time to confirm drying progress. If readings stay elevated, call a pro.
| Tool | Where to use | What it shows |
|---|---|---|
| Pinless meter | Across boards | Moisture % |
| Hygrometer | Floor level | RH % |
| IR camera | Along seams | Cold/wet areas |
| Visual probe | Trim edges | Softness/damage |
When To Remove Baseboards Or Trim To Dry The Cavity
You’ve checked surface and subfloor moisture without pulling anything up, but wet cavities behind baseboards can trap water and slow drying. So you’ll need to know when to remove trim.
Remove baseboards when moisture readings near the wall exceed normal levels, when you smell mildew, or when visible staining or warping appears. If readings are borderline, monitor 24–48 hours after initial drying attempts before deciding.
- High moisture readings at the wall cavity
- Persistent musty odor or visible mold
- Warped, stained, or soft trim
- Slow overall drying despite airflow and dehumidification
How To Dry Between Boards And Seams Effectively
Start by inspecting gaps and seams to find where water’s trapped so you can target your efforts.
Use a wet/dry vacuum along the joints to extract as much moisture as possible.
Then speed drying by directing airflow with fans and a dehumidifier to pull moisture out from between the boards.
Inspect Gaps And Seams
Because water hides in the smallest openings, inspect gaps and seams between boards immediately after surface drying to find trapped moisture early. Check each seam with good lighting and press gently along edges; soft spots or discoloration signal retained water.
Use a moisture meter for accuracy and mark problem areas so you can target them. Avoid forcing boards apart.
- Run a flashlight along seams to spot darkened grain and swelling
- Use a pin or pin-type meter for localized readings
- Dry marked seams with directed airflow and dehumidification
- Recheck daily until readings are consistently within safe limits
Use Wet/Dry Vacuum
When water’s crept between boards, a wet/dry vacuum is one of the fastest, most controlled ways to pull that moisture out without prying the floor apart. You’ll fit a narrow crevice tool or wrap a soft cloth around the hose to protect the finish, then run slow, overlapping passes along seams.
Work from the wettest areas outward, emptying the tank frequently so suction stays strong. Check the underside of removable vents or baseboards and vacuum there if accessible.
After vacuuming, wipe remaining dampness with a microfiber towel. Repeat inspections with a moisture meter to confirm readings drop before restoring furniture.
Promote Air Circulation
How can you speed drying between boards and seams? Open windows and doors to create cross-ventilation, and position box fans to blow along the grain so air moves through gaps.
Lift area rugs and baseboards to expose edges. Use a dehumidifier to pull moisture from the room, and consider a floor fan with a low-angle tilt aimed at seams.
If boards are slightly raised, insert soft paddles to widen gaps gently for airflow, then remove them after a few hours.
- Position fans to direct airflow along seams
- Run a dehumidifier continuously
- Remove obstructions near baseboards
- Use gentle gap spacers for airflow
When To Remove Flooring Planks For Proper Drying
If you spot cupping, buckling, persistent soft spots, or a musty smell after drying attempts, it’s time to pull up the affected planks so the subfloor and joists can dry completely.
Remove only damaged boards to expose wet areas, working outward from the obvious problem to inspect hidden saturation. Check fasteners, underlayment, and seams for trapped moisture.
Remove only the damaged boards, working outward to reveal hidden wet spots; inspect fasteners, underlayment, and seams for trapped moisture.
Dry the exposed subfloor with fans, dehumidifiers, and gentle heat; monitor moisture levels until readings return to safe ranges.
Replace damaged underlayment or joist components as needed.
Reinstall new or salvaged planks only when both the structure and replacement materials are fully dry.
Temporary Repairs To Prevent Immediate Warping
Act fast to seal wet areas so moisture doesn’t spread into healthy boards.
Remove any standing water and blot damp spots to stop immediate swelling.
If boards are already distorted, brace or weight them temporarily to hold their shape until you can dry and repair properly.
Seal Wet Areas Quickly
When water has soaked into boards, seal the wet areas quickly to stop immediate swelling and cupping; you’ll buy time for drying by creating temporary barriers and reducing further moisture intrusion. Act fast: blot damp spots with absorbent towels, then apply quick seals to edges and seams to limit soak-back. Use materials that you can remove later and won’t trap mold.
- Press down clean towels or microfiber to draw surface moisture.
- Apply waterproof tape along gap lines to block edge wicking.
- Lay plastic sheeting over localized wet planks, taping edges.
- Weight covered areas evenly to prevent cupping while drying.
Remove Standing Water
How soon you remove standing water matters — you’ll cut the risk of immediate warping by getting it up fast. Grab a wet/dry vac or high-capacity pump and start at low spots, working outward so you don’t trap puddles.
Mop residual moisture with absorbent towels, wringing into a bucket and replacing saturated cloths often. Open doors and windows to aid airflow if weather allows.
Remove rugs and furniture to expose the floor. Mark areas that stayed wet so you can monitor them.
Act quickly but safely: shut off electricity in flooded zones before using powered equipment and wear protective gear.
Support Distorted Boards
Although you’ve removed most of the water, you’ll still need to support any boards that have started to cup or buckle to prevent immediate warping. Act quickly: prop cupped boards with wedges or shims, clamp bowed planks flat with padded cauls, and relieve pressure points to stop cracks. Keep supports adjustable so you can tighten as boards dry and settle. Monitor humidity and remove supports once boards return toward normal shape.
- Slip thin shims under edges to lift and stabilize.
- Use spring clamps with wood blocks for even pressure.
- Add weight distributed across large buckles.
- Check daily and adjust.
Cleaning And Sanitizing After Water Exposure
Before you refinish or replace anything, clean and sanitize the floor to remove contaminants and prevent mold growth. Begin by removing debris, furniture, and loose finish with a soft broom or vacuum using a HEPA filter.
Wipe boards with a damp cloth and a pH-balanced wood cleaner; avoid saturating the wood.
For contaminated water (sewage, floodwater), use a disinfectant labeled for wood surfaces or a diluted bleach solution (1 cup bleach to 1 gallon water), rinsing afterward.
Dry thoroughly with fans and dehumidifiers.
Dispose of contaminated rags safely, and wear gloves and a mask while cleaning.
How To Spot And Treat Early Mold On Wood Floors
After you’ve cleaned and dried the floor, keep an eye out for small, discolored patches, fuzzy growth, musty odors, or dark staining along seams and in corners—these are early signs of mold on wood.
After cleaning and drying, watch for small discolored patches, fuzzy growth, musty smells, or dark seams—early wood-mold signs.
Act fast: isolate the area, increase ventilation, and wear gloves and an N95 mask. Lightly scrub affected spots with a solution of mild detergent and water; rinse and dry thoroughly. If stain persists, use a 3% hydrogen peroxide wipe; avoid saturating wood.
- Inspect daily for spreading or new spots
- Dry with fans and dehumidifiers immediately
- Discard contaminated rugs or padding
- Call a pro for widespread growth
Refinishing Vs Sanding: Repair Steps After Drying
Once the floor’s fully dry and you’ve ruled out mold or structural rot, decide whether to refinish the surface or sand down to bare wood based on the damage. If scratches and finish wear dominate, you’ll refinish: clean, lightly sand, and apply new finish. If cupping, deep stains, or gouges remain, you’ll sand to bare wood, inspect boards, replace any ruined planks, then proceed. Test a small area first. Use proper PPE and hire pros for large jobs. Emotions matter—this restores comfort and pride.
| Fear | Relief | Pride |
|---|---|---|
| Loss | Repair | Home |
How To Restore Finish After Drying Without Staining
First, you’ll assess the finish to see if it’s just cloudy, scratched, or peeled—this tells you whether a simple recoat will work.
If the finish is intact and only the top layer is dull, you can lightly clean and abrade the surface, then recoat with a compatible finish without applying stain.
Only consider more aggressive repair or staining if the wood itself shows color loss or deep damage.
Assess Finish Damage
When the floor’s surface looks cloudy, peeling, or has dark water rings, you need to assess the finish before doing any restorative work. Inspect closely under good light for cupping, raised grain, or finish separation so you can choose the right non-staining repair method.
You’ll check whether finish failure is superficial or structural, and decide if spot sanding, buffing, or finish removal is required. Note any discoloration that’s embedded in wood versus on the finish. Photograph areas for reference. Consider moisture readings before repairs.
- Identify surface haze and peeling
- Check boards for cupping or swelling
- Test finish adhesion gently
- Record moisture levels and photos
Recoat Without Stain
If the wood and finish are dry and the finish damage is limited to scratches or dullness rather than deep staining, you can recoat without applying a stain. Start by cleaning the surface thoroughly, scuff-sanding lightly to promote adhesion, and wiping away all dust before testing a small inconspicuous area with your chosen finish.
After a successful test, apply thin, even coats of compatible polyurethane or water-based finish per manufacturer instructions. Allow proper drying time, and sand lightly between coats with fine-grit sandpaper.
Blend new finish into surrounding areas, ventilate well, and avoid heavy traffic until full cure to guarantee a uniform result.
Cost And Time Estimates For DIY Drying Vs Professional Help
Although you can often lower expenses by tackling drying yourself, DIY approaches usually take longer and risk hidden damage. You’ll spend on fans, dehumidifiers, moisture meters, and supplies; expect 1–7 days of active work and monitoring, with costs often $100–$600 depending on rental vs. purchase.
You can save money drying yourself, but expect longer work, equipment costs, and risk of hidden moisture.
Professionals charge more upfront but work faster and include inspection, extraction, drying, and documentation—typical jobs run 24–72 hours and cost $500–$3,000 based on severity.
- DIY: lower cash outlay, higher time investment
- Pro: higher cost, faster results
- DIY risk: missed moisture pockets
- Pro benefit: warranty and paperwork
When To Call A Professional Water-Restoration Company
Because water can hide and spread fast, call a professional if you spot extensive standing water, warped or buckling boards, a musty odor, or any signs of contamination from sewage or floodwater.
You should also hire pros when damage covers multiple rooms, lasts over 24–48 hours, or follows heavy storms.
If you’re unsure about structural integrity, electrical hazards, or persistent staining and corrosion, get an expert assessment.
Professionals can document damage for insurance and advise whether repair or replacement is needed.
Don’t wait if health risks, mold growth, or complex cleanup are possible—acting quickly limits loss and cost.
What Pro Drying Equipment Does And Why It Matters
After you call a pro or decide to hire one, you’ll notice their gear does more than blow air — it changes how fast and how thoroughly your floor dries. You’ll get targeted airflow, controlled dehumidification, and moisture monitoring that prevents warping and mold.
Pros use tools you don’t have, so they can extract water from beneath boards and finish quickly without damaging wood.
- High-capacity air movers focus drying where it’s needed.
- Low-grain refrigerant dehumidifiers remove unseen moisture.
- Injectidry systems dry subfloor and seams effectively.
- Moisture meters and thermal imagers guide decisions and verify dryness.
Document Water Damage For Insurance Claims
When water damages your wood floor, document everything immediately so your insurance claim has solid evidence. Take clear photos and videos from multiple angles, note times and dates, and keep copies of any communications, receipts, and emergency repairs.
Next, create a simple inventory of affected rooms, listing damaged items, estimated value, and visible issues like buckling or staining.
Save meter readings, humidity and temperature logs from drying equipment, and contractor estimates.
Email yourself a timestamped summary to create a record. Keep originals and make backups on cloud storage.
Organized documentation speeds claim processing and supports fair settlements.
Preventing Future Water Damage To Wood Floors
If you want to avoid future water damage, start by identifying and fixing likely sources—leaky appliances, faulty seals, poor drainage, and damaged roofing—and make a simple maintenance plan that includes regular inspections, swift repairs, and seasonal checks of seals and gutters.
You should also elevate vulnerable items, improve ventilation, and use rugs only in low-risk areas. Keep humidity under control with a dehumidifier and monitor plumbing for slow leaks.
Act quickly on spills and teach household members to report issues.
- Inspect under sinks and behind appliances monthly
- Clean gutters every season
- Test sump pumps annually
- Keep humidity below 50%
Best Flooring Underlayment Choices To Resist Moisture
When you reinstall or replace flooring after water damage, choosing the right underlayment can keep moisture from coming back.
Consider cement board for a rugged, water-tolerant base.
Cork pads are a naturally moisture-resistant cushioning option.
Rubber vapor barriers can block seepage from below.
Each option has trade-offs in cost, installation, and performance, so pick the one that fits your subfloor and budget.
Cement Board Underlayment
Because cement board combines cement and reinforcing fibers, it gives you a stable, moisture-resistant underlayment that won’t swell or rot like wood-based products. You can install it under tile or resilient flooring to create a durable barrier after water damage.
It won’t promote mold, and it handles repeated drying cycles without degrading. Fasteners and thin-set secure it; seams get sealed with tape and mortar for a continuous moisture-resistant plane.
Choose appropriate thickness for load and tile size, and verify subfloor flatness before installation.
- Durable and dimensionally stable
- Mold- and rot-resistant
- Compatible with tile and vinyl
- Requires proper seam sealing
Cork Moisture-Resistant Pads
While cork’s natural cellular structure gives it excellent moisture resistance, you’ll still want pads treated or paired with a vapor barrier for the best protection in damp areas. You’ll find cork pads cushion planks, reduce mold risk, and moderate humidity under hardwood. Install treated cork over a clean subfloor, seam with tape, and keep edges elevated from active leaks. Use cork underlayment to speed drying by allowing airflow when combined with drying fans and dehumidifiers. Choose dense, compressed cork for durability and water repellents for added defense.
| Benefit | Note |
|---|---|
| Cushioning | Improves comfort |
| Mold resistance | Limits growth |
| Breathability | Aids drying |
Rubber Vapor Barriers
If you need a tough, long-lasting underlayment that blocks moisture and isolates sound, rubber vapor barriers are a top choice. You’ll find they resist mold, compress under weight without degrading, and provide a reliable vapor stop beneath hardwood or engineered planks.
Install them to protect joists and subfloors while speeding drying by preventing ground moisture rebound. They’re heavier and pricier but often worth it in damp areas.
- Durable, non-porous moisture block
- Excellent sound and impact insulation
- Resists mold and bacterial growth
- Useful under radiant heat with proper specs
How To Test For Lingering Humidity After Restoration
After restoration, you’ll want to confirm the air and subfloor are truly dry before reinstalling finishes or furniture. Use a moisture meter on surface and core, check relative humidity (RH) with a hygrometer, and compare readings to species-specific safe levels. Take multiple readings across the room and repeat over 48–72 hours to guarantee stability. If RH or wood moisture rises, continue drying. Document results for warranty or insurance.
| Tool | Purpose |
|---|---|
| Pin meter | Surface/core moisture |
| Infrared | Cold spots |
| Hygrometer | Air RH |
| Data logger | Trend over time |
| Calcium chloride | ASTM moisture test |
Seasonal Considerations For Drying Wood Floors
Because temperature and humidity shift with the seasons, you’ll need to adjust drying strategies and target moisture levels to match local conditions.
In cold, dry months you can run humidifiers to prevent over-drying and gaps.
In hot, humid months focus on dehumidifiers and increased airflow.
Monitor moisture meters frequently and avoid rapid temperature swings that stress boards.
Aim for equilibrium moisture content appropriate for your region.
- Winter: protect against excessive shrinkage by keeping steady indoor humidity.
- Summer: control humidity to prevent cupping and mold.
- Transitional seasons: watch daily swings; adjust equipment runtime.
- Regional variation: follow local EMC charts.
Quick Action Checklist: Dry Wood Floors Fast
When water hits your wood floor, act fast: shut off the source, remove standing water with a wet vacuum or mop, and open windows and doors to start airflow.
Next, move furniture and rugs to a dry area, lifting legs to prevent staining. Use fans and dehumidifiers focused across planks; aim airflow along the grain.
Move furniture and rugs to a dry spot; lift legs to avoid stains and aim fans/dehumidifiers along the grain.
Check seams and baseboards for trapped moisture, and lift trim if needed to ventilate subfloor gaps.
Monitor humidity and wood moisture daily; keep devices running until readings fall to normal.
Document damage for insurance, and call a pro if warping, buckling, or persistent dampness appears.
Common Mistakes That Make Water Damage Worse
You’ve taken the right first steps, but a few common errors can undo that effort fast. Don’t let rushed choices worsen stains, warping, or mold. Act deliberately: stop water, remove soaked items, and start drying, but avoid these pitfalls.
- Leaving furniture or rugs in place, which traps moisture and creates hot spots for mold.
- Using only a household fan; inadequate airflow slows drying and warping continues.
- Applying heat without dehumidifying; warm air holds moisture and spreads it back into wood.
- Ignoring hidden moisture in seams or underboards, which lets damage progress unseen.
Catch these mistakes early to protect your floors.
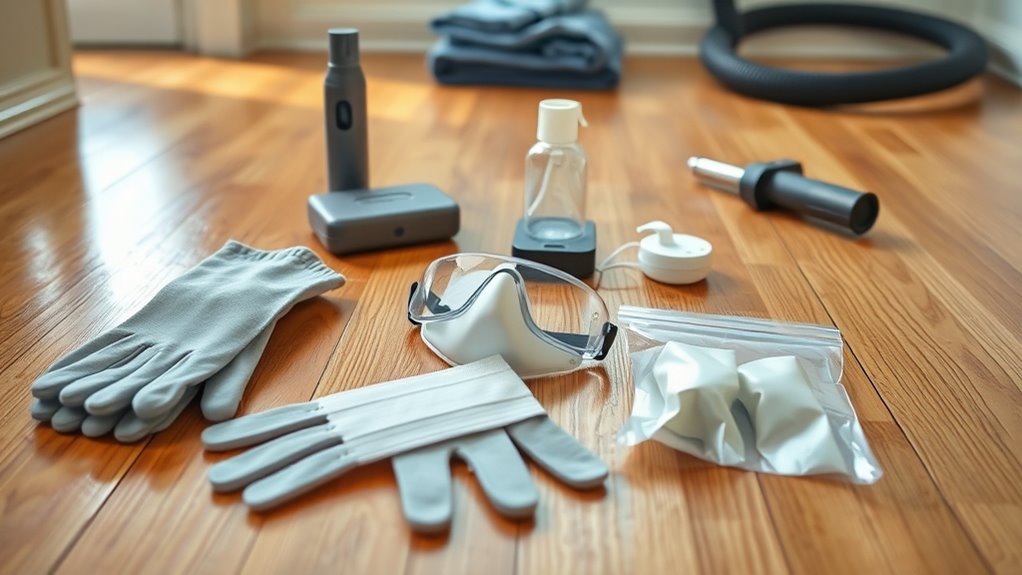
Tools And Supplies To Keep On Hand For Fast Response
If you want to stop water damage fast, keep a compact kit of proven tools and supplies ready so you can act immediately. Include a wet/dry vacuum for surface water, heavy-duty towels and microfiber cloths for blotting, and absorbent mop heads.
Add portable fans and a dehumidifier to speed drying, plus extension cords and timers. Keep a moisture meter to monitor wood and a pry bar and utility knife for removing trim or baseboards safely.
Pack gloves, goggles, disposable masks, and plastic sheeting for containment. Store everything in an easy-to-carry tote by an exit for quick access.
How To Prioritize Rooms After Multi-Room Flooding
Although every flooded room feels urgent, start by triaging spaces based on safety, value, and moisture level. You’ll assess hazards first — electrical, structural, or contaminated water — then focus where drying prevents biggest loss.
Although every flooded room feels urgent, triage by safety, value, and moisture — address hazards first, then protect high-value areas.
Prioritize high-traffic and high-value rooms with wood floors, like living areas and kitchens, then bedrooms and storage. Act fast to reduce cupping, warping, and mold.
- Inspect for safety risks before entering.
- Measure moisture and note standing water depth.
- Tackle rooms with finished hardwood and heavy use first.
- Save low-value or easily replaceable spaces for last.
Real Homeowner Recovery Timeline Examples
After you’ve triaged rooms and begun urgent drying steps, it’s helpful to see how a full recovery can play out in real homes so you know what to expect.
Week 1: you remove standing water, lift rugs, open vents, run dehumidifiers, and monitor moisture daily.
Weeks 2–3: boards may cup; you keep drying, tighten loose boards, and decide if sanding is needed.
Month 1: if moisture is near normal, you refinish or spot-replace damaged planks.
Longer issues: mold or delamination require professionals and can extend recovery to several months.
Track progress and act fast to minimize repairs.
Frequently Asked Questions
Can Pet Urine Under Finish Cause Delayed Wood Floor Failure?
Yes — pet urine under the finish can cause delayed wood floor failure. You’ll get staining, finish breakdown, and moisture-driven rot or cupping over time if acids and salts aren’t neutralized and the floor isn’t properly cleaned and repaired.
Will Humidity Alone Warp Engineered Hardwood After Drying?
Yes — high humidity alone can warp engineered hardwood after drying. If moisture remains in the core or repeated humidity swings occur, the layers can cup, swell, or separate. You’ll need stable humidity and proper acclimation.
How to Document Drying Progress for an Insurance Adjuster?
You’ll document drying progress by taking dated photos, logging moisture readings, noting equipment and settings, recording timestamps and locations, keeping contractor reports and receipts, and writing concise daily summaries to provide clear evidence for the insurance adjuster.
Are Chemical Sealers Safe for Temporarily Stabilizing Saturated Planks?
They’re not ideal for temporary stabilization; you’ll risk trapping moisture and causing mold or finish damage. Use them only with manufacturer guidance and after testing a small area, prioritizing drying and ventilation instead of chemical sealing.
Can Radiant Floor Heating Speed Drying Without Damaging Boards?
Yes — radiant floor heating can speed drying if you’ll use low, gradual temperatures and monitor moisture; don’t blast heat, or boards may warp, cup, or crack. Keep airflow, dehumidifiers, and moisture checks throughout.
Conclusion
You can recover from water-damaged wood floors quickly if you act fast, stay organized, and use the right tools. Start by stopping the water, removing standing moisture, and boosting airflow with fans and dehumidifiers. Prioritize safety—cut power if needed—and focus on the worst rooms first. Monitor moisture levels, replace badly warped boards, and call a pro for contamination or structural concerns. With prompt, steady action, you’ll minimize long-term damage and restore your floors.