How to Decorate a Wooden Christmas Tree Creative Ideas
Pick a wooden tree that fits your space and secure its base, then layer textures—burlap, twine, eucalyptus—for a farmhouse vibe or keep geometrics and sparse lights for modern minimalism. Wrap battery LED strands along grain lines, anchor ornaments with small hooks or floral wire, and balance weight to prevent wobble. Finish with a felt skirt or painted base, seal for outdoor use, and follow simple maintenance tips to keep it looking great; keep going for step‑by‑step ideas.
Which Wooden Tree Fits Your Space: Types & Pros

When choosing a wooden Christmas tree, think about the space you have and the look you want. You’ll pick slim wall-mounted slats for tight corners, tiered tabletop models for desks, or full standing trees for open rooms.
Consider rustic reclaimed wood for a farmhouse vibe, painted or lacquered panels for modern minimalism, and modular pieces if you like rearranging.
Lightweight options suit rentals, while sturdy bases work with heavier ornaments. You’ll also weigh assembly ease and storage.
Match tree height and width to traffic flow so it enhances your space without crowding it or disappearing into it.
Pre‑Decorating Checklist: Measurements, Safety, Supplies
Before you start hanging ornaments, measure the tree and the space so it fits comfortably without blocking walkways or heating vents.
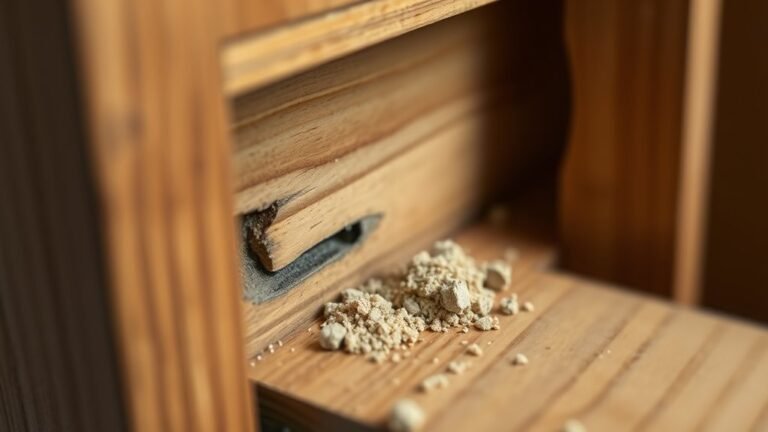
Check the tree for wobble, loose joints, or splinters and make any repairs to guarantee it’s stable and safe.
Gather essentials like lights, hooks, a level, and basic tools so you won’t be searching for supplies mid‑project.
Measure Tree And Space
How big is the tree going to feel in your room? You’ll measure ceiling height, floor area, and traffic paths so the wooden tree fits without crowding. Note door swings and heater proximity, and allow space for a skirt or stand. Jot down dimensions and clearance before shopping or building. Use the table below to record quick measurements and choices; keep it nearby while planning lights and ornaments.
| Item | Measure | Notes |
|---|---|---|
| Ceiling height | 8’0″ | Allow 6″ clearance |
| Floor space | 4’x3′ | Near sofa |
| Pathway clearance | 36″ | High traffic zone |
Inspect For Stability
Wondering if your wooden tree will stand up to lights, ornaments, and curious pets? Check joints, base, and balance before you hang anything. Tighten screws, glue loose dowels, and replace warped pieces so the tree won’t wobble.
- Test base: press each side and rock the tree; it should return to center without shifting.
- Inspect joints: look for gaps or cracked glue; reinforce with clamps and wood glue where needed.
- Simulate load: hang a few ornaments and a string of lights to confirm stability.
Fix problems now so decorating stays safe and stress-free.
Gather Essential Supplies
Ready to decorate? Gather essential supplies before you start: a tape measure to confirm tree and room dimensions, a level and clamps for secure assembly, and sturdy hooks or screw eyes for ornaments.
Choose lightweight ornaments and battery LED strings to prevent overload. Have a screwdriver, pliers, extra screws, and zip ties for quick fixes.
Keep a fire extinguisher and smoke detector nearby as safety precautions. Lay down a drop cloth to protect floors and sort decorations by size and weight.
With measurements, safety gear, and organized supplies, you’ll streamline decorating and avoid last‑minute setbacks.
Essential Tools & Supplies for Wooden Trees
Before you start cutting and assembling, gather the right tools and supplies so your wooden tree project goes smoothly. You’ll need safe, reliable equipment and basic materials to build a sturdy, attractive tree without wasted trips to the shop.
- Power saw (jigsaw or circular), drill, sanding block
- Clamps, wood glue, assorted screws and nails
- Measuring tape, square, pencil and safety gear
Pick wood (plywood or pine) to suit weight and budget. Have spare scrap for test cuts and mockups. Keep a clean workspace and good lighting so joints fit tight and components align neatly.
Paints & Stains: Finishes for Different Woods
Think about what wood you’re working with—pine, oak, and plywood all accept paint and stain differently, so you’ll pick products that match each grain and density.
Decide on a sheen that fits your look and durability needs, from flat for a rustic feel to satin or semi-gloss for easy cleaning.
Use proper stain techniques—test on scraps, sand between coats, and follow drying times—to get an even, lasting finish.
Wood Type Compatibility
Because different woods absorb and react to finishes in their own ways, you’ll want to match your paint or stain to the tree’s species for predictable results.
Softwoods like pine soak up stain unevenly, so preconditioning or thin coats help.
Hardwoods such as oak show grain beautifully with transparent stains; test first to avoid blotchiness.
Exotic or oily woods may repel conventional finishes and need special cleaners or primers.
- Pine: use conditioners, thin washes, or opaque paint for uniform color.
- Oak/Maple: prefer transparent or gel stains to enhance grain.
- Teak/Ipé: use oil-based products or shellac primers before finishing.
Choosing Paint Sheens
When you’re picking a sheen for your wooden Christmas tree, consider how light, wear, and the wood’s character will interact with the finish.
Choose matte to hide imperfections and preserve a rustic, natural look—it’s forgiving under bright strings.
Satin gives subtle glow and cleans easier, good for moderate handling or ornaments.
Semi-gloss boosts color and highlights grain, ideal for painted accents but it shows scratches and fingerprints.
High-gloss reflects lights dramatically, best for polished modern trees but demands careful upkeep.
Test small areas on the actual wood to confirm appearance and durability before finishing the whole piece.
Stain Application Techniques
While stain soaks into wood rather than sitting on top like paint, your technique still determines the final color and consistency, so prep, application speed, and wiping method matter. You’ll sand to an even surface, remove dust, and test stain on scrap. Work in manageable sections and keep a wet edge to avoid lap marks.
- Apply with a brush or rag, following grain, and wait the manufacturer’s recommended dwell time.
- Wipe excess with a clean cloth in one direction for uniform tone.
- Repeat coats for depth, sanding lightly between coats if needed.
Sealing & Weatherproofing Outdoor Wooden Trees
How do you keep your outdoor wooden tree looking great season after season? Start by sanding smooth, then apply an outdoor-grade primer to block moisture.
Use a marine or spar varnish with UV inhibitors; brush thin coats, sanding lightly between layers for adhesion.
Seal end grain with epoxy or sealant to prevent splitting.
For added protection, treat metal fasteners with rust converter and paint.
Let finishes cure fully before placing outdoors.
Reinspect annually: clean debris, touch up worn spots, and recoat every 1–3 years depending on exposure.
Anchor the base and elevate wood off wet ground to reduce rot.
Scandi Minimalist Ideas for Small Wooden Tabletop Trees
Although simple, Scandi minimalist tabletop trees make a big visual impact by focusing on clean lines, natural materials, and restrained accents. You’ll choose pale wood, matte white paint, or raw branches and keep decorations subtle.
Select one or two textures—linen ribbon, felt stars, or a single strand of warm micro‑LEDs. Arrange pieces with negative space so each element breathes.
- Choose natural base: birch, ash, or unfinished pine.
- Pick muted ornaments: small felt, wood beads, or brass hooks.
- Place sparingly: asymmetry over clutter, one focal ornament at eye level.
This approach feels calm and modern.
Bright, Kid‑Friendly Ornament Ideas for Wooden Trees

If you want a more playful look for a wooden tabletop tree, swap the muted Scandi palette for bright, kid‑friendly colors and tactile ornaments that beg to be touched.
Choose felt balls, pom‑pom garlands, and chunky wooden beads painted in primary hues. Add fabric animal or star cutouts with Velcro tabs so kids can rearrange them safely.
Use lightweight foam shapes and shatterproof plastic baubles for lower branches. Incorporate ribbon loops for easy hanging and tiny clothespins to clip artwork or photos.
Finish with battery LED string lights—cool to the touch—and a soft felt tree skirt for cozy, hands‑on fun.
Rustic Farmhouse Styling With Burlap, Twine & Greenery
When you want a cozy, lived‑in look, dress your wooden tree in natural textures like burlap, twine, and sprigs of greenery for instant farmhouse charm. You’ll layer simple elements to keep the aesthetic warm and uncluttered.
- Wrap burlap loosely as a garland, letting edges fray for texture.
- Tie little bundles of twine around branches or hang tiny wooden tags and bells.
- Tuck eucalyptus, pine sprigs, or magnolia leaves into crevices for scent and color.
You’ll balance neutral tones with natural shapes, use warm white lights, and let the tree feel handcrafted rather than perfectly polished.
Modern Geometric and Monochrome Schemes for Wooden Trees
You can create a striking wooden tree by sticking to a monochrome palette—think all-white, matte black, or shades of grey—for a clean, cohesive look.
Place geometric ornaments with intention, using repeating shapes and staggered spacing to emphasize lines and negative space.
Keep lighting minimalist with slim LED strips or tiny warm bulbs that outline angles without overwhelming the design.
Monochrome Palette Choices
Although it sticks to a single hue, a monochrome palette can create striking modern and geometric looks on a wooden Christmas tree. You’ll focus on texture, finish, and contrast within one color to keep the scheme bold yet simple.
Choose matte, glossy, and metallic variations to add depth without extra colors. Balance scale and negative space so the tree breathes and reads cohesive.
- Pick a single color and three finishes for ornaments and paint.
- Use varied textures—wood, fabric, metal—to define layers.
- Keep accents minimal to maintain a clean, contemporary silhouette.
Geometric Ornament Placement
If you want a crisp modern look, place geometric ornaments with intention—align triangles, circles, and bars along implied vertical and diagonal lines to reinforce the tree’s structure and maintain visual flow.
You’ll balance shapes by repeating sizes and materials—matte wood, metal, or painted pieces—in a limited monochrome range.
Cluster small shapes near branch ends and stagger larger forms toward the center for depth.
Use negative space deliberately; don’t overcrowd tiers.
Anchor the scheme with one or two statement pieces mid-tree.
Step back often to adjust rhythm and symmetry until the composition feels calm, ordered, and distinctly modern.
Minimalist Lighting Techniques
Having placed geometric ornaments with intention, now bring lighting into the mix to reinforce that modern, monochrome geometry without overpowering it. You want subtle, directional light that highlights lines and shapes. Choose a single color temperature and keep brightness low to preserve contrast.
Consider these approaches:
- Wrap slim, warm-white LED tape along edges to trace triangles and angles.
- Drape a single strand of micro fairy lights in a controlled zigzag to echo geometric placement.
- Use battery-operated puck lights behind larger ornaments for soft backlighting and depth.
Test placement in dim light, adjust spacing, and keep cords hidden for a clean, modern result.
Fairy Light Placement Tips for Wooden Branches
When you wrap fairy lights around wooden branches, follow the grain and natural angles so the strands sit snugly and look intentional; this prevents gaps, reduces snagging, and makes the tree glow evenly.
Start at the trunk, spiraling outward to maintain even spacing and hide the plug near the base.
Begin at the trunk and spiral outward for even spacing, concealing the plug near the base.
Use lightweight, battery-powered strands on thinner arms to avoid sagging.
Secure lights with clear twist ties or floral wire tucked behind branches.
Vary bulb density: tighter near focal points, looser elsewhere.
Step back frequently to correct kinks and ensure balanced glow.
Unplug before adjusting to avoid burns or damage.
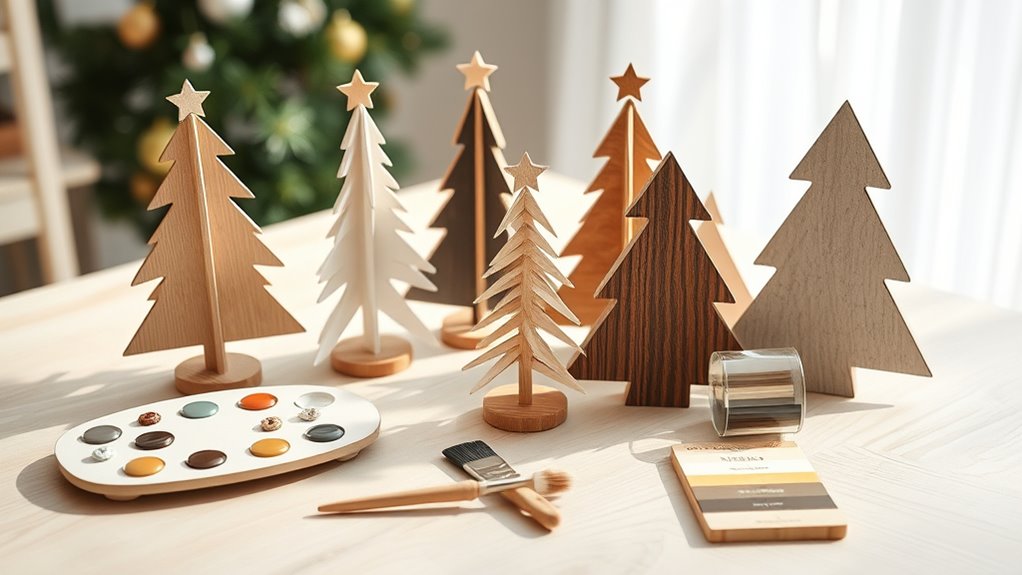
DIY Wooden Ornaments From Scrap Wood
Though scrap wood might seem too small or rough for projects, you can turn those offcuts into charming, sturdy ornaments with just a few basic tools and finishes. You’ll cut simple shapes—circles, stars, trees—sand edges, drill a tiny hole, and seal with paint or oil. Keep designs minimal so the wood grain shines.
- Cut shapes using a jigsaw or coping saw; sand smooth.
- Add a drilled hole, then twine or a metal hook for hanging.
- Finish with shellac, acrylic wash, or beeswax to protect and enhance grain.
Turn Reclaimed Planks Into Layered Wooden Tree Art
Start by picking planks of varying widths and lengths so the tree tapers naturally and the proportions feel balanced.
Layer the boards from largest at the base to smallest at the top, staggering seams for visual interest.
Secure each layer with screws or dowels and wood glue so the tree stays flat and sturdy.
Choosing Plank Sizes
How wide and long should each plank be to give your layered wooden tree the right silhouette and balance? You’ll pick sizes that step down evenly from base to tip, matching your desired height and width while keeping weight manageable. Consider scale, spacing, and visual rhythm.
- Base: widest and longest — sturdy, around 12–18 inches wide, length matching tree width.
- Middle: reduce width by 15–25% per tier for a gradual taper; keep depths uniform for consistency.
- Top: narrowest, lightest piece to finish the peak; shorter length prevents top-heaviness and keeps proportions clean.
Layering And Fastening
Once you’ve cut and arranged your planks to the right widths, layer them from widest at the bottom to narrowest at the top and fasten them so each tier sits square and stable. Clamp each plank, check alignment, then predrill through a hidden backboard or into a central dowel to prevent splitting.
Use countersunk screws or exterior wood glue for weatherproof pieces; nails can work for rustic looks. Space tiers evenly or stagger slightly for texture, measuring gaps as you go.
Sand overlapping edges, fill small gaps with wood filler, and recheck stability before finishing with paint or sealant.
Garlands, Ribbons & Fabric Accents: How to Layer
When you layer garlands, ribbons, and fabric accents, think of them as visual levels that guide the eye from the tree’s tip to its skirt. Combine textures—beaded garlands, wired ribbon, burlap—to create depth, and vary widths so each strand reads at a different distance. Use contrast and spacing to avoid clutter.
Follow a simple sequence:
- Start with a base garland for shape and scale.
- Add mid-layer ribbons, weaving in and out for movement.
- Finish with fabric accents—bows, swags, or scraps—for focal points and softness.
Adjust tension and overlap so layers sit naturally and highlight ornaments without hiding them.
Attaching Ornaments Securely to Uneven Wood
Because wooden trees are often uneven, you’ll need fasteners and placement strategies that compensate for gaps, grain, and irregular surfaces.
Use adhesive-backed hooks for smooth spots and small finishing nails or brads where you can countersink without splitting.
Wrap wire or floral tape around branches or dowels to secure bulbs and lightweight ornaments; twist tightly and tuck ends into crevices.
For heavier pieces, add small L-brackets or hook screws into studs or thicker sections.
Pad contact points with felt or rubber to prevent slipping and protect finishes.
Test each ornament’s balance, adjusting position until it hangs straight and stable.
Choosing a Stable Base & Anchoring Freestanding Wooden Trees
How will your wooden tree stay upright through curious pets, busy foot traffic, or a bumped table? You’ll prioritize a wide, heavy base and secure anchoring so the tree won’t tip.
Consider methods that suit your floor and space:
- Bolt a wooden cross-base with hidden weights for low center of gravity.
- Use L-brackets to anchor the trunk to a wall stud, keeping fasteners concealed.
- Add non-slip pads or a rubber mat beneath the base to prevent sliding on hardwood or tile.
Test stability after decorating, tighten connections, and reposition if wobble appears to guarantee safety and durability.
Budget Hacks to Get a High‑End Wooden Tree Look
If you want a luxe-looking wooden tree without blowing your budget, focus on texture, finish, and a few strategic details you can DIY or source affordably. You’ll sand and stain selectively, add metallic accents with leafing or spray paint, and swap cheap wire lights for warm LED strands. Recycle thrifted ornaments with fresh ribbon, and use natural fillers like pinecones or dried orange slices for elevated charm. Try layering matte and glossy finishes to mimic designer depth.
| Texture | Finish | Accent |
|---|---|---|
| Sanded grain | Walnut stain | Brass clips |
| Burlap ribbon | Satin varnish | Velvet bow |
Room‑By‑Room: Styling Your Wooden Tree (Living Room, Entry, Porch)
Place your wooden tree where it becomes the living room’s focal point. Then layer lights and a few standout ornaments to make it pop.
In the entry, add accents like a runner, wreath, or small garland to create a warm welcome that ties to the tree.
On the porch, choose weatherproof ornaments, sturdy fastenings, and simple greenery so your tree looks festive and holds up to the elements.
Living Room Focal Styling
Wondering how to make your wooden Christmas tree the room’s centerpiece? Place it where sightlines converge—near the sofa or opposite the fireplace—so it anchors conversation.
Balance scale and texture: pair the tree with a low-profile rug and a single sculptural side table. Keep surrounding decor minimal so the tree reads as intentional, not cluttered.
- Elevate: add a subtle tree topper and warm filament string lights for height and glow.
- Ground: use a simple tree skirt or reclaimed wood base to tie to floor tones.
- Accent: choose three coordinated ornaments to echo room colors and finish the look.
Welcoming Entry Accents
How will your entry set the tone for guests? You’ll place a small wooden tree on a console, layer soft lights, and add a welcome mat that echoes the tree’s texture. Use scented pine or citrus and a mirror to reflect glow. Keep pathways clear.
| Element | Purpose | Tip |
|---|---|---|
| Mini wooden tree | Greeting focal | Height balance with vase |
| String lights | Warmth | Warm white, low lumen |
| Wreath | Continuity | Match wood tones |
| Scent | Invitation | Subtle, not overpowering |
| Rug | Anchoring | Durable, easy-clean |
This creates an inviting, cohesive first impression.
Porch Weatherproof Decor
When you bring your wooden tree outdoors, plan for wind, moisture, and temperature changes so it stays attractive all season. You’ll seal wood with marine varnish, anchor the base to prevent tipping, and pick hardy decorations that won’t fade or collect water. Place the tree under an overhang when possible and use battery-operated lights rated for outdoor use.
- Seal and elevate: protect wood, keep off wet surfaces.
- Secure and weighted: prevent wind damage with anchors or sandbags.
- Weatherproof accents: use metal, treated fabric, or plastic ornaments and outdoor-rated fasteners.
Storage & Seasonal Care for Wooden Trees
Because you’ll want your wooden tree to look great year after year, proper seasonal care and storage matter. Clean gently with a soft cloth, remove ornaments, and let finishes fully dry before packing. Store flat or upright in a dry, cool spot away from sunlight to prevent warping and fading. Use acid-free paper or padded bags for delicate parts and label boxes for easy setup next season. Check once mid-year for pests or moisture and air items briefly before returning them.
| Item | Storage Tip | Timing |
|---|---|---|
| Tree | Upright/dry | Off-season |
| Ornaments | Padded | After cleaning |
| Stand/parts | Labeled box | Immediately |
| Finish care | Cool, dark | Annual check-up |
Troubleshooting: Chips, Wobble, and Faded Finishes
If your wooden tree shows chips, a shaky base, or a dulled finish, you can fix most issues with a few simple tools and routine checks.
Sand small chips smooth, fill with wood filler, then touch up paint or stain to match.
Tighten screws and check the stand; add shims or felt pads to stabilize on uneven floors.
For faded finishes, clean gently, then apply a coat of clear varnish or wax to revive sheen and protect wood.
Follow these steps:
- Repair chips and touch up color.
- Secure base and level tree.
- Clean, restore, and seal finish.
Frequently Asked Questions
How Do I Childproof a Wooden Tree for Crawling Toddlers?
You secure the tree to the wall or floor, remove small or sharp ornaments, use fabric or soft foam decorations, cover edges with padding, keep heavy items low, and supervise—create a stable, chew-safe display toddlers can’t topple or grab.
Can I Use Live Greenery With an Indoor Wooden Tree Safely?
Yes, you can use live greenery with an indoor wooden tree safely if you seal cut stems, keep water away from wood, secure greenery well, check for pests, and monitor for mold or sap to protect wood and indoor air quality.
What Weight Limits Apply for Ornaments on Thin Wooden Branches?
You should keep ornaments light — typically under 2–4 ounces (60–115 grams) per thin branch; heavier pieces need support or reinforced branches. Test weight gradually, distribute load evenly, and avoid concentrated stress near joints or tips.
How Do I Repair Burnt Spots From Hot Glue on Finished Wood?
You’ll remove glue gently with a plastic scraper and hairdryer, sand lightly with fine grit, clean, then apply matching stain or touch-up marker. Finish with clear sealer or wax to blend and protect the repaired area.
Are There Eco-Friendly Finishes That Avoid VOCS and Allergens?
Yes — you can use eco-friendly finishes like water-based acrylics, plant-based oils (linseed, tung), shellac, and milk or casein paints; they’re low-VOC, non-toxic, and won’t trigger common allergens when fully cured.
Conclusion
You’ve got the know‑how to pick, prep, and style a wooden Christmas tree that fits your space and budget. Measure carefully, gather the right tools, and choose finishes that suit indoor or outdoor use. Protect, store, and touch up your tree so it lasts seasons. With a few creative accents and simple maintenance, your wooden tree will stay sturdy and beautiful — a unique holiday statement you’ll enjoy year after year.