How to Clean Teak Indoor Furniture Proper Care Guide
You can keep indoor teak looking great by dusting with a microfiber cloth, blotting spills immediately, and using a mild pH‑neutral cleaner for sticky spots. Gently scrub crevices with a soft brush, rinse sparingly with distilled water, and dry thoroughly before oiling or waxing. Check joints, tighten hardware, and reapply oil or sealer when water stops beading. Follow these basics now and you’ll find step‑by‑step care, stain fixes, and restoration tips if you want more.
Quick Cleaning: Teak Indoors, Now
If you need a fast refresh for your indoor teak, start with a dry dust and a mild soap wipe-down—you’ll remove surface grime without stripping natural oils.
Work gently along the grain with a soft cloth or microfiber, rinse the cloth often, and avoid soaking the wood.
For sticky spots, dampen the cloth slightly with warm water and a drop of dish soap, then dry immediately.
Use a soft-bristled toothbrush for crevices.
If the teak looks dry afterward, apply a thin coat of teak oil or maintenance oil sparingly, buffing to an even sheen to restore warmth and protection.
What This Guide Covers and Who It’s For
This guide is for you if you own teak indoor furniture or care for it regularly and want straightforward, practical advice.
You’ll find step-by-step cleaning methods, stain removal tips, and maintenance routines tailored to indoor teak.
Who Should Read
Wondering whether this guide is right for you? You’ll find it useful if you own, care for, or shop for indoor teak and want practical, safe cleaning steps. It’s for DIYers, renters, busy households, and small businesses keeping teak looking its best without harsh chemicals.
| Who you are | Why it helps |
|---|---|
| New teak owner | Learn basic, effective routines |
| Experienced cleaner | Quick refresh techniques |
| Caretaker for rentals | Fast, repeatable methods |
You won’t get deep restoration or commercial refinishing here—this focuses on everyday indoor care and sensible maintenance routines.
What The Guide Covers
Now that you know whether this guide fits your needs, let’s outline what it covers so you can find the steps that matter most. You’ll get clear, practical instructions for cleaning and maintaining indoor teak, plus guidance on tools, cleaners, and safe techniques.
This guide’s for anyone who owns or cares for teak furniture—new buyers, renters, DIYers, and pros—who wants lasting beauty without harsh chemicals. Follow the step-by-step routines, preventive tips, and quick fixes to tackle common issues like stains or dulling. Use what matches your skill level and the furniture’s condition.
- Daily care and gentle cleaning routines
- Deep cleaning and stain removal
- Maintenance, oiling, and protection schedules
Understanding Teak Wood and Indoor Behavior
Because teak contains natural oils and dense grain, it resists moisture, pests, and warping better than many indoor woods, so you’ll find it stays stable in typical home environments.
You’ll notice its warm color varies from golden to amber and darkens slightly with age.
Teak’s oils make it less absorbent, so spills bead rather than soak in immediately, but regular dusting prevents buildup.
It tolerates humidity fluctuations without significant movement, though extreme conditions can still affect joints or finishes.
Understanding these traits helps you choose gentle cleaners, avoid harsh stripping, and maintain original appearance with minimal intervention.
Signs Indoor Teak Needs Cleaning or Repair
How can you tell when indoor teak needs attention? Look for visible cues so you act before damage spreads. Dust or light grime is one thing; deeper issues need cleaning or repair.
- Dull, grayish patina or dark stains that don’t wipe away, indicating embedded dirt or moisture exposure.
- Cracks, splinters, or raised grain where finish has failed, signaling structural wear or drying.
- Sticky residue, persistent odors, or mold in crevices, showing spills or humidity problems that require targeted cleaning and possible repair.
Address these signs promptly to preserve teak’s appearance and strength.
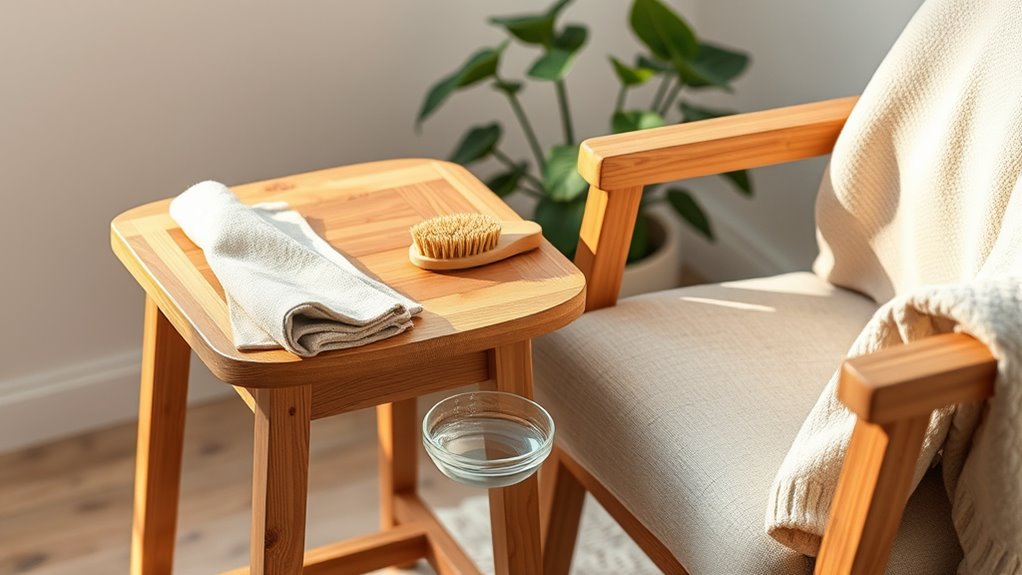
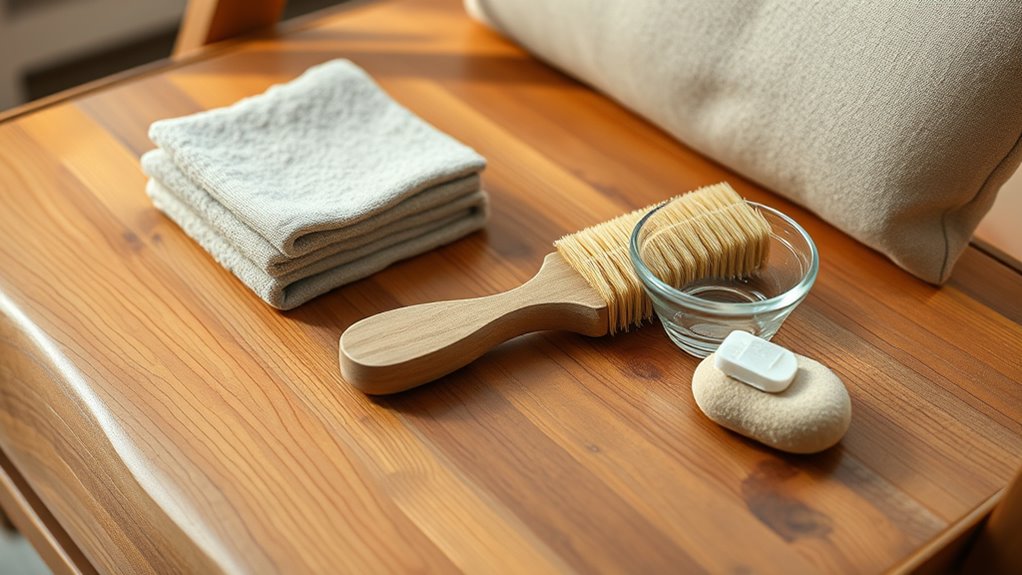
Tools and Supplies to Have on Hand
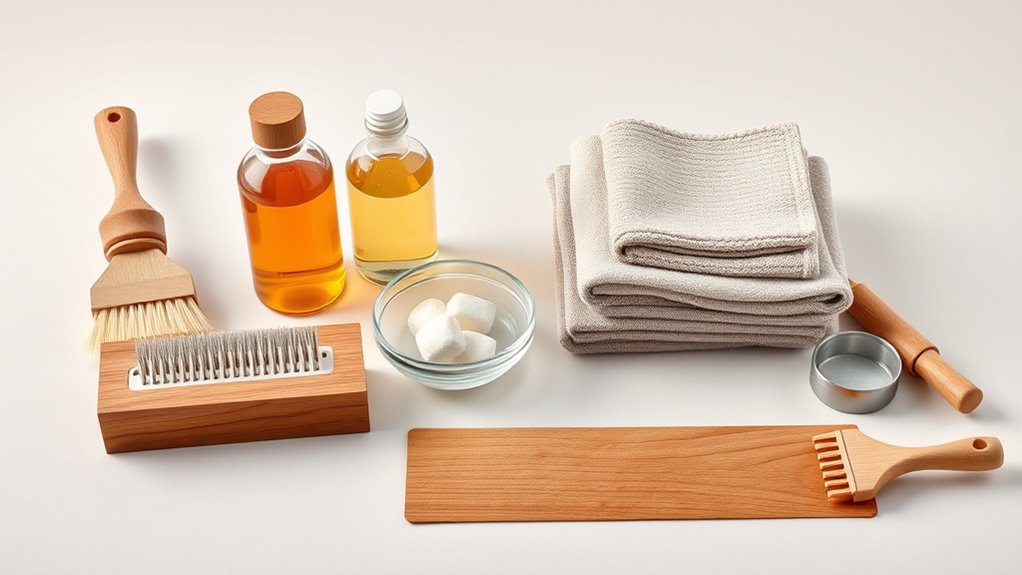
Before you start, gather the right tools and supplies so cleaning goes quickly and won’t damage the wood. You’ll need soft microfiber cloths, a soft-bristled brush, and a vacuum with a brush attachment for dust in crevices.
Choose a mild, pH-neutral wood cleaner or a diluted teak-specific cleaner; avoid harsh detergents. Keep distilled water, a spray bottle, and a bucket handy.
For stains, have fine-grit sanding pads and teak oil or preservative for touch-ups.
Use gloves to protect your hands and test cleaners on an inconspicuous spot before treating visible areas.
Everyday Cleaning Routine for Indoor Teak Furniture
When you keep a simple daily routine, indoor teak stays clean and its finish lasts longer. You’ll quickly prevent buildup by wiping spills immediately, using coasters, and keeping food off bare wood.
Twice weekly, run a soft microfiber cloth lightly dampened with mild soap solution; don’t saturate the wood. Rotate cushions and avoid placing hot items directly on surfaces.
Keep humidity steady to prevent cracking.
- Wipe spills promptly with a soft cloth
- Dust gently with a dry microfiber cloth every few days
- Use coasters and pads to protect surfaces
These small steps preserve appearance and reduce deep cleaning.
Removing Dust and Debris Without Scratching
Use a soft, non-abrasive cloth to wipe your teak regularly so you don’t grind dirt into the grain. Gently dust with light strokes or a microfiber mitt, working along the wood’s natural lines.
If particles feel gritty, lift them with a brush or vacuum first to avoid scratching.
Use Soft, Non-Abrasive Cloths
Although dust may seem harmless, it can abrade teak’s surface if you wipe with the wrong cloth. So pick a soft, non‑abrasive microfiber or cotton rag and gently lift particles rather than rubbing them across the grain.
You’ll preserve the finish by using lint-free fabrics that trap dust instead of pushing it into pores. Avoid towels with loops, paper products, or rough synthetics.
Keep separate cloths for cleaning and drying to prevent grit transfer. Rinse and replace cloths often during use to prevent scratching from embedded debris.
- Microfiber cloth (lint‑free)
- Soft cotton rag
- Dedicated drying cloth
Gentle Dusting Techniques
Now that you’ve got the right cloths, shift to gentle dusting to lift particles without scratching teak’s surface. Work with soft, lint-free cloths or a microfiber duster, sweeping along the grain to avoid abrasion.
Tap crevices with a soft-bristled brush or use compressed air for tight joints. Don’t press hard—let the fibers capture dust.
For stubborn debris, slightly dampen the cloth with distilled water and wring thoroughly before wiping. Change or shake cloths frequently to avoid redistributing grit.
Finish by buffing lightly with a dry cloth to restore warmth and remove any remaining residue.
Gentle Soap Solution for Regular Cleaning
Wondering how to keep teak clean without stripping its natural oils? Mix a mild, pH-neutral dish soap with warm water (a few drops per quart). Dampen a soft cloth, wring thoroughly, and wipe surfaces following the grain. Rinse the cloth frequently and change the solution if it darkens.
Wondering how to keep teak clean without stripping its oils? Use a few drops of mild, pH-neutral soap in warm water and gently wipe with a damp cloth following the grain.
- Use minimal soap to avoid residue
- Blot dry immediately with a clean towel
- Test in an inconspicuous spot first
You’ll maintain teak’s color and protective oils by cleaning gently and regularly. Avoid harsh detergents, bleach, or soaking the wood, which can dull the finish and dry out oils.
Using Microfiber and Soft Brushes Correctly
Choose a lint-free, medium-pile microfiber that won’t scratch the teak and keep a soft-bristled brush for crevices.
Use gentle, circular strokes with the brush and wipe along the grain with the microfiber to lift dirt without abrading the wood.
Finish by blotting dry and letting the piece air-dry fully before applying any oil or sealant.
Choose The Right Microfiber
When you’re cleaning teak furniture, pick a microfiber cloth with a tight, split-weave pile—it’s gentle enough to avoid scratching but effective at lifting dirt and oils without chemical help.
Choose a plush, lint-free cloth for finished surfaces and a slightly coarser weave for textured grain.
Keep several sizes: one for large panels, one for crevices, one for finishing touches.
Wash cloths separately without fabric softener to maintain absorbency.
Replace when fibers mat or leave streaks.
Store clean, dry cloths away from dust and sunlight to prevent contamination and preserve performance.
- Plush, lint-free for finished teak
- Coarser weave for grain
- Small for crevices
Soft Brush Techniques
Although microfiber handles most dust and oils, you’ll get into grain and crevices best by pairing it with a soft-bristled brush.
Use short, gentle strokes along the grain to lift particles without abrading teak. Hold the brush at a shallow angle and apply minimal pressure; let the bristles do the work.
For tight joints, use a small detailing brush or a soft toothbrush.
After brushing, sweep loosened debris with your microfiber cloth rather than rinsing.
Rinse the brush often in clean water and blot dry between uses to avoid transferring grit back onto the wood.
Replace worn brushes promptly.
Drying And Finishing
Want crisp, streak-free results? Drying and finishing teak properly seals your work and highlights grain. After rinsing, blot excess water with a clean microfiber, then follow with gentle circular passes using a soft brush to lift trapped moisture from crevices. Work quickly to avoid watermarks.
- Use a plush microfiber for flat surfaces.
- Use a soft-bristled brush for joints and grooves.
- Finish with light, even strokes along the grain.
Let the wood air-dry fully before applying oil or sealer.
Test a small area first, and avoid abrasive pressure that can scratch or dull the teak’s natural luster.
Lifting Spills: Water, Coffee, and Wine
Spilled coffee, wine, or water? Act quickly: blot liquids with a clean, absorbent cloth—don’t rub.
For water rings, dry with a soft cloth and let air finish drying; if halo remains, lightly sand with fine-grit paper following the grain, then re-oil.
For coffee or wine, blot repeatedly, then mix mild dish soap with warm water and gently dab the stain; rinse with a damp cloth and dry immediately.
For persistent color, make a paste of baking soda and water, apply briefly, then wipe off and oil.
Always test cleaners in an inconspicuous spot first to protect the teak.
Removing Oil and Grease Stains From Teak
Start by identifying what kind of oil or grease you’re dealing with—cooking oil, motor oil, or furniture polish all behave differently on teak.
Once you know the type, choose a matching degreasing method, from mild dish soap and warm water for light oils to a specialized solvent or teak cleaner for heavier, sticky residues.
Test any product in an inconspicuous spot and work gently to avoid damaging the wood.
Identifying Oil Types
Before you treat a mark, figure out what kind of oil caused it so you can choose the right cleaner and technique. Identify fresh versus set stains: fresh oils sit on the surface and may feel tacky; set stains have penetrated and darkened the grain.
Note oil source—food, body oil, cooking oil, furniture polish—since scent, color, and viscosity differ. Test a small hidden area to observe absorption.
Also check finish: unfinished teak soaks oil quicker than sealed pieces.
- Food oils: lighter, may spread
- Heavy oils: viscous, darker spots
- Silicone/polish: glossy residue
Effective Degreasing Methods
How do you tackle oil and grease without damaging teak’s natural oils and grain? Start by blotting fresh spills with a paper towel—don’t rub.
Mix a mild dish soap with warm water and scrub gently using a soft brush along the grain.
For stubborn stains, apply a paste of baking soda and water, let it sit 10–15 minutes, then rinse.
For heavy grease, use a teak-specific cleaner or diluted mineral spirits sparingly, testing in an inconspicuous spot first.
Rinse thoroughly, dry with a clean cloth, and, once fully dry, consider a light teak oil or maintenance oil to restore balance.
Tackling Ink, Marker, and Dye Stains Safely
When ink, marker, or dye lands on your teak, act quickly and gently to stop it from soaking in and staining permanently. Blot excess with a clean, dry cloth—don’t rub.
Test any cleaner on an inconspicuous spot first.
For fresh marks, dab with a cloth lightly moistened with diluted isopropyl alcohol (70%) or mild dish soap solution; blot until the stain lifts, then rinse with a damp cloth and dry.
For stubborn dye, use a teak-safe stain remover following label directions and rinse thoroughly.
- Blot, don’t rub
- Always spot-test cleaners
- Rinse and dry completely
Treating Mold, Mildew, and Surface Discoloration
If you spot mold, mildew, or odd discoloration on your teak, tackle it promptly to prevent staining and wood damage. Gently wipe with a soft cloth and a mild detergent solution, then rinse and dry. For persistent patches, use a diluted vinegar mix (1:1 water) or a teak cleaner designed for indoor use; test hidden area first. Avoid harsh bleaches that can lighten grain. After cleaning, let the wood dry fully and consider a light oiling to restore warmth.
| Issue | Quick fix |
|---|---|
| Light film | Mild detergent |
| Spotty patches | Vinegar mix |
| Stubborn mold | Teak cleaner |
When to Do a Deeper Scrub and How
Because light cleaning won’t remove ingrained grime or long-neglected mildew, you should plan a deeper scrub when the wood still looks dull after a surface wash, dark streaks remain in the grain, or you can feel roughness under your hand. These signs mean dirt, oils, or mildew have penetrated the pores and need stronger treatment than a wipe-down.
When wood stays dull, streaked, or rough after a wash, plan a deeper scrub to remove ingrained grime.
Use a mild teak cleaner or a DIY mix of warm water, gentle soap, and a little white vinegar. Work with a soft-bristled brush along the grain, rinse thoroughly, and dry immediately. Repeat only if residue persists.
- Inspect closely
- Test cleaner on a hidden area
- Brush gently along the grain
Sanding Basics: Light Sanding for Indoor Teak
You’ll want to sand only when the teak shows roughness, stains that won’t lift, or old finish buildup.
Choose a fine grit (220–320) for light smoothing and a medium grit (120–150) if you need to remove minor blemishes first.
Sand with the grain, keep pressure light, and check your progress often to avoid removing too much wood.
When To Sand
Wondering when to sand your indoor teak? You’ll sand only when surface issues affect appearance or finish adhesion. Light sanding refreshes dull areas, smooths minor scratches, and preps for oil or sealer—don’t overdo it. Sanding isn’t routine; do it as needed.
- When the finish peels or feels rough to the touch
- When stains or water marks won’t lift with cleaning
- Before re-oiling if the wood looks dry or unevenly colored
Work gently, test a hidden spot first, and stop once the surface evens. That keeps grain definition and avoids unnecessary material removal.
Sanding Grit Choices
When choosing sandpaper for light sanding of indoor teak, pick the finest grit that still solves the problem: start with 220–320 grit for smoothing dull spots, light scratches, or old finish edges, and move up to 400–600 grit only when you need an ultra-smooth surface before oiling or sealing.
You’ll sand with the grain, use gentle pressure, and check progress frequently so you don’t overwork the wood.
For minor touch-ups, a 320 grit is usually enough; for prepping before oil or varnish, finish with 400–600.
Clean dust between grits and test on an inconspicuous area first.
Repairing Scratches, Dents, and Small Gouges
Small scratches, dents, and gouges are common on indoor teak, but you can usually fix them yourself with a few simple tools and the right approach.
Assess damage, clean area with mild soap, then decide: light scratches buff out with fine steel wool and teak cleaner; dents often respond to steam—apply a damp cloth and iron briefly to raise fibers; small gouges need wood filler matched to teak, sand smooth, and blend carefully.
Assess damage and clean; buff scratches, steam dents to raise fibers, and fill small gouges, then sand and blend.
Finish by cleaning dust and conditioning the spot.
- Clean first, always.
- Test filler and technique on scrap.
- Work progressively; stop when acceptable.
Teak Finishes: Oil, Wax, or Sealer Compared
Once you’ve repaired scratches and filled gouges, you’ll need to decide how to protect and finish the teak—oil, wax, or a sealer will each highlight the wood differently and offer varying levels of protection.
Oil penetrates and enriches color, giving warm, natural depth but needs periodic reapplication.
Wax adds a soft sheen and smooth feel, repels light spills, and buffs easily, though it wears faster.
Sealers form a protective film, offering stronger resistance to stains and moisture but can alter the tactile feel and appearance.
Match your choice to desired look, maintenance willingness, and room humidity for best results.
How to Oil Indoor Teak Step by Step
Before you apply oil, make sure the teak is clean, dry, and free of dust or previous finish—this lets the oil penetrate evenly and produce a consistent tone.
Work in a well-ventilated area and test the oil on a hidden spot.
Apply thin, even coats with a lint-free cloth or natural-bristle brush, following the grain.
Wipe away excess after 10–15 minutes to avoid tackiness.
Let each coat dry fully (usually 24 hours) before reapplying.
Finish when color and sheen meet your preference.
- Use teak-specific or quality penetrating oil
- Sand lightly between coats if needed
- Remove spills promptly
How to Apply Wax or Polish for Lasting Sheen
After the oil has fully dried and you’re satisfied with the color, you can add wax or polish to deepen the sheen and protect the surface. This final layer enhances water resistance and makes future cleaning easier.
Choose a high-quality beeswax or paste polish made for teak. Work in a well-ventilated area and use a soft lint-free cloth. Apply a thin, even layer following the grain, rubbing in small circular motions.
Let the wax haze for the time recommended, then buff briskly with a clean cloth until you get the desired luster. Reapply sparingly every 6–12 months or as wear appears.
Using a Sealer or Varnish on Indoor Teak
Want a longer-lasting finish on your indoor teak? You can seal or varnish to protect grain and simplify cleaning. Choose a clear, non-yellowing sealer or a marine-grade varnish labeled for indoor use.
Want a longer-lasting indoor teak finish? Seal or varnish with a clear, non-yellowing, indoor-rated product.
Sand lightly between coats, wipe dust, and apply thin, even layers with a natural-bristle brush. Allow proper drying and cure times per product instructions.
Test a small, hidden area first to ensure desired sheen. Avoid exterior products that trap moisture.
Maintain the finish by cleaning gently and repairing nicks promptly.
- Pick a compatible, indoor-rated product
- Prepare surface thoroughly
- Apply thin, even coats
How Often to Oil or Seal Teak (Use & Climate)
How often you oil or seal teak depends mainly on how often the piece gets used—high-traffic items may need attention every 3–6 months, while rarely used pieces can go a year or more.
Climate matters too: dry, heated indoor air or very humid rooms can speed up drying or mold growth and change the schedule.
Watch for dullness, graying, or water beading failures—those are clear signs it’s time to re-oil or reseal.
Frequency By Usage
Because your teak’s exposure and use change how it weathers, you should match oiling or sealing frequency to both usage and climate.
For indoor pieces, adjust by how often you use them: daily-use dining chairs need fresher protection than occasional accent pieces.
Check finish wear every 3–6 months; if water beads poorly or surfaces look dull, treat them. Lightly sand glossy wear spots before reapplying oil or sealer.
Keep records so you don’t over-treat. Follow manufacturer directions on products.
- Daily or heavy use: inspect every 3 months
- Regular use: inspect every 6 months
- Occasional use: inspect annually
Climate Effects On Frequency
Your home’s climate will influence how often you need to oil or seal indoor teak, so factor humidity and temperature into the inspection schedule you use for wear.
In dry, heated environments, teak can lose oils faster; check and treat every 6–12 months.
In consistently humid or cool homes, moisture retention slows drying, so oiling or sealing every 12–24 months is usually enough.
If your space cycles between extremes—humid summers, dry winters—aim for biannual checks and adjust treatments accordingly.
Use milder sealing in stable climates and more frequent light oiling where fluctuations accelerate drying or minor checking.
Signs It Needs Oiling
When indoor teak starts to look dull, feel dry, or develop small surface cracks, it’s time to think about oiling or sealing it. Frequency then depends on how you use the piece and your home’s climate. Check annually as a baseline and adjust if you notice wear sooner.
High use or dry, heated rooms may need oiling every 6 months; low use in stable humidity might be fine every 12–18 months. Light sanding before oil helps adhesion.
Watch for color fading, roughness, or water beading loss—those are clear prompts to act.
- Dull, grayish surface
- Water no longer beads
- Fine surface cracks
Preventive Habits That Keep Teak Looking Fresh
If you adopt a few simple habits, you’ll keep teak looking fresh far longer with less work later.
Wipe spills immediately with a soft cloth to prevent stains and reduce grime buildup. Use coasters and placemats to avoid water rings, oil marks, and heat damage.
Wipe spills at once with a soft cloth; use coasters and placemats to prevent stains, rings, and heat damage.
Rotate cushions and move decorative items occasionally so sunlight and wear distribute evenly.
Dust weekly with a dry microfiber to stop abrasive particles from scratching the surface.
Keep indoor humidity steady—use a humidifier or dehumidifier as needed—to prevent cracking or warping.
Inspect joints and hardware periodically and tighten or repair small issues promptly.
Cleaning Products and Ingredients to Avoid
Don’t use harsh chemical cleaners on teak — they can strip natural oils and damage the wood.
Avoid oil-based polishes, which leave residue and attract dirt over time.
Stick to mild, teak-safe products so your furniture stays healthy and looks natural.
Harsh Chemical Cleaners
Although harsh chemical cleaners can promise quick results, they can strip teak’s natural oils, dull its finish, and damage joints or glue over time. You should avoid bleach, ammonia, and strong degreasers; they break down wood fibers and remove protective oils.
Instead, choose mild, teak-specific cleaners or diluted gentle soap and water. Test any product on an inconspicuous spot first, rinse thoroughly, and dry immediately to prevent stains or warping.
If residue remains, repeat with a soft cloth rather than increasing strength. Protecting the wood with proper cleaning preserves appearance and structural integrity.
- Bleach and chlorine-based cleaners
- Ammonia and alkali solutions
- Strong degreasers and solvents
Oil-Based Polishes
When you reach for oil-based polishes thinking they’ll instantly revive teak’s sheen, be careful: they can leave a sticky residue that attracts dust, darken the wood unevenly, and interfere with future treatments. You should avoid them for regular care. Instead, use mild soap and water, dry promptly, and apply a teak-specific oil sparingly if direction requires. Test any product on a hidden spot first. If residue builds, remove it with gentle solvent recommended for teak and recondition with approved products. Remember, preserving natural oils and grain is better than masking with heavy polishes.
| Risk | Effect | Action |
|---|---|---|
| Sticky residue | Attracts dust | Avoid |
| Uneven darkening | Alters appearance | Test first |
| Treatment interference | Stops refinishing | Remove gently |
Eco‑Friendly, Non‑Toxic Options for Indoors
Because you’re keeping teak indoors, choose cleaning and care products that are non-toxic and low-odor so they won’t off-gas into your living space. Use gentle, plant-based cleaners and diluted castile soap to remove dirt without stripping natural oils. Spot-test any product on a hidden area.
For nourishing finish, apply beeswax or a water-based, low-VOC teak oil sparingly. Wipe up spills immediately and ventilate during application. Avoid harsh solvents, ammonia, and aerosol sprays.
Here are simple, safe options to try:
- Diluted castile soap and warm water
- Beeswax paste or conditioner
- Water-based, low-VOC teak oil
Seasonal Care: Humidity and Dryness Tips
Keeping your indoor teak healthy goes beyond choosing non-toxic cleaners; you also need to manage seasonal humidity and dryness to prevent cracking, warping, or loosening joints.
Monitor indoor humidity with a hygrometer and aim for 40–60%. In dry winter months, use a humidifier near seating areas or place water trays on radiators to keep moisture steady.
During humid summers, run dehumidifiers or air conditioning to avoid swelling and mold.
Keep teak away from direct heat sources and sun that exaggerate seasonal shifts.
Wipe spills promptly, and inspect joints each season so you can tighten or treat small issues before they worsen.
Moving and Storing Teak Without Damage
Before you move teak furniture, give it a final gentle cleaning so dirt or oils won’t trap moisture or scratch surfaces in transit.
Wrap pieces with soft padding and support legs and joints to prevent stress or shifting.
Store teak in a cool, dry, well-ventilated spot away from direct sunlight and extreme humidity.
Proper Cleaning Before Moving
When you’re preparing teak furniture for a move or storage, clean it thoroughly so dirt, oils, and salts won’t trap moisture or encourage stains while it’s packed. Start by wiping with a soft, dry cloth to remove loose dust.
Use a mild, pH-neutral soap and lukewarm water with a soft brush for ingrained grime; rinse and dry immediately.
Avoid harsh chemicals or pressure washing that can damage oils. Allow pieces to air dry completely in a ventilated, shaded area before packing.
Treat any sticky spots or spills with a diluted vinegar solution, then rinse well.
- Wipe loose dust first
- Gentle soap and brush
- Fully air dry
Secure Padding And Support
Because teak is dense but still vulnerable at edges and joints, you’ll want to pad and support each piece so it can’t shift, rub, or take impact during moves or storage. Wrap corners with foam or felt and secure with breathable tape. Use straps that distribute pressure—not tight knots—over frames. Place rigid boards under legs to prevent crushing and keep stacked items separated with spacers. Label fragile spots and lift with helpers, not dragged.
| Item | Protection |
|---|---|
| Legs | Foam blocks |
| Corners | Felt wraps |
| Surfaces | Soft blankets |
| Joints | Padded straps |
Ideal Storage Conditions
If you want your teak to keep its color and structural integrity during storage or a move, control the environment: choose a cool, dry space with stable temperature and humidity, good air circulation, and protection from direct sunlight and moisture.
Pack pieces separately, wrap with breathable cloth or moving blankets, avoid plastic that traps humidity, and lift rather than drag to prevent scratches.
Place sealed silica gel packs nearby to absorb residual moisture, and check periodically for mold or warping.
Don’t stack heavy items on top of delicate slats; support weight evenly to prevent bowing.
- Cool, dry, ventilated
- Breathable wrapping
- Even support and spacing
Restoring Vintage Teak: DIY vs Professional
While you can revive a vintage teak piece yourself with basic tools and elbow grease, deciding between DIY and a pro comes down to skill, time, and the chair’s value.
You can restore a teak chair yourself, but choose a pro for complex damage, value, or original finishes.
If you’ve got steady hands, patience, and experience with sanding, finishing, and matching stains, DIY saves money and lets you control results.
Choose professional help if the piece has structural damage, intricate joinery, original finishes you want preserved, or collector value—pros use specialized treatments and can guarantee outcomes.
Inspect wood, test finishes, and weigh long-term preservation against immediate savings before you start.
Cost & Time: Common Teak Maintenance Tasks
When you plan routine teak care, estimate both time and money realistically. You’ll spend small amounts regularly to avoid big repairs.
Simple cleaning with mild soap and a soft brush takes 20–40 minutes per piece and costs little—cleaner and cloths.
Occasional sanding and oiling need 1–3 hours and modest material costs: sandpaper, teak oil, brushes.
Professional refinishing runs higher in both time and price but isn’t required for light wear.
- Weekly light cleaning: low cost, 20–30 minutes
- Seasonal oiling/sanding: moderate cost, 1–3 hours
- Professional refinish: higher cost, several hours to days
Inspecting Teak for Structural Issues and Rot
Because teak can hide slow-developing damage, you should inspect joints, fastenings, and undersides regularly for looseness, soft spots, or discoloration that signal structural issues or rot.
Use a bright light and run your fingers along seams, chair legs, and hidden corners. Press gently to detect spongy areas and tap to listen for dull sounds indicating decay.
Look for rusted screws, split glue lines, sapwood staining, or white fungal growth. Note any movement or gaps when you apply slight pressure.
Record findings, clean affected areas, and tighten or replace hardware to prevent minor problems worsening.
When to Hire a Professional Restorer
If your inspection turns up persistent soft spots, widespread discoloration, structural movement, or fungal growth that you can’t confidently repair, call a professional restorer. You’ll save time and avoid worsening damage by letting an expert evaluate rot, joinery failure, or deep-set stains.
Professionals have the tools and chemicals to stabilize wood, lift embedded contaminants, and match finishes without harming teak’s natural oils. Ask about methods, guarantees, and whether conservation or replacement is recommended. Expect a written estimate and timeline before work begins.
Professionals use specialized tools and products to stabilize, clean, and refinish teak—ask about methods, guarantees, and timelines.
- Structural repairs and compromised joints
- Extensive fungal or insect infestation
- Deep stains or finish failures
Caring for Upholstery and Cushions on Teak Frames
How do you keep cushions and upholstery looking their best on teak frames? Inspect fabric for stains, tears, and worn seams; address small issues before they worsen. Vacuum regularly to remove dust and grit that abrade fibers and teak. Rotate cushions and flip to promote even wear and prevent indentations.
Spot-clean spills promptly using the fabric manufacturer’s recommended cleaner, testing an inconspicuous area first. For removable covers, follow label washing instructions or use a gentle professional cleaner. Allow cushions to dry fully away from direct heat.
Store cushions in a breathable bag when not in use to avoid mildew and fading.
Quick Checklist: Daily, Monthly, and Annual Care
When you care for teak regularly, small tasks keep it looking great and prevent bigger repairs down the line; this quick checklist lays out what to do daily, monthly, and annually so you can fit maintenance into your routine without guesswork.
You’ll wipe spills immediately, dust surfaces, and air cushions to avoid mold.
Each month, clean with mild soap, inspect joints, and touch up minor stains.
Annually, deep-clean with teak cleaner, lightly sand weathered spots, and apply protective oil if desired.
Follow this schedule to extend the life and beauty of your teak furniture.
- Daily: wipe spills, dust, air cushions
- Monthly: soap clean, inspect joints, spot-treat stains
- Annual: deep-clean, sand, oil/apply finish
Frequently Asked Questions
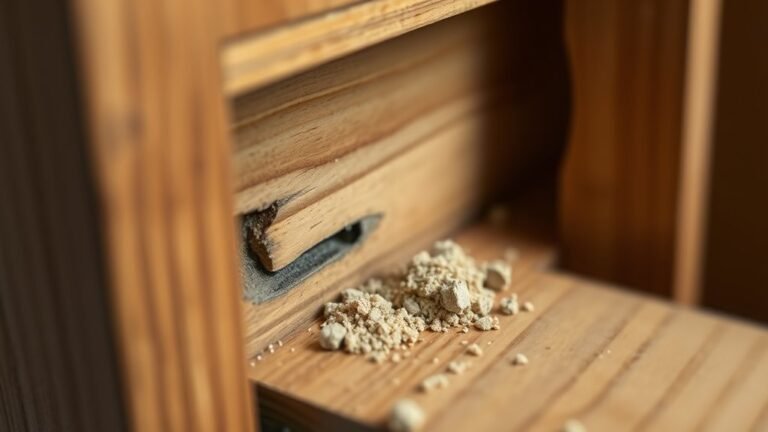
Can Indoor Teak Attract Pests Like Termites or Beetles?
Yes, indoor teak can attract pests like termites or wood‑boring beetles if moisture, wood contact with soil, or old untreated timber are present. You should control humidity, seal gaps, and inspect regularly to prevent infestations.
Can Teak Emit Odors or Off-Gas After Refinishing?
Yes — freshly refinished teak can emit mild odors or off-gas from finishes, adhesives, or residual solvents. You’ll notice them briefly; ventilate, use low-VOC products, and let the piece cure fully to minimize lingering smells.
Is It Safe to Use Teak Furniture in a Bathroom With a Shower?
Yes — you can use teak in a shower bathroom because it resists moisture and rot, but you should ventilate well, avoid constant standing water, oil periodically, and dry it between uses to prevent mold, stains, and splitting.
Can Indoor Teak Be Safely Used Outdoors Temporarily?
Yes, you can use indoor teak outdoors temporarily, but don’t leave it exposed to heavy rain or direct sun for long; you should oil or seal it beforehand, and bring it inside or cover it when weather worsens.
Will Sunlight Through Windows Cause Teak to Yellow or Darken?
Yes — sunlight through windows will slowly darken teak and can cause slight yellowing over time; you’ll notice color changes where UV hits, so rotate pieces, use UV-filtering films or curtains, and clean gently to minimize uneven aging.
Conclusion
You’ve got the basics to keep indoor teak looking great and lasting for years. With routine dusting, occasional gentle cleaning, and prompt attention to scratches or loose joints, you’ll prevent bigger problems. Use the right supplies, inspect for rot, and call a pro for serious structural issues. Don’t forget upholstery care and seasonal checks. Stick to the quick checklist, and your teak furniture will stay beautiful, comfortable, and durable in your home.