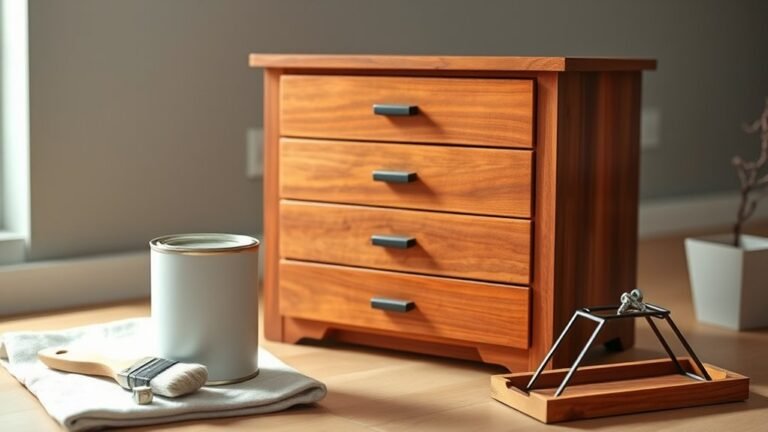
How to Clean Cedar Wood Furniture the Right Way
You can safely clean cedar furniture by gently dusting, wiping spills, and using mild soapy water or a diluted vinegar solution for grime; avoid harsh chemicals, bleach, and abrasive pads that strip oils. Inspect for soft spots, mildew, or loose hardware before you start, sand only when necessary with fine grit along the grain, then rinse and dry thoroughly to prevent mold. Follow simple protective steps and you’ll preserve cedar’s look and scent—keep going to learn the specific methods and schedules.
Who This Guide Is For
If you own cedar furniture—indoors or out—or care for it professionally, this guide is for you. You want practical, safe steps to keep cedar looking and smelling great without damaging its oils or finish.
Whether you’ve got a cedar chest, patio set, closet lining, or decorative paneling, you’ll get advice matched to those uses. This guide suits homeowners, renters, woodworkers, antique dealers, and maintenance staff who need efficient routines and troubleshooting for stains, mildew, or wear.
You’ll learn when to tackle a job yourself, when to call a pro, and how to choose gentle products.
Quick Answer: How to Clean Cedar Furniture Safely
When you need a fast, safe clean, start by dusting or brushing away loose dirt, then wash gently with mild soap and water—avoiding harsh chemicals or high-pressure washing that can strip cedar’s natural oils.
Rinse with clean water and dry with a soft cloth or allow air drying in shade to prevent warping.
For stains, spot-test diluted white vinegar or baking soda paste on an inconspicuous area before treating.
Sand lightly with fine-grit paper to remove rough spots, always following the grain.
Reapply a light, breathable cedar oil or sealer only if the wood looks dry or dull.
When to Clean Cedar : And When to Leave It Alone
Because cedar weathers differently than other woods, you should clean it only when signs of dirt, mildew, or deterioration appear rather than on a fixed schedule.
If the surface looks clean, smells fresh, and repels water, leave it alone—overcleaning can strip natural oils and age the wood prematurely.
Clean after visible grime, dark streaks, mold spots, or pollen buildup, and after exposure to salt spray or heavy storms.
Inside, tidy only when stains or odors occur.
When in doubt, spot-clean a small area first; routine visual checks let you act only when necessary, preserving cedar’s character.
How to Inspect Cedar Furniture Before Cleaning
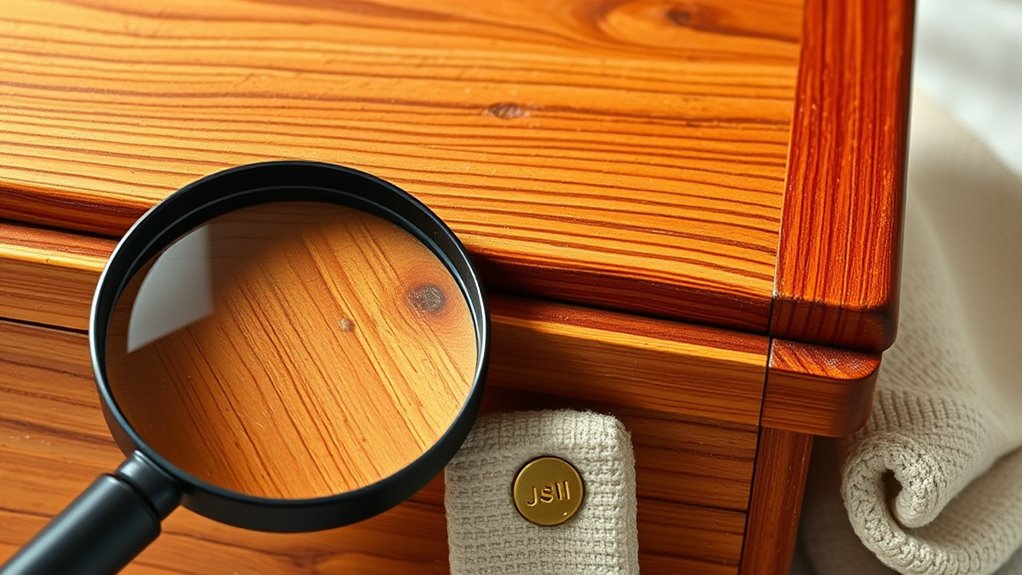
Before you pick up any cleaners, take a close look at the wood’s surface, joints, and hardware to determine what kind of cleaning (if any) is needed.
Before cleaning, closely inspect the wood’s surface, joints, and hardware to assess what treatment is needed.
Check for soft spots, cracks, or rot by pressing gently; soft or spongy areas may need repair rather than cleaning.
Note stains, mold, or mildew and whether they’re surface-level or ingrained.
Inspect joints and glue lines for loosening, and test screws, hinges, or handles for rust or movement.
Smell the wood for mustiness that signals deeper issues.
Photograph damage, then plan cleaning or repairs based on what you find.
Indoor vs. Outdoor Cedar: Care Differences
After you’ve inspected the piece and noted any damage or odor, consider whether your cedar has spent most of its life indoors or outdoors—each setting changes how you should clean and care for it.
Indoor cedar usually needs gentler attention: dust regularly, use mild soap and water sparingly, and avoid excessive moisture to preserve aroma and finish.
Outdoor cedar faces sun, rain, and mildew; you’ll need firmer cleaning, periodic drying, and UV protection or oiling to prevent cracking and graying.
In both cases, let the wood dry fully after cleaning and address repairs promptly to extend the furniture’s lifespan.
Cleaning Products to Avoid on Cedar Furniture
Don’t use harsh chemical cleaners on cedar—they can strip natural oils and damage the wood.
Avoid oil-based polishes that leave residues and attract dirt, and steer clear of high-alkaline solutions that can discolor or weaken the fibers.
Instead, you’ll want gentle, pH-neutral products or simple soapy water for routine cleaning.
Harsh Chemical Cleaners
While cedar’s natural oils give it beauty and resilience, strong chemical cleaners can strip those oils, dull the finish, and even discolor the wood. You should avoid bleach, ammonia, harsh solvents, and abrasive oven cleaners when caring for cedar furniture.
You’ll want gentler options: mild soap, diluted vinegar for mildew, or specialized wood cleaners. Test any product on an inconspicuous spot first. Rinse and dry thoroughly to prevent residue or water stains.
Don’t let concentrated cleaners soak or sit. If in doubt, consult the furniture maker’s care instructions to protect cedar’s scent and grain.
- Bleach and ammonia
- Paint strippers
- Abrasive powders
Oil-Based Polishes
One common mistake is using oil-based polishes on cedar, because they leave a sticky film that attracts dust, darkens the wood unevenly, and can mask cedar’s natural aroma.
You’ll notice buildup in crevices and a dulled, blotchy finish after repeated use. Don’t assume “natural” oils are safe; many contain solvents or fragrances that alter color and finish.
Instead, wipe with a slightly damp cloth and dry immediately, or use cleaners formulated for softwoods.
If oil residue’s already present, remove it with a mild solvent recommended for cedar, then rinse and condition with a product labeled safe for cedar.
High-Alkaline Solutions
Because high-alkaline cleaners strip cedar’s natural oils and raise the wood’s pH, they can cause surface fibers to swell, dull the finish, and leave the grain looking washed-out. You shouldn’t use strong detergents, oven cleaners, or drain cleaners on cedar; they etch and weaken fibers.
If you’ve already applied one, rinse thoroughly with plain water and let the wood dry fully before conditioning. Test any cleaner on an inconspicuous spot first.
Opt for mild, pH-neutral soaps or specialized wood cleaners designed for softwoods. Gentle care preserves color, aroma, and longevity—don’t let harsh chemistry ruin your cedar.
- Oven cleaners
- Heavy-duty degreasers
- Lye-based products
Safe Household Cleaners for Cedar Furniture
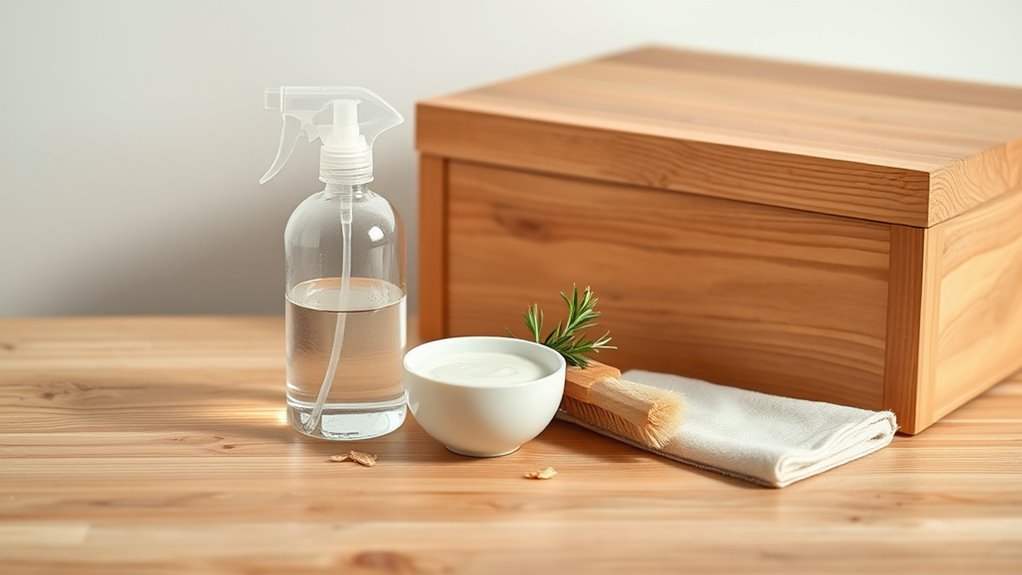
You can safely clean cedar with a few simple household items: mild soap and water works for regular dust and grime.
For stubborn spots or to neutralize odors, a dilute white vinegar solution is effective and gentle.
Finish by rubbing a small amount of olive oil into the grain for a subtle shine and to help nourish the wood.
Mild Soap And Water
When dirt and grime are light, mild soap and water clean cedar without stripping its natural oils. You’ll mix a teaspoon of mild dish soap into a quart of warm water, dampen (not soak) a soft cloth or sponge, and work with the wood’s grain.
Rinse with a clean, damp cloth to remove residue, then dry thoroughly to prevent water spots or mildew. Test a hidden area first to guarantee finish compatibility.
Use sparingly—frequent washing can dull patina.
- Gentle soap preserves cedar’s aroma and oils
- Quick rinse prevents buildup
- Always dry immediately
White Vinegar Solution
A simple white vinegar solution—one part vinegar to four parts water—cleans cedar gently and kills mildew without stripping natural oils.
Dampen a soft cloth or sponge, wring it well, and wipe along the grain. Test a hidden spot first to verify colorfastness.
For stubborn stains, let the solution sit briefly, then blot—don’t scrub aggressively. Rinse with a clean, damp cloth to remove residue and dry promptly with a soft towel to prevent water marks.
Use this method sparingly—frequent applications can dull finish.
Store leftover mixture in a labeled bottle and discard if it becomes cloudy.
Olive Oil For Shine
Although olive oil can add a warm sheen to cedar, use it sparingly and only on finished pieces—dab a few drops on a soft cloth, rub with the grain, and buff off any excess to prevent sticky residue or darkening the wood. You’ll refresh appearance, mask minor scratches, and avoid chemical cleaners.
Test a hidden spot first to verify color and finish compatibility. Don’t apply to raw cedar, as oil can trap moisture and promote mildew.
Maintain with light applications every few months, and always remove pooled oil promptly to keep the surface even and non-tacky.
- Quick test on an inconspicuous spot
- Light, grain-following strokes
- Wipe excess immediately
Easy Homemade Cedar-Safe Cleaning Solution
Because cedar is delicate, you’ll want a gentle cleaner you can make with items from your kitchen: mild dish soap, warm water, and a splash of white vinegar to cut grease without harming the wood’s oils.
Mix one teaspoon of dish soap with a quart of warm water and add two tablespoons of white vinegar.
Dampen a soft cloth, wring it well, and wipe along the grain to lift dirt without saturating the wood.
Rinse the cloth in clean water and repeat to remove residue, then dry immediately with a dry cloth.
Test on an inconspicuous spot first to guarantee color stability.
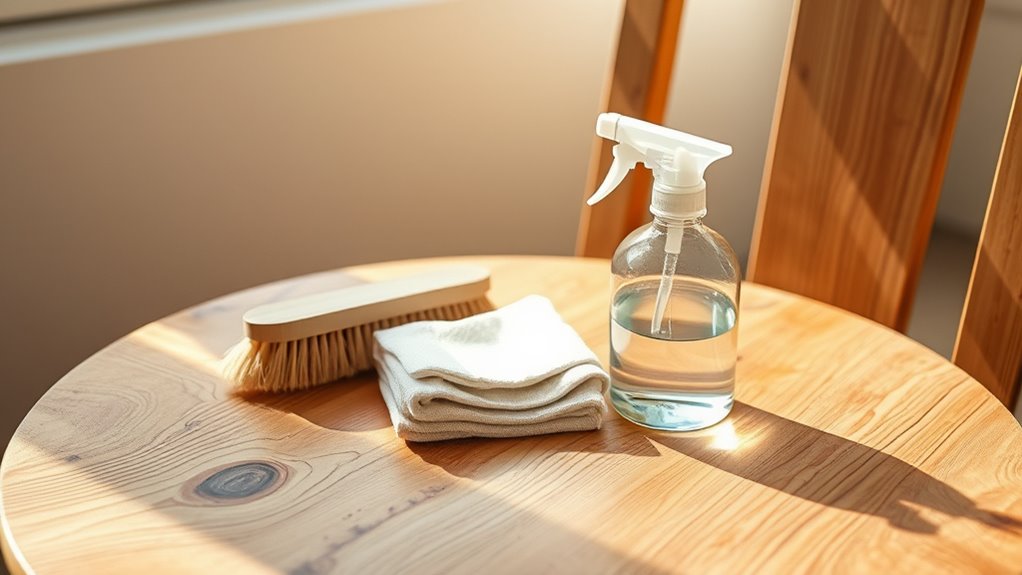
Tools and Supplies for Cleaning Cedar Furniture
Before you start cleaning, gather the essential tools—soft brushes, lint-free cloths, a gentle scrub sponge, and a shop vacuum for dust.
Pick safe cleaning solutions like mild soap or a vinegar-based mix that won’t harm cedar’s oils.
Finish with protective supplies—light sandpaper, food-safe oil or clear sealer, and clean rags—to restore and preserve the wood.
Essential Cleaning Tools
When you’re ready to clean cedar furniture, gather a few reliable tools so the job goes smoothly and you don’t damage the wood. You’ll want items that let you remove dust, gently scrub away grime, and dry thoroughly without scratching or saturating the wood.
Pick soft brushes and lint-free cloths, plus a small bucket for rinsing and controlled water use. Work gently, testing any tool in an inconspicuous spot first. Store tools clean and dry between uses to avoid transferring dirt or mildew.
- Soft-bristled brush or dusting brush
- Lint-free microfiber cloths
- Small plastic bucket and gentle scrub sponge
Safe Cleaning Solutions
Although cedar handles moisture and oils better than many woods, you’ll still want cleaning solutions that lift dirt without stripping natural oils or altering the wood’s color.
Use mild dish soap diluted in warm water for routine cleaning—about a teaspoon per quart—applied with a soft cloth or sponge.
For mildew, mix equal parts water and white vinegar; test an inconspicuous spot first.
Avoid bleach, harsh detergents, or ammonia, which can discolor cedar.
Rinse with clean water and blot dry.
For stubborn grime, a paste of baking soda and water gently scrubs without sanding.
Always spot-test before full application.
Protective Finishing Supplies
Now that you’ve cleaned and treated stains, protecting cedar with the right finishing supplies will keep it looking and performing its best. You’ll want breathable finishes that repel moisture, brushes and rags for smooth application, and tack cloths to remove dust between coats.
Choose products formulated for softwoods and outdoor use when applicable. Apply thin, even coats, sanding lightly between layers for adhesion. Store leftover finish safely and follow manufacturer safety recommendations.
Proper supplies make maintenance easier and extend cedar’s life.
- Penetrating oil or exterior-grade sealer
- Natural-bristle brush and lint-free rags
- Fine-grit sandpaper and tack cloth
Routine: Dusting and Light Cleaning Steps
If you want your cedar furniture to keep its aroma and finish, dust it regularly with a soft cloth or a microfiber duster and address spills quickly.
Wipe along the grain using gentle, even strokes to lift surface dust without abrading the wood.
For light cleaning, dampen a cloth slightly with water mixed with a few drops of mild dish soap; wring it well so it’s barely damp. Rinse the cloth and wipe again to remove soap residue, then dry immediately with a clean towel.
Check joints and crevices with a soft brush, and repeat this routine every one to two weeks.
Removing Dirt and Pollen From Outdoor Cedar
When cedar sits outside it quickly collects dirt, pollen, and airborne grime that can dull its color and mask its scent, so you’ll want to remove buildup before it becomes embedded. Start by brushing loose debris with a soft-bristle brush, working along the grain to avoid scratching.
Mix mild soap and warm water, wipe gently with a soft cloth, then rinse with a garden hose on low pressure. Dry thoroughly to prevent mildew. If pollen is heavy, repeat after a day.
Avoid harsh chemicals or power washers.
- Brush along the grain
- Use mild soap and water
- Rinse and dry completely
Remove Sap, Grease, and Sticky Residue From Cedar Furniture
When you find sap, grease, or sticky residues on cedar, start with gentle solvents like rubbing alcohol or mineral spirits to soften them without harming the wood.
Use a plastic scraper, soft cloth, or fine steel wool to lift softened residue, working with the grain to avoid scratches.
Afterward, clean the area with mild soap and water, let it dry, and apply a light coat of cedar oil or protective finish to restore moisture and color.
Gentle Solvent Options
Looking for a safe way to lift sap, grease, or sticky residue from cedar without harming the wood? You can use mild solvents that dissolve residues without stripping oils. Test any solvent on an inconspicuous spot first.
Apply sparingly with a soft cloth, blot—don’t rub—and wipe dry immediately. Rinse the area with a damp cloth afterward and let it air dry.
- Mineral spirits: use a small amount for stubborn grease, then wipe clean.
- Rubbing alcohol (70%): effective on sap; dab gently and dry quickly.
- Citrus-based cleaner: natural option for sticky residues; rinse thoroughly.
Mechanical Residue Removal
If solvent or chemical methods don’t suit the finish, you can remove sap, grease, and sticky residue mechanically using gentle tools and steady hands; this approach minimizes exposure to liquids and preserves cedar’s natural oils.
Work on a cool, shaded surface.
Scrape dried sap with a plastic scraper or an old credit card at a low angle to avoid gouging.
For greasy spots, blot with a dry microfiber cloth, then lift residue with a soft-bristled nylon brush.
Use fine steel wool (0000) very lightly along the grain for stubborn patches.
Finish by wiping with a clean, dry cloth to remove loosened particles.
Post-Cleaning Wood Care
After you’ve removed sap, grease, and sticky residue, let the cedar dry completely and then inspect it for any lingering tackiness or scratches so you can address them before finishing. If the surface still feels sticky, wipe with a cloth dampened in mineral spirits, then dry.
Lightly sand scuffed areas with fine-grit paper, always following the grain. Clean away dust, then decide whether to oil, seal, or leave natural based on use and exposure.
Maintain regularly by wiping spills and reapplying finish as needed.
- Restore sheen with light sanding
- Choose oil or sealant for protection
- Schedule periodic inspections and touch-ups
Treating Water Stains and Ring Marks on Cedar
When water spots or cup rings appear on your cedar furniture, you can often lift them without sanding by using gentle heat or moisture-balancing methods; start with the least invasive approach and escalate only if the stain persists.
First, try placing a clean cloth over the mark and applying a warm (not hot) iron briefly to draw moisture out. If that fails, rub mineral oil or a dedicated wood cleaner into the grain with a soft cloth, wiping excess.
For stubborn white rings, mix equal parts baking soda and water to form a paste, rub gently, then wipe and dry.
Removing Mildew and Mold From Cedar Furniture
Because cedar resists decay but can still grow mildew in damp conditions, you should tackle spots as soon as you see them to prevent spread.
Because cedar resists decay but can still grow mildew in damp spots, tackle any sightings promptly to stop spread
Mix mild detergent with water, scrub gently with a soft brush, then rinse and dry in sun.
For stubborn mildew, use a 1:4 bleach-to-water solution, test a hidden area first, and ventilate well.
Always wear gloves and a mask.
After cleaning, let the wood dry fully to discourage regrowth.
- Remove loose debris before treatment.
- Use gentle, non-abrasive tools.
- Repeat only if mildew returns, not immediately.
How to Treat Deep Stains and Discoloration
If deep stains or uneven color bother you, address them promptly so they don’t become permanent. Lightly sand stained areas with fine-grit paper, following the grain, until discoloration fades.
For persistent spots, apply a wood bleach like oxalic acid per label instructions, rinse thoroughly, and dry completely. Test any product on an inconspicuous area first.
After treatment, sand smooth and reapply a thin coat of cedar oil or a compatible finish to restore sheen and protect the wood. Repeat only if needed; overworking cedar risks thinning soft grain.
Wear gloves and ventilate the area while you work.
How to Neutralize Odors in Cedar Chests and Closets
To neutralize musty smells in cedar chests and closets, try placing an open box of baking soda to gently freshen the air.
For stronger or persistent odors, put a few small containers of activated charcoal where they won’t touch the wood to absorb scent molecules.
Replace the baking soda every month and refresh the charcoal according to the product instructions.
Freshening With Baking Soda
Looking to neutralize musty smells in a cedar chest or closet? Use baking soda to absorb odors without harming the wood. Sprinkle a thin layer in a shallow dish or breathable cloth pouch and place it inside for 24–72 hours. Swap it out weekly until the scent improves.
- Use plain, unscented baking soda for best results.
- Avoid pouring directly onto cedar surfaces to prevent residue.
- Combine with ventilation and gentle cleaning for faster freshening.
You’ll find baking soda inexpensive, safe, and easy to refresh—an effective first step before stronger treatments.
Absorbing Scents With Activated Charcoal
When musty odors won’t budge with baking soda, activated charcoal offers a stronger, chemical-free option that traps and neutralizes smells at the molecular level. Place small breathable bags or bowls of activated charcoal inside your cedar chest or closet, leaving them for several days to absorb odors. Replace or recharge the charcoal monthly, and keep it away from direct contact with delicate fabrics by using muslin or paper pouches. For persistent smells, combine charcoal placement with airing and light sanding of the cedar surface.
| Location | Container | Replace every |
|---|---|---|
| Chest interior | Small pouch | 4 weeks |
| Closet shelf | Bowl | 3–4 weeks |
| Drawers | Sachet | 4 weeks |
| Storage box | Bag | 4 weeks |
When to Sand Cedar and What Grit to Use
If your cedar furniture shows rough patches, deep stains, or the finish is peeling, it’s time to sand so the surface will accept new stain or sealer. You should sand when surface defects resist cleaning or when old coatings flake.
Start with coarser grit for damaged areas, then refine for a smooth, even base ready for finishing.
- Use 80–100 grit to remove peeling finish and level gouges.
- Follow with 120–150 grit to blend and even the surface.
- Finish with 180–220 grit for a receptive, not overly slick, surface before staining or sealing.
How to Raise and Smooth Cedar Grain Safely
Before refinishing, you’ll want to raise the cedar grain gently so finishes adhere better without roughening the surface.
Use light, dampening passes and soft sanding to smooth the raised fibers without removing too much wood.
Take your time and work with the grain to avoid scratches or uneven spots.
Raise Grain Gently
Because cedar’s soft grain can lift after cleaning or exposure to moisture, you’ll want to raise it gently and then smooth it back down to get an even, pleasant surface.
You’ll dampen the area lightly with a sponge—no soaking—then let the fibers swell for a few minutes. Pat dry and use a clean, lint-free cloth to blot excess moisture.
When the grain stands, move to careful smoothing (covered in the next section). For now, focus on controlled moisture and patience to avoid tearing fibers.
- Use minimal water
- Blot, don’t rub
- Wait between steps
Smooth Wood Safely
Now that the grain’s been raised gently and patted dry, you’ll smooth it back down to restore a flat, even surface without damaging the soft cedar.
Lightly sand with fine 220-grit sandpaper, moving with the grain and using minimal pressure. Keep strokes even; don’t over-sand or you’ll create low spots.
For edges and contours, use a sanding sponge or folded paper to follow curves.
Wipe away dust with a tack cloth, then feel the surface—if it’s consistently smooth, finish with a thin coat of cedar-safe oil or wax.
Let cure fully before using the furniture.
Choosing a Finish: Oil, Wax, or Sealer for Cedar
When you’re deciding how to finish cedar furniture, focus on the look and protection you want. You’ll pick oil for deep color and natural feel, wax for soft sheen and easy touch-ups, or a sealer for stronger moisture and UV resistance.
Consider indoor versus outdoor use, desired sheen, and how often you’ll refresh the finish. Each option changes appearance and maintenance needs, so weigh longevity against warmth.
- Oil: enhances grain, enriches color
- Wax: subtle shine, easy repairs
- Sealer: durable protection, less frequent reapplication
How to Apply Cedar Oil or Protective Finish
With your finish chosen, prepare a clean, well-ventilated workspace and gather the tools you’ll need: lint-free rags or a natural-bristle brush, fine-grit sandpaper (220–320), a tack cloth, and the cedar oil or sealer.
Lightly sand along the grain to smooth and open pores, then remove dust with the tack cloth.
Apply a thin, even coat with a rag or brush, working with the grain and avoiding puddles. Let soak for the time the product specifies, then wipe off excess.
For sealers, apply multiple thin coats, sanding lightly between coats for adhesion and a smooth final surface.
Restoring Weathered Outdoor Cedar
If your outdoor cedar has grayed, roughened, or started to splinter, you can bring back its color and integrity without replacing the pieces. Start by cleaning with a mild detergent and water, rinsing thoroughly, and letting the wood dry completely.
If your outdoor cedar has grayed or splintered, clean with mild detergent, rinse, and let it dry completely.
Lightly sand with 120–150 grit to remove surface fibers and restore grain. Remove dust, then assess for deeper damage—replace or repair loose slats and fill small cracks with exterior wood filler.
Finish by applying a cedar-appropriate oil or transparent finish to enhance tone and grain.
- Clean, rinse, dry
- Light sanding, dust removal
- Repair, fill, finish
Protect Cedar From Sun, Rain, and Humidity
Shield your cedar from prolonged sun by moving pieces into shade or using UV-resistant finishes.
Keep furniture under eaves or a waterproof cover to prevent soaking in heavy rain.
Control humidity around storage areas with ventilation or a dehumidifier to stop swelling and mold.
Limit Direct Sun Exposure
Why leave cedar in direct sun and harsh weather when a little protection preserves its color and strength? You should position furniture where it gets morning sun and afternoon shade, rotate pieces periodically, and use breathable covers during peak UV months.
Apply a UV-blocking finish every couple of years and touch up exposed edges. Monitor for fading or drying and sand lightly before refinishing to restore smoothness. Avoid heavy paints that trap moisture; opt for stains or clear sealers designed for cedar.
- Move items into shaded zones during midday heat
- Use breathable UV covers when idle
- Refinish proactively to prevent sun damage
Ensure Proper Rain Coverage
Because cedar soaks up moisture that can warp, stain, or rot over time, you should give it consistent rain protection and good airflow to keep the wood healthy.
Position furniture under an awning, porch, or cover when heavy rain’s forecast, and use breathable furniture covers that shed water but allow trapped moisture to escape.
Angle slatted surfaces to promote runoff and avoid sitting pieces directly on damp ground—use risers or pavers.
Check drainage around seating areas and clear gutters to prevent splashback.
After storms, wipe pooled water and open covers to air-dry.
Regular inspection prevents long-term moisture damage.
Control Ambient Humidity
Along with keeping cedar dry after storms, you’ll want to control the air around your furniture to prevent swelling, cracking, and finish failure. You can moderate humidity by placing pieces under covered porches, using breathable furniture covers, and keeping indoor cedar away from damp basements.
Use a hygrometer to check levels; cedar prefers 40–60% relative humidity. In fluctuations, move items or add a dehumidifier to stabilize conditions.
Regularly inspect joints and finishes for movement so you can reapply sealant before damage sets in. Small proactive steps extend cedar’s life and keep its appearance consistent.
- Monitor humidity with a hygrometer
- Use breathable covers or shelter
- Stabilize indoor air with a dehumidifier
Seasonal Maintenance Schedule for Cedar Furniture
As the seasons change, set a simple maintenance rhythm so your cedar furniture stays attractive and durable year-round. Inspect surfaces each season, dust gently, and spot-clean spills promptly. Reapply protective oil or finish annually if pieces are outdoors. Sand and refinish areas showing wear every 2–3 years. Store cushions and small items during harsh weather, and rotate movable pieces to even out sun exposure.
| Season | Tasks | Frequency |
|---|---|---|
| Spring | Deep clean, check for mildew | Once |
| Summer | Dust, rotate, protect from sun | Monthly |
| Fall | Oil, cover, store cushions | Once |
| Winter | Minimal use, cover | As needed |
Caring for Cedar-Lined Chests and Closets
If you want your cedar-lined chests and closets to keep clothes and linens fresh, inspect them regularly for dust, pests, and spills, and air them out to prevent mustiness.
Wipe interiors with a soft cloth slightly dampened with mild soap and water, then dry thoroughly.
Sand rough spots lightly and reapply a thin coat of clear cedar oil or finish if scent fades.
Use breathable storage bags and rotate linens to avoid permanent compression.
- Vacuum with a soft brush attachment to remove dust.
- Place sachets or cedar blocks to maintain aroma.
- Check for insect signs monthly.
Caring for Cedar Planters and Outdoor Furniture
Keeping cedar in good shape indoors helps you recognize the same issues outdoors, where planters and furniture face sun, rain, and soil contact.
You should place planters on feet or drains to avoid constant wetting; rotate pots and move furniture during heavy storms.
Clean debris and soil from crevices regularly with a soft brush, then rinse gently.
Every year, inspect for mildew, loose joints, or deep stains; treat mildew with a mild vinegar solution and rinse.
Reapply a breathable, exterior-grade oil or sealant as recommended to preserve color and repel moisture, avoiding impermeable finishes that trap moisture.
Quick Fixes for Scratches and Dings in Cedar
Small scratches on cedar are easy to hide with a light sanding and a matching stain or wax, and you’ll often get near-invisible results.
For deeper dings or gouges, you’ll want to clean the area, fill with a cedar-colored wood filler or epoxy, then sand and finish to match the surrounding grain.
I’ll walk you through simple steps and tips so you can choose the right repair for the damage.
Minor Surface Repairs
When your cedar gets nicked or scratched, you can often fix it quickly with a few simple tools and materials you likely already have on hand. You’ll first clean the area, gently sand with fine-grit paper along the grain, and wipe away dust.
For shallow scratches, rub a matching-color wood marker or crayon into the groove, then buff lightly.
For tiny dings, apply a dab of clear or matching wood filler, smooth with a plastic card, and sand when dry.
Finish with a light coat of cedar oil or wax to blend and protect.
- Clean, sand, wipe
- Color-in scratches
- Fill tiny dings
Deeper Gouge Remedies
If sanding and a touch-up marker didn’t hide the damage, you’ll need stronger fixes for deeper gouges that remove more wood or expose the substrate. First, clean debris and dry the area.
For shallow but deep-looking gouges, use wood filler tinted to match cedar; press it in, level with a putty knife, sand smooth when dry, then finish with oil or varnish.
For larger voids, carve a tight-fitting cedar patch or use a pre-matched wood plug glued into place, trim flush, sand, and finish.
Always test stains on scrap, work in thin layers, and let finishes cure fully before use.
Preventing Insect Infestations in Cedar Furniture
Because cedar naturally repels many pests, you still need to take simple steps to keep insects from nesting in your furniture — regular cleaning, proper storage, and occasional inspections will stop small problems from becoming infestations.
You should vacuum crevices, wipe surfaces with a mild detergent, and dry thoroughly to remove attractants. Inspect joints and undersides monthly, looking for frass or tiny holes. If you spot activity, sand lightly and apply a cedar-safe insecticide or borate treatment, then seal exposed wood.
Keep humidity low and airflow good to deter larvae and molds.
- Vacuum seams and cushions regularly
- Inspect monthly for frass or holes
- Treat promptly with borate or cedar-safe products
Safe Storage Tips for Unused Cedar Items
Storing cedar items properly will keep their aroma, deter pests, and prevent warping. Clean and dry each piece before storage; moisture invites mildew and warping.
Wrap smaller items in breathable cotton or muslin to allow airflow while blocking dust. For large pieces, use breathable covers and store off the floor on slats or pallets to maintain circulation.
Keep cedar away from direct sunlight and heat sources to avoid cracking. Add a few sachets of natural cedar chips or blocks to sustain scent, replacing them yearly.
Check stored items every few months for pests, moisture, or any signs of damage.
When to Call a Pro for Cedar Restoration
When damage goes beyond routine cleaning or simple repairs, call a pro to assess and restore your cedar furniture. You’ll want expert help if structural joints are loose, deep rot appears, or finishes have failed extensively. A pro can evaluate hidden issues, recommend appropriate consolidation or replacement, and use correct stains or sealers to preserve cedar’s natural oils.
- Major rot, soft spots, or insect tunnels visible
- Warping, splitting, or compromised joints affecting stability
- Large-scale finish failure, deep stains, or chemical damage
Getting professional assessment prevents further harm and preserves longevity without unnecessary DIY risk.
Cost and Time Estimates for Common Cedar Care Tasks
If you’re planning cedar care, budgeting time and money up front will keep the project on track and avoid surprises. Light cleaning with mild soap and a soft brush usually takes 30–60 minutes and costs under $20 for supplies.
Deep cleaning or mildew treatment can take 1–3 hours and $20–50 for cleaners and scrub tools.
Sanding and refinishing a small piece typically requires 2–6 hours over a day and $30–100 for sandpaper, finishes, and brushes.
Sealing or oiling takes 1–2 hours plus drying time; materials run $15–60 depending on quality and coverage.
Top Mistakes That Damage Cedar : And How to Avoid Them
Because cedar’s natural oils and grain are both its strength and its vulnerability, a few common mistakes—like using harsh cleaners, over-sanding, or leaving moisture trapped against the wood—can cause lasting damage.
Because cedar’s natural oils and grain give it strength—and vulnerability—avoid harsh cleaners, over-sanding, and trapped moisture.
You should avoid bleach, ammonia, and abrasive scrubbers that strip oils and dull the finish. Don’t sand aggressively; you’ll remove the protective cedar layer and alter the patina.
Keep damp materials and planters from sitting on surfaces to prevent stains and rot. Address spills quickly and test any product on an inconspicuous spot first.
- Using harsh chemical cleaners
- Over-sanding or aggressive scraping
- Letting moisture sit for long periods
Weekend Checklist: Clean and Protect Your Cedar
Now that you know what to avoid, set aside a couple of hours this weekend to give your cedar furniture a targeted clean-and-protect routine.
Start by brushing loose dirt and debris with a soft-bristle brush, then wipe with a mild soap solution and a damp cloth. Rinse lightly and let the wood dry fully in shade.
Sand any rough spots gently with fine-grit sandpaper, following the grain.
Apply a cedar-safe oil or UV-protective sealer evenly, using a clean cloth or brush. Let it cure per product instructions, then reassemble cushions and enjoy refreshed, protected cedar for seasons to come.
Frequently Asked Questions
Can Cedar Furniture Be Safely Pressure-Washed?
Yes — you can pressure-wash cedar furniture cautiously, but don’t blast it. Use a low-pressure setting, wide fan nozzle, keep the wand at least 12–18 inches away, test a small area, then sand and reseal if needed.
Will Cedar Darken Permanently After Cleaning?
No, cedar won’t necessarily darken permanently after cleaning; you’ll often see temporary darkening from moisture or cleaners, but it usually lightens as it dries and weathers—unless you strip or stain it, which causes lasting change.
Can I Use Vinegar on Antique Cedar Pieces?
You shouldn’t — vinegar’s acidity can dull or etch antique cedar finishes and strip oils. If you must, dilute heavily, test an inconspicuous spot first, and prefer a gentle, pH-neutral cleaner or professional conservation advice instead.
Does Cedar Naturally Repel Moths and Pests?
Yes — cedar naturally repels moths and many pests because it releases aromatic oils (cedarwood oil) that insects dislike. You’ll still need regular maintenance and proper storage; heavy infestation may require professional treatment.
How Long After Finishing Can I Store Items in a Cedar Chest?
You can store items after about 24–72 hours once the finish’s strong solvent smell’s gone; wait a week for full cure if possible. Be sure the finish is dry and non-tacky to avoid trapping odors or sticking.
Conclusion
Cedar’s natural oils protect and beautify it, and with simple care you’ll keep that warm scent and rich color for years. Inspect first, clean gently with mild soap and water, and only sand or refinish when necessary. Treat indoor and outdoor pieces a bit differently, and call a pro for major restoration. Avoid harsh chemicals and pressure washers. Follow the weekend checklist regularly, and your cedar furniture will stay durable, attractive, and low-maintenance.