How to Dispose of Pressure Treated Lumber Safely
Check whether the wood is pressure-treated (greenish or stamped) and wear gloves, eye protection, and an N95/P100 mask; never burn or bury it. Remove nails, bundle and label pieces, keep them off soil on pallets, and contact your municipal hazardous-waste program, transfer station, or certified recycler for drop-off or pickup; if none exist, hire a licensed hauler and document receipts. Follow local rules to avoid fines and contamination — keep going to learn which option fits your situation.
Quick Plan: Dispose of Pressure-Treated Lumber Safely (Start Here)
Before you start hauling boards away, make a quick plan so you handle pressure-treated lumber safely and legally. Identify quantity, condition, and local regs before touching anything.
Before hauling boards, make a quick plan: assess quantity, condition, and local rules before you touch treated lumber.
Wear gloves, a dust mask, and eye protection; avoid cutting or burning treated wood.
Bag small debris and clean tools on nonporous surfaces.
Contact your municipal waste authority or landfill to confirm drop-off rules and fees—some areas require special handling.
Consider licensed haulers or recycling centers that accept treated lumber.
Keep neighbors informed if pickup or temporary storage affects them.
Stick to the plan to minimize contamination and legal risks.
Is This Wood Pressure-Treated or Just Weathered?
Before you toss a board, check its color and grain—greenish or brownish tints and darker streaks near the surface can signal treatment.
Look at fastener stains and saw marks for internal color changes, and sniff for chemical or oily residues that fresh weathering won’t have.
Those clues help you tell pressure-treated lumber from simply worn wood so you can handle disposal correctly.
Color And Grain Clues
When you’re trying to tell whether a board’s been pressure-treated or simply weathered, look closely at color and grain patterns: treated lumber often has a faint greenish or brown tint and uniform penetration around knots.
While sun-bleached, untreated wood fades to a silvery gray with more uneven, surface-only wear. You’ll also notice treated wood’s grain often appears darker where preservative pooled, and inner rings may retain color when you split a scrap.
Untreated wood usually shows more contrast between earlywood and latewood after weathering. Use a clean cut or fresh edge for the clearest comparison before disposal decisions.
Fastener And Cut Marks
Color and grain give you clues, but fastener and cut marks often tell the definitive story: pressure-treated lumber frequently shows chemical staining around nail or screw holes and darker rings where a saw blade exposed preservative-rich wood.
Whereas weathered, untreated boards will have cleaner, pale holes and saw cuts that match the sun-bleached surface. Check around rusted fasteners for greenish or brown halos; that indicates preservative migration.
Fresh cuts on treated pieces often reveal a noticeably richer color than the weathered face. Use a magnifying glass to inspect fibers; treated wood fibers may look slightly swollen or discolored near cuts.
Smell And Surface Residue
Wondering whether that musty or chemical odor means the wood’s been treated? You can often tell by smell and surface residue.
Pressure-treated lumber may smell slightly chemical, oily, or metallic, while weathered wood smells musty or like damp leaves. Run a rag over the surface: treated wood can leave a faint oily or greenish residue from preservatives; weathered wood usually sheds dry dust.
Look for greenish or dark staining, surface crystals, or persistent odor after drying—these suggest treatment. When in doubt, treat the piece as pressure-treated: avoid burning, use gloves, and dispose through proper channels.
How to Identify Treated Lumber by Color, Tags, and Stamps
If you’re trying to tell whether lumber is pressure-treated, look for telltale greenish or brownish hues and, more reliably, the manufacturer’s tags and end-stamps that indicate preservative type and treatment level.
Check end grains and cut ends for dye concentration. Read metal tags, staples, or inked stamps for treatment codes (like “UC3” or “CCA” historically) and retention values; they tell you designed use and protection level.
Don’t rely solely on color—weathering can fade dyes. If tags are missing, note mill stamps or tool marks and combine visual cues with where the wood was used (decks, posts) to guide disposal decisions.
Spotting Old CCA (Arsenic) vs. Newer Copper-Based Treatments
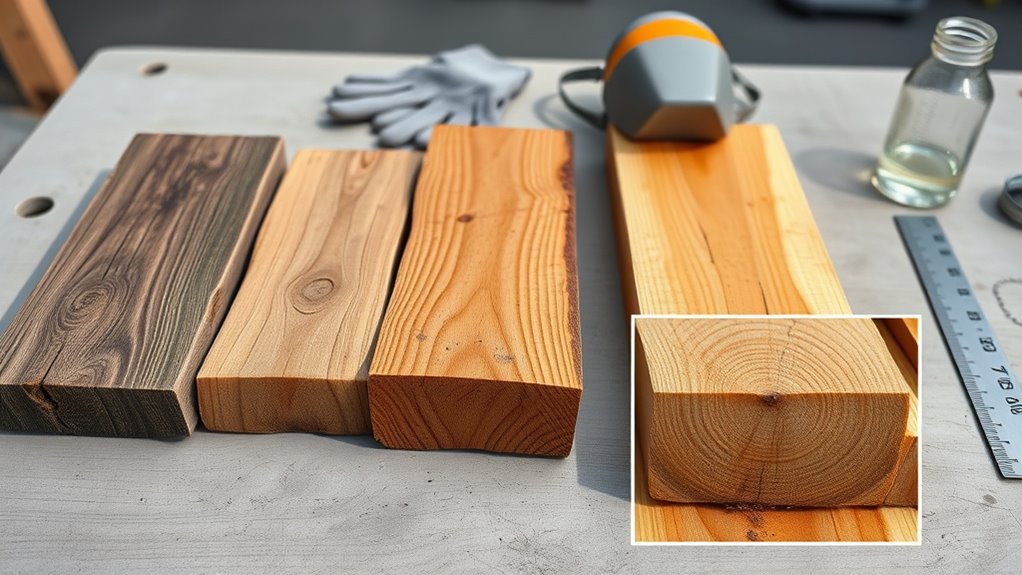
You can often move from visual cues and tags to looking for the specific preservative used, because older CCA-treated lumber and modern copper-based products show different signs and labels.
You’ll find CCA boards usually stamped “CCA” or dated before 2004; they often have a greenish tint from chromated copper arsenate.
Newer treatments are labeled with terms like ACQ, CA, or MCA and may appear browner or less uniformly green.
If tags are missing, check purchase records or ask suppliers.
When in doubt, treat unknown lumber cautiously and follow local disposal rules for potentially hazardous treated wood.
Why Improper Disposal Spreads Toxic Chemicals
Because treated lumber contains concentrated preservatives like arsenic or copper compounds, tossing, burning, or chipping it can release those toxins into soil, dust, and ash where they move into groundwater, air, and food chains. You’ll contaminate yards, streams, and nearby wells if you dump scraps or let runoff carry particles.
Treated lumber’s preservatives can leach or become airborne when dumped, burned, or chipped, contaminating soil, water, and food chains.
Burning sends toxic fumes and ash into the air that settle elsewhere. Chipping spreads contaminated wood dust that adheres to clothing and produce.
- Dumping: leaches toxins into soil and water.
- Burning: creates toxic ash and fumes.
- Chipping: spreads fine contaminated dust.
- Mixing: increases exposure pathways.
Which Chemicals Matter: Arsenic, Copper, and Preservatives
When you handle pressure-treated lumber, pay attention to the preservative chemicals—most commonly arsenic in older wood and copper-based compounds in newer products—since they determine how hazardous scraps, dust, and ash can be. You should identify the treatment type (CCA, ACQ, or others) to gauge persistence, leaching potential, and disposal restrictions. Labels or mill stamps help. Know that arsenic is a persistent toxin, copper accumulates in soil, and newer organic biocides vary. Choose disposal routes that match the chemical profile and local regulations to prevent contamination.
| Chemical | Persistence | Concern |
|---|---|---|
| Arsenic | High | Toxic |
| Copper | Medium | Soil buildup |
| Biocides | Variable | Variable |
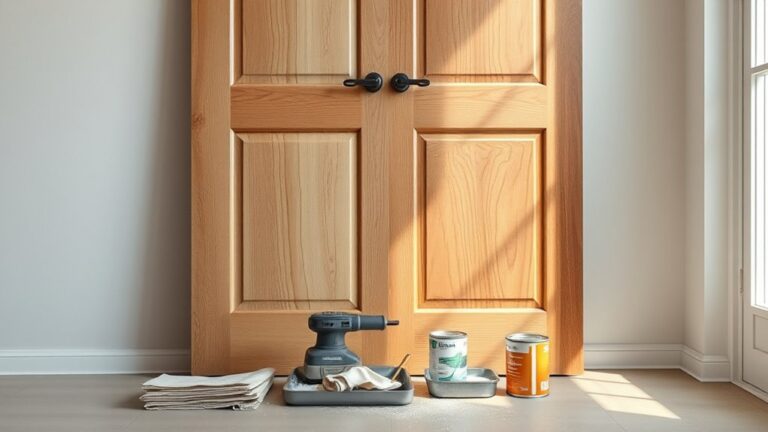
Immediate Safety Steps for Handling Pressure-Treated Lumber

If you’re about to cut, sand, or move pressure-treated lumber, don’t plunge in without basic protections: wear gloves, long sleeves, eye protection, and an N95 or P100 respirator to keep skin contact and inhalation of dust or fumes to a minimum.
Next, work outdoors or in a well-ventilated area, and keep bystanders, especially children and pets, away. Avoid burning or using indoor power tools that spread dust. Seal off and clean your workspace after handling.
Work outside or in good ventilation, keep kids and pets away, avoid burning, and thoroughly clean the work area afterward
- Wet the wood slightly to reduce dust.
- Use hand tools when practical.
- Bag and label debris.
- Wash exposed skin and clothing promptly.
PPE for Working With Treated Wood (What to Wear and Why)
You’ve already reduced risks by wetting the wood, working outside, and bagging debris—now focus on the personal protective equipment that actually stops exposure. Wear a NIOSH-approved N95 or P100 respirator to block fine dust and preservative particles; guarantee a snug fit.
Use chemical-resistant gloves (nitrile or PVC) for handling and disposal; change them if torn or contaminated.
Put on long sleeves and pants made of tightly woven fabric to limit skin contact, and wear safety glasses with side shields or a face shield to protect eyes from splinters.
Finish with sturdy boots you can clean or discard.
Cutting Tips to Minimize Dust and Splinters
Because cutting pressure-treated lumber creates hazardous dust and sharp splinters, take steps that reduce airborne particles and limit breakage before you cut. Work outdoors or in a well-ventilated area, secure the board firmly, and mark straight cuts to avoid rework. Use sharp carbide-tipped blades and slow, steady feeds to make cleaner cuts that produce fewer splinters.
Cut pressure-treated lumber outdoors with sharp carbide blades, firm support, and slow, steady cuts to minimize dust and splinters.
- Score the cut line with a utility knife first to reduce tear-out.
- Clamp scrap boards as backing to support fibers at the exit point.
- Choose fine-tooth blades designed for treated wood.
- Make shallow pass cuts for thick or brittle pieces.
Controlling Dust and Debris During Demolition
When demolishing pressure-treated lumber, control dust and debris by working methodically and using appropriate containment and PPE so particles don’t spread or get inhaled.
Wet the wood lightly to suppress dust, but avoid soaking to prevent runoff.
Use HEPA-filter respirators, eye protection, gloves, and disposable coveralls.
Break boards down slowly with hand tools or muffled power tools equipped with dust collection.
Bag fragments and sawdust in heavy-duty plastic; seal and label bags for disposal.
Sweep with a HEPA vacuum or damp cloths instead of dry sweeping.
Decontaminate tools and PPE before leaving the site to prevent offsite transfer.
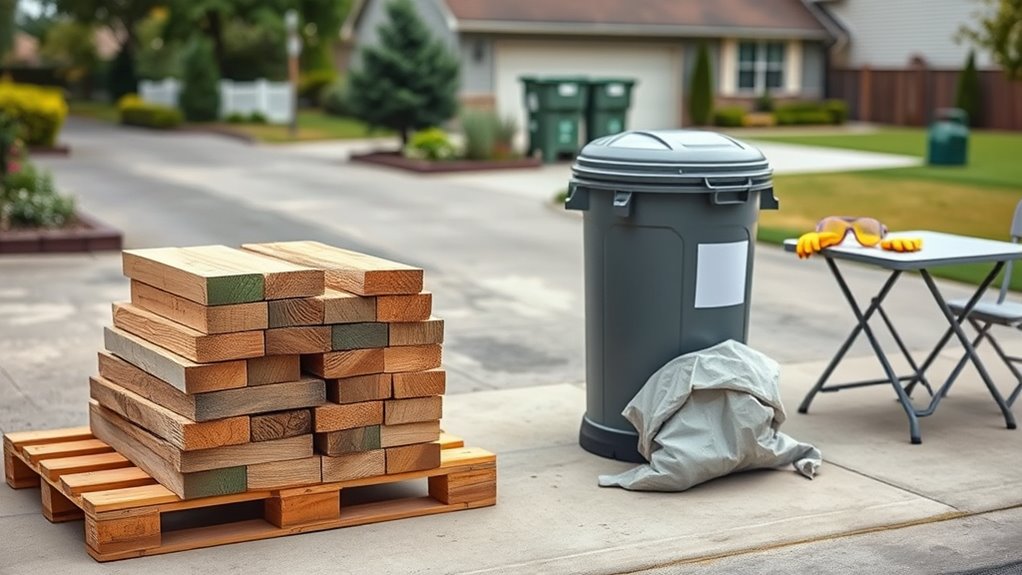
On-Site Containment and Temporary Storage Best Practices
You should keep pressure-treated lumber in secure, covered storage to prevent weather exposure and leaching.
Set up spill containment measures like berms or lined pallets to catch any runoff or treatment residue.
Clearly label handling zones so workers know where to stage, process, and remove treated wood.
Secure Covered Storage
Although temporary, on-site storage needs the same attention as permanent containment. Secure covered storage keeps pressure-treated lumber dry, labeled, and separated from unprotected materials to minimize chemical runoff, accidental contact, and degradation.
You should choose a level, ventilated cover that prevents water pooling and direct sun exposure. Elevate bundles on pallets or supports to avoid ground contact and moisture wicking.
Keep clear signage and tamper-resistant barriers to limit access. Regularly inspect for damage, water intrusion, or staining, and rotate stock so older pieces are disposed of first to reduce long-term onsite accumulation.
- Sheltered, ventilated cover
- Elevate on pallets
- Visible labeling
- Routine inspections
Spill Containment Measures
Spill containment is critical for protecting soil, groundwater, and workers whenever you handle pressure-treated lumber onsite. Set up immediate barriers and absorbent materials to control any leaks, and keep cleanup supplies and personal protective equipment within easy reach.
Establish temporary containment pads or berms beneath stored lumber. Use heavy-duty plastic sheeting to catch drips, and place labeled, sealable containers for contaminated absorbents.
Inspect stored piles often for runoff after rain and reposition barriers as needed. Train crew to stop leaks, isolate affected areas, and follow a documented cleanup procedure so you minimize spread and dispose of residues according to regulations.
Labeled Handling Zones
When you set up labeled handling zones, everyone onsite knows where pressure-treated lumber can be handled, stored, and cleaned, which reduces cross-contamination and speeds safe work.
You’ll mark clear areas for incoming, cutting, storage, and wash-down, using signs, barriers, and color coding. Keep zones apart from general traffic and sensitive materials, and post PPE requirements at each zone.
Train crew briefly at shift start and enforce rules. Regularly inspect labels and replace worn signs.
Use containment mats and covered bins in each zone to collect debris and runoff, then manage waste per local regulations.
- Define zones
- Post PPE
- Inspect labels
- Contain debris
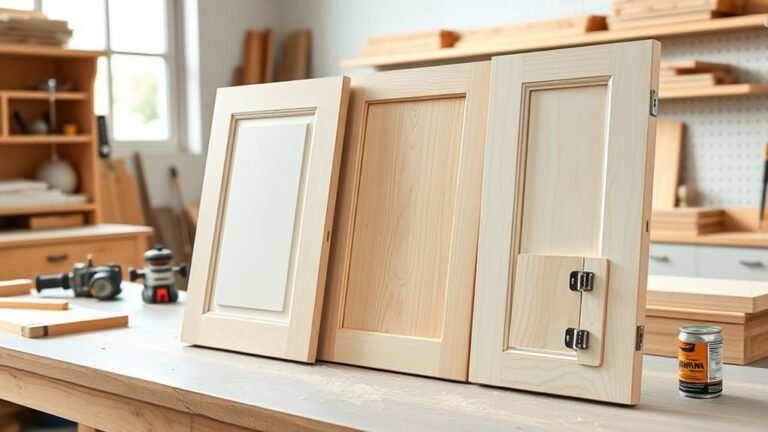
Can You Safely Reuse Pressure-Treated Lumber? How to Test
Before you decide to reuse pressure-treated lumber, inspect and test it to confirm it’s structurally sound and free of hazardous contamination. Check for rot, deep splits, heavy corrosion, or chemical staining. Use a probe and moisture meter; if wood softens or moisture exceeds safe levels, don’t reuse it. Wear gloves and a mask while testing. For small projects, cut away suspect ends; for structural uses, prefer new material.
| Quick Check | Action |
|---|---|
| Surface rot | Discard |
| Deep cracks | Discard |
| Slight weathering | Sand/test |
| Chemical stains | Dispose safely |
Cleaning and Decontaminating Tools After Cutting Treated Wood
After you’ve determined that pressure-treated lumber is safe to reuse, clean any tools that contacted it to prevent chemical carryover and corrosion. You’ll protect future projects and extend tool life by removing sawdust, residues, and chemical films promptly.
- Brush off dry debris outdoors, then vacuum if possible.
- Wipe blades and metal parts with a rag dampened with isopropyl alcohol or soapy water; avoid soaking wooden handles.
- Neutralize residues by rinsing metal pieces with clean water, then dry thoroughly to stop rust.
- Lubricate moving parts and store tools in a dry, ventilated area.
How to Cut and Size Lumber to Reduce Waste and Exposure
To reduce both waste and your exposure to chemical residues, plan cuts so you get the most usable board from each piece and limit the number of times you score or crosscut treated lumber. Measure twice and mark once, layout all cuts on the board before sawing, and group identical lengths to minimize blade passes.
Use a sharp blade and slow, steady feed to reduce dust; cut outdoors or in a well-ventilated area. Wear PPE—respirator, gloves, eye protection—and clean up dust immediately with a HEPA vacuum or wet wiping.
Keep offcuts contained for proper disposal; don’t burn treated wood.
Recycling Options for Pressure-Treated Lumber Near You
When you’re ready to get rid of pressure-treated lumber, check your local hazardous waste center first since they often accept treated wood. You can also contact commercial wood recyclers that handle treated materials safely.
See if nearby curbside pick-up programs will take it on scheduled collection days. Before you move anything, call ahead to confirm requirements and any fees.
Local Hazardous Waste Centers
If you’ve got pressure-treated lumber you can’t reuse, your best safe option is to take it to a local household hazardous waste (HHW) or municipal recycling center that accepts treated wood. Check your city or county website for drop-off hours, restrictions, and any preparation steps like cutting to manageable lengths or bundling.
Staff can confirm whether they accept creosote or arsenic-treated pieces. Don’t mix treated wood with regular recyclables or yard waste. Expect a small fee at some sites and bring ID if required.
- Find your nearest HHW/municipal center
- Confirm accepted treatments
- Follow prep rules
- Ask about fees
Commercial Wood Recyclers
Looking for alternatives to municipal drop-offs? Commercial wood recyclers accept pressure-treated lumber from contractors and homeowners, often charging a fee or requiring pre-sorting. You’ll contact local recyclers to confirm they handle treated wood and ask about acceptance criteria, contaminants, and documentation.
They may chip, kiln-dry, or convert lumber to fuel for industrial boilers under regulated conditions; some refuse chemically treated pieces. Prepare lumber by removing nails, hardware, and nonwood materials to avoid processing damage.
Keep records of drop-off and fees for disposal tracking. Comparing several recyclers helps you find compliant, cost-effective options near you.
Curbside Pick-Up Programs
After checking commercial recyclers, you might find curbside pick-up programs more convenient for handling pressure-treated lumber. You’ll need to confirm local rules—some programs accept treated wood if bundled correctly, others don’t.
Schedule a special bulky-item pickup or join a hazardous-waste collection day. Keep pieces free of nails and limit sizes to the posted maximums. Label bundles clearly if required and follow weight limits.
- Call your municipal waste hotline
- Check the city website for guidelines
- Prep and bundle lumber per instructions
- Attend scheduled collection events
Following rules prevents fines and protects sanitation workers.
Municipal Hazardous-Waste Programs: What They Accept
Although municipal hazardous-waste programs vary by locality, they generally accept pressure-treated lumber that contains chemical preservatives when it’s contaminated or in quantities that can’t go in regular trash, and they’ll tell you what forms and drop-off procedures they require.
You should check your city or county website or call the waste office to confirm accepted materials—some programs take only lumber with arsenic, chromium, or copper preservatives, while others accept all treated wood.
They’ll note size limits, whether mixed debris is allowed, and any fees. Follow their acceptance list to avoid refusals and potential fines.
How to Prepare Wood for Municipal Drop-Off: Bundling & Labeling
When you plan to drop off pressure-treated lumber, bundle pieces by type and size and clearly label them so staff can quickly verify they’re acceptable. Group similar lengths and cross-sections, remove nails or hardware, and keep bundles manageable for lifting. Use heavy twine or banding and cover bundles with plastic if wet.
- Label contents (e.g., “PT pine 8ft”) and include approximate weight.
- Separate painted or heavily weathered pieces and note condition.
- Keep contaminated items (soil, concrete) out of bundles.
- Photograph bundles before transport and leave labels visible for inspection.
Finding Specialized Wood Recyclers and Processors
If your municipal facility can’t accept pressure-treated lumber or you have large quantities, look for specialized wood recyclers and processors who handle PT materials. Search online directories, state recycling agencies, or trade associations for certified firms.
Ask about acceptance policies, sorting requirements, processing methods (chipping, thermal treatment), and end-use markets to guarantee environmentally responsible handling.
Confirm licensing, insurance, and any required documentation or permits. Get written cost estimates and pickup options.
If a processor won’t accept your wood, ask for referrals. Keep records of communications and receipts to document proper disposal and compliance with local regulations.
Using Private Haulers or Transfer Stations for Treated Wood
Check your local transfer station rules before hauling treated wood—many facilities have size limits, drop-off hours, and fee schedules you’ll need to follow.
If you hire a private hauler, confirm they accept pressure-treated lumber and meet any documentation or disposal requirements.
Prepare the wood by removing non-wood materials, bundling or cutting it to approved sizes, and clearly labeling it as treated to avoid refusal or extra charges.
Local Transfer Station Rules
Because local rules vary widely, you’ll need to confirm whether your private hauler or nearby transfer station accepts pressure-treated lumber before you drop it off. Call ahead or check the facility website for accepted materials, size limits, and any required separation (painted, nailed, or contaminated pieces).
Ask about fees, appointment requirements, and documentation. Bring protective gloves and secure loads to prevent debris. If a facility refuses the wood, they’ll usually suggest alternatives like specialized disposal or recycling centers.
- Call or check online first
- Note size and prep rules
- Confirm fees and appointments
- Bring PPE and secure loads
Private Hauler Requirements
When you hire a private hauler to take pressure-treated lumber, confirm their specific acceptance policies, preparation requirements, and any liability or paperwork they need before loading.
Ask whether they accept treated wood, what documentation they require, and if special permits apply in your area.
Clarify cost structure, weight or volume limits, and hazardous-waste surcharges.
Verify insurance coverage and who’s liable for spills or damage during transport.
Get pickup scheduling, cancellation, and container requirements in writing.
If you’ll use a transfer station instead, confirm drop-off hours, fees, and proof-of-acceptance to avoid denied loads or unexpected charges.
Proper Preparation Steps
Before you hand treated wood to a private hauler or bring it to a transfer station, prepare the load so it’s accepted quickly and safely. You’ll sort, secure, and document the material to meet facility rules and protect handlers.
Follow these concise steps before transport:
- Separate treated lumber from other waste; label or tag piles clearly.
- Cut oversized pieces to facility size limits; bundle or palletize for easy handling.
- Remove nails, hardware, and debris to prevent injury and equipment damage.
- Bring proof of origin or any required manifests and follow any local disposal instructions.
Disposal When Recycling or Hazardous Programs Aren’t Available
If you can’t access recycling or hazardous-waste programs, you’ll need to handle pressure-treated lumber carefully to minimize environmental and health risks. Keep pieces intact, avoid burning, and store off soil in a covered area. Contact local transfer stations for guidance; some accept treated wood for landfill with restrictions.
| Action | Why | Tip |
|---|---|---|
| Keep intact | Reduces dust and fragments | Stack on pallets |
| Don’t burn | Releases toxins | Use licensed disposal sites |
| Label and cover | Protects workers/environment | Use heavy plastic, tape |
Wear gloves, a dust mask, and wash hands after handling. Document disposal steps if required.
On-Site Burial of Treated Wood: Risks, Limits, and Legal Issues
Although burying pressure-treated wood on your property might seem convenient, you should treat it as a last resort because it can leach chemicals into soil and groundwater and may violate local rules. If you consider burial, check ordinances, setbacks, and protected areas first.
Limit risks by keeping treated pieces small, away from wells, and separated from compost or food gardens. Record burial location and depth for future proofing.
- Confirm local laws and permitting requirements.
- Avoid burial near water sources or vegetable gardens.
- Use liners or barriers to reduce leaching when allowed.
- Document location and dates for disclosure.
Why You Must Never Burn Pressure-Treated Lumber
You shouldn’t burn pressure-treated lumber because it releases toxic chemicals like arsenic and chromium into the smoke.
Those fumes also carry harmful airborne particles that can irritate your lungs and settle on nearby surfaces.
Burning it can contaminate soil and water, spreading pollutants beyond the burn site.
Toxic Chemical Release
Because pressure-treated lumber is infused with chemical preservatives like chromated copper arsenate (CCA), creosote, or alkaline copper quaternary (ACQ), burning it releases highly toxic fumes and ash that can seriously harm your health and the environment.
You shouldn’t burn treated wood because those chemicals vaporize, concentrate in ash, and contaminate soil, water, and food. If you inhale smoke or touch residue, you risk acute and long-term poisoning.
Dispose of treated lumber through approved municipal programs or licensed hazardous-waste handlers instead.
Consider these key risks:
- Airborne chemical vapors
- Toxic ash contamination
- Soil and groundwater leaching
- Long-term environmental persistence
Harmful Airborne Particles
When you burn pressure-treated lumber, it doesn’t just smoke — it releases a dense mix of microscopic particles loaded with toxic metals and chemical residues that you can inhale or carry into your home on clothing and tools.
You’ll breathe fine ash and soot that penetrate deep into lungs, increasing respiratory irritation, asthma attacks, and long-term disease risk.
Particles settle on surfaces, contaminating indoor air and belongings.
Masks help, but they don’t eliminate exposure to ultrafine particles.
Don’t assume outdoor burning is safe; wind spreads contamination.
Use approved disposal methods instead of burning to protect your health and others.
Environmental Contamination
How can burning pressure-treated lumber not harm the environment? You shouldn’t. Burning releases toxic metals and chemicals that contaminate soil, water, and air. If you burn treated wood, runoff will carry residues into groundwater and nearby streams, harming plants and animals. You’ll also deposit persistent toxins in ash that spreads with wind or rain.
- Heavy metals (like arsenic) leach into soil.
- Chemical additives enter waterways and bioaccumulate.
- Ash spreads toxic particles to nearby land.
- Wildlife and crops absorb persistent contaminants.
Dispose through licensed facilities or hazardous-waste programs to prevent lasting environmental damage.
Disposing of Dust, Sawings, and Residue Safely
If you’re cutting or sanding pressure-treated lumber, treat the resulting dust, sawings, and offcuts as potentially hazardous and handle them deliberately to prevent exposure and environmental contamination.
Wear a NIOSH-approved respirator, gloves, and eye protection while collecting debris; don’t use compressed air that spreads particles.
Wear a NIOSH‑approved respirator, gloves, and eye protection when collecting treated-wood debris; avoid compressed air that spreads particles.
Sweep or vacuum with a HEPA filter, and place residues in heavy-duty, sealed bags or covered containers.
Label containers and keep them separate from household trash and recyclables.
Don’t burn treated wood or dispose of residue in compost.
Contact your local waste authority for approved disposal sites or hazardous-waste events before discarding.
Documenting Disposal for HOAs, Landlords, and City Rules
You’ll want to keep clear records of how you handled and discarded pressure-treated lumber to meet HOA, landlord, or city requirements.
Check whether permits or notifications are required before removal and note any filing dates or reference numbers.
Also get written documentation from your waste hauler showing pickup, transport, and final disposal.
Record Keeping Requirements
Because local ordinances and property agreements often require proof of proper handling, keep clear, dated records whenever you dispose of pressure-treated lumber for an HOA, rental property, or municipal site. You’ll document what was removed, how it was transported, and where it ended up. Keep digital backups and retain originals per local retention rules. Use consistent filenames and logs so you can produce records quickly for inspections or disputes. Include chain-of-custody details and receipts from disposal facilities.
- Date, location, and quantity
- Photos before and after
- Disposal facility name and receipt
- Transporter identity and vehicle info
Permits And Notifications
When disposing of pressure-treated lumber from an HOA property, rental unit, or city site, check permit requirements and notify the appropriate authorities before you move any material.
Contact your HOA board or property manager and get written approval; ask whether bulk removal, temporary storage, or contractor work needs a permit.
For rental properties, notify the landlord and document consent and any required municipal filings.
Check city or county environmental and building departments for disposal, transport, or burn restrictions and apply for permits if needed.
Keep copies of approvals, permit numbers, dates, and contact names to show compliance and avoid fines.
Waste Hauler Documentation
How will you prove that pressure-treated lumber left your property legally and responsibly? You’ll need clear waste hauler documentation: signed manifests, receipts, and destination proof. Keep originals for HOAs, landlords, or city inspectors.
Request details that show chain of custody and proper disposal methods.
- Signed pickup manifest with date and address
- Receipt showing weight/volume and disposal facility
- Facility certification or permit number
- Photo of load and corresponding hauler ID
Store digital copies and originals. If rules require, file reports with your HOA or municipal office promptly to avoid disputes or fines.
Cost Estimates for Disposing Pressure-Treated Lumber
What’ll it cost you to dispose of pressure-treated lumber? Expect fees varying by region, volume, and disposal route.
Municipal drop-off centers may charge per load or by weight—often $10–$50 for small amounts, more for tons.
Private haulers charge pickup fees plus landfill or processing surcharges; get written estimates.
Recycling or specialized processors may cost more but reduce landfill impact.
If you hire a contractor for removal, include labor and transport in the quote.
Ask about minimum fees, weight rates, and hazardous material surcharges.
Compare at least three providers and get documented pricing before scheduling disposal.
Choosing the Right Disposal Method by Wood Type and Volume
Because disposal options depend on both the type of treated wood and how much you have, start by sorting lumber into categories—e.g., creosote-treated, CCA (chromated copper arsenate), ACQ/CA/other modern preservatives, and painted or contaminated pieces—and estimate volume in cubic yards or tons so you can match methods to scale.
Sort treated lumber by type—creosote, CCA, modern preservatives, or painted/contaminated—and estimate volume to plan disposal.
- Small amounts (bagged household waste): suitable for some modern-preservative scraps; confirm local rules.
- Moderate loads (dumpster or transfer station): many facilities accept ACQ/CA but may reject creosote or CCA.
- Large volumes (commercial hauler): hire a licensed contractor for hazardous-designated wood.
- Reuse/recycle: unpainted, uncontaminated modern-treated lumber may be reclaimed.
Common Disposal Mistakes and How to Avoid Them
After you’ve sorted by type and volume, the next step is to watch for common disposal mistakes that can cost you time, money, or result in fines. Don’t toss treated wood in regular trash, burn it, or mix it with recyclables — those actions spread toxins and violate rules.
Don’t assume all facilities accept treated lumber; call ahead and confirm guidelines, drop-off hours, and fees.
Don’t cut corners on documentation for commercial loads.
Use proper PPE when handling, secure loads during transport, and label materials if required.
Following local rules and common-sense precautions prevents penalties and protects health and environment.
Frequently Asked Questions
Can Treated Wood Be Taken to a Landfill Mixed With Regular Yard Waste?
No, you can’t mix treated wood with regular yard waste; you’ll need to check local rules and take it to a designated landfill or hazardous-waste facility, or use a licensed disposal service that accepts pressure-treated lumber.
Are There Any Permits Needed to Transport Large Quantities of Treated Lumber?
Yes — you might need permits if hauling large amounts across jurisdictions or using commercial vehicles; check local landfill and transport regulations, get hazardous-waste or oversized-load permits when required, and keep paperwork handy during transit.
Can Pets or Livestock Safely Roam Where Treated Wood Is Stored Temporarily?
No, you shouldn’t let pets or livestock roam near stored treated wood; keep animals fenced away, cover and elevate lumber, wash hands after handling, and avoid using treated wood where animals eat or frequent to reduce ingestion and contact risks.
How Long Must I Keep Disposal Receipts for Legal or HOA Disputes?
You should keep disposal receipts for at least three to seven years, depending on local laws and HOA rules, but keep them longer if disputes arise; store copies digitally and physically so you can quickly prove proper disposal.
Is Pressure-Treated Plywood Handled Differently Than Dimensional Lumber?
Yes — you’ll handle pressure-treated plywood similarly but with extra caution; it can leach preservatives, so you’ll avoid burning, follow local landfill or recycling rules, bag or tarp it, and keep disposal receipts for potential disputes.
Conclusion
You’ve got this — dispose of pressure-treated lumber safely by identifying whether it’s old CCA or newer copper-treated, then choose the right route: municipal hazardous-waste, landfill following local rules, a licensed disposal service, or certified recycler. Don’t burn or bury it, document the disposal for HOAs or landlords, and get cost estimates ahead of time. Take photos, keep receipts, and follow facility instructions to avoid spreading toxic chemicals and to protect yourself and the environment.