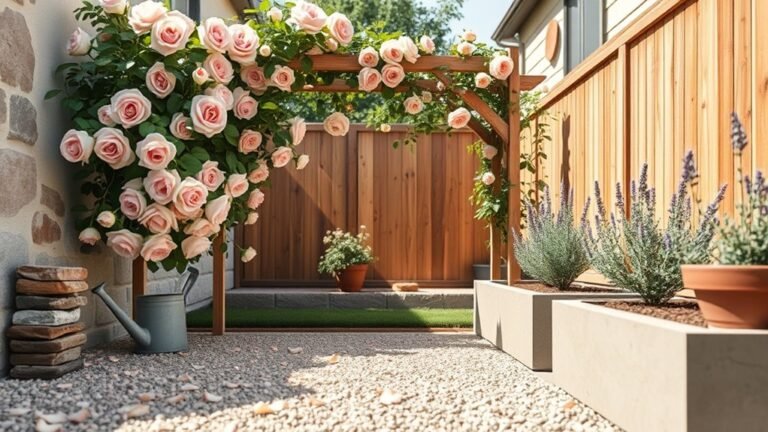
How to Fix Wood Paneling Walls Step by Step Guide
Start by inspecting panels for rot, warping, stains, or loose seams, tapping and using a moisture meter near suspect areas; mark spots to repair versus replace. For minor damage, clean, sand, fill cracks, reattach loose panels, stain or paint with low‑VOC products. Replace panels with structural failure, mold, or widespread warping. Compare costs, lifespan, and matching finishes before deciding. Keep materials, timeline, and a final inspection checklist handy if you want more step‑by‑step guidance.
Quick Decision Flow: Repair, Refinish, or Replace Wood Paneling?
Before you start tearing anything out, decide whether you should repair, refinish, or replace the paneling by evaluating its condition, your budget, and the look you want.
Before ripping it out, assess condition, budget, and desired look—repair, refinish, or replace accordingly.
Walk the room and note rot, buckling, stains, or structural issues. If boards are sound with surface wear, refinishing saves time and money.
Small cracks, loose seams, or isolated damage call for targeted repairs.
Extensive water damage, persistent mold, or outdated construction might justify replacement despite higher cost.
Factor in tools, time, and your skill level. Choose the option that meets aesthetic goals while minimizing unexpected expenses and effort.
When to Repair vs Replace Wood Paneling (Checklist)
Start by evaluating the extent of damage to the panels so you know if repairs will be cosmetic or extensive.
Check the wall’s structural integrity—rotten studs or mold usually means replacement.
Finally, weigh the cost versus benefit: compare repair expenses and time against replacement and long-term value.
Extent Of Damage
When you assess damaged wood paneling, focus on what you can salvage versus what’ll cost more time and money to keep—minor scratches, loose trim, and small water stains are usually repairable.
While widespread warping, rot, or structural mold means replacement is the smarter choice.
Next, map affected areas: note isolated panels, seam issues, and localized staining.
Estimate repair time and materials per area.
Check if matching panels or finishes are available; mismatched repairs look worse than full replacement.
Prioritize sections where repair restores function and appearance; replace when repairs become costly, temporary, or visually inconsistent.
Structural Integrity Check
If you want to decide whether to repair or replace wood paneling, run a quick structural integrity check that focuses on rot, warping, moisture, and how securely panels attach to studs.
Inspect each panel for soft spots or crumbling—probe edges and seams with a screwdriver. Look for cupping, bowing, or gaps that indicate permanent warping.
Use a moisture meter near baseboards, windows, and plumbing walls; readings above 18% mean hidden damage.
Tap panels—hollow sounds suggest detached backing or missing fasteners.
Note mold stains and musty odors.
Mark panels that fail any test for replacement rather than repair.
Cost Versus Benefit
Deciding whether to repair or replace wood paneling comes down to comparing the costs, the expected lifespan after work, and how much effort you’re willing to invest. Assess damage severity, material value, and hidden problems like rot or mold.
Repair if panels are mostly sound, damage is localized, and you want a quicker, cheaper fix—estimate labor, patching, staining, and future maintenance.
Replace if widespread decay, outdated style, or insulation/electrical upgrades are needed—factor demolition, disposal, new materials, and installation.
Use a simple checklist: damage extent, cost estimate, lifespan gain, DIY feasibility, and resale impact to guide your choice.
Quick Visual Checklist for Paneling Damage
Before you start repairs, take a quick walk around the room and scan the paneling for obvious issues: warping, gaps at seams, loose or popping nails, surface scratches, water stains, and mold spots. Note locations on a simple map or photo.
Before repairs, walk the room and note warped panels, gaps, loose nails, stains, and mold—mark priorities on a simple map.
Check vertical and horizontal seams for light showing through and press panels to find soft or hollow areas. Look at baseboards and trim for separation.
Test suspicious spots by tapping; listen for dull thuds indicating rot. Mark priority repairs: safety hazards, active water damage, then cosmetic fixes.
Keep your list clear and numbered for efficient work.
How to Identify Real Wood vs Veneer Paneling
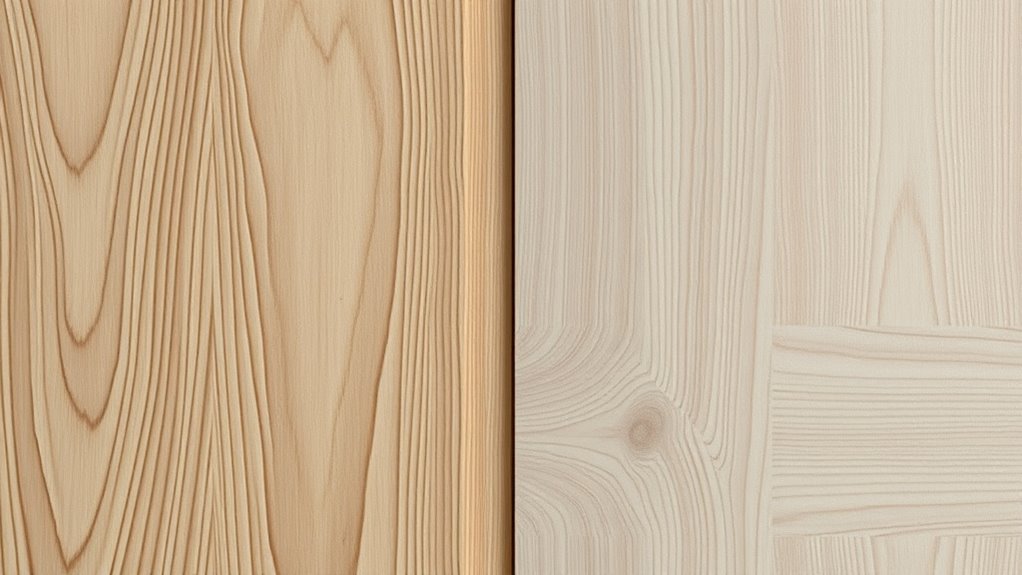
Wondering whether your wall is solid wood or just a thin veneer? Look at edges, seams, and grain patterns. Real wood shows consistent grain through edges and end cuts. Veneer has a paper-thin layer glued to a substrate like plywood or MDF.
Tap the panel: solid wood sounds denser and more muted. Veneer over substrate sounds hollow or higher-pitched.
Check thickness—panels under 1/8 inch are likely veneer. Inspect around outlets, trim, or damaged spots to see layers.
Smell can help: real wood often has a woody scent when sanded, while veneer and composites smell processed.
How to Test Wood Paneling for Water Damage and Mold
If you found thin veneer or saw signs of wear, the next step is to check for water damage and mold since moisture often hides behind panels and accelerates decay. Start by smelling for musty odors and inspecting discoloration, bubbling, or soft spots.
Press gently along seams; give extra attention near floors, windows, and plumbing. Use a moisture meter on several spots—readings above 18% indicate concern.
If you spot black, green, or fuzzy growth, wear gloves and a mask before probing. Remove a small panel section to inspect the substrate and insulation; document findings to decide repair or remediation.
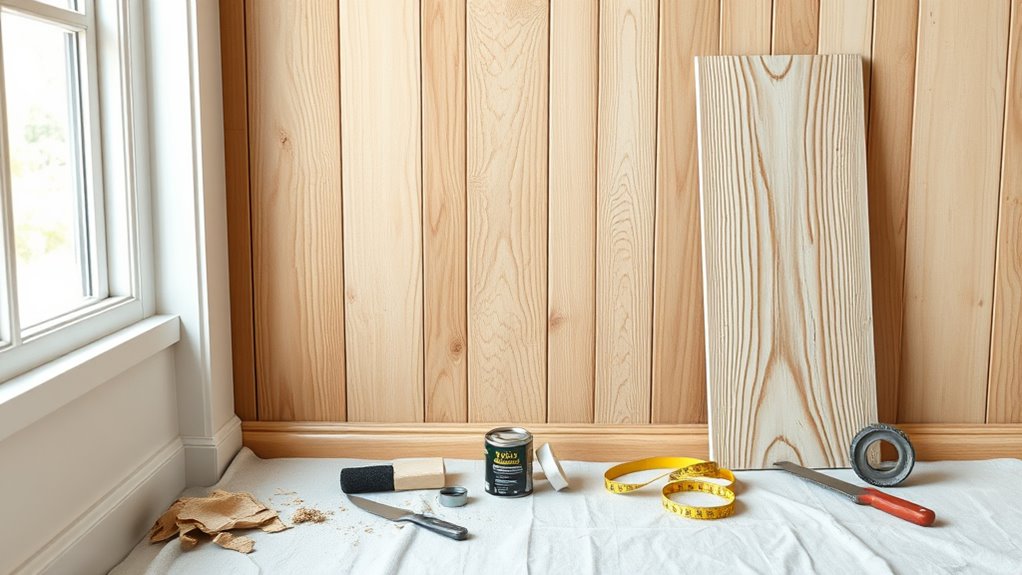
Basic Tools & Materials for Wood Paneling Repair
When you tackle wood paneling repair, having the right tools and materials on hand speeds the job and prevents mistakes. Gather basic hand and power tools: pry bar, hammer, cordless drill, and a jigsaw for trimming.
Stock common supplies: wood filler, carpenter’s glue, finishing nails, replacement trim or panels, sandpaper in varied grits, and stain or paint to match.
Include small extras like wood shims and caulk for tight fits. Keep everything organized so you work efficiently and avoid damage while repairing seams, replacing boards, or prepping surfaces for finish.
- Pry bar, hammer, drill
- Wood filler, glue, nails
- Sandpaper, stain, caulk
PPE and Dust Control for Paneling Projects
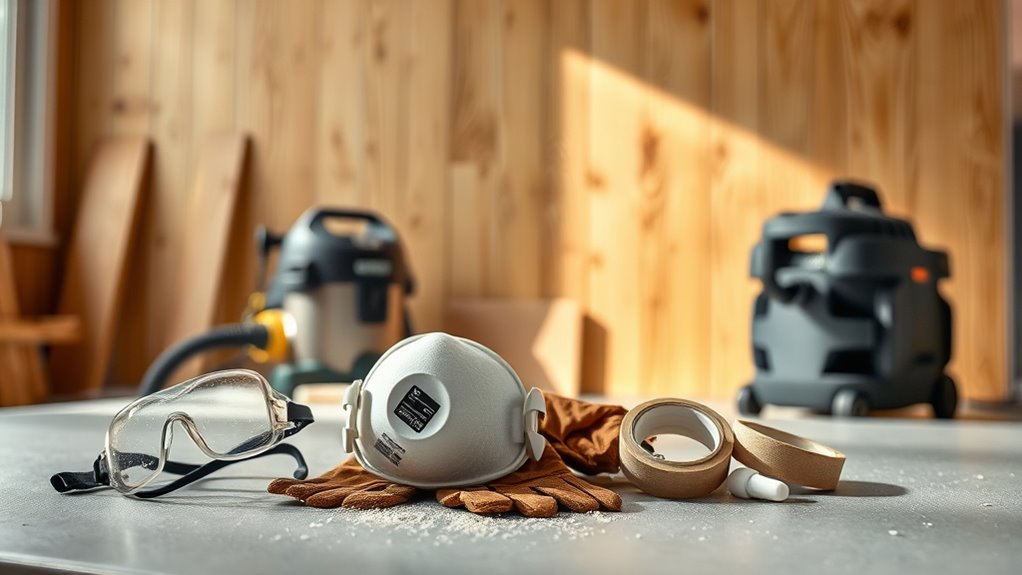
You’ll want to gear up with proper PPE—safety glasses, a NIOSH-rated dust mask or respirator, gloves, and hearing protection—before you start cutting or sanding.
Keep dust contained by sealing the work area with plastic sheeting, using a shop vacuum with HEPA filtration, and running a portable air scrubber or fan to direct dust outside.
Taking these steps will protect your lungs and make cleanup much easier.
Personal Protective Equipment
Because cutting and sanding paneling throws up a lot of fine dust and can expose you to splinters, old paint chips, and loud tools, you should suit up before starting work. Wear a NIOSH-rated respirator for dust and possible lead particles if the paint is old. Use safety glasses or a full-face shield to protect eyes, and wear ear protection when operating power tools. Don’t forget gloves to prevent splinters and a long-sleeve shirt to protect skin.
Keep PPE clean and replace filters as needed.
- NIOSH respirator (N95 or better)
- Safety glasses / face shield
- Ear protection (earmuffs or plugs)
Dust Containment Methods
Although paneling work kicks up dust and debris, you can keep it contained with a few disciplined steps. Seal doorways with plastic and a zipper, run a window fan outward, and use a shop vac with a HEPA filter while sanding. Wear N95 or P100 respirators, goggles, and disposable coveralls. Clean frequently with a damp cloth to prevent spread.
| Area | Method | Frequency |
|---|---|---|
| Doorways | Plastic zipper | Before work |
| Airflow | Exhaust fan | Continuous |
| Tools | HEPA shop vac | During tasks |
| Surfaces | Damp wipe | After work |
How to Measure and Mark Panels for Repair
Before cutting or removing anything, take precise measurements and mark clearly so each replacement panel fits snugly. Measure height and width twice, noting tongue-and-groove orientation and any curvature. Transfer dimensions to the new panel, allow minimal clearance for expansion, and mark cutlines with a sharp pencil. Use a straightedge and carpenter’s square to keep lines true.
- Note adjacent panel reveals and match grain direction.
- Mark locations of studs and fasteners on the panel edge.
- Indicate any notch or outlet cutouts with exact offsets.
Double-check all marks before cutting to avoid mistakes and wasted material.
Remove Trim and Molding Safely
When you remove trim and molding, work methodically to avoid damaging the wall or the pieces you might reuse. Begin by scoring paint lines with a utility knife to cut caulk and paint bond.
Pry gently using a putty knife behind the trim, then slide a flat bar between the trim and wall, protecting surfaces with a scrap of wood.
Remove nails with pliers or a nail puller, tapping heads flush if needed before pulling.
Label each piece and stack them in order to simplify reinstallation.
Keep screws and fasteners in a labeled container so nothing gets lost.
Remove a Damaged Panel Without Damaging Neighbors
Now that the trim’s off and fasteners are labeled, you can focus on removing the damaged panel without harming adjacent pieces.
Score any tongue-and-groove seams with a utility knife to break paint seals.
Pry gently at the panel’s edge with a thin pry bar, protecting neighbors with scrap wood.
Work along the face nails, removing them or punching them through from the back if accessible.
- Cut caulk and paint seals with a sharp blade.
- Use scrap wood as a fulcrum to spread force evenly.
- Remove nails one at a time, avoiding wedge pressure on adjacent panels.
Stop if resistance feels structural.
Replace a Full Section of Wall Paneling
First, you’ll assess how much damage there’s to determine whether a full section really needs replacing.
Then you’ll remove the old panels carefully, taking out nails and trim without harming the underlying studs or adjacent panels.
Finally, you’ll install new paneling, fitting, fastening, and finishing it so the repair blends with the rest of the wall.
Assess Damage Extent
If a section of your wood paneling is warped, rotten, or gouged beyond simple patching, you’ll need to determine how much to remove and whether the studs or backing have been compromised.
Inspect visually for discoloration, soft spots, mold, and insect damage. Tap panels to find hollow sounds that indicate delamination. Probe suspect areas with a screwdriver to test integrity.
Check behind trim, at seams, and near the floor for moisture paths. Note electrical outlets, plumbing, or insulation that may be affected so you can plan repairs.
Summarize findings before cutting replacement dimensions.
- Soft, discolored zones
- Hollow sounds
- Nearby utilities
Remove Old Panels
Ready to pull the damaged section? Start by turning off power to nearby outlets and removing trim with a pry bar. Score caulk lines with a utility knife to avoid splintering. Remove nails or screws—use a screw gun for fasteners and a pry bar for nailed seams—working top to bottom.
Label removed boards so you know orientation and location. Inspect studs and backing for rot or mold; remove any compromised material and clean the cavity. Keep salvaged fasteners and small trim for reuse.
Stack removed panels flat to prevent warping and dispose of irreparable pieces responsibly.
Install New Paneling
Once the cavity is clean and dry, measure the opening and cut your replacement panel to fit, keeping a 1/8-inch gap at the bottom for expansion and a tight fit at studs and trim.
Fit the panel into place, check alignment with adjacent panels, and shim as needed to make it plumb.
Fasten to studs with finishing nails or screws through the tongue if tongue-and-groove; countersink and fill holes for a seamless finish.
Seal edges with paintable caulk where trim meets paneling.
Sand any filled spots, prime, and paint or stain to match the room.
- Test fit before fastening
- Use galvanized nails or trim screws
- Finish seams carefully
How to Salvage and Reuse Removed Panels
While you’re removing panels, treat each one like reusable material — careful handling now saves time and money later. Label each panel, remove nails gently, and stack flat with padding to prevent warping. Inspect for rot or insect damage; salvage good sections for accent walls, shelves, or trim. Clean surfaces and keep original finish if possible to preserve character. Store indoors, off the floor, in a dry spot. Plan reuse before demolition so pieces fit new layouts. Use smaller scraps for framing or craft projects to minimize waste and keep the room’s original warmth.
| Memory | Possibility |
|---|---|
| Nostalgia | New life |
| Savings | Creativity |
How to Insulate Behind Paneling During Repairs
When you remove panels, do it slowly so you don’t damage the studs or wiring.
Fit fiberglass batts or rigid foam between the studs, cutting pieces snug for full coverage.
Finish by sealing gaps and adding a proper vapor barrier to prevent drafts and moisture.
Remove Panels Carefully
Although removing wood panels can feel intimidating, you can do it safely by working methodically and using the right tools. Start by locating studs, cutting power, and marking obstacles.
Pry gently at seams with a pry bar and putty knife, working top to bottom to avoid splintering. Label each panel so you can refit or reuse it later.
- Wear gloves and safety glasses to protect hands and eyes.
- Use a stud finder, utility knife, and small reciprocating saw for stubborn nails.
- Keep a trash bin and drop cloth handy for insulation debris and dust.
Check behind panels for wiring before proceeding.
Add Batts Or Rigid
After you pull the panels and inspect the cavity, decide between fiberglass batts and rigid foam based on your wall depth and moisture concerns.
If cavities reach full stud depth and framing is regular, cut batts to fit snugly without compressing; staple or friction-fit them between studs, trimming around wiring and plumbing. Use unfaced batts if you’ll add a separate vapor control later.
Choose rigid foam when space is tight or moisture risk is higher; cut panels to fit, seal edges with compatible tape or adhesive, and fasten per manufacturer instructions.
Work systematically, replace blocking, and prepare for re-paneling.
Seal Gaps And Vapor
If you want the insulation behind your paneling to perform well and avoid moisture damage, seal all gaps and establish a proper vapor control layer before you close the wall. Start by inspecting for cracks, wire penetrations, and rim joist gaps. Use low-expansion spray foam for irregular voids and caulk for seams.
Install a smart vapor retarder or 6-mil polyethylene on the warm-in-winter side, taped at seams and sealed to framing. Balance breathability with protection based on climate.
- spray foam fills odd-shaped voids
- tape and seal vapor sheet seams
- caulk around windows, pipes, and outlets
Add Drywall Over Paneling (No Demolition)
When you want a smooth, updated look without tearing out existing panels, installing drywall right over wood paneling is a fast, cost-effective option.
Start by cleaning panels, filling holes, and sanding glossy finishes so adhesive and screws bite.
Attach 1/2″ or 5/8″ drywall horizontally using longer screws into studs or furring strips; maintain a 1/8″ gap at the floor.
Tape seams with fiberglass or paper tape, apply joint compound in thin coats, sanding between layers for a seamless surface.
Prime thoroughly to seal differences, then paint.
This approach saves time, reduces mess, and preserves insulation.
Install Beadboard or Shiplap Over Existing Paneling
Although it looks like a full remodel, you can refresh a room quickly by installing beadboard or shiplap directly over existing paneling. Measure and prep: clean the surface, fill gaps with foam or caulk, and shim where paneling is uneven. Use adhesive plus finish nails to secure panels, staggering seams for a natural look. Finish with caulked seams, trim, and paint or stain.
- Narrow vertical beadboard for a classic, cottage feel
- Wide horizontal shiplap for modern, rustic texture
- Painted finish for brightness or stained for warmth
This method saves time, reduces waste, and updates style.
Repair Warped Panels With Moisture Control
Start by finding where moisture’s coming from—leaks, poor insulation, or high indoor humidity can warp panels.
Once you’ve identified the source, stop the water and improve ventilation.
Then use a dehumidifier and keep airflow moving to prevent future warping.
Identify Moisture Sources
Because warped wood almost always points to excess moisture, your first step should be finding where that moisture’s coming from. Inspect the room methodically: check baseboards, the ceiling under bathrooms, and around windows for stains, soft spots, or peeling finish. Smell for mildew and watch for condensation after showers or cooking.
Use a simple moisture meter or tap panels to compare dampness across the wall.
- Look for plumbing lines behind panels, especially near bathrooms or kitchens.
- Note exterior wall breaches: flashing, siding gaps, or failed caulking.
- Observe grading, gutters, and downspouts outside for runoff issues.
Dehumidify And Ventilate
Want to stop warped panels from coming back? You’ll need to control humidity and improve airflow. Run a dehumidifier in damp rooms until readings stay between 30–50% relative humidity.
Vent bathrooms and kitchens with exhaust fans during and after use, and make sure dryer vents discharge outside.
Open windows regularly to promote cross-ventilation when outdoor humidity is low.
Seal leaks and insulate cold exterior walls to prevent condensation.
Place moisture barriers behind panels in basements.
Keep indoor plants limited and move water sources away from walls.
Monitor humidity with a hygrometer and adjust settings to maintain steady, moderate moisture.
Level Bowed Panels With Shims and Adhesive
If a wall panel bows away from its studs, you can bring it back flush by tacking thin shims behind the low spots and using construction adhesive to hold it tight while the fasteners go in.
Work systematically: locate the bow’s midpoint, slip tapered shims behind the panel, and press the panel to the stud.
Apply adhesive in a bead on the stud face so the panel bonds when compressed. Hold with clamps or temporary screws until set, then drive finish nails or screws through the panel into the stud.
Remove temporary fasteners and trim shim edges flush.
- Tapered wood shims
- Construction adhesive bead
- Clamps or temporary screws
Reattach Loose Panels and Secure Studs
Start by locating studs accurately with a stud finder or by tapping for solid spots so you know where to fasten.
Once you’ve found them, press the panel back into place and reattach it firmly with adhesive or construction glue.
Reinforce the repair by sinking screws through the panel into the studs, countersinking and filling the holes for a clean finish.
Locate Studs Accurately
Before you reattach loose panels or drive new screws, locate the studs accurately so your fasteners bite into solid framing rather than just hollow paneling. Use a stud finder, knock pattern, and visible seams to map framing before you work. Check twice to avoid missed bites.
- Run a reliable stud finder slowly, marking center lines.
- Tap across the paneling: a solid sound indicates a stud, hollow means cavity.
- Measure from corners and outlets (studs are typically 16″ on center) and pencil-mark positions.
Confirm marks by drilling a small pilot hole at a low spot before final fastening.
Reattach Panels Firmly
With studs marked and pilot holes checked, you can reattach loose panels so they sit tight against the framing. Position the panel, align edges and seams, and press it flush.
Use clamps or a helper to hold the panel steady while you fasten at the top and bottom to prevent bowing. Drive fasteners into the marked studs, countersink slightly if needed, and avoid overdriving which can split the wood.
Check for gaps and shim small spaces to maintain a flat surface. Once secured, remove clamps, inspect the panel for evenness, and wipe away dust before finishing.
Reinforce With Screws
How do you make sure a panel stays put long-term? You’ll reinforce loose panels by driving screws into studs, not just the panel edges. Pre-drill countersunk holes to prevent splitting and use wood or trim screws long enough to bite the stud through the panel backing. Sink screw heads slightly, then fill and sand for a smooth finish.
- Locate studs with a detector and mark vertical lines.
- Pre-drill 1/8″ pilot holes every 12–16 inches along the stud line.
- Use 1½”–2½” screws depending on panel thickness and backing.
Check for level as you tighten each screw.
Fix Splitting Seams and Wide Gaps Between Panels
If your wood paneling has splitting seams or gaps that let drafts and dust through, you can repair them neatly without removing the sheets.
First, clean gaps with a vacuum and a stiff brush, then dry.
For narrow splits, use high-quality paintable acrylic latex caulk; push it into the seam with a putty knife and smooth with a wet finger.
For wider gaps, insert backer rod sized to the opening before caulking to support filler and prevent sinking.
Allow curing per manufacturer instructions, sand lightly if needed, then paint or stain to match.
Check periodically and re-caulk where shrinkage occurs.
Fill Gouges, Scratches, and Nail Holes in Paneling
Before you start, remove any loose splinters and dust by sanding or brushing the damaged area so filler will adhere properly. Choose a wood filler or colored putty that matches grain and stain. Press filler into gouges, scratches, and nail holes, overfilling slightly. Let it dry per instructions, then sand flush with the paneling surface. Clean dust, then touch up with stain or paint.
- Small hairline scratches: use tinted paste and a soft cloth
- Deep gouges: pack in layers, allowing each to cure
- Nail holes: fill, sand, and spot-stain for an invisible repair
Repair Veneer That’s Peeling or Bubbling
When veneer starts to peel or bubble, act quickly to prevent further damage and restore a smooth surface.
Gently lift bubbled areas with a utility knife, sliding a thin spatula under the veneer to separate it from the substrate. Inject wood glue or contact cement beneath lifted sections, pressing down and wiping excess.
For large peeled pieces, remove loose veneer, clean the substrate, trim a replacement veneer patch to fit, glue, clamp, and sand edges flush once dry.
Finish by filling tiny gaps with wood filler, sanding smooth, and touching up to match the surrounding paneling.
Remove Old Stain, Varnish, or Paint From Panels
Once the surface’s finish has been compromised or you want a fresh look, strip off old stain, varnish, or paint to guarantee new coatings adhere properly and the wood’s grain shows through.
Put on gloves, goggles, and a respirator, then test a small area with a chemical stripper or heat gun.
Work in sections, scraping gently with a plastic or wooden scraper to avoid gouging.
Neutralize chemical residue per instructions and clean with mineral spirits.
Repair any damaged fibers before finishing.
Visualize the process:
- Spot-test stripper on an inconspicuous panel
- Remove softened finish in thin passes
- Wipe residue and let dry thoroughly
Sand Wood Paneling the Right Way for Refinishing
If you want a smooth, even surface that accepts stain or paint, sand the panels methodically using the right grit progression and tools for the job.
Start with 80–100 grit to remove remaining finish and level damaged areas, working with the grain.
Begin with 80–100 grit, sanding with the grain to strip finish and level damaged areas.
Switch to 120–150 grit to smooth scratches, then finish with 180–220 grit for a uniform sheen.
Use a random-orbit sander on flat sections and a sanding block or detail pad for grooves and edges.
Keep pressure light, move steadily, and vacuum between grits to inspect progress.
Wipe with a tack cloth before applying any new finish.
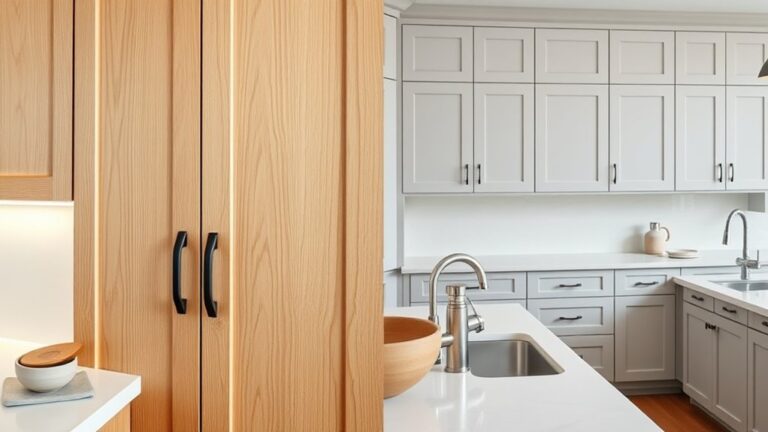
Choose Stain or Paint to Modernize Wood Paneling
Before you pick color or finish, make sure you prep and clean the paneling so stains or paint adhere properly.
We’ll compare stain versus paint for tone, coverage, and how much wood grain you want to show.
Finally, you’ll choose a protective finish that matches the look and durability you need.
Prep And Clean
Start by stripping dust, grease, and any loose finish from the panels so paint or stain can bond properly. You’ll clean, sand, and repair before applying anything. Work top to bottom, use mild detergent, then rinse and let dry fully.
Light sanding scuffs gloss and opens grain for adhesion; fill cracks or nail holes with wood filler and sand smooth.
Protect floors and trim with drop cloths and tape. Check for mold or water damage—replace any compromised boards. Final wipe with a tack cloth removes residue so your chosen finish sticks and looks professional.
- Mild detergent wash, rinse, dry
- Light sanding, tack cloth
- Fill holes, replace damaged boards
Stain Vs Paint
When you want to modernize wood paneling, deciding between stain and paint comes down to the look you want, how much wood grain you want to keep, and how much prep you’re willing to do.
Staining enhances natural grain, deepens color, and feels warmer; you’ll need to sand and choose a compatible stain.
Painting hides grain, brightens rooms, and offers more color options; you’ll have to clean, prime sealed panels, and use paint designed for wood.
Consider room style, lighting, and maintenance: stains show wear differently than paint.
Pick what suits your aesthetic and the effort you’re ready to invest.
Finish And Protect
If you want your refreshed paneling to last and look its best, choose a finish that matches the treatment—stain or paint—and the room’s use. After sanding and priming, pick a protective topcoat: water-based polyurethane for light rooms, oil-based for heavy wear, or a satin polycrylic for a balanced sheen.
Apply thin coats, sanding lightly between them, and follow drying times.
- Living room: semi-gloss paint with a durable polyurethane topcoat
- Bedroom: satin stain sealed with water-based polycrylic for warmth
- Bathroom: oil-based polyurethane over stain or enamel paint for moisture resistance
Apply Primer and Paint to Wood Paneling
Although wood paneling can look dated, you can transform it quickly by priming and painting for a clean, modern finish. Start by cleaning the surface, filling gaps, and sanding glossy areas lightly. Tape trim and protect floors.
Choose a high-adhesion primer made for glossy or veneered surfaces; apply in thin, even coats with a brush for grooves and a roller for flats. Let primer dry fully and sand lightly between coats.
Pick a durable latex or acrylic paint in a sheen you like; apply two thin coats, maintaining a wet edge to avoid lap marks. Remove tape and touch up as needed.
Re-Stain and Seal Real Wood Paneling
Want to bring out the natural richness of your wood paneling? You’ll sand lightly, remove dust, and test stain on an inconspicuous board.
Lightly sand, remove dust, and test stain on an inconspicuous board to reveal the wood’s natural richness.
Choose stain color and type (oil or water-based) that matches room tone. Apply evenly with a cloth or brush, wiping excess, and let dry per instructions.
Finish by sealing to protect finish and deepen grain.
- warm amber stain highlighting knots and grain
- satin polyurethane for low-sheen durability
- lint-free cloth and tack cloth for clean application
Work in good ventilation, follow drying times, and inspect for even coverage before sealing.
Blend Patched Areas So Repairs Are Invisible
When you patch wood paneling, matching the grain and texture is the first thing to get right so the repair reads as part of the original board.
Use scraping, sanding, and directional staining to recreate the grain, then feather edges and blend tones for a seamless finish.
With the right tools and patience, the repair will disappear at normal viewing distance.
Match Grain And Texture
To make your repair disappear, match the surrounding grain and texture precisely before you finish the patch. You’ll study direction, scale, and depth so the eye won’t catch differences. Use simple tools and deliberate strokes to recreate patterns.
- Use a razor or needle to etch grain lines following the panel’s flow.
- Apply thin layers of filler, then texture with a stiff brush or toothpick to mimic pores.
- Transfer grain from scrap wood with pencil rubs or a texture stamp for consistent scale.
Work patiently, checking from different angles and light to guarantee the repair blends seamlessly.
Seamless Finish Techniques
Although a flawless repair starts with matching grain and texture, your finish is what ultimately hides the work, so you’ll focus on blending color, sheens, and edges until the patch disappears. Start by feathering stain or paint outward, wipe excess, and let multiple thin coats build depth. Match sheen: matte, satin, or gloss. Sand lightly between coats and soften edges with a dry brush. Step back often under room lighting to catch mismatches. Use touch-up markers for tiny spots and microfillers for gaps. Practice on scrap to duplicate tone before touching the wall.
| Step | Tool | Purpose |
|---|---|---|
| 1 | Sandpaper | Smooth gradual change |
| 2 | Stain/paint | Match color |
| 3 | Brush/cloth | Blend edges |
| 4 | Sealer | Uniform sheen |
Refinish Tongue-And-Groove vs Flat Panels
Because tongue-and-groove and flat panels take different prep and finishing approaches, you’ll want to choose your method based on the panel type before you start sanding or staining. Tongue-and-groove needs attention to joints; flat panels are continuous sheets. You’ll clean, lightly sand, and decide whether to highlight grain or paint solid.
- Tongue-and-groove: sand edges, fill gaps with flexible caulk, stain between boards.
- Flat panels: scuff-sand broadly, prime seams if painted, use roller for even coverage.
- Finish choice: oil or water-based stain for grain, semi-gloss paint for durability.
Work methodically to match technique to panel construction.
Repair Paneling Around Windows and Doors
When you repair paneling around windows and doors, start by inspecting the trim, seams, and flashing for rot, gaps, or loose panels so you know exactly what to replace or seal.
Remove damaged trim and panels, prying gently to avoid splitting.
Measure and cut replacement pieces to fit tight against the jamb and casing.
Use exterior-grade adhesive and finish nails for secure attachment, sinking nails slightly and filling holes with wood filler.
Seal seams with paintable exterior caulk to prevent drafts and moisture.
Sand, stain or paint replacements to match existing paneling, and reinstall trim for a clean finish.
Handle Electrical Outlets and Switches in Paneling
Before you cut or install panels around outlets and switches, turn off power at the breaker and verify it’s off with a non-contact tester so you can work safely. Remove cover plates, loosen devices, and pull them forward without disconnecting wires.
Trace device outlines on the panel, cut with a jigsaw or rotary tool, and dry-fit before fastening. Recess boxes if needed so the panel sits flush; use box extenders for gaps.
After fastening panels, reinstall devices, confirm wiring isn’t pinched, and tighten mounting screws. Restore power and test function.
- Keep screws snug, not overtightened
- Use gaskets for moisture-prone areas
- Label circuits if unclear
Repair Paneling on Exterior Walls and Basements
Check the exterior and basement paneling for rot, mold, and water stains so you can assess how extensive the damage is.
Prioritize repairing or replacing any compromised boards and treating surrounding areas to stop further decay.
Finally, weatherproof seams and seal edges to keep moisture out and protect your repairs.
Assess Damage Extent
How badly is the paneling damaged, and where did the moisture or impact originate? You’ll inspect every board, seam, and backing for rot, warping, or loose nails. Note patterns that point to source and scope so repairs target causes, not just symptoms.
- Soft spots, discoloration, and mold clusters near floors or corners indicate seepage paths.
- Buckling, splitting, or blown-out seams near windows or vents suggest impact or localized pressure.
- Evenly aged staining across panels hints at long-term humidity versus sudden leaks.
Record measurements and photos. Prioritize safety—wear gloves and mask—and decide if panels need partial or full replacement.
Weatherproof And Seal
Because exterior and basement paneling gets hit by moisture and temperature swings, you’ll need to create a continuous barrier that keeps water out and vapor managed.
Start by removing damaged trim and sealing gaps with exterior-grade caulk.
Install a proper vapor barrier or house wrap behind the paneling if accessible.
Use corrosion-resistant fasteners and flashing at joints, windows, and doors to divert water.
Apply a penetrating wood sealer or exterior-grade primer and paint or stain to exposed surfaces.
Check and repair nearby drainage and grading to prevent pooling.
Inspect seals annually and recoat as needed to maintain protection.
Prevent Future Moisture Damage and Rot
If you want your repaired wood paneling to last, control moisture sources and improve ventilation before you reinstall or seal the boards. Inspect for leaks—fix flashing, roof, and plumbing issues that let water reach the wall. Raise indoor airflow with vents, exhaust fans, or a dehumidifier to keep relative humidity below 50%. Choose rot-resistant or pressure-treated trim where moisture is likely. Apply a breathable exterior finish that sheds water but lets trapped moisture escape.
- Check attic and crawlspace ventilation paths.
- Use weatherstripping at windows and doors.
- Slope soil away from the foundation.
Treat and Remove Mold From Wood Paneling
First, you’ll inspect the paneling to identify how widespread the mold is and whether it’s surface-level or has penetrated the wood.
Then you’ll clean affected areas with gentle solutions like diluted vinegar or a mild detergent, scrubbing softly to avoid damaging the finish.
Finally, you’ll take steps to prevent future growth by improving ventilation, fixing leaks, and keeping humidity low.
Identify Mold Extent
Before you start scrubbing, inspect the paneling to determine how far the mold has spread so you can choose the right treatment and know if removal is necessary. Look for discoloration, fuzzy growth, musty odor, and water stains. Use a flashlight and a magnifier to spot hidden colonies in seams and behind trim.
- Surface specks confined to a single board or corner
- Widespread spotting across multiple panels or behind baseboards
- Soft, warped wood or persistent dampness indicating deep penetration
Document locations and take photos. If mold seems extensive or wood is soft, plan for removal and professional assessment.
Clean Using Gentle Solutions
Once you’ve confirmed the mold hasn’t deeply penetrated the wood, prepare gentle cleaning solutions and work methodically from least to most aggressive so you remove growth without damaging the paneling.
Start with a soft brush and a mixture of warm water and mild dish soap, scrubbing gently along the grain.
If stains persist, use a diluted white vinegar solution (one part vinegar to three parts water) and blot—don’t saturate.
For stubborn spots, try a baking soda paste applied briefly, then rinse.
Dry thoroughly with fans and a dehumidifier, and dispose of cleaning rags safely to avoid spreading spores.
Prevent Future Growth
After cleaning and confirming surface mold is gone, take steps to stop it from coming back by removing remaining spores and correcting the conditions that let mold thrive. You’ll want to treat the wood and change the environment so mold can’t reestablish.
Apply a fungicidal solution per label instructions, let panels dry fully, then seal with a mold-resistant primer.
Control humidity and fix leaks.
- Use a HEPA vacuum and brush to lift hidden spores.
- Run a dehumidifier or improve ventilation to keep relative humidity below 50%.
- Repair leaks, insulate cold surfaces, and keep heating consistent.
Match Grain and Color on Replacement Panels
When you’re replacing a damaged panel, matching the grain and color is the key to making the repair disappear; take time to compare wood species, grain direction, and finish sheen to get a seamless look.
Inspect adjacent panels for growth patterns and pick replacement stock with the same cut (plain, quarter, or rift sawn).
Test stains on scrap pieces under the room’s lighting, adjusting with dilute glazes to refine hue without obscuring grain.
Match bevels and tongue-and-groove orientation so patterns align.
Blend new and old edges using fine sanding and a light coat of the original finish for cohesion.
Pick Adhesives and Fasteners for Lasting Repairs
You’ll want to pick adhesives rated for wood and paneling so joints stay secure without staining the surface.
Use fasteners sized for the panel thickness and substrate to avoid splitting or popping later.
Prep surfaces by cleaning, sanding, and removing old glue so everything bonds tightly.
Choosing Appropriate Adhesives
Because the right adhesive can make the difference between a repair that lasts and one that fails, you’ll want to match glue type to panel material, substrate, and expected stress.
Choose waterproof or PVA for interior plywood or veneer; construction adhesive for heavier panels; and specialty contact cement for reattaching laminate surfaces.
Prepare surfaces—clean, dry, and sand light—then apply adhesive evenly and clamp or weight as recommended.
Test a small area if unsure.
Consider gap-filling properties and cure time so panels align properly.
Safety: ventilate and wear gloves with solvent-based glues.
- PVA: easy, strong for wood
- Construction adhesive: heavy-duty
- Contact cement: laminates
Selecting Correct Fasteners
Although adhesives do most of the bonding, fasteners lock panels in place and control alignment, so pick screws and nails that match panel thickness, substrate, and expected load.
Use coarse-thread screws for studs and fine-thread for sheet goods; choose length so the screw penetrates the substrate by at least 3/4 inch without poking through the finished face.
Finish or trim nails work for visible edges; ring-shank nails resist pull-out in older framing.
Corrosion-resistant fasteners suit humid rooms.
Space fasteners evenly—typically every 8–12 inches on studs, closer at seams.
Pre-drill near edges to avoid splitting, and countersink heads for a neat finish.
Preparing Surfaces Properly
Before you glue or screw anything, make the substrate clean, dry, and sound so adhesives bite and fasteners hold. You’ll remove loose paint, old glue, and dust; repair rot with epoxy or replace bad strips; and sand glossy finishes for better grip. Check for hidden damage and moisture with a probe and meter. Choose adhesives and fasteners after the surface’s ready so bonds last.
Prepare edges and seams so adhesive beads contact solid wood, then clamp or screw as instructed.
- Scrape and vacuum debris
- Dry and decontaminate damp spots
- Sand and feather edges for adhesion
How to Estimate Time and Cost for Common Repairs
When estimating time and cost for common wood paneling repairs, start by identifying the specific issue—cracks, loose panels, water stains, or surface refinishing—and break the job into tasks you can time and price individually.
List materials (caulk, sandpaper, stain, nails) and tools you’ll rent or buy.
List materials like caulk, sandpaper, stain, and nails, and note tools you’ll rent or buy.
Assign realistic hours per task: prep, repair, sanding, finishing, and drying times.
Get local prices for materials and add a contingency (10–15%) for hidden damage.
Multiply labor hours by your hourly rate or contractor estimates.
Sum totals, document assumptions, and note tasks that could expand scope if problems appear.
When to Call a Professional Carpenter
If the paneling hides warped studs, sagging floors, or moisture-compromised framing, call a pro to assess structural damage before you do more work.
You should also hire a carpenter when repairs need specialized tools or skills you don’t have, like reframing, electrical relocation, or precision trim work.
Getting an expert early can save time, money, and prevent unsafe repairs.
Structural Damage Assessment
Because wood paneling can hide rot, framing shifts, or insect damage, you should inspect signs of structural problems early and know when to bring in a professional carpenter. Check for persistent sagging, spreading cracks, or floors that no longer sit level; these suggest load issues.
Smell for damp, mold, or musty odors near panels—hidden rot worsens quickly. Tap panels; hollow or soft spots can mean compromised studs. When in doubt, call a pro to avoid unsafe repairs.
- Sagging walls or visible framing gaps
- Soft, crumbly wood or damp odors
- New or widening cracks near openings
Tool And Skill Limits
Although you can tackle many paneling repairs with basic carpentry tools, know your limits and call a professional when the job requires structural fixes, complex trim work, or precise electrical/plumbing relocations. You should hire help if you encounter extensive rot, warped studs, or load-bearing issues. If trim alignment or custom molding must match, a carpenter saves time. For any wiring or pipe moves, get licensed pros. Expect faster, safer outcomes and warranty options. Use the table to gauge complexity and when to call someone.
| Issue | DIY Feasible? | Call Professional When |
|---|---|---|
| Surface scratches | Yes | Deep gouges |
| Loose panels | Yes | Rotten framing |
| Trim gaps | Maybe | Complex molding |
| Wiring behind panel | No | Relocation needed |
Common Beginner Mistakes and How to Avoid Them
When you immerse yourself in fixing wood paneling, a few predictable mistakes can turn a quick project into a costly headache; knowing them up front helps you avoid wasted time, materials, and effort. You’ll want to plan, measure, and prep—skipping steps costs more later. Common pitfalls include misjudging adhesive needs, using wrong fasteners, and neglecting moisture checks. Prevent them by reading product instructions, testing on scrap, and keeping a moisture meter handy.
Plan, measure, and prep — avoid misjudged adhesives, wrong fasteners, and moisture surprises when fixing wood paneling.
- Overcutting panels that can’t be recovered
- Using nails that split thin trim
- Painting without sealing gaps first
Stay patient, test, and follow manufacturer guidance.
How to Document Your Repair Work for Resale Value
You’ve avoided common mistakes and finished repairs—now document them so buyers see the value. Photograph each stage: before, during, and after. Capture wide shots and close-ups of joints, seams, and repair details. Date-stamp images and keep them in a folder labeled by room.
Save receipts for materials, invoices for pros, and a short written summary of techniques and products used. Note warranties and any paint or stain codes. Compile everything into a single PDF or printed packet to include with your seller disclosures.
Clear, organized documentation reassures buyers and can help justify your asking price.
Maintain Refinished Paneling Long Term
Once your paneling’s refinished, keep it looking fresh by establishing a simple maintenance routine. You’ll inspect, dust, and protect regularly so the finish lasts and minor issues don’t become major repairs. Use gentle tools, avoid harsh chemicals, and address nicks quickly.
Keep refinished paneling fresh with simple, regular care: dust, inspect, protect, and quickly repair nicks to prevent bigger problems.
- Weekly: dust with a microfiber cloth and check for scratches or lifting finish.
- Monthly: touch up small blemishes with matching stain or clear coat; tighten any loose trim.
- Yearly: apply a light maintenance coat if finish manufacturer recommends it and inspect for moisture or mold near seams.
Stick to this schedule and your work will pay off.
Clean Different Finishes Without Damaging Them
First, identify whether your paneling has a varnish, shellac, lacquer, or painted finish so you know what cleaners are safe to use.
Test a small hidden area with a mild, pH-neutral cleaner or a specific solvent for the finish to make sure it won’t soften or strip the surface.
Work gently with soft cloths and avoid abrasive pads or strong chemicals that can damage the finish.
Identify The Finish
Before you start cleaning, identify the finish so you don’t strip stain, lacquer, shellac, or varnish by mistake. Check a hidden spot: rub with a damp cloth, then a bit of denatured alcohol on a cotton swab. If alcohol softens it, it’s shellac. If it dulls with mineral spirits, it’s lacquer. If neither affects it, it’s likely varnish or polyurethane.
- Shellac: softens with alcohol, glossy, amber tone.
- Lacquer: dissolves with lacquer thinner or strong solvent, very smooth finish.
- Varnish/polyurethane: solvent-resistant, tougher, often matte to semi-gloss.
Label the finish before any cleaning or repair.
Safe Cleaning Methods
Because each finish reacts differently, clean paneling gently and test as you go to avoid damage.
Start with a dusting using a soft microfiber or lambswool duster.
For sealed or lacquered surfaces, mix mild dish soap with warm water, wring a soft cloth well, and wipe with the grain; dry immediately.
For varnish or shellac, use a barely damp cloth or a cleaner labeled safe for those finishes.
For raw or waxed wood, avoid water—use a vacuum brush and a specialty wood cleaner or paste wax sparingly.
Always spot-test hidden areas and work in small sections to monitor results.
Update Paneling With Trim and Molding Styles
When you add trim and molding to wood-paneled walls, you instantly sharpen the room’s style and hide seams or uneven edges. You’ll pick profiles that match your room — simple shoe molding for a modern look, chunky crown for traditional rooms, or picture rail for visual interest.
Add trim to wood-paneled walls to sharpen style, conceal seams, and choose profiles that suit your room.
Install carefully: measure, miter corners, and nail into studs, then fill gaps and caulk for a seamless finish. Consider stain or paint to coordinate with existing tones.
Small details make a big difference:
- Clean, thin baseboard with quarter-round for a neat floor transition
- Bold crown molding to raise perceived ceiling height
- Chair rail to break tall panels into balanced sections
Create a Painted Accent Wall From Wood Panels
If you want to make your wood-paneled wall the room’s focal point, painting an accent section is an easy, high-impact move that refreshes texture and color at once.
Choose a wall or vertical strip, sand lightly, and clean dust and oils. Prime with a stain-blocking primer to prevent tannin bleed-through.
Use painter’s tape to define clean edges, and roll in thin, even coats—two coats usually do it.
Consider deep, saturated colors for drama or muted tones for subtle contrast.
Finish with a durable satin or semi-gloss for easy cleaning and lasting visual impact.
Add a Wainscoting Look Using Existing Panels
You can give existing wood panels a classic wainscoting look without removing them by adding trim and paint to define lower-wall panels. Measure and mark a consistent top rail height, then attach a chair rail and vertical stiles to create framed panels.
Give wood-paneled walls a wainscoting update by adding trim and paint for framed lower panels.
Fill gaps, sand, and prime before painting the lower section a durable semi-gloss while leaving the upper wall neutral or lightly contrasting.
- Install a horizontal rail at 32–36 inches for traditional proportion.
- Space vertical stiles evenly to form rectangular panels.
- Caulk seams and use wood filler for a seamless finish.
This approach updates paneling affordably and quickly.
Blend Modern Lighting With Refreshed Paneling
Although refreshed wood paneling brings warmth and texture, modern lighting is what’ll make those surfaces sing—so choose fixtures that balance the room’s scale and style.
You’ll layer ambient, task, and accent lights: recessed or low-profile pendants for general illumination, directional sconces to wash vertical grain, and LED strip lights along trim to highlight texture.
Match color temperature to stain—warm LEDs for honey tones, neutral for gray or whitewashed panels.
Dimmers give control and prevent glare.
Position fixtures to minimize harsh shadows and reveal paneling detail.
Finish with slim, contemporary fixtures to keep the look fresh and cohesive.
Troubleshoot Stubborn Adhesion or Paint Issues
When paint won’t stick or peels right after application, start by identifying the surface condition and the adhesive culprit—old finishes, tannin bleed, moisture, or incompatible primers can all be to blame. You’ll test and fix quickly: sand glossy finishes, strip or degloss old varnish, and blot for moisture.
Use stain-blocking primer for tannins and verify panels are dry before priming. Check compatibility between primer and paint. If adhesion still fails, scuff with 120–150 grit and clean residue.
- Sand glossy or failed paint to a dull, keyed surface.
- Use a stain-blocking primer on tannin spots.
- Confirm panels are fully dry before painting.
Choose Eco-Friendly Finishes and Low-VOC Products
After fixing adhesion and paint problems, consider finishes that cut indoor pollution and environmental impact. Choose low-VOC or zero-VOC stains, primers, and paints labeled for indoor use.
Look for water-based polyurethanes or plant-based sealers that resist yellowing and show manufacturer VOC data. Test a small, ventilated area to confirm odor and drying time.
Choose water‑based polyurethanes or plant‑based sealers that resist yellowing; check manufacturer VOC data and spot‑test odor and drying time.
Use brushes and rollers that minimize waste, and buy only what you’ll need to avoid disposal. Dispose of leftover products at a hazardous-waste facility per local guidelines.
Proper ventilation during application and curing keeps your air safer and preserves finish performance.
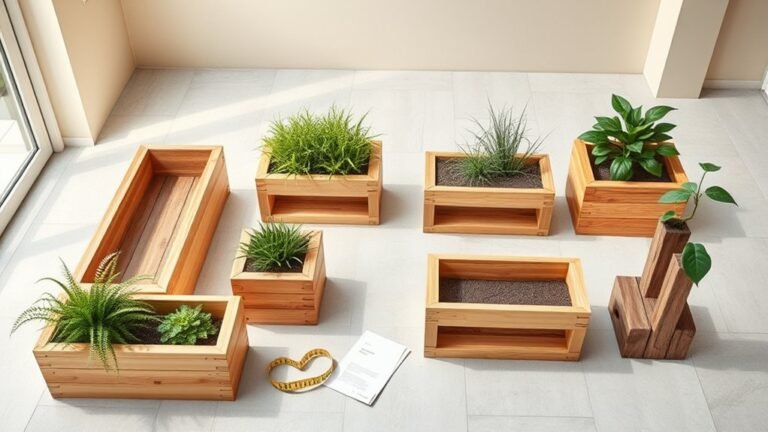
Salvage Ideas: Repurpose Removed Paneling Pieces
If you’re removing wood paneling, don’t toss the boards—salvage them for trim, shelves, or accent walls to save money and add character. You can clean, sand, and cut reclaimed planks to match baseboards or window trim, giving rooms cohesive warmth.
Smaller offcuts become floating shelves or picture ledges with simple brackets. For a feature wall, staggered or shiplap patterns bring texture without new lumber. Seal or paint as needed to suit style.
- Thin strips for baseboard or casing
- Wider planks for open shelving
- Staggered accent wall pieces for visual interest
Final Inspection Checklist and Professional Touch-Ups
Because you want the job to look and perform right, walk the room with a clear checklist and note any cosmetic or functional issues that need a pro’s touch. Inspect seams, trim, and passages for gaps or misalignment. Test doors, outlets, and baseboards for smooth operation and secure fastening.
Look for finish inconsistencies, stains, or uneven sheen requiring sanding or matching stain. Verify moisture barriers and insulation remain intact where applicable. Photograph problem areas and list priorities.
For structural concerns, persistent warping, or electrical/plumbing complications, call licensed professionals to correct defects and finish details safely and permanently.
Project Checklist: Materials, Timeline, and Budget at a Glance
When you plan your wood-paneling project, list materials, set a realistic timeline, and lock in a budget before you start so you won’t get blindsided by delays or surprise costs.
Map tasks week-by-week, calculate labor and tool rentals, and add a 10–15% contingency.
Prioritize purchases to avoid downtime and know when to hire pros for electrical or structural issues.
- Materials: panels, adhesive, nails, filler, sandpaper, finish
- Timeline: demo, prep, repair, install, finish (estimate days)
- Budget: materials, labor, permits, contingency
Check receipts as you go and adjust the plan if prices or scope change.
Frequently Asked Questions
Can I Paint Over Paneling Without Priming if It’s Previously Finished?
You can, but you shouldn’t. If the finish is glossy, you’ll need to sand or degloss first; otherwise paint may peel. Clean thoroughly, scuff-sand, and use a bonding primer for best adhesion and durability.
Will Heated Rooms Like Kitchens Affect New Adhesive Bonds Long-Term?
Yes — heated rooms can weaken some adhesives over time, especially with repeated temperature cycles and moisture. You should choose heat- and moisture-rated adhesives, follow manufacturer instructions, and test a small area before full installation.
How Do I Repair Paneling Near Built-In Shelving or Cabinets?
You’ll remove trim, detach affected panels carefully, patch or replace damaged sections, shim and secure new panels to studs, glue seams, fill gaps with wood filler, sand, stain or paint, then reinstall trim for a seamless finish.
Can Pets Damage Refinished Paneling and How to Protect Surfaces?
Yes, pets can damage refinished paneling; you should use scratch-resistant finishes, apply clear protective films, install pet gates or trim, provide scratching posts, keep nails trimmed, and clean spills promptly to prevent stains and wear.
What Warranties Apply to Professional Paneling Repair Work?
Warranties vary: you’ll typically get workmanship guarantees (30–365 days), limited material warranties from suppliers, and sometimes extended service warranties; always get terms in writing, clarify coverage, exclusions, and repair timelines before work starts.
Conclusion
You’ve got the tools to decide whether to repair, refinish, or replace your wood paneling and to spot damage, mold, or veneer. Choose low‑VOC finishes, test for water issues, and salvage usable pieces for other projects. Follow the step-by-step checks and keep a clear materials, timeline, and budget plan. Do a final inspection or call a pro for tricky spots, and you’ll restore your walls efficiently, safely, and sustainably.