How to Get Rid of Wood Pallets Fast and Easy Methods
You can clear wood pallets fast by sorting usable ones to sell or donate and flagging damaged or contaminated pieces for immediate haul-away or recycling. Post clear photos, dimensions, and pickup-only terms on local marketplaces, or call same-day junk-haulers. Stack and cover nonurgent pallets to prevent pests, and break down stained or treated boards for disposal or mulch. Inspect for chemical stamps and wear PPE when handling; keep following tips for quick pricing, pickup prep, and safe reuse.
Fastest Ways to Remove Pallets Now (Sell, Donate, Haul)
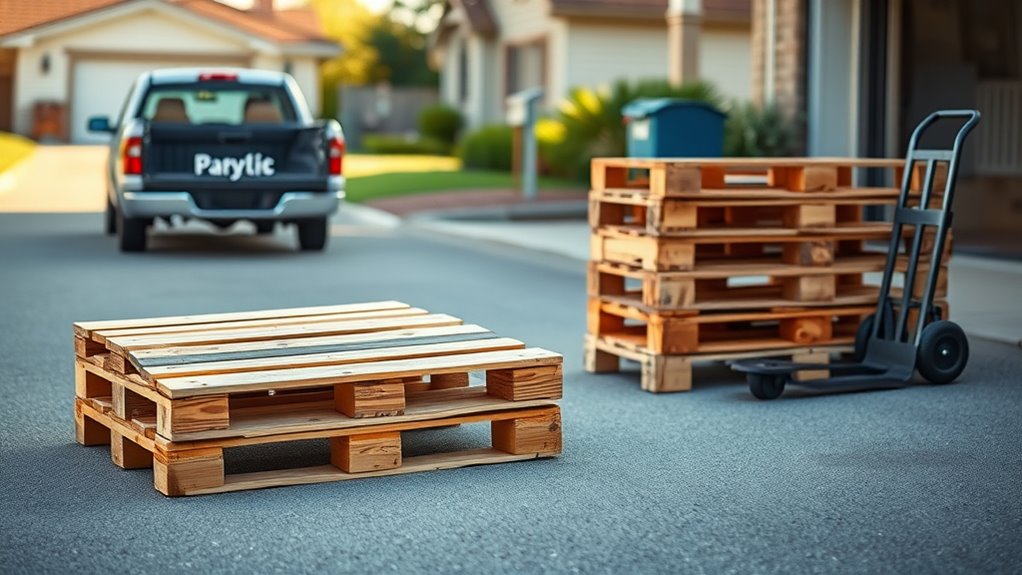
If you need pallets gone quickly, focus on selling, donating, or arranging a same-day haul—each option gets them off your property fast.
First, list usable pallets online with clear photos, dimensions, and pickup-only terms so buyers come to you.
List usable pallets online with clear photos, dimensions, and pickup-only terms so buyers come to you.
Second, contact local businesses, community groups, or reuse centers; they’ll often take pallets free and arrange pickup.
Third, call a junk-haul service or same-day pickup app; they’ll remove broken or mixed pallets for a fee.
In all cases, separate reusable from damaged, state any hazards, and schedule removal promptly to avoid repeated inquiries or missed pickups.
Decide: Remove Fast or Reuse Later?
Decide whether you’ll remove pallets immediately or keep them for later projects based on how many you have and available space.
Inspect each pallet for broken boards, mold, or pests to judge reuse potential.
If storage is limited, factor in where you’ll stack them and how long they’ll sit before choosing removal.
Remove Immediately Or Later
When you come across a stack of pallets, weigh how soon they need to go: are they a safety or pest risk that requires immediate removal, or are they dry and sturdy enough to store for a future project?
If they pose tripping, fire, or infestation hazards, remove them now—call a pickup, haul them to a transfer station, or break them down and dispose of the pieces.
If removal can wait, cover and elevate the stack to prevent moisture and pests, label it with a deadline, and clear access for later handling.
Prioritize actions that reduce liability and preserve useful material.
Inspect For Reuse Potential
Now that you’ve judged urgency, take a close look to see which pallets are worth keeping. Inspect boards for cracks, rot, loose nails, and contamination.
Test structural integrity by pressing and lifting corners; discard any that sag or splinter dangerously.
Check stamp marks for heat-treated (HT) vs chemically treated lumber; avoid chemically treated if reusing indoors or for projects with skin contact.
Separate reusable pallets by condition: ready-to-use, reparable, or scrap. Label reparable pieces and note needed fixes—replacing boards, tightening nails, or sanding.
That way you decide quickly which to remove now and which to store for later use.
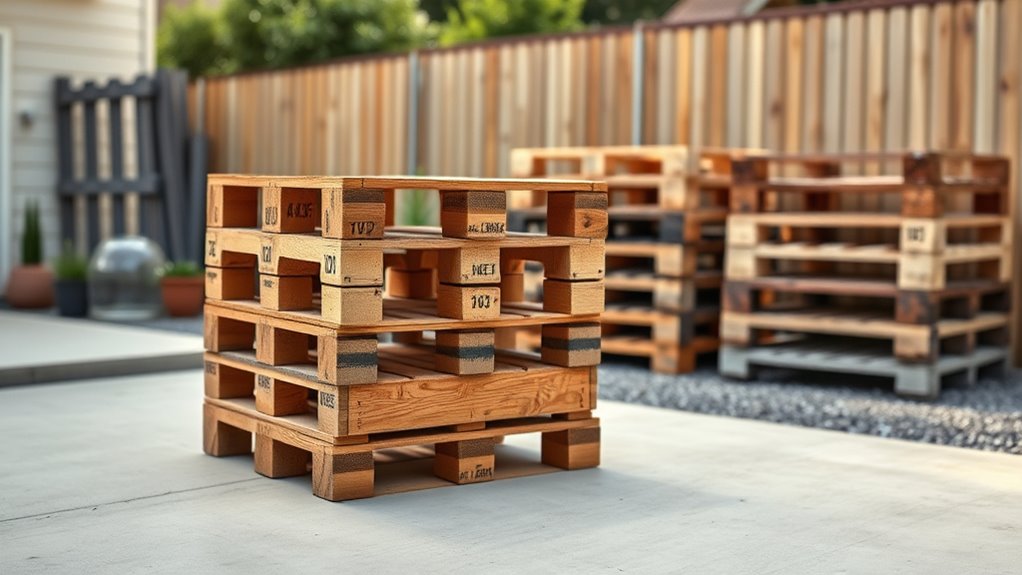
Consider Storage And Space
Because space and timing determine whether you’ll cart pallets off immediately or hold them for projects, size up your storage options before you move anything. Decide quickly: will you need pallets soon, or will they just clutter? Measure, plan placement, and consider protection from weather. Think about access for a truck if you plan a pickup later. Balance convenience against cost of storage and risk of degradation.
- Count usable pallets and note damage
- Measure available dry, ventilated space
- Prioritize easy access for removal
- Cover pallets to prevent rot if kept outside
- Set a retention deadline to avoid hoarding
Quick Checklist Before You Touch Pallets
Before you handle any pallet, check it carefully for hazards like loose nails, sharp splinters, or signs of chemical staining.
Make sure the pallet is safe to move and that you’re allowed to take or dispose of it where you found it—some areas or businesses have legal restrictions.
Taking these quick steps keeps you safe and avoids fines or liability.
Inspect For Hazards
If you’re about to handle a pallet, take a quick safety scan first: look for protruding nails, loose or cracked boards, mold, chemical stains, and signs that it held hazardous materials.
Move slowly, wear gloves and eye protection, and don’t lift anything that looks unstable.
Note odors or slick residues. If you spot contamination, isolate the pallet and get expert advice before proceeding.
- Protruding nails or splinters
- Broken or missing boards
- Visible mold or rot
- Unusual stains or chemical smells
- Signs of pesticide or industrial use
Confirm Legal Restrictions
After you’ve checked for physical hazards, pause to confirm any legal limits that apply to handling, storing, or transporting pallets in your area. Check local ordinances for bulk wood storage, fire codes, and property setbacks.
Ask your municipality about permits for large collections or commercial disposal. Verify zoning rules if you plan to sell or reuse pallets from a business.
If pallets show chemical stains, confirm hazardous-waste rules before moving them. Contact your waste authority about pickup schedules and accepted drop-off sites.
Document any approvals or restrictions so you won’t face fines or forced removal later.
Sort Pallets by Condition and Safety
When you start sorting pallets by condition and safety, separate them into clear categories—intact, repairable, and scrap—so you can handle each pile correctly and quickly.
Inspect for broken boards, loose nails, rot, and chemical stains. Mark piles and move them to designated zones to avoid cross-contamination. Use gloves and eye protection while you work.
Inspect for damage, mark and zone piles to prevent cross-contamination, and wear gloves and eye protection.
Decide quickly which pallets can be reused, which need simple fixes, and which must be discarded.
- Check for structural integrity
- Look for biohazards or spills
- Remove protruding nails
- Stack by category and date
- Keep walkways clear and labeled
Which Pallets Are Safe to Keep
You’ll want to hang on to heat-treated pallets because they were processed to kill pests and are safer for reuse.
Untreated hardwood pallets can also be kept if they’re clean, dry, and free of chemical stains.
Don’t keep any pallet that’s cracked, heavily soiled, or has unknown markings.
Heat-Treated Pallets
Because they were heated to kill pests rather than soaked in chemicals, heat-treated (HT) pallets are generally safe to reuse for furniture, gardening, and home projects. You can repurpose them with confidence if you follow a few checks and simple steps.
- Inspect for stamps: look for “HT” marking on the wood.
- Avoid pallets with spills, stains, or mold visible.
- Sand rough edges and remove nails before use.
- Use a food-safe sealant if contact with edibles is expected.
- Cut away damaged boards; rejoin with proper fasteners.
Handle HT pallets sensibly and they’ll serve many safe, creative purposes.
Untreated Hardwood Pallets
Heat-treated pallets are great for many projects, but you may prefer untreated hardwood pallets when chemical-free wood is a priority.
Untreated hardwoods like oak or maple haven’t been exposed to fumigants or pesticides, so you can use them indoors, for furniture, or for composting without worrying about toxins.
Inspect each pallet: avoid visible mold, oil stains, or embedded chemicals.
Check markings—absence of “MB” (methyl bromide) is good.
Sand and clean the boards before use to remove dirt and splinters.
If you’re unsure, test a small piece or choose heat-treated stamped pallets instead for added safety.
Which Pallets to Discard Immediately
When should you toss a pallet without a second thought? You should discard any pallet that’s unsafe, unsalvageable, or poses health or legal risks. Quickly identify hazards and act.
If a pallet is unsafe, unsalvageable, or poses health or legal risks, throw it away immediately.
- Broken boards or loose nails that can’t be repaired
- Heavy oil, fuel, or chemical stains permeating the wood
- Moldy, rotted, or insect-infested boards
- Missing structural pieces or warped frames causing instability
- Pallets from unknown or suspicious industrial sources
Don’t try to repurpose pallets that meet these conditions; they’re liabilities. Dispose of them responsibly through your local waste facility or a licensed hauler.
Check Pallet Stamps: HT, IPPC, MB, or Chemical?
Check the stamps on each pallet so you know what treatment it received and whether it’s safe to reuse. Look for common codes like HT (heat-treated), the IPPC logo, MB (methyl bromide), or other chemical markings.
If a pallet shows chemical treatment or unclear markings, don’t bring it into your home—dispose of it properly.
Identify Pallet Markings
Before you decide what to do with a pallet, look for its stamp—those little codes tell you how it was treated and whether it’s safe for certain uses. You’ll scan the top-deck, stringer, and inner boards for clear markings.
Note country codes, manufacturer marks, and symbols; take a photo for reference. If markings are faded, check multiple boards.
- IPPC wheat-sheaf logo
- HT (heat-treated) letters
- MB (methyl bromide) letters
- Country or plant code
- Any chemical or recycling symbols
Record what you find before deciding reuse, disposal, or repurposing options.
Understand Treatment Codes
Now that you’ve recorded the visible stamps, look closely at the treatment codes—the letters and logos tell you how the pallet was processed and what uses are safe.
HT means heat-treated wood and’s generally safe for crafts and indoor use.
IPPC or the wheat‑ear logo indicates international standards compliance.
MB or Methyl Bromide shows chemical fumigation—avoid using those indoors, for food contact, or in kids’ projects.
Sometimes you’ll see other chemical abbreviations; if unsure, treat the pallet as contaminated.
When in doubt, dispose of or recycle through proper channels to protect health and meet local regulations.
Quick Pallet Valuation: What Buyers Pay
Although pallet prices change with market demand, you can quickly estimate what buyers will pay by checking wood type, condition, size, and regional scrap rates—those four factors usually determine the bulk of a pallet’s value. You’ll get a faster sale if you present clear details and realistic expectations.
Estimate pallet value quickly: note wood type, condition, size, and local scrap rates for faster, smoother sales.
Consider buyers like recyclers, refurbishers, and hobbyists; each pays differently based on your pallet’s readiness and transport logistics.
- Wood species (hardwood vs. softwood)
- Overall condition (intact, damaged, or broken)
- Standard size or custom dimensions
- Treatment stamps (HT, MB, etc.)
- Local demand and scrap rates
Estimate Pallet Volume and Space Needs
When you’re planning to store or sell pallets, calculate total volume and footprint so you know how much space you’ll need and how many trips or buyers to coordinate. Measure one pallet (length × width × height), multiply by count, and add clearance for aisles and loading. Stack height limits vary—check stability and local rules. Estimate truck or yard capacity in cubic feet or meters to plan pickups. Use the quick reference table below to visualize storage scenarios and adjust counts before contacting buyers or booking transport.
| Item | Example |
|---|---|
| Single pallet | 48×40×6 in |
| Stack of 10 | 48×40×60 in |
| Truck load | 2,400 cu ft |
| Yard space | 200 sq ft |
Prep Pallets for Pickup or Sale
Before pickup or sale, clean each pallet of debris, loose nails, and damaged boards so they’re safe to handle and transport.
Secure any shaky boards with screws or straps and stack pallets neatly to save space.
Label the pile with quantity, dimensions, and any defects, and keep a simple inventory sheet or photos for buyers or the carrier.
Clean And Secure Pallets
To get pallets ready for pickup or sale, clean them thoroughly and secure any loose boards so buyers or carriers can handle them safely. You’ll inspect each pallet, remove nails or debris, and replace broken boards. Sand rough edges and sweep or pressure-wash to remove dirt. Treat or note stains that suggest contamination.
Fasten loose boards with screws or staples, and tighten any wobbly blocks.
- Inspect for structural damage
- Remove hazards: nails, splinters, debris
- Clean: sweep, pressure-wash, or spot-scrub
- Repair: replace boards, secure with screws
- Mark repaired pallets for transparency
Label And Document Contents
Although you’ve cleaned and repaired the pallets, you still need to label and document what’s on each one so carriers and buyers know exactly what they’re handling. Use clear tags, list contents, weights, destination, and contact info. Snap photos and save a simple manifest for pickup or sale. Attach weatherproof labels and double-check counts before pickup. Below is a quick reference table to standardize entries:
| Label | Info Required | Example |
|---|---|---|
| Contents | Item name, qty | 20 crates of bolts |
| Shipping | Weight, destination | 800 lb, 123 Main St |
Keep records digital and printed.
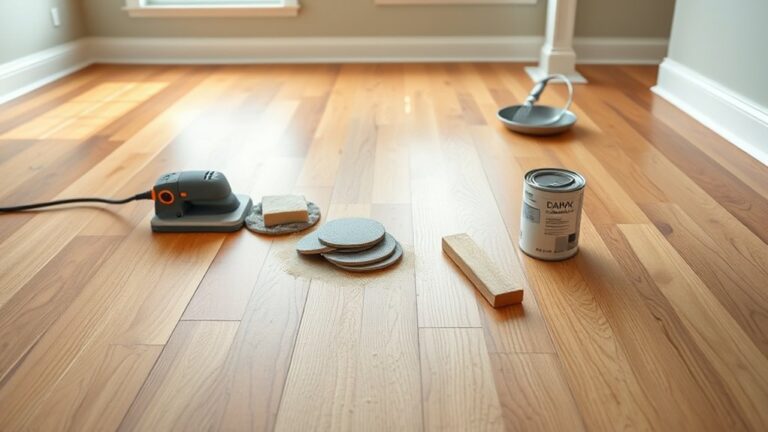
Clean and Dry Pallets for Resale
When you plan to resell pallets, clean, dry ones fetch higher prices and attract more buyers. You’ll inspect for nails, mold, and oil stains, then sweep and scrub with a stiff brush and mild detergent.
Let pallets dry thoroughly in sun or a ventilated area to prevent warping. Treat minor mold with vinegar solution, and replace any loose boards to improve appearance without disassembling. Package or stack neatly for pickup.
- Sweep off debris
- Scrub stains gently
- Sun-dry or ventilate
- Spot-treat mold with vinegar
- Tighten or replace loose boards
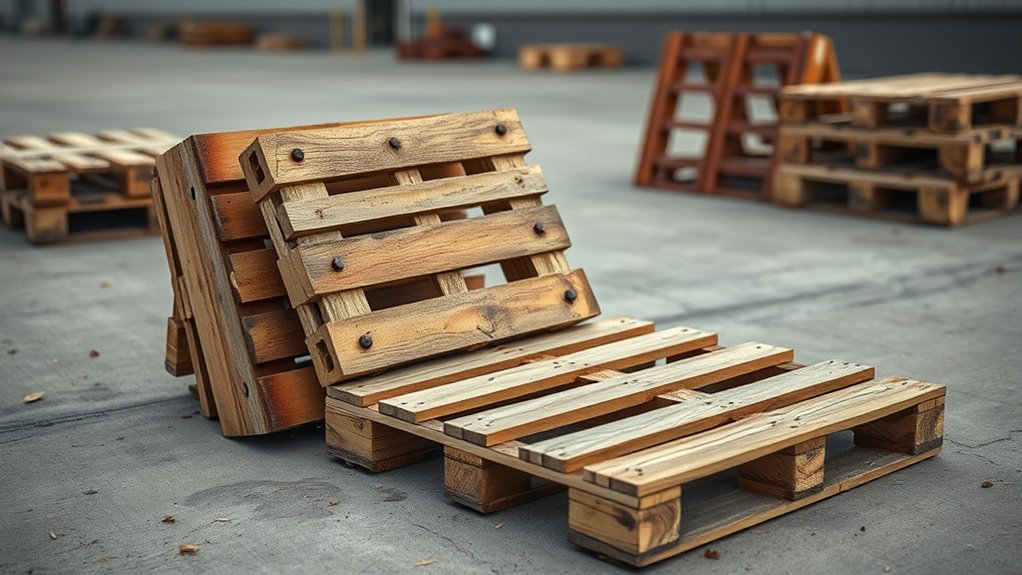
Disassemble Pallets With Basic Tools
If you want usable lumber or fasteners, disassemble pallets carefully with basic hand tools so you don’t split boards or bend nails. Start by removing loose debris, then pry boards gently with a pry bar and claw hammer, working along seams to keep pressure even.
Use a nail puller or cat’s paw for stubborn nails; tap the tool under the head and lever out nails without tearing the wood. Cut remaining nails flush with an angle grinder if needed.
Use a nail puller or cat’s paw to lever stubborn nails; grind any flush with an angle grinder to avoid wood damage.
Label and stack reclaimed boards by length and condition. Store fasteners in a container.
Wear gloves and eye protection throughout.
Break Down Pallets for Firewood Safely
Before you start cutting pallets into firewood, make sure you know what they were treated with and remove any metal, hardware, or contaminants so the wood burns cleanly and safely. You’ll wear gloves, eye protection, and a dust mask, and work outdoors on a stable surface.
Use a reciprocating saw or circular saw to cut between boards, avoiding pressure-treated or chemically stained pieces. Pull nails with a pry bar or use a magnet to sweep fragments.
Stack seasoned wood off the ground, covered but ventilated, and only burn pallet wood that’s clearly untreated and dry.
- Wear PPE
- Inspect stamps
- Remove nails
- Cut outdoors
- Season wood
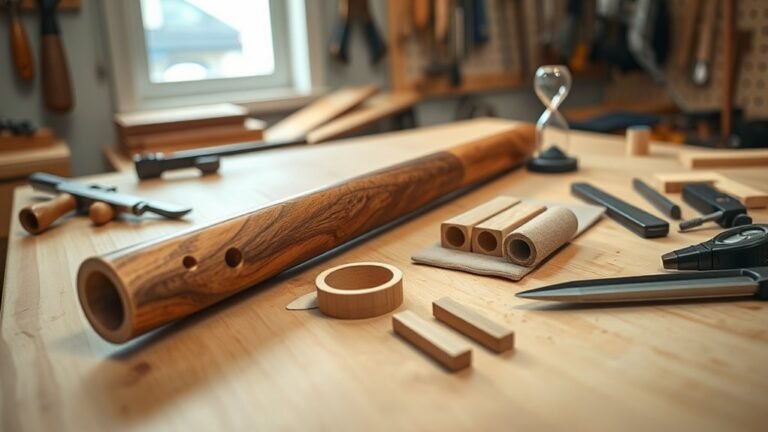
Cut Pallet Boards for DIY Projects
Before you cut anything, measure and mark each pallet board carefully so your pieces fit the project.
Use safe cutting techniques—wear eye and ear protection, clamp boards, and cut with the right saw and blade.
After cutting, sand, clean, and inspect the boards so they’re ready for finishing or assembly.
Measure And Mark
Once you’ve decided on your project, measure and mark each pallet board precisely so your cuts fit the design; take your time and double-check dimensions. Use a tape measure, square, and pencil, and note grain direction and defects. Mark cut lines clearly and label pieces for assembly. Consider spacing for joins and finish thickness.
- Measure twice, mark once
- Use a carpenter’s square for perpendicular lines
- Label boards with project numbers
- Account for blade width in measurements
- Mark end grain and knots to avoid weak spots
Accurate marking saves material and speeds assembly later.
Safe Cutting Techniques
Now that your boards are measured and labeled, it’s time to cut them safely. Wear goggles, gloves, and a dust mask. Use a stable workbench or sawhorses and clamp each board to prevent movement.
Choose the right saw: a circular saw for straight cuts, a jigsaw for curves, or a handsaw for small tasks. Cut slowly along your marks, keeping your free hand well away from the blade.
Let the saw reach full speed before contacting wood and finish the pass without forcing it. After each cut, inspect edges for splinters and sand only as needed before assembly.
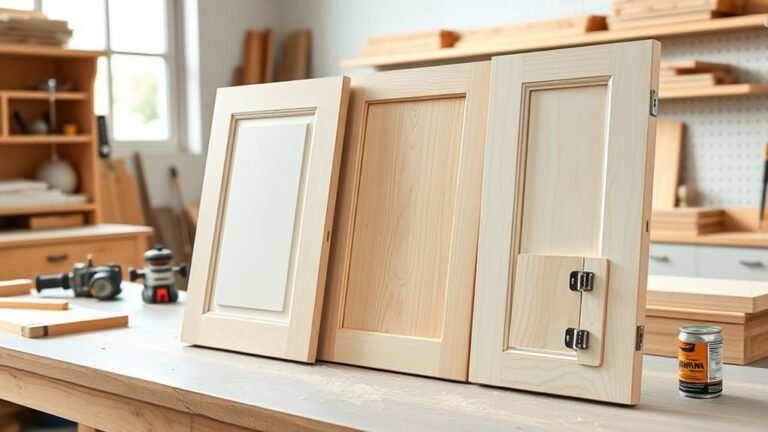
Prepare Boards For Use
After cutting, lay out your pallet boards and inspect each one for nails, cracks, and rot so you only keep sound pieces for your project. You’ll clean, sand, and trim boards to size, and label matching lengths for assembly. Remove any remaining fasteners and rip warped boards; keep replacements handy. Seal or treat wood based on indoor or outdoor use.
- Sand progressively from coarse to fine grit
- Fill holes and gouges with wood filler
- Crosscut ends square for tight joints
- Stain or paint samples before full finish
- Store flat, elevated, and dry until use
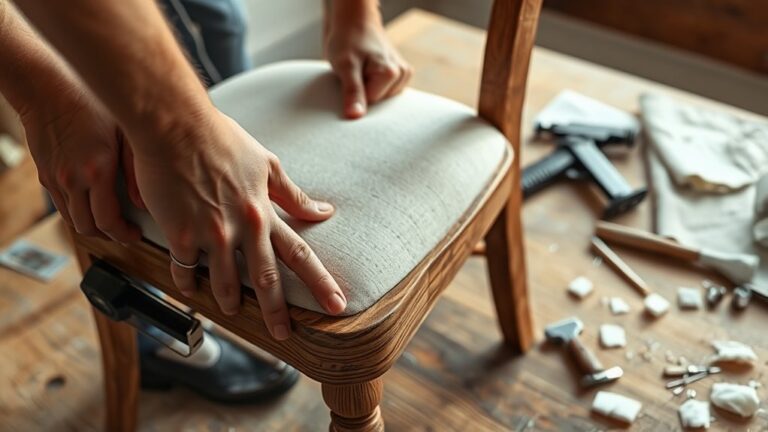
Fast Furniture: Repurpose a Pallet in an Hour
If you’ve got a pallet, a few basic tools, and an hour to spare, you can turn that scrap into a useful piece of furniture that looks intentional, not thrown together.
Start by sanding rough spots and removing loose nails. Decide on a simple project—side table, bench, or wall shelf—then trim or disassemble only as needed.
Secure boards with screws or brackets for strength, add felt pads or casters, and finish with a quick coat of stain or paint for protection.
Focus on clean joins and balanced proportions so your speedy build feels polished and functional.
Sell Pallets Online for Same-Day Pickup
When you list pallets for same-day pickup, highlight quantity, condition, and pickup window so buyers can decide quickly. Clear photos and a firm price cut the back-and-forth and attract local contractors or shop owners who need material immediately.
List quantity, condition, pickup window, clear photos, and a firm price for same-day pallet buyers.
You’ll speed sales by being specific, responsive, and flexible on timing. Offer easy curbside loading and specify size/weight limits so buyers know what to expect.
- State exact count and pallet type
- Note damage or repairs needed
- Include pickup hours and location details
- Post 3–5 clear photos from different angles
- Set a non-negotiable price to avoid timewasters
Best Local Listing Sites and Templates
Choosing the right local listing sites and using tight, clear templates makes selling pallets fast and painless. Use Craigslist, Facebook Marketplace, OfferUp, Nextdoor, and local buy/sell groups. Post concise titles, pallet counts, condition, pickup details, and price. Reply fast and set expectations.
| Site | Quick Template |
|---|---|
| Craigslist | “Pallets: 10 used, good cond. $5 each. Pickup: [zip].” |
| Marketplace | “10 wood pallets, stackable. $40 total. Pickup today.” |
| OfferUp | “Wood pallets x10, firm price, cash only, pickup.” |
| Nextdoor | “Free/cheap pallets x10—pickup in [neighborhood].” |
Give Pallets Away on Community Platforms
Post your pallets on local online marketplaces like Facebook Marketplace or Craigslist to reach buyers nearby quickly.
You can also share them in neighborhood social groups or on Freecycle and BuyNothing to give them away for free to folks who’ll reuse them.
Be clear about size, condition, and pickup details so people can claim them fast.
Local Online Marketplaces
Wondering how to move unwanted pallets fast and avoid landfill? Use local online marketplaces to list pallets free or cheap, reach hobbyists, builders, and upcyclers, and control pickup times.
Write a clear title, include dimensions and photos, state condition, and set pickup rules. Highlight safety and reuse ideas to attract buyers.
- Post on neighborhood marketplace sites
- Use clear photos and exact sizes
- Set “first-come, pickup” terms
- Describe nails, damage, and cleanliness
- Offer multiple contact methods
Respond quickly, update listings when gone, and remove posts after pickup.
Neighborhood Social Groups
If you want pallets gone fast and free, tap into neighborhood social groups where neighbors swap, borrow, and pick up items quickly.
Post clear photos, dimensions, and condition; state pickup details and any restrictions. Use direct, friendly language and set a first-come, first-served policy to avoid back-and-forth.
Pin the post or update it when claimed so others know. Offer helpful disposal tips—like bringing gloves or a truck—to speed pickup.
Monitor comments and remove the listing once collected. These groups move items fast, so respond promptly and keep safety in mind when arranging meetups.
Freecycle And BuyNothing
When you want pallets gone without fuss, use community platforms like Freecycle and BuyNothing to give them away for free; they’re built for locals who’ll pick up fast and often for free. You post clear photos, list pick-up details, and wait — people who craft or reuse pallets respond quickly.
Be honest about condition and safety, arrange a convenient pickup spot, and confirm timing. These groups cut disposal costs and reduce waste, and you’ll likely find someone enthusiastic for projects.
- Take sharp photos in daylight
- State dimensions and condition
- Offer curbside pickup
- Set a firm pickup window
- Respond promptly to requests
Use Social Media to Find Local Takers
Looking to get rid of pallets fast? Use social media to reach nearby takers quickly. Post clear photos, dimensions, condition, and pickup details on local buy/sell groups, neighborhood pages, and community apps.
Use concise, searchable titles and include keywords like “free pallets” and your town. Set a time window to encourage quick responses and ask commenters to message you to avoid clutter.
Pin or update the post when claims change so others know availability. Share to your story for extra visibility and tag local DIY or gardening groups that might repurpose pallets.
Be prompt and polite when coordinating pickup.
Screen Potential Buyers and Pickup Services
Wondering how to separate serious buyers from time-wasters? You’ll vet inquiries quickly: ask purpose, pickup timeframe, and vehicle type. Verify contact details and check reviews or profiles. If someone seems vague, move on. Use clear expectations so pickups stay smooth.
- Ask for a full address and pickup vehicle
- Request photos of buyer profile or business page
- Confirm availability windows (but don’t yet negotiate same-day terms)
- Ask whether they’ll disassemble or need whole pallets
- Set a short-response deadline to filter noncommittal replies
Trust instincts; prefer repeatable communication and documented agreements.
Negotiate Same-Day Pickup Terms
When arranging same-day pickup, make sure you agree on a clear pickup window so you’re not waiting around all day.
Confirm payment terms and any fees up front so there are no surprises when the truck arrives.
Also agree on a contingency pickup plan if they’re delayed or can’t make it.
Clear Pickup Window
If you want same-day pickup for your wood pallets, set a clear window and confirm it in writing so both parties know exactly when the carrier will arrive. Tell the driver your preferred two-hour span, get their estimated arrival, and agree on backup times if traffic or loading delays occur.
Use text or email confirmations and save timestamps. Before pickup day, remind the carrier and verify access instructions.
At arrival, note the time and communicate any changes immediately.
- Choose a two-hour window
- Confirm via text or email
- Provide precise access details
- Set a backup window
- Record arrival time
Payment And Fees
1. You’ll want to agree on payment and fees before same-day pickup to avoid surprises. Ask the hauler for a firm quote that covers labor, fuel, disposal, and any rush charges. Offer cash or instant electronic payment if they’ll discount for immediate settlement.
Confirm whether they charge per pallet, per load, or by time, and get any minimums in writing — text or email works. If you need a faster pickup, expect a premium; negotiate a capped fee instead of open-ended rates.
Keep receipts and record the agreed amount so both sides stay accountable.
Contingency Pickup Plan
Because same-day pickups can hit snags, set a clear contingency plan with your hauler before they arrive. You’ll avoid delays and surprise charges by agreeing on alternatives and responsibilities in advance. Specify communication methods, extra fees, and timing so everyone knows what to do if issues pop up.
- Confirm a backup pickup window or next-available slot
- Agree on a fair surcharge cap for overtime or quick reschedules
- Decide who covers removal of inaccessible or damaged pallets
- Specify photo proof for disputes and accepted communication channels
- Set cancellation notice period and refund terms
Stick to the plan and follow up in writing.
Price a Paid Pickup to Get It Gone
When you don’t want to haul pallets yourself, hiring a paid pickup service can save time and effort while giving you a clear upfront cost.
Get quotes from local junk haulers, carpenters, or specialized pallet removers—provide pallet count, size, condition, and pickup location for accurate pricing.
Request quotes from junk haulers, carpenters, or pallet removers—include pallet count, sizes, condition, and pickup location.
Ask if fees include loading, disposal, recycling, or transport; some charge per pallet, per load, or by truck size.
Confirm scheduling, payment methods, and cancellation policy.
Verify insurance and waste handling to avoid surprises.
Compare offers, choose the best value, and schedule promptly so the pallets are removed without delay.
Arrange Curbside Pickup With Your City
Check your city’s bulky-waste or recycling guidelines to see if pallets are accepted and whether there are size or material rules.
Schedule the curbside pickup on the designated collection day and note any limits on quantity.
Before pickup, break down or stack pallets as required and remove nails or nonwood materials so they meet the rules.
Check Local Guidelines
Wondering how to get rid of pallets without hauling them yourself? Check local guidelines first so you don’t get fined or turned away. Contact your city or sanitation department to confirm rules about curbside pallet pickup, size limits, preparation, and acceptable materials.
Note any required permits or special collection days. Prepare pallets accordingly—remove nails, break them down if required, or bundle them. Use the checklist below before you arrange pickup:
- Confirm curbside acceptance
- Verify size and weight limits
- Ask about bundling or disassembly
- Check permit or fee requirements
- Note hazardous material restrictions
Schedule Pickup Day
If your city offers curbside pallet pickup, call or use their online portal to schedule a specific collection day so you’re not left waiting at the curb. Confirm pickup rules, allowable pallet counts, and any permit requirements during the call or online form.
Ask about size or weight limits and whether mixed materials are accepted. Note the cutoff time for setting or changing appointments and request an email or text confirmation.
Mark the scheduled day on your calendar and set a reminder to move pallets to the designated spot that morning. Keep the confirmation number handy in case of issues on collection day.
Prepare Pallets Properly
Before you set pallets out for curbside pickup, make sure they’re clean, dry, and stacked neatly so collection crews can handle them quickly and safely. Check your city’s rules, note size limits, and pick a sturdy spot out of traffic. Label if required and keep them accessible.
- Remove nails, loose boards, and debris
- Stack uniformly, no higher than guidelines allow
- Tie or band stacks to prevent shifting
- Keep away from sidewalks, hydrants, and driveways
- Mark treated or stained pallets clearly
Follow these steps so pickup goes smoothly and you avoid fines or delays.
Schedule Bulky-Item Pickup With Hauler
Once you’ve gathered and stacked your pallets neatly, contact your regular trash hauler to arrange a bulky-item pickup—you’ll save trips and avoid hauling heavy wood yourself.
Check your hauler’s guidelines: size limits, weight restrictions, number of items allowed, and any preparation required like breaking pallets down or bundling. Ask about fees and schedule windows so you can place pallets curbside on the correct day.
Label items if needed and keep access clear for the crew. If your pickup requires proof of residency or account info, have it ready. Confirm pickup the day before to avoid missed collections.
Find a Junk Removal Service for Pallets
When you’d rather skip hauling or your hauler won’t take pallets, hire a junk removal service to handle pickup, transport, and disposal for you. You’ll save time and avoid safety risks while pros sort, break down, and haul pallets to recycling or disposal sites.
Get quotes, check reviews, and confirm they accept wood pallets.
- Ask about pallet disposal or recycling options
- Verify pricing structure and any minimums
- Confirm insurance and licensing
- Schedule a pickup window that fits you
- Request a receipt or waste manifest for records
Choose a company with clear policies and fast turnaround.
Donate Pallets to Schools, Farms, Nonprofits
You can offer pallets to local schools and education programs for woodworking classes, STEM projects, or outdoor classroom builds.
Farms and community gardens often need pallets for compost bins, raised beds, or fencing, and they’ll usually appreciate a free supply.
Contact the organizations directly to confirm condition and arrange pickup.
Schools And Education Programs
If you’ve got extra wood pallets, consider passing them to local schools, farms, or nonprofits where they’ll become teaching tools, garden beds, or building materials for student projects. You can contact vocational programs, art classes, or STEM clubs and offer pallets for hands-on learning.
Make sure pallets are clean and safe; remove nails and broken boards first. Coordinate pickup or drop-off and include basic safety guidelines.
Suggestions for use:
- Build simple workbenches for shop class
- Create outdoor seating for campus events
- Supply materials for sculpture and art projects
- Support woodworking lessons in vocational training
- Provide components for classroom engineering challenges
Farms And Community Gardens
Because community gardens and farms often need low-cost, usable materials, donating clean wood pallets can give you a quick, practical way to support local food and green-space projects. Contact local farms, cooperatives, or gardening groups to ask if they accept pallets; many use them for compost bins, raised beds, trellises, pathways, or storage.
Inspect pallets first: only donate untreated, clean, sturdy wood without chemical stamps. Arrange drop-off or pickup, and include nails removed or countersunk for safety.
You’ll reduce waste, help neighbors, and free up space—an efficient, eco-friendly solution that benefits your community.
Locate Recycling Centers That Accept Pallets
Start by checking nearby municipal recycling centers and private drop-off facilities that list wood pallets as acceptable materials — many will accept whole pallets for reuse or chip them for mulch. You can search online directories, call facilities to confirm sizes and contamination rules, and ask about drop-off hours or pickup services.
Bring any proof of ownership if required, and separate treated or damaged pallets per facility rules.
Use these tips to streamline the process:
- Confirm pallet types accepted
- Ask about fees or free drop-off
- Verify contamination and treatment policies
- Schedule pickup if offered
- Get receipt or documentation
Recycle Pallet Wood Into Mulch Safely
Want to turn old pallets into useful mulch? Inspect each pallet for paint, stamps, chemicals, and metal fasteners; avoid pallets marked MB (methyl bromide) or heavily treated.
Remove nails, screws, and hardware, then break boards into manageable pieces. Use a wood chipper or saw to create 1–2 inch chips, aiming for uniform size to promote even moisture retention.
Remove nails and hardware, break boards down, then chip to 1–2″ pieces for consistent moisture and texture.
Screen out large splinters and contaminated pieces. Apply mulch around ornamentals, trees, and non-edible beds only, avoiding vegetable gardens.
Monitor for mold and replace if needed. Store mulch dry and use within a year for best results.
Compost Pallet Wood: Do’s and Don’ts
Before you toss pallet wood into your compost, check for chemical stamps like MB (methyl bromide) or HT (heat-treated) so you know what you’re dealing with.
Don’t compost pallets treated with questionable chemicals — stick to heat-treated or unstamped wood.
If the wood is safe, break it into small chips or sawdust and let it age so it balances with green materials.
Check For Chemical Stamps
When you’re handling pallet wood for compost or garden projects, always check the stamps and labels to see if it’s been chemically treated; those marks tell you whether the wood’s safe to compost or should be kept out of soil and plants.
Look for HT (heat-treated) as safe, MB (methyl bromide) or other chemical codes as dangerous, and unfamiliar markings that warrant caution.
If in doubt, don’t compost it. Record any treated pallets you reject and separate them from clean wood to avoid contamination.
- HT = heat-treated, generally safe
- MB = methyl bromide, avoid
- Chemical names = avoid
- Missing stamp = be cautious
- Photographic record materials
Prepare Wood Properly
If you’ve confirmed the pallet is safe (HT stamped or known untreated), prep the wood so it breaks down efficiently in your compost. Chop or chip the pallet into small pieces; increased surface area speeds decomposition.
Remove nails, screws, staples, and any metal to protect tools and your compost.
Avoid painted, stained, or pressure-treated boards—even small amounts can leach toxins.
Mix wood chips with nitrogen-rich materials like kitchen scraps, grass clippings, or manure to balance the carbon-heavy wood.
Monitor moisture and turn the pile regularly to keep it aerobic.
Don’t add large intact boards—they’ll persist for years.
Dispose of Treated vs. Untreated Pallets Legally
Because treated and untreated pallets are regulated differently, you’ll need to identify the type first and follow the appropriate disposal rules. Treated pallets often carry chemical or heat-treatment stamps and may be restricted from composting or burning, while untreated wood can usually be recycled, mulched, or burned where local laws allow.
Identify whether a pallet is treated or untreated first—treatment affects disposal, composting, burning, and local rules.
You should then sort, label, and handle them safely, keeping treated wood separate to avoid contamination. Consider these options:
- Recycle untreated pallets at wood recovery centers
- Donate reusable pallets to businesses or community groups
- Chip untreated wood for mulch or compost
- Dispose treated pallets via hazardous-waste programs
- Sell salvageable boards online
Check Local Regulations Before Dumping Pallets
After sorting treated and untreated pallets, check your city and county rules before you dump or burn anything. Look up municipal codes, waste authority guidelines, and burn bans online or call local agencies.
Some areas prohibit dumping pallets at curbside, restrict open burning, or require permits for transport to disposal sites.
Note recycling center hours, accepted materials, and any preparation rules like cutting or nailing removal. Keep documentation of permits or approvals if needed.
Following local rules prevents environmental harm and legal trouble, and helps you choose compliant options like approved recycling, donation, or licensed disposal services.
Avoid Fines at Transfer Stations
When you bring pallets to a transfer station, follow posted rules and staff instructions to avoid fines. You’ll save time and money by preparing pallets correctly and knowing fees. Check acceptable materials, load limits, and hours before arrival. Be honest about quantity to avoid citations.
- Separate treated or painted pallets
- Remove non-wood debris and hardware
- Stack neatly to facility standards
- Declare commercial quantities if applicable
- Pay required disposal or processing fees
Staff can refuse improperly prepared loads. Call ahead if unsure, and get clear instructions to prevent surprises and fines.
Transport Pallets Safely in a Pickup or Trailer
If you’re hauling pallets in a pickup or trailer, secure them so they won’t shift, blow out, or overload the vehicle. Balance weight over the axle(s), stack pallets flat, and avoid overhanging more than local regulations allow.
Use ratchet straps or ropes to anchor bundles to tie-down points; tarps help contain debris and prevent wind lift. Check tire pressure and suspension for added load.
Anchor pallets with ratchet straps or ropes to tie‑downs, cover with a tarp, and check tires and suspension.
Drive slowly, avoid sudden maneuvers, and signal early for lane changes. Stop after a short distance to recheck fastenings.
If pallets are damaged or unstable, move them individually or seek alternative transport to stay safe.
Load and Secure Pallets for Transport
Before you lift a pallet, plan its placement so weight sits over the axle and the load stays low and centered; this reduces sway and makes securing straps more effective. Position pallets flat, interlock if stacking, and keep heavier units below.
Use straps and ratchets rated for the load, protecting wood with edge guards. Tie down to anchor points and check tension after a short drive. Inspect tie-downs periodically.
- Place pallets over trailer axles
- Stack evenly, avoid offsetting loads
- Use rated straps and edge protectors
- Secure to solid anchor points
- Re-tension after driving a short distance
Handle Broken or Hazardous Pallet Pieces
After you’ve loaded and secured pallets, address any broken or hazardous pieces before transport or reuse; damaged boards, protruding nails, and loose blocks can cause load shifts, punctures, or injuries.
Inspect each pallet and mark unsafe areas. Remove split or warped boards that won’t hold weight, and cut away splinters that could snag.
Hammer down or clip protruding nails flush so they won’t catch skin or tires. Replace or brace loose blocks with screws or straps if you plan to reuse the pallet.
If a pallet is extensively damaged, set it aside for disposal to avoid accidents during handling.
Salvage Nails and Hardware From Pallets
When you’re ready to reclaim nails and hardware, work deliberately so you don’t damage boards you plan to reuse or injure yourself; wearing gloves and eye protection is essential.
Start by prying boards gently with a pry bar, then use a hammer or nail puller for stubborn fasteners. Keep hardware sorted and inspect for rust before reuse or recycling.
Pry boards gently with a bar; use a hammer or nail puller for stubborn fasteners and sort hardware by condition.
- Use a pry bar to lift boards evenly.
- Cut bent nails flush with a grinder if pulling risks splitting wood.
- Collect screws separately in labeled containers.
- Clean salvageable brackets with a wire brush.
- Recycle rusty metal responsibly.
Store Leftover Pallet Wood for Later Projects
If you’re not ready to use every board immediately, sort and stack your leftover pallet wood in a dry, ventilated spot so it stays straight and mold-free.
Label bundles by thickness and length so you can grab the right pieces for future projects. Keep thinner slats separate from heavy planks to prevent warping.
Elevate wood on pallets or 2x4s to avoid ground moisture, and use stickers (small spacers) between layers to promote airflow.
Check periodically for pests or rot, and apply a light coat of sealant if you plan long-term storage.
Rotate stock to use older wood first.
Combine Selling and Donating for Fast Clearance
Looking to clear out pallets fast? Use a split approach: sell what’s valuable and donate the rest to move inventory quickly and help others. You’ll reach more buyers and avoid hauling unsellable pieces to the dump. Follow a simple plan to price, list, and coordinate drop-offs or pickups.
- Inspect and separate sturdy pallets from damaged ones
- Price bulk lots competitively and list locally
- Offer damaged pallets free to community groups
- Arrange timed pickups to minimize effort
- Keep records of donations for tax or tracking
This combo speeds clearance while maximizing return and good will.
Use Pallet Removal in a One-Day Cleanup Plan
After you’ve split sellable pallets from the rest, plan a one-day removal to clear the remainder fast. Schedule a pickup with a local pallet removal service that confirms same-day or next-day collection.
Gather unsellable, damaged, and scrap pallets in one accessible area to speed loading. Provide clear directions and a contact number for the crew.
If you’re handling transport, rent a truck or trailer and recruit helpers to load quickly. Aim to finish before evening to avoid permits or noise issues.
Once removed, sweep the area and document the pickup for records and future planning.
Estimate Time and Cost for Removal Methods
When you compare removal options—hauling yourself, hiring a local pickup service, or contracting a pallet company—estimate both hands-on time and out‑of‑pocket costs so you can pick the best fit for schedule and budget. You’ll assess labor, transport, disposal fees, and any prep work.
Factor in tools, fuel, loading time, and waiting or appointment windows. Use quick estimates to narrow choices, then get quotes for precision.
- Haul yourself: time to load + fuel cost
- Local pickup: per-pallet or per-trip rate
- Pallet company: pickup schedule and fee
- Disposal: landfill or recycling charges
- Hidden costs: permits, damage
Choose the Fastest Method for Your Budget
Now that you’ve compared time and cost for each removal option, pick the fastest approach that fits your budget by balancing speed against expense. Decide whether you’ll pay for pickup, rent a truck, or recruit friends. Factor convenience: same-day pickup costs more but saves time. If safety or local rules matter, budget for disposal fees. Choose the option that clears pallets quickly without overspending. Use the quick comparison below to confirm your choice.
| Method | Typical Speed/Cost |
|---|---|
| Pickup service | Fast / Higher |
| Rental truck | Fast / Moderate |
| Donation pickup | Moderate / Low |
| DIY haul | Slow / Low |
| Junk removal | Fastest / Highest |
Prevent Future Pallet Clutter at Your Property
Want to stop pallets from piling up again? You can prevent clutter with a few simple, consistent habits. Keep storage tidy, reduce intake, and make reuse or removal routine so pallets don’t become a problem.
- Inspect deliveries and refuse excess pallets.
- Designate a compact, covered pallet zone.
- Rotate and reuse pallets promptly.
- Schedule regular pickups with recyclers or haulers.
- Teach staff or neighbors to follow pallet rules.
Stick to these steps, enforce them, and check weekly. You’ll cut buildup, save space, and avoid last-minute disposal headaches without overhauling your operations.
Set Up a Simple System to Manage Incoming Pallets
Because incoming pallets can quickly overwhelm space, set up a straightforward intake routine you and your team will actually follow. Designate a single drop zone near loading; post clear signage and mark safe stacking limits.
Set a single drop zone with clear signage and safe stacking limits to control incoming pallet flow.
Assign one person per shift to inspect, log, and tag pallets as “keep,” “repair,” or “remove.” Use color-coded tags and a simple spreadsheet or app to track counts and destinations.
Schedule daily or weekly pickups for removals so piles don’t grow. Train drivers to leave pallets neatly and require approval for extra deliveries.
Review the system monthly and tweak rules to keep flow consistent.
Turn Pallet Salvage Into Ongoing Material Savings
Once you’ve got intake under control, start treating salvage as a regular source of materials and savings instead of a one-off chore. You’ll want a simple routine to sort, grade, and repurpose pallet wood so it fuels projects and reduces purchases.
Track usable stock and common sizes so you can plan builds, sell extras, or trade materials. Consistency turns leftovers into predictable inventory and cuts costs over time.
- Create standard grading criteria
- Log dimensions and quantities
- Schedule weekly inspections
- Assign storage zones for readiness
- Set simple repurpose priorities
Frequently Asked Questions
Can I Legally Burn Pallets in My Backyard?
You probably can’t legally burn pallets in your backyard without checking local laws and burn bans; treated or painted pallets release toxic fumes, so you’ll want permits, proper containment, or safer disposal options to avoid fines and health risks.
How Do I Identify Pesticide-Treated Pallet Wood?
You check stamped codes, greenish tint, or strong chemical odors; treated pallets often bear HT, MB, or DB markings—avoid MB (methyl bromide) and green dye. If unsure, don’t burn or use for indoor projects.
Are There Liability Issues When Giving Pallets Away for Free?
Yes — you can face liability if someone gets hurt or uses treated pallets incorrectly. You should disclose known hazards, avoid promising safety, keep records, consider waivers or “as‑is” disclaimers, and check local laws before giving them away.
Can Termites or Pests Spread From Stored Pallets?
Yes, they can. If you store pallets outdoors or against buildings, pests like termites, ants, or rodents can infest and spread to nearby structures or materials, so you should inspect, elevate, and treat or remove infested pallets promptly.
What Insurance Covers Damage During Pallet Pickup?
Your commercial general liability or property insurance might cover damage during pallet pickup, but you’ll often rely on the hauler’s liability or a transportation policy; check contracts, certificates of insurance, and deductible limits carefully.
Conclusion
You’ve got options—sell, donate, haul, or repurpose—so act fast and pick the one that fits your time and budget. First sort pallets by condition and safety, dispose of broken or chemical-treated ones, and keep only what’s reusable. Set up a simple intake system to prevent future clutter and turn usable pallets into projects or savings. Do this now and you’ll clear space, save money, and stop pallet pileups for good.