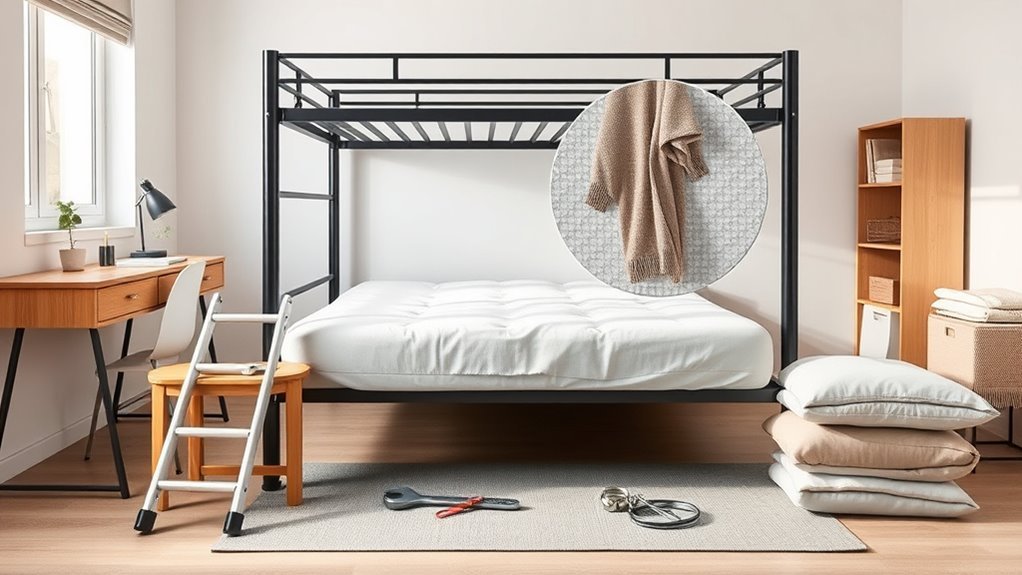
How to Loft a Dorm Bed
You can loft a dorm bed by first checking your housing rules and measuring ceiling height, then choosing a safe method—manufacturer kits, metal risers, or reinforced DIY brackets—and confirming mattress plus rail clearances. Secure the frame to studs with load-rated hardware, test stability, and avoid unstable supports like cinder blocks. Keep pathways clear for fire safety and document approvals and hardware for move-out. Continue below and you’ll find detailed steps, materials, and safety checks to follow.
What “Lofting” a Dorm Bed Means

When you loft a dorm bed, you raise the mattress platform to create usable space beneath it—usually for storage, a desk, or seating—by using built-in hardware, aftermarket risers, or a compatible lofting kit.
Lofting changes vertical layout, giving you room to work, sit, or stash belongings without expanding your footprint. You’ll secure legs or brackets, confirm mattress and guardrail heights, and follow dorm rules to keep it safe and allowed.
Depending on the method, you might need tools, help lifting, and periodic checks for stability. Done properly, lofting maximizes tiny rooms while keeping access and safety in mind.
Who Should Loft a Dorm Bed
You should only loft your dorm bed if it’s safe for you and anyone who’ll be sharing the room — consider climbability, ceiling height, and any medical or mobility issues.
Talk it over with your roommate before making changes, since a lofted bed affects space, privacy, and shared furniture placement.
If you both agree and safety checks are met, a loft can be a smart way to free up floor space.
Health And Safety
If you’re comfortable climbing a ladder and confident balancing on a raised sleeping surface, lofting a dorm bed can be a safe, practical choice for maximizing space.
Before lofting, assess your mobility, balance, and any medical conditions—like vertigo, recent surgeries, or joint problems—that could make climbing risky.
Check weight limits of frames and mattresses, and pick sturdy ladders and guardrails.
Keep a clear pathway and adequate lighting to prevent trips at night.
If you sleep deeply or move a lot, consider lower loft options.
Consult a doctor if you have health concerns, and follow manufacturer safety instructions strictly.
Roommate Considerations
Balancing safety with shared living means talking to your roommate before lofting a bed—agree on who handles assembly, anchor points, and whether one side of the room will be more crowded.
Decide who benefits most: the person who needs floor space for study or storage often gains more from a lofted bed.
Discuss schedules, noise, and visitors so neither of you feels inconvenienced.
Share costs and tool responsibilities up front, and confirm both understand emergency access and fire safety rules.
If either of you disagrees or feels unsafe, postpone or choose a different layout to keep living arrangements fair.
Check Your Dorm’s Rules and Housing Policies
Before you buy parts or start cutting wood, check your dorm’s housing policies so you know what’s permitted. Most schools have specific rules about lofting, bed heights, hardware, and whether you can modify provided furniture. Contact housing or read the handbook for explicit permission, approved vendors, and required inspections.
Ask about fire codes, weight limits, tethering, and prohibited tools or adhesives. Get any approvals in writing and keep records.
If you share a room, involve your roommate and document agreements. Following rules avoids fines, forced dismantling, or safety violations, and ensures your loft stays compliant all semester.
Measure Room Height and Required Head Clearance
Now that you’ve confirmed what’s allowed, measure your room’s ceiling height so you can determine a safe loft height and head clearance. Use a tape measure from floor to ceiling at multiple spots—corners can vary—then note the lowest measurement.
Subtract at least 33–36 inches for comfortable sitting and 18–24 inches more if you’ll sit upright in bed; leave extra if you’re tall. Also measure window placements, light fixtures, and vents that could interfere.
Record these dimensions before buying or modifying a frame. Accurate measurements prevent headaches, guarantee safety, and help you pick a loft height that actually fits.
Check Your Bed Frame Type and Mattress Thickness

Once you know your ceiling clearance, check what kind of bed frame you have and how thick your mattress is so you can calculate the actual sleeping-platform height. Measure from floor to top of mattress with bedding off. Note frame type—slatted, box spring, platform, or metal—because each changes how much height you add when lofting. Compare that combined height to your safe loft height from the previous step.
- Measure frame thickness at its highest point.
- Measure mattress thickness in compression and at rest.
- Record both numbers and add them.
- Subtract total from ceiling clearance to verify headroom.
Check Weight Limits, Frame Stability, and Mattress Support
You’ve measured your mattress and frame, so next check how much weight the frame can safely carry and whether it’ll stay steady at a higher height. Look for a stamped or printed weight limit on the frame or consult the manufacturer.
Include mattress, bedding, and occupant weight plus any storage or furniture you’ll add.
Inspect welds, bolts, and legs for cracks, corrosion, or looseness.
Test stability by applying pressure at varying points and simulate getting in and out.
Confirm slats or platform adequately support your mattress type; add a bunkie board or plywood if recommended to prevent sagging.
Tools and Supplies to Have Before You Start Lofting
Before you start lifting the bed, gather the right tools and supplies so the job goes quickly and safely. You’ll want items that protect the frame, secure hardware, and make adjustments easier. Don’t grab random tools — prepare specifically for bolts, metal edges, and moving heavy parts. Have someone help if pieces are awkward or heavy.
- Adjustable wrench or socket set
- Rubber mallet and soft cloth pads
- Locking pliers and spare bolts/washers
- Non-slip pads or furniture cups
With these on hand, you’ll reduce scratches, stripped threads, and wobbly fittings while you work.
Quick Step‑by‑Step Guide to Lofting Your Dorm Bed
Although lofting a dorm bed sounds intimidating, you can do it safely and efficiently by following a few clear steps and working with a helper.
First, read your bed and dorm policies, then clear the area. Remove mattress and bedding, loosen fasteners, and keep hardware organized.
First, check bed and dorm rules, clear the area, remove bedding, loosen fasteners, and organize hardware.
With your helper, lift one side and detach legs or brackets as instructed. Raise the bed to the chosen height, secure new supports or extension pieces, and tighten all bolts evenly.
Replace mattress, test stability by applying weight, and recheck fasteners after a day. Keep your tools handy for adjustments.
Dorm Bed Lofting Options: Full, Partial, and Platform
Now that you know the basic steps to lift a dorm bed, choose the loft style that fits your space and needs: full loft raises the mattress high to clear floor space underneath for a desk or seating.
Partial loft lifts only one end to create storage or a low workspace.
Platform loft builds a wide, stable sleeping surface often with integrated storage beneath.
Pick based on ceiling height, roommate needs, and daily routine. Balance safety, access, and storage.
Measure before altering. Consider mattress thickness for guardrail effectiveness.
- Full loft: max floor clearance
- Partial loft: flexible footprint
- Platform: integrated storage
- Safety: rail and ladder planning
Use Manufacturer Lofting Kits (Pros and Cons)
If you want a straightforward, warranty-safe way to raise your dorm bed, use the manufacturer’s lofting kit — it’s designed to fit your specific frame and keeps you within school rules.
For a simple, warranty-safe lift that meets school rules, use your bed frame’s manufacturer lofting kit.
You’ll get parts that align with bolt patterns, clear instructions, and support rated for the original design, so installation is usually quick and secure.
Downsides include limited height options, higher cost than generic hardware, and dependence on availability for older models.
If you value compliance, ease, and preserving warranties, a manufacturer kit is the smart choice; just check stock and measure desired clearance before buying.
DIY Bed‑Raising Brackets and Extenders
If you’re thinking about DIY bed‑raising brackets and extenders, start by choosing strong, rated materials like steel or thick hardwood to keep the frame safe.
Sketch simple bracket designs that distribute weight evenly and avoid complex joints that can fail.
When you install them, tighten connections, use locking hardware, and test stability thoroughly before sleeping on the lofted bed.
Choosing Safe Materials
When you decide to build DIY bed‑raising brackets or extenders, prioritize materials rated for structural loads and indoor use. Steel angle brackets, hardwood blocks, and high‑grade lag bolts will outperform cheap plastics or thin sheet metal. You’ll want components that resist shear, bending, and corrosion; choose galvanized or powder‑coated steel, kiln‑dried hardwood, and stainless or zinc‑plated fasteners.
Match screw length and diameter to frame thickness and avoid adhesives as primary anchors. Inspect for defects and test fit before final assembly. Keep documentation of load ratings and campus rules.
- Use load‑rated hardware
- Prefer solid hardwood blocks
- Select corrosion‑resistant finishes
- Verify fastener sizing
Simple Bracket Designs
Although you don’t need fancy tools to raise a dorm bed, stick to simple, proven bracket designs that clamp or bolt to the existing frame and transfer weight down into sturdy legs or blocks.
You’ll want L‑brackets, U‑clamps, or flat plates with threaded rods—materials you can source at a hardware store.
Cut and drill accurately, deburr edges, and use locking nuts or threadlocker for security.
Pad contact points to prevent metal‑on‑metal wear.
Design so load paths run vertically into the legs or blocks, avoiding lateral stress on thin tubing.
Label parts and keep fasteners matched for easy inspection.
Installation And Stability
Start by dry‑fitting each bracket and extender to confirm alignment and clearances before you commit to drilling or bolting anything. You’ll check frame square, mattress fit, and ladder access.
Use grade‑appropriate hardware, lock washers, and threadlocker where vibration could loosen fasteners.
Add lateral bracing or corner gussets to prevent racking.
Tighten fasteners in a cross pattern, then recheck after a day’s use.
- Inspect mounts for distortion or paint cracks after initial load.
- Torque bolts to recommended specs and mark them for periodic checks.
- Place rubber pads to reduce metal‑on‑metal wear and noise.
- Test stability with gradual weight before full use.
Metal Bed Risers and Screw‑In Lifts: Pros and Cons
If you want a sturdy, low‑cost way to raise your dorm bed, metal bed risers and screw‑in lifts are worth considering; they clip or thread into the bed legs and give you several inches of extra clearance without major tools or carpentry.
You’ll get solid, durable support that handles mattresses and sleepers better than plastic risers. Screw‑in lifts offer adjustable height and resist shifting; metal risers are quick to install and remove.
Check weight ratings, leg diameter compatibility, and protect floors with pads. They don’t require permanent modification, but verify campus rules before installing to avoid violations.
Why Cinder Blocks and Loose Wood Blocks Are Unsafe
You might be tempted to use cinder blocks or loose wood blocks because they’re cheap, but they don’t provide stable support. Those materials can crush under weight or shift and slide, creating a sudden collapse risk.
Don’t gamble with makeshift blocks when safer, tested risers are available.
Unstable Support Materials
Although cinder blocks and loose wood blocks might seem like cheap, easy solutions, they’re unstable and can shift, crack, or crumble under a lofted bed’s concentrated weight. You need reliable, rated supports designed for vertical loads and lateral stability.
Don’t improvise with materials that weren’t engineered for repetitive stress, moisture exposure, or uneven floors. Choose manufactured legs, steel frames, or bolted platforms that meet dorm rules and safety standards.
Inspect components regularly and replace any degraded part.
- They can tilt on uneven surfaces.
- They absorb moisture and weaken.
- They may crack under point loads.
- They lack engineered fastening.
Crushing And Sliding Risks
Those unstable supports don’t just wobble — they can crush or slide under load, creating sudden collapse hazards. You might think cinder blocks or loose wood are cheap solutions, but they concentrate weight on small, uneven points.
Under stress, concrete can crumble, mortar can fail, and stacked blocks can shift. Loose lumber can split, compress, or slip, suddenly dropping the bed and whatever — or whoever — is on it.
Use engineered bed frames, metal risers, or properly braced lumber secured with bolts. Inspect connections and distribute load across broad, rated supports to avoid catastrophic failure.
Build a Small Custom Loft Platform (Dorm‑Friendly)
When space is tight, building a small custom loft platform gives you usable room without altering dorm walls or violating rules. You can tailor the height, footprint, and materials to fit your bed and storage needs.
You’ll measure ceiling height and bed size, pick sturdy 2×6 or metal framing, and design a platform that clamps or braces to the bed frame rather than the wall.
Keep the structure low-profile for safety and clearance, and use plywood decking with edge guards. Test stability before use.
- Measure twice; plan once
- Choose lightweight, strong materials
- Prioritize secure connections
- Include guard rails and a safe ladder
Plan Workspace and Storage Under Your Lofted Bed
If you want a functional space beneath your lofted bed, map how you’ll use it—study your daily routines and prioritize zones for work, storage, and relaxation so every inch counts. Decide on a desk size, lighting, and outlets, then assign vertical storage for rarely used items. Use rolling drawers or cubes for flexibility and label bins for easy access. Keep clear pathways and leave knee room at the desk. Measure before buying furniture and choose multiuse pieces like foldable chairs or an under‑bed dresser that doubles as a nightstand.
| Zone | Example item |
|---|---|
| Work | Compact desk |
| Storage | Cube shelves |
| Relax | Bean bag chair |
Ladder and Access Choices: Built‑In, Attachable, or Standalone
Deciding how you’ll climb into your loft matters as much as the bed frame itself, so weigh built‑in ladders, attachable ladders, and standalone options against safety, space, and style. You’ll choose based on room layout, roommate traffic, and how often you’ll need to move the bed.
Built‑in ladders save floor space; attachable ladders offer flexibility; standalone ladders can double as steps or shelves. Consider step depth, handholds, and angle for comfort.
Pick non‑slip treads and sturdy fastenings. Test reach to ceiling lights and shelving before finalizing.
- Built‑in: permanent, space‑saving
- Attachable: adjustable, relocatable
- Standalone: versatile, movable
- Safety features: treads, handholds
How to Secure a Lofted Bed to Stop Wobble and Tipping
To stop wobble and tipping, you’ll want to anchor the loft to a stud in the wall, reinforce the frame joints with brackets or gussets, and fit anti-tip brackets at the base.
Start by checking studs and tightening or replacing any loose fasteners.
These simple steps keep the bed steady and safe without major mods.
Anchor To Wall
Worried your lofted bed might wobble or tip? Anchor it to the wall for safety. Find studs with a detector, mark heights matching bed posts, and use lag bolts or heavy-duty brackets rated for the load. Drill pilot holes, secure brackets to both bed frame and studs, and use lock washers or thread-lock for vibration resistance.
Check for electrical/plumbing before drilling. Test stability by applying pressure to corners, then re-tighten after a week.
- Locate studs and measure carefully
- Choose hardware rated for dynamic loads
- Use wall brackets or L-braces on each corner
- Inspect and retighten periodically
Reinforce Frame Joints
When a lofted bed feels shaky, reinforce the frame joints to stop wobble and prevent tipping; solid connections between legs, rails, and cross-braces make the biggest difference.
Check every bolt and nut, tighten loose fasteners, and replace stripped hardware with properly sized bolts.
Add metal corner brackets at weak joints and use lock washers or threadlocker to keep connections from backing out.
Where possible, fit carriage bolts through overlapping members and secure with nuts and washers on the opposite side.
Finally, inspect welds and damaged tubing—repair or replace compromised pieces so the whole frame stays rigid and safe.
Use Anti-Tip Brackets
Although lofted beds can feel secure, anchoring them to a wall with anti-tip brackets is the single most effective step you can take to stop tipping and reduce wobble. You’ll need simple tools and a helper.
Position brackets where the frame meets the wall, mark stud locations, drill pilot holes, and fasten brackets to studs—not just drywall. Tighten connections and test for movement.
If studs aren’t accessible, use a rated toggle anchor. Check brackets periodically and after any move. Properly installed anti-tip brackets give you confidence and safety without altering the bed’s function.
- Locate studs before drilling
- Use strong, rated hardware
- Tighten and test connections
- Inspect regularly
Mattress and Bedding Adjustments for Lofted Beds
Because lofting raises your sleeping surface, you’ll want to rethink mattress thickness, support, and bedding to keep comfort and safety intact. Choose a low-profile mattress (6–8″) for stability and ladder access, or a medium (8–10″) if railing height allows. Use a firm base or plywood for even support. Secure fitted sheets and tuck blankets to avoid snags. Keep a light-weight duvet to reduce strain on the loft frame.
| Item | Recommendation |
|---|---|
| Mattress | 6–10″ low/medium |
| Base | Plywood or slatted |
| Bedding | Tucked, fitted |
| Weight | Light duvet only |
Fire Safety and Egress for Raised Dorm Beds
When you loft your dorm bed, keep pathways to doors and windows completely clear so everyone can exit quickly in an emergency.
Choose mattresses, covers, and curtains labeled flame-resistant and avoid piling combustible items under or around the bed.
Check that your setup still meets campus egress rules and fire-safety guidelines.
Maintain Clear Egress Pathways
If you loft your dorm bed, make sure exits and pathways remain completely clear so everyone can get out quickly in an emergency. You should keep at least one clear route from the bed to the door and window, avoid blocking stairs or ladders, and position furniture and storage so they don’t obstruct sightlines or movement.
Regularly inspect and remove clutter, especially shoes, bins, and boxes that gather under and around the loft.
Communicate with roommates about evacuation plans and agreed clear zones to prevent accidental blockage.
- Keep floor routes free of storage
- Leave ladder and stair areas unobstructed
- Maintain clear sightlines to exits
- Inspect and declutter weekly
Use Flame-Resistant Materials
Although lofting a bed frees up floor space, you should choose flame-resistant materials for the bed, mattress, bedding, and any under-bed storage to reduce fire risk and help keep egress paths safe. Pick a mattress and mattress cover rated for flame resistance and check labels for compliance with local codes.
Use treated or inherently flame-resistant fabrics for curtains, canopies, and upholstery. Avoid piles of paper, cardboard, or loose textiles under the bed.
Keep charging devices off sleeping surfaces, use UL-listed power strips, and store flammables elsewhere.
Regularly inspect materials for damage and replace anything compromised to maintain safety.
Temporary vs. Semi‑Permanent Lofts: Which to Choose
Deciding between a temporary and a semi‑permanent loft comes down to how long you’ll need the extra space, how much DIY time and skill you’ve got, and what your dorm allows. Temporary lofts are quick, low‑commitment solutions, while semi‑permanent builds offer greater stability and storage but require more work and often campus approval.
Choose temporary for quick, low‑commitment space; choose semi‑permanent for stability, storage, and long‑term use.
You’ll weigh mobility, cost, safety, and landlord rules. Temporary options like risers or tension poles keep moves easy and minimize damage. Semi‑permanent frames let you add shelving and secure fastening for heavier loads, but plan for disassembly, permits, and potential deposits.
- Mobility vs stability
- Cost and tools
- Damage and permission
- Load capacity and safety
Typical Sequence: Step‑by‑Step Lofting Checklist
Start by measuring your mattress, bed frame, and ceiling height so you know what clearance you’ll have and which lofting options will fit.
Next, gather tools and follow the manufacturer’s instructions to assemble the frame securely, tightening all fasteners and checking for wobble.
Finish by double‑checking clearances and stability before putting your mattress back on.
Measure Bed And Ceiling
Before you move anything, grab a tape measure and note two key heights: the distance from the floor to the ceiling and the distance from the floor to the top of your mattress when it’s on the bed frame. Measure twice to avoid surprises.
Check for overhead fixtures, vents, or lighting that reduce usable height. Record measurements clearly so you can compare against loft kit specs or university rules.
Make certain you’ll have at least 36–40 inches of clearance above the mattress for sitting and moving.
- Measure floor-to-ceiling at multiple points.
- Measure mattress height on frame.
- Note obstructions (lights, vents).
- Record all numbers and photos.
Assemble Frame Securely
Once you’ve confirmed clearances and laid out all parts, assemble the loft frame step by step, tightening hardware as you go and checking alignment frequently. Begin by loosely fitting corner brackets and bolts so you can adjust squareness.
Raise side rails onto posts, then add cross supports and slats, keeping everything level with a spirit level. Torque fasteners incrementally—don’t over tighten until frame sits true.
Install safety rails and ladder per instructions, verifying each connection. Give the structure a firm shake test, inspect for wobble, and retighten as needed.
Finish by rechecking clearances and ensuring all hardware is securely seated.
Common Problems When Lofting and Quick Fixes
Although lofting a dorm bed can feel straightforward, you’ll likely run into a handful of predictable issues—wobbly frames, uneven platforms, clearance problems, and mattress slippage—that you can fix quickly with the right checks and simple tools.
Inspect bolts and retighten every joint; add washers or locknuts if hardware shifts. Check platform level with a small level and shim gaps using folded cardboard or rubber pads. Measure headroom; lower or raise the loft to clear lights and vents. Prevent mattress movement with non-slip pads or Velcro strips.
- Loose bolts
- Uneven platform
- Low clearance
- Mattress sliding
Moving Out: Restore Bed and Avoid Deposit Charges
Fixing those wobble and clearance issues now means you’ll have an easier time returning the bed to its original state when move-out day comes. Document the current configuration with photos and note hardware you added or removed.
Fix wobble and clearance now, photograph configurations, keep original hardware labeled—so moving out is simple and damage-free
Keep original bolts and any removed slats in a labeled bag taped under the bed or stored in your closet.
Reverse modifications in the reverse order: detach additions, reattach original pieces, tighten factory hardware to spec.
Patch any minor wall or floor marks with removable putty and clean surfaces thoroughly.
Leave the bed stable and intact so inspections find no cause for deposit deductions.
Budgeting Tips: Low‑Cost vs. Long‑Term Solutions
When you’re weighing fixes for a lofted dorm bed, think in two categories: quick, cheap fixes that get you safe and functional now, and slightly pricier updates that last and reduce future hassle.
You’ll prioritize safety first, then comfort and longevity. Pick temporary supports, noninvasive brackets, or rental-friendly pads if you might move. Choose sturdier hardware, reinforced slats, or a proper ladder if you plan to keep the setup.
Balance upfront cost against replacement frequency and potential deposit deductions.
- Use inexpensive tension poles for short-term support
- Invest in quality bolts for long-term stability
- Buy modular parts you can reuse
- Compare DIY versus prebuilt costs
When to Call Housing or Maintenance for Help
If the loft feels unstable, you should call housing or maintenance right away to check for structural or safety concerns.
Don’t try to sleep on a frame that creaks, shifts, or shows obvious damage.
Also report any mattress sagging, broken slats, or hardware problems so they can replace or repair them.
Structural Or Safety Concerns
Because a lofted bed changes how weight and stress transfer through the frame and floor, you should call housing or maintenance the moment you spot any cracks, wobble, or exposed fasteners you didn’t install.
Don’t ignore noises, sagging, or floors that feel softer under the bed. Describe what you see, when it started, and any actions you took.
Let professionals assess load limits, anchoring, and potential damage to joists or ceiling below. For your safety and building integrity, avoid DIY fixes that alter structure.
- Visible cracks in nearby walls or ceiling
- Persistent frame wobble or tilting
- Unexplained floor dips under the bed
- Loose or missing structural fasteners
Mattress Or Frame Issues
Although a mattress or bed frame problem might seem minor, you should contact housing or maintenance as soon as you notice issues that affect comfort, safety, or structural integrity.
If the mattress sags, has exposed springs, stains suggesting mold, or emits odors, report it—these affect sleep and health.
For frames, call if joints wobble, bolts strip, slats break, or metal shows cracks or sharp edges.
Don’t attempt major repairs yourself; improper fixes can void agreements or cause injury.
Document problems with photos, note dates, and describe symptoms clearly when requesting service so staff can respond appropriately and promptly.
Alternatives to Lofting If It’s Not Allowed or Practical
When lofting isn’t allowed or just won’t work for your space, you still have smart options to free up floor area and create storage or study zones. You can rearrange and repurpose vertical space without altering the bed structure. Think modular, temporary, and multifunctional solutions that comply with rules and keep things tidy.
- Use underbed rolling drawers or slim storage bins to reclaim wasted space.
- Add a tall, narrow shelving unit beside the bed for books and supplies.
- Install adhesive hooks and fabric organizers on walls or the bed frame.
- Choose a compact desk or wall-mounted fold-down table for studying.
Frequently Asked Questions
Can Lofting Affect Campus Wi‑Fi or Nearby Antenna Placement?
Lofting itself won’t affect campus Wi‑Fi or nearby antenna placement, but metal bed frames or added shelving can cause local signal reflections or blockage, so you’ll want to position devices and antennas for clear line‑of‑sight and test connectivity.
Will Lofting Interfere With Smoke Detector Sensitivity or Placement?
Lofting usually won’t interfere with smoke detector sensitivity if you maintain required clearances and don’t block detectors. You should check housing rules, avoid mounting near detectors, and contact campus housing or fire safety if you’re unsure or need approval.
Can I Insure My Roommate’s Belongings Under My Loft?
You generally can’t insure your roommate’s belongings under your policy unless the insurer allows coverage for nonrelatives; you’ll need a renters or personal property policy naming them, or they should get their own renter’s insurance to be safe.
Do Lofted Beds Affect Dorm Room Pest Control Treatments?
Yes — lofted beds can affect pest treatments because they change access and hiding spots; you’ll need to move or raise bedding and clear under-bed areas so pest-control workers can reach crevices, and you should follow their specific instructions.
Are There Liability Issues for Injuries to Guests Climbing My Loft?
Yes, you can be liable if a guest gets injured climbing your loft; you should secure the structure, post warnings, avoid dangerous modifications, and check school or lease rules and insurance to reduce risk and potential claims.
Conclusion
Lofting your dorm bed can boost space and privacy when done safely and within housing rules. Before you raise anything, check your dorm’s policies, measure ceiling height and mattress thickness, confirm your frame type, and budget for either temporary or permanent solutions. If unsure, ask maintenance to avoid damage or deposit charges. If lofting isn’t allowed or practical, consider alternatives like under-bed storage, room dividers, or vertical shelving to maximize your space.
