How to Make a Bookstand
You can make a sturdy wooden bookstand in an afternoon using basic tools and common materials. Measure the book’s height and width, cut a back panel and a lip platform that’s 1–2 inches wider than the book, sand edges, and join with glue and screws or dowels at a 20–30° angle. Add rubber feet and a page clip for stability. Finish with stain or paint. Keep going for tips on styles, fastenings, and scaling.
Why This Guide Works
Because you’ll follow clear, tested steps, this guide gets you a sturdy bookstand without guesswork. You’ll work from simple plans that prioritize stability, fit, and material efficiency, so each cut and joint matters.
You’ll get measurements you can trust, tool choices that match your skill level, and troubleshooting tips for common fit issues. You’ll avoid trial-and-error wasted time because the sequence builds reliably: layout, cut, assemble, finish.
You’ll also learn small adjustments that tailor the stand to your books and space. Follow it, and you’ll finish with a useful, well-made bookstand you can depend on.
Choose a Bookstand Style: Study, Display, Travel, Cookbook
When you pick a style for your bookstand, think about how and where you’ll use it.
For studying, choose a stable, adjustable stand that holds textbooks upright and lets you change angles to reduce neck strain.
Choose a sturdy, adjustable stand that keeps textbooks upright and lets you change angles to ease neck strain.
For display, favor an attractive, simple easel that showcases covers and won’t distract from the book’s aesthetics.
For travel, pick a lightweight, foldable design that packs flat and locks securely.
For cookbooks, opt for a moisture-resistant stand with a page clip and wide base to rest on counters.
Match form to function so the finished stand fits your daily needs.
Tools and Materials for Bookstand Beginners
Now that you’ve picked a style, gather a compact set of tools and materials that match that design and your skill level. Choose basic, safe options: wood or acrylic for the body, simple fasteners, and finishes suited to use. You don’t need specialized gear to start; pick manageable pieces and practice cuts on scraps.
Prioritize a reliable ruler, an appropriate saw or cutter, sandpaper, glue, and clamps. Keep adhesives and finishes with clear drying times. Prepare a clean workspace and basic safety gear—gloves, eye protection, and a dust mask—to work confidently and avoid mistakes.
- Measuring and marking tools
- Cutting tool
- Clamps and glue
- Sanding and finishing supplies
Measure Books for a Snug Fit
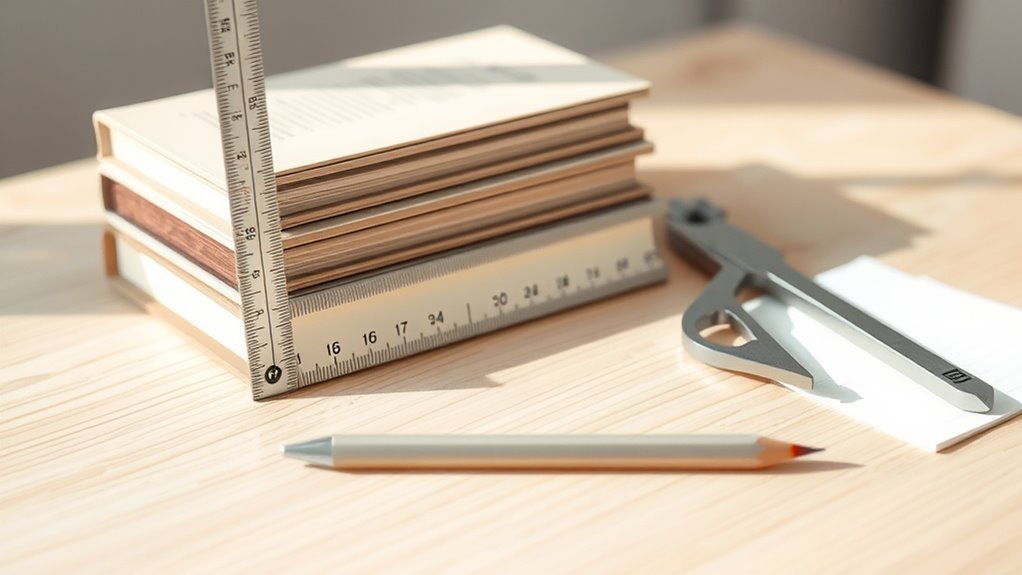
Measure each book’s height, width, and depth so the stand matches its dimensions.
Remember to include cover thickness—dust jackets and hard covers add real bulk.
Finally, leave a few millimeters of clearance so books slide in and out without catching.
Measure Book Dimensions
Before you cut any wood, take accurate measurements of the books you plan to hold so the stand fits snugly and supports them properly.
Measure height from base to top edge.
Measure width across the spine.
Measure depth with covers closed.
Note the tallest, widest, and deepest book you’ll store, and add small clearance for easy placement.
Record each book’s dimensions and mark averages or extremes to guide panel sizes.
- Height: base to top
- Width: spine edge to spine edge
- Depth: front cover to back cover
- Clearance: small gap for insertion
Account For Cover Thickness
How thick are your book covers, and will they change how snugly each book fits? Measure each book’s cover type—paperback, hardcover with dust jacket, or board—then add its thickness to the spine measurement.
For multiples, record the average plus any outliers like boxed sets. Mark the largest combined dimension you’ll store; that’s your minimum internal slot width.
If covers compress slightly, note that, but don’t rely on compression when planning permanent dividers. Use calipers or a ruler for accuracy and write measurements on your plan.
These precise figures prevent books from tilting or binding against each other.
Allow Clearance For Ease
Now that you’ve accounted for cover thickness, give each slot a little breathing room so books slide in and out without force.
Measure the widest book.
Add a slim margin—about 2–4 mm per side—for easy insertion and removal.
Test with stacked and single volumes to confirm clearance under different conditions.
If you plan to hold heavy tomes, increase clearance slightly to avoid wedging.
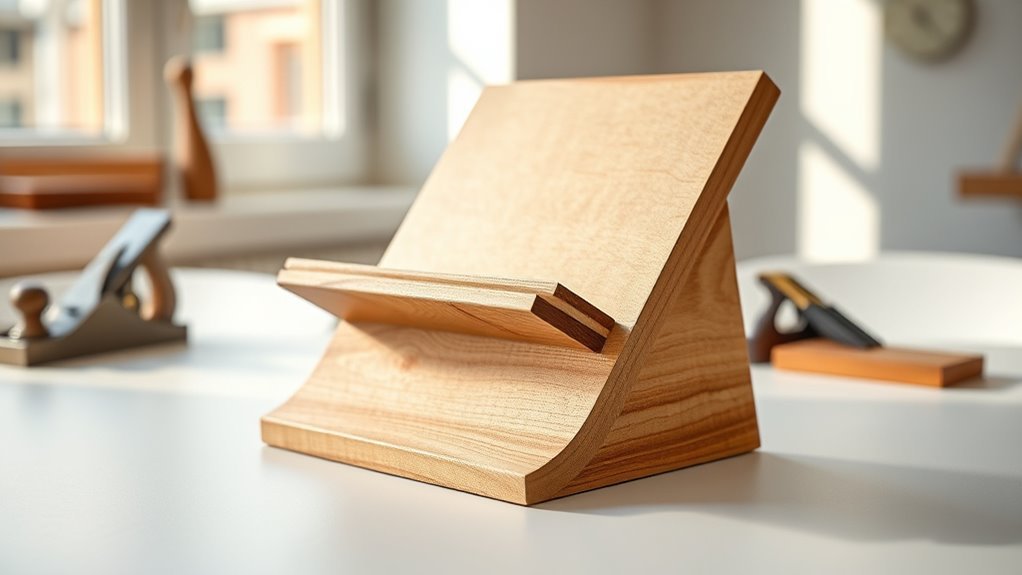
Quick Plan: Basic Wooden Angled Bookstand
You’ll need basic materials and tools—think a 1×8 board, a few screws or wood glue, sandpaper, a saw, and a drill—to build an angled wooden bookstand.
Measure and mark your cuts, then follow a simple cutting and assembly sequence: cut the back panel, cut the angled support, and join them with screws or glue for a sturdy fit.
Finish by sanding edges and testing the angle with your books to guarantee a snug, stable stand.
Materials And Tools
Before you cut anything, gather the materials and tools you’ll need for the basic angled wooden bookstand so the build goes smoothly:
A 12″ x 8″ hardwood board (1/2″–3/4″ thick), a 6″ x 2″ strip for the lip, 2 small wood screws or brass pins, wood glue, sandpaper (120 and 220 grit), a handsaw or circular saw, a chisel or router for the angle, a drill with countersink bit, clamps, a square and ruler, and a finish (wax, oil, or varnish).
Inspect wood for defects, choose a compatible finish, and confirm that the screw length fits the thickness of the wood.
Keep safety gear ready: goggles and a mask.
- Material checklist
- Tool checklist
- Safety items
- Finish options
Cutting And Assembly
Ready to cut and fit the pieces? Mark measurements on your board: two side panels, back support, shelf lip. Use a square and pencil; double-check dimensions.
Cut slowly with a circular saw or handsaw, keeping edges straight. Sand each edge smooth and test-fit parts dry.
Angle the back panel about 20–25 degrees from vertical for comfortable reading. Apply wood glue to joints, clamp, and wipe squeeze-out. Reinforce with brad nails or screws countersunk below the surface.
Attach the shelf lip at the front, check alignment, and let glue cure. Final sand and finish with varnish or oil before use.
Cut and Sand the Wood: Step-by-Step
Once you mark your measurements clearly and double-check them, cut each piece to size with a sharp saw, then sand the edges smooth so the parts fit together without gaps. Use clamps to steady boards, cut slowly to avoid splintering, and keep fingers clear.
Progress from coarse to fine grit, wiping dust between passes. Check mating surfaces for flatness and adjust with a block plane or sanding block. Test-fit pieces without glue. Finish sand with 220-grit before applying sealant or paint.
- Secure and cut
- Remove splinters
- Gradual grit progression
- Final test-fit
Assemble the Wooden Bookstand: Step-by-Step
Start by cutting and preparing each piece to the exact dimensions you planned so everything lines up.
Dry-fit the parts on a flat surface to check alignment and make any minor adjustments before fastening.
Once satisfied, secure the joints with screws, countersink them, and re-check for square.
Cut And Prepare Pieces
Before you assemble anything, cut and prepare the pieces precisely so they fit together without gaps or forcing. Measure twice, mark clearly, and use a sharp saw for clean edges. Smooth edges with a block plane or sandpaper, and keep consistent grain direction for glue joints. Label each part so you won’t mix left and right.
- Measure and mark parts to scale.
- Cut with steady, controlled strokes.
- Square ends; check with a try square.
- Sand mating surfaces; remove splinters and dust.
Handle pieces gently to avoid dings; keep clamps and hardware organized for quick use.
Dry Fit The Parts
Although you haven’t glued anything yet, dry fitting the parts lets you verify alignment, identify tight spots, and confirm hardware locations before committing.
Lay out base, uprights, shelf, and back supports in their final arrangement. Check mating faces for gaps; mark high spots and sand or pare them with a block plane. Make certain the shelf rests flush and the angle is correct.
Temporarily insert dowels or clamps to simulate joins and confirm clearances for pages and turning. Mark screw or hinge positions with a pencil so you won’t misalign later.
Refit pieces until everything seats cleanly and moves as planned.
Secure With Screws
With the parts dry-fitted and aligned, you’re ready to secure them with screws. Grab a clamp, pilot bit, and screws sized for your wood. Clamp assemblies to prevent shift, then drill shallow pilot holes to avoid splitting.
Drive screws flush or slightly countersunk so they won’t catch pages or clothing. Check square after every few screws and adjust before tightening fully.
Sand any raised grain and fill countersinks if you plan to finish.
- Clamp pieces firmly to maintain alignment.
- Drill pilot holes matched to screw shank.
- Use screws long enough for bite, not exit.
- Recheck squareness as you tighten.
Set and Secure the Reading Angle
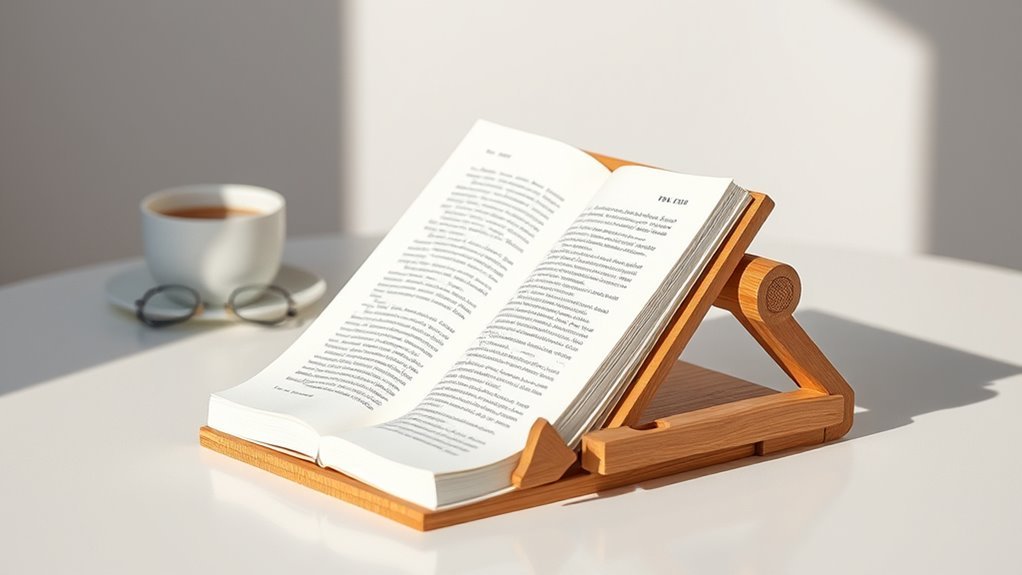
Once you decide where you’ll read, adjust the bookstand so the pages sit at eye level and tilt the spine until the text is easy to follow without straining your neck. Test several angles by placing a book, then locking the hinge or tightening wingnuts. Use rubber pads to prevent slipping and mark your preferred angle with a pencil or tape for repeatable setup. If the stand wobbles, reinforce the joint with a small brace or add a rear support bar. Check how the light hits pages and tweak tilt to reduce glare. Store angle marks for different books.
| Angle | Use case |
|---|---|
| 60° | Large text |
| 30° | Sketching |
Finish the Stand: Stain, Paint, and Seal
Before you apply any finish, sand the stand smooth and clean off dust so stain or paint adheres evenly.
Before finishing, sand the stand smooth and remove dust so stain or paint adheres evenly.
Choose stain or paint based on look and durability; test on scrap wood.
Apply thin coats, wiping excess stain or brushing paint with the grain, and let each coat dry fully.
Lightly sand between coats for a professional feel.
Protect the surface with a clear sealer—polyurethane for durability or a water-based varnish for quicker drying.
Follow manufacturer drying times and ventilate the area.
Maintain even coverage and avoid drips to keep edges and joints neat.
- Select finish
- Test on scrap
- Apply thin coats
- Seal and dry
Build a Folding Bookstand for Travel
Ready to make a compact, sturdy bookstand you can fold into a backpack? Cut two identical wooden panels for the base and back, hinge them with small piano hinges so the back reclines.
Add a removable ledge that hooks onto notches at different angles. Sand edges, round corners, and test folding clearance so the ledge nests neatly.
Use brass or nylon hardware to reduce bulk. Optionally glue thin leather strips to contact points to prevent slipping.
Finish with a lightweight varnish for weather resistance. When folded flat, secure with an elastic band or clasp for easy travel storage.
Make a Minimalist Metal Bookstand
You’ll need basic materials and tools—thin steel or aluminum stock, a hacksaw or metal shears, files, and a drill—to shape a sleek, sturdy frame.
Follow a few simple folding and bending steps to form the supports and hinge points so the stand collapses flat.
Finish with sanding, a rust-resistant coating, and felt pads to protect both the metal and your books.
Materials And Tools
If you want a clean, sturdy minimalist metal bookstand, gather a short list of precise materials and a few basic tools so you can work efficiently and safely.
You’ll need a length of 3–4 mm steel rod or flat steel strip, two small rubber feet, and optional matte powder coat or spray paint for finish.
Use simple tools: a hacksaw or cutoff wheel, metal file, bench vise or clamps, and a tape measure with marker.
Wear safety glasses and gloves. Prepare a clear workspace and a scrap piece for test bends before forming the final stand.
- Steel rod or flat strip
- Cutting tool
- Clamping and filing tools
- Safety gear
Simple Folding Steps
Before you start bending the metal, mark the rod or strip for the two bends—the back leg and the lip—so each fold is accurate and repeatable.
Clamp the piece in a vise with the first mark just outside the jaws, so you get a crisp 90° back leg.
Use a bending jig or a pipe to make a smooth curve and bend slowly to avoid kinks.
Reposition for the lip bend, aiming for a shallow 20–30° angle to hold pages.
Check alignment against a book, tweak with pliers for symmetry, and test stability on a flat surface before proceeding.
Finishing And Protection
When the bends are true and the stand sits steady, finish and protect the metal to keep it looking good and prevent rust.
Clean off filings and oil with a degreaser, then sand lightly to remove burrs and rough spots.
Apply a metal primer if you intend to paint, or choose a clear coat for a raw-steel look. Let each coat cure fully.
- Clean: remove debris, oils, and dust.
- Sand: smooth edges and surfaces.
- Prime/Paint: use rust-inhibiting primer and topcoat.
- Seal: apply clear lacquer or wax for extra protection and grip.
Upcycle Crates and Frames Into Stands
Because old crates and picture frames already have structure and character, you can turn them into sturdy, attractive bookstands with just a few tools and basic repairs.
Choose a crate with solid slats or a frame with a deep rabbet. Clean, sand, and tighten joints; replace broken slats or reinforce corners with screws or wood glue.
Cut a simple ledge from scrap wood and attach it inside the frame or along the crate front to hold pages.
Finish with paint, stain, or clear coat to protect wood.
Position vertically or tilt slightly back for comfortable reading and display.
Add Page-Holders for a Cookbook Stand
If you’ve ever tried flipping a greasy page with floury fingers, you know a cookbook stand needs reliable page-holders—clips, magnets, or ledges that keep recipes open without damaging pages. You’ll pick holders that resist moisture and won’t stain.
Use spring clips with rubber tips, flat magnets sewn into a fabric strip, or a thin acrylic ledge that supports pages at an angle. Mount holders so they’re adjustable for thick or thin books and easy to remove for cleaning.
Test on scrap paper to set tension. Aim for secure, gentle grip that lets you turn pages with one hand.
- Spring clips with rubber tips
- Magnetic fabric strip
- Thin acrylic ledge
- Adjustable pivoting arms
Design a Display Stand for Coffee-Table Books
For a coffee-table display you’ll want materials and finishes that feel substantial and complement your room—think hardwoods with a satin finish or matte metal.
Keep proportions in mind so the stand supports large-format books without overwhelming the table, and scale the base and backrest accordingly.
Offer adjustable display angles (flat for stacks, tilted for front-facing covers) so you can change the look for different books.
Materials And Finish
When you pick materials and a finish for a coffee-table bookstand, prioritize durability, aesthetics, and how the pieces will interact with the books and room.
Choose hardwoods like oak or walnut for warm tones and strength. Metal gives a slimmer, modern profile. Acrylic feels light and won’t distract. Plywood is budget-friendly if edge-banded.
Finish matters: oil brings depth and hand-feel, lacquer adds durability and sheen, matte varnish resists glare, and clear wax softens edges.
Consider book covers—acid-free backing or felt pads prevent scratches—and choose a finish that complements the room’s palette and maintenance habits.
- Hardwood (oak, walnut)
- Metal (steel, brass)
- Acrylic or plywood
- Finishes (oil, lacquer, matte, wax)
Proportions And Scale
Although you’ll vary details by style and space, keeping proportions balanced between the book, stand, and room is essential. You’ll size the platform to the book’s footprint, allow breathing room, and match stand height to nearby furniture so the book reads naturally in the scene. Scale influences visual weight: use thicker materials for large volumes, slimmer profiles for light monographs. Consider sightlines from seating and entry points to avoid overpowering the room. Quick reference:
| Element | Guideline |
|---|---|
| Platform margin | 1–2″ beyond book edges |
| Stand height | Align with coffee-table surface |
Display Angle Options
Why angle the book at all? You want visibility, comfort, and aesthetic impact. Choosing the right tilt depends on viewing distance, page size, and room lighting.
A gentler angle suits relaxed browsing; a steeper one emphasizes covers. Consider adjustable stops so you can tweak the display for different books.
Balance stability with accessibility; heavier books need lower, more secure angles.
- 15–25° — casual, low-reflection viewing for large coffee-table books.
- 30–45° — pronounced display, good for focal pieces.
- 0–10° — subtle, almost flat, for stacked or layered displays.
- Adjustable — versatile for mixed collections.
Portable Bookstand for Tablets and E-Readers
If you want a compact, sturdy way to hold your tablet or e-reader, a portable bookstand gives you hands-free reading without adding bulk to your bag. You’ll choose lightweight materials, fold-flat hinges, and a low-profile lip to secure devices. Aim for stable feet and non-slip pads so it won’t tip on your lap. Consider ventilation and cable access for charging. Test with your device’s size and case. A simple clamp or magnetic catch can keep everything closed when stored, and quick assembly means you’ll grab it for commuting, travel, or sofa reading.
| Feature | Benefit | Tip |
|---|---|---|
| Fold-flat | Saves space | Fits pockets |
| Lightweight | Easy carry | Use aluminum |
| Non-slip | Stable use | Add rubber |
| Ventilation | Prevents heat | Keep slots open |
Build an Adjustable-Height Bookstand
When you need a stand that adapts to different chairs, desks, or bed heights, build one with a simple telescoping or threaded adjustment so you can raise or lower the reading surface quickly and lock it securely.
Start with a sturdy base, a vertical tube or threaded rod, and a movable support platform.
Begin with a solid base, a vertical tube or threaded rod, and an adjustable support platform for height.
Use a locking collar, wing nut, or clamp to fix height.
Balance sturdiness with lightness so it’s easy to move.
Test for wobble and adjust bracing.
Finish edges for comfort and add a tilt mechanism if you want adjustable viewing angles.
- Base stability
- Vertical support
- Locking mechanism
- Platform tilt
Add Non-Slip Pads and Grips
After you’ve secured the height and tilt of your bookstand, add non-slip pads and grips to keep books and the stand itself steady during use. Apply small rubber pads to feet to prevent sliding on smooth surfaces; choose adhesive-backed or screw-on types based on material. Add thin silicone strips along the bottom edge of the book ledge to stop pages from slipping. Use foam or rubber bumpers where wood meets table to prevent scratches. Press pads firmly, trim excess, and let adhesives cure per instructions. Test with different book sizes and adjust pad placement until the stand remains stable and books hold position.
Joinery Choices: Screws, Dowels, or Glue
When choosing screws, dowels, or glue, think about how strong and durable you need the bookstand to be.
Screws give quick, reliable strength.
Dowels hide the fasteners and add solid shear resistance.
Glue can be plenty strong if joints fit tightly.
Consider how much time and skill you want to spend—pick the method that balances durability with ease of assembly.
Strength And Durability
Though a simple shelf might hold lightweight paperbacks, a sturdy bookstand needs joinery that resists repeated loading, knocks, and humidity changes. You’ll choose screws for shear strength and easy tightening, dowels for neat alignment and decent resistance to lateral forces, or glue for continuous bond across large surfaces.
Combine methods: glue plus dowels reduces reliance on mechanical fasteners; screws in high-stress zones prevent joint creep. Select hardwood or exterior-grade glue where moisture varies, and predrill screw holes to avoid splits.
Regularly inspect joints and retighten or re-glue as needed to maintain long-term performance.
- Screws: shear strength, serviceable
- Dowels: alignment, clean look
- Glue: uniform bond, surface area
- Hybrid: best margin of safety
Ease Of Assembly
Choosing joinery affects how quickly and confidently you can build the bookstand, so pick the method that matches your skills and tools.
Screws are fast, forgiving, and let you disassemble if needed; pre-drill to avoid splitting and countersink for a clean look.
Dowels give neater joints and decent strength but demand accurate marking and a jig for alignment; clamp tightly while glue cures.
Glue-only joints are seamless and strong with good surface prep, but you’ll lose adjustability and need precise fits.
Balance speed, appearance, and permanence: choose screws for simplicity, dowels for finish, glue for invisible, solid bonds.
Fix Common Stability Problems
If your bookstand wobbles or tips, tackle the problem by checking three things: leg alignment, joint tightness, and base support.
Inspect legs for uneven lengths or angled feet; sand or trim and add felt pads to level.
Tighten screws, bolts, or clamps and replace stripped hardware.
Reinforce loose joints with wood glue or metal brackets, clamping until set.
Widen the base with crossbars or a small platform to lower the center of gravity.
Add rubber feet for grip on slippery floors.
Recheck alignment after fixes and make incremental adjustments until the stand feels solid and stable.
Test Weight Limits Safely
Now that the stand is stable, it’s time to test how much weight it can handle so you don’t overload it during use. Begin by placing items incrementally: start with a single light book, then add similar-weight volumes one at a time.
Watch for sagging, wobble, or joint strain after each addition. Record the point where movement appears and stop before that threshold—leave a safety margin of about 20%. Test both centered and off-center loads to mimic real use.
If hardware shifts or glue softens, disassemble and reinforce weak spots, then repeat tests. Always lift and place weights steadily to avoid shock loads.
Child-Safe Tweaks for Kids’ Stands
Because kids will use the stand differently than adults, you should make a few simple modifications to keep it safe and durable. Use rounded edges and sand thoroughly to remove splinters.
Choose non-toxic, wipeable finishes and secure loose parts with childproof fasteners.
Lower the angle so books don’t slide and add a gentle lip to hold pages.
Anchor taller stands to the wall to prevent tipping.
- Round edges and smooth surfaces
- Non-toxic, washable finishes
- Shallow angle plus page lip
- Wall anchors and secure fasteners
Style Your Stand to Match Decor
Think about your room’s color palette and pick paint or stain that echoes those hues so the stand feels intentional.
Match materials and textures—woodgrain, metal, or woven accents—to other furniture for a cohesive look.
Small details like hardware finish or a fabric strap can tie the whole design together.
Coordinate With Room Palette
When you style your bookstand to match the room’s palette, pick one or two dominant colors from the space and echo them in your finish or accent details so the stand feels intentional rather than tacked-on.
Choose a hue that complements walls, rugs, or large textiles, then apply it sparingly: a painted edge, drawer front, or decorative inlay. Use neutrals to balance bold choices, and test swatches under room lighting before committing.
Keep contrast moderate so books remain focal. Small pops of color read as design choices, not noise, and help the stand sit naturally within the room.
- Pick 1–2 dominant colors
- Apply color to accents
- Use neutrals to balance
- Test swatches in lighting
Match Materials And Textures
If you want the bookstand to feel like part of the room, match its materials and textures to the surrounding decor. You’ll choose wood grain for warmth, metal for modern edges, or fabric-wrapped panels for softness. Consider scale and sheen so the stand doesn’t compete with furniture. Mix finishes sparingly: one dominant surface, one accent. Test small samples against lighting and upholstery before committing. Use tactile contrasts—smooth shelf, rough base—to add interest without clutter. A simple comparison table helps guide choices:
| Material | Mood | Best Use |
|---|---|---|
| Wood | Warm | Living room |
| Metal | Sleek | Office |
| Fabric | Cozy | Bedroom |
Personalize With Carving, Inlay, or Decals
Because a plain bookstand doesn’t have to stay plain, you can make it truly yours with carving, inlay, or decals. Choose a style that complements your finish and skill: shallow relief carving for subtle texture, woodburned motifs for contrast, simple geometric inlays for color, or waterproof decals for easy change.
Work cleanly, test on scraps, and seal decorations with a compatible finish. Think about placement—corners, spine edge, or center panel—and keep functionality in mind so decorations don’t catch pages.
Maintain scale: small books need delicate details; large stands can handle bolder designs.
- Shallow relief carving
- Pyrography motifs
- Simple wood inlays
- Waterproof decals
Quick 30-Minute Bookstand Hacks
Although you’ve planned more elaborate builds, you can throw together a sturdy, attractive bookstand in about 30 minutes using a few common tools and materials. Start with a single board or thick cardboard, cut to desired height, and score a rear notch for angle.
Use a small hinge or scrap strip glued across the base for a lip. Sand edges, round corners, and apply quick stain or paint. Clamp while glue dries, or use screws for instant strength.
Add non-slip pads to the base and a simple elastic band to hold pages open. Test and adjust the angle.
Budget Builds: Best Materials Under $20
You can build a sturdy bookstand without spending much by choosing cheap wood like pine or plywood, repurposing household items such as cutting boards or picture frames, and picking a few affordable hardware pieces like small hinges and L-brackets.
We’ll look at which inexpensive woods hold up best, how to adapt everyday items into useful parts, and what budget hardware gives the most stability.
Follow these tips and you’ll keep the cost under $20 while getting a reliable result.
Cheap Wood Options
Looking for a sturdy, low-cost wood for your bookstand? You can pick affordable, workable woods that hold up and look good. Choose based on weight, grain, and ease of cutting. Seal or paint to extend life and prevent splinters. Avoid soft, brittle scraps that warp easily.
- Pine — cheap, light, easy to cut; good for simple stands.
- Poplar — smooth, takes paint well, slightly stronger than pine.
- Plywood (fir or utility) — stable, inexpensive, great for panels and shelves.
- MDF — super smooth for painted finishes; avoid moisture exposure.
Upcycled Household Items
When you’re on a tight budget, everyday items around the house can become sturdy, attractive parts of a bookstand—think wooden crates for the base, cereal boxes reinforced with cardboard for angled supports, and old picture frames for decorative panels. You’ll salvage, cut, and combine items to stay under $20. Choose clean, dry pieces; reinforce joints with glue and strips of scrap wood or duct tape. Finish with paint or fabric. Lightweight, repurposed materials keep the stand portable and eco-friendly.
| Item | Role |
|---|---|
| Crate | Base |
| Frame | Panel |
| Cereal box | Support |
| Fabric | Finish |
Affordable Hardware Picks
Start with a short list of versatile, low-cost hardware that’ll make your bookstand sturdy without blowing the budget. You’ll want pieces that are easy to find, simple to install, and durable. Choose materials that match your design and weight needs, keeping tools minimal.
Here are four reliable picks that usually cost under $20:
- Corner braces (steel) for strong joints.
- Wood screws (assorted pack) to fit thin boards.
- Small metal L-brackets for adjustable angles.
- Felt pads and rubber bumper feet to protect surfaces.
Combine these, and you’ll get a stable, neat bookstand on a shoestring.
Advanced: Hinge-and-Brace Adjustable Mechanism
If you want a bookstand that adjusts smoothly and stays solid at any angle, a hinge-and-brace mechanism gives you precise, repeatable support for everything from thin paperbacks to heavy reference volumes.
You’ll mount a sturdy hinge at the spine support and add a drop-in or sliding brace that locks into notches or detents on the base.
Choose stainless or brass hardware for durability; countersink screws and use hardwood reinforcements where stress concentrates.
Test angles before final fastening, sanding edges to prevent binding.
For heavier books, widen the brace footprint and increase hinge screw count for reliable, wobble-free performance.
Maintain and Repair a Wooden Bookstand
A good hinge-and-brace setup will give you precise adjustments, but routine care keeps that mechanism — and the rest of the stand — working for years. Inspect joints monthly, tighten loose screws, and replace stripped fasteners.
Clean surfaces with a damp cloth; avoid soaking or harsh solvents. Refinish worn areas with light sanding and matching stain or oil.
For cracks, glue and clamp; for bigger damage, splice in a patch piece.
- Tighten and replace hardware
- Clean gently and oil moving parts
- Repair cracks with glue and clamps
- Sand and refinish worn surfaces
Pack and Store Folding Stands
When you’re ready to pack a folding stand, fold it fully and lock any braces so it stays compact. Then wrap vulnerable edges with a soft cloth or bubble wrap to prevent scratches and dents.
Next, place it in a padded bag or box sized to prevent shifting; use corner protectors for extra support. Store any detachable parts together in a labeled pouch and secure with tape or a twist tie.
Choose a dry, temperature-stable area off the floor to avoid moisture and pests. Periodically inspect the stand for corrosion or wear, and air the storage space to prevent mustiness.
Power Tool Safety Checklist
1 practical rule: treat every power tool as potentially dangerous until you’ve verified its condition and your control over it. Inspect cords, guards, blades, and batteries before you start. Wear eye and ear protection, and keep long hair and loose clothing secured. Unplug or remove batteries when changing parts.
- Check tool condition: blades, guards, cords, batteries.
- Personal protection: goggles, hearing protection, gloves as appropriate.
- Workspace control: clear area, clamp workpieces, ensure good lighting.
- Operational habits: use correct bit/blade, maintain two-handed control, disconnect before adjustments.
Troubleshoot Warped or Wobbly Stands
If your bookstand tilts, rattles, or won’t sit flat, start by isolating the source of the movement: check joints, fasteners, and contact points for looseness, unevenness, or wood twist. Tighten screws, re-glue loose joints, and sand contact points so feet sit flush. Clamp warped pieces to a straight surface with moisture or heat if needed. Add small shims under one foot for temporary leveling. Replace badly twisted boards. Test with weight to confirm stability.
| Problem | Fix |
|---|---|
| Loose joint | Re-glue and clamp |
| Uneven feet | Sand or shim |
| Warped panel | Clamp with heat/moisture |
Downloadable Plans and Templates
Looking for a reliable starting point? You can download plans and templates that match skill level and materials. Use PDFs with full-scale patterns, cut lists, and labeled parts so you avoid measuring mistakes.
Download full‑size templates and cut lists to match your skill and materials—no measuring mistakes, just follow the patterns.
Choose templates that include joinery notes and recommended fasteners. Verify dimensions against your tools before cutting.
- Beginner: simple fold-and-slot template with full-size patterns
- Intermediate: angled supports, adjustable backrest pattern
- Advanced: joinery diagrams, glue-up sequence
- Material-specific: plywood sheets, hardwood blanks, or acrylic layouts
Next Steps: Scale Designs for Shelving or Displays
When you’re ready to expand from a single bookstand to shelving or display units, scale your designs by keeping proportions, joinery strength, and load-bearing requirements consistent with the new size.
Measure expected loads per shelf, factor in safety margins, and choose materials with appropriate thickness and stiffness.
Increase fastener sizes and spacing, and consider adding vertical supports or back braces to prevent racking.
Keep clearances for books or objects proportional to shelf depth and height.
If using modular units, standardize connector locations so pieces interlock.
Prototype one scaled unit first, test with real loads, then refine plans before full build.
Frequently Asked Questions
Can I Use Reclaimed Barn Wood With Unknown Treatment or Chemicals?
You shouldn’t use reclaimed barn wood with unknown treatments or chemicals; you’ll risk toxic residues, off-gassing, or reactions with finishes. If you insist, test small pieces, sand thoroughly, seal with a certified barrier, and wear protection.
How Do I Protect the Stand From Mold in Humid Climates?
You’ll prevent mold by sealing wood with a mold-resistant primer and exterior-grade paint or clear marine varnish, ensuring good ventilation, using moisture-resistant joinery, elevating the stand off damp surfaces, and periodically cleaning with diluted vinegar solution.
Can Pets Chew or Damage Specific Materials Used?
Yes — pets can chew or damage materials like thin plywood, softwoods (pine), particleboard, foam, and some plastics; you should choose hardwoods, metal, or thick acrylic, secure edges, and supervise or deter chewing with training.
Are There Fire-Risk Concerns With Finishes Near Stoves?
Yes — you should be cautious: flammable finishes can ignite or off-gas near heat. Choose heat-resistant, low-VOC coatings, keep the stand a safe distance from stoves, and test finishes for smell or softening before regular use.
How to Adapt Designs for Extremely Large Art Books?
Scale components, reinforce joints, use wider, taller supports and heavier materials, add adjustable angled shelves, deep non-slip lips, and casters for mobility; you’ll brace spine areas, allow extra weight capacity, and test stability thoroughly.
Conclusion
You’ve got what you need to build a useful bookstand that fits your needs—study, display, travel or cookbook. Use the measurements and safety checklist, pick materials that match your skill level, and follow the basic angled plan for a snug, stable fit. If something’s warped or wobbly, troubleshoot before finishing. Grab the downloadable templates to save time, then scale up designs for shelves or displays as your confidence grows.