How to Make a Wood Flute
You can make a wood flute in a weekend by choosing a seasoned hardwood blank, marking the centerline and hole positions, boring a smooth straight tube, then shaping an embouchure (fipple or open) and drilling tone holes accurately; sand, voice, and tune by ear, adjusting hole size and windway for clarity. Use basic hand tools, safety gear, and incremental tests; take notes and proceed patiently—keep going and you’ll pick up detailed voicing, tuning, and finishing tips.
What You’ll Build, Time and Skill Needed
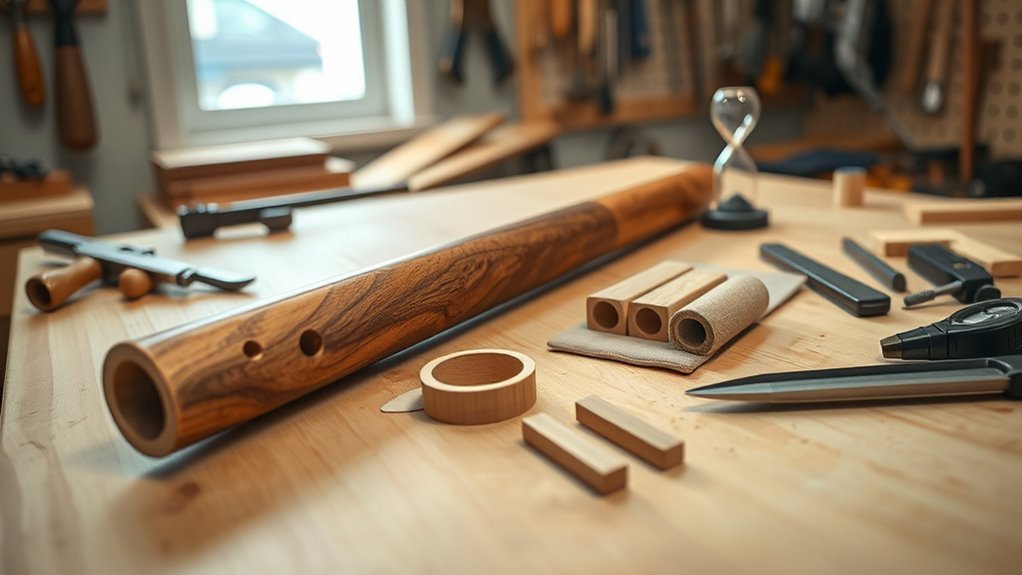
You’ll build a simple, playable wooden flute—about 12–16 inches long with six open finger holes and a tuned mouthpiece—using basic hand tools and common hardwoods like maple or cherry.
You’ll need intermediate patience and basic woodworking skills: measuring, drilling, reaming, sanding, and tuning by ear.
Expect about 4–8 hours spread over a couple days, allowing glue or finish to dry.
You’ll use a hand drill or brace, files, rasps, sandpaper, and a tuning pipe or chromatic tuner.
Safety gear—eye protection and a dust mask—is required.
Quick Build Plan and Checklist
Before you start cutting, gather the materials and tools listed so you won’t stop mid-project.
Follow the step-by-step timeline to keep each phase—drilling, shaping, tuning—on schedule.
This quick plan and checklist will help you finish the flute efficiently and avoid common setbacks.
Materials And Tools
Although you can improvise with basic shop supplies, gather a concise set of materials and tools to guarantee a clean, playable wood flute. You’ll need a straight, seasoned hardwood blank (maple, cherry, or walnut), sandpaper (120–400 grit), wood glue, beeswax or food-safe finish, and masking tape.
For tools, use a drill press with bits matching bore and tone-hole sizes, a spade or Forstner bit for roughing, a saw, files, rasps, a reamer or tapered tool for bore finishing, calipers, a ruler, and a sharp marking knife.
Add safety gear: eye protection, dust mask, and clamps for steady work.
Step-By-Step Timeline
When you’re ready to build, follow a compact timeline that breaks the flute into clear phases—layout and marking, boring the bore, refining the bore, cutting and shaping the body, drilling and tuning tone holes, final sanding and finishing, and assembly—so you can track progress and quality at each step.
You’ll plan sessions, gather tools, and set milestones: measure, cut, test, adjust. Keep a checklist and record notes after each phase. Pace yourself; small corrections beat rushed fixes. Trust your ears and patience.
- Anticipation of the first clear tone
- Satisfaction after a smooth bore
- Pride at final assembly
Choose Your Flute Type: Concert, Native, or Fipple
Wondering which flute will suit your goals and skill level? You’ll pick based on tone, playability, and purpose.
Wondering which flute fits your goals? Choose by desired tone, playability, and musical purpose.
A concert flute (transverse) gives precise tuning, wide dynamic range, and suits ensemble or classical work; it demands breath control and accurate hole placement.
A Native-style flute offers a warm, open tone, simpler fingering, and expressive sliding; it’s forgiving for beginners and solo players.
A fipple (recorder-like) focuses on ease—its whistle mouth lets you produce sound quickly, ideal for teaching or casual music.
Consider how you’ll play, what sound you want, and how much construction complexity you’ll accept.
Decide Tube Length and Target Tuning
Now that you’ve picked a flute style, decide on the tube length and the pitch you want the instrument to play. Measure desired concert pitch (A=440Hz or other), then use simple length-to-frequency charts or calculators to find approximate tube length for an open or stopped tube.
Remember tuning adjusts with headjoint and fingerholes later, so leave fine changes for later. Choose a length that feels good to hold and matches your musical goals. Consider tone, range, and portability:
- Imagine the voice you’ll coax from this wood.
- Feel pride as notes bloom.
- Think of players smiling.
Pick Bore Diameter for Your Pitch

Because the bore controls tone, response, and tuning, choose a diameter that matches your desired pitch and playing style. For higher pitches use a narrower bore to sharpen resonance and aid articulation; for lower pitches widen the bore to support fuller harmonics and richer tone.
Balance bore with wall thickness and length—too narrow can make sound thin and unstable, too wide muddles clarity. Start with established ratios (cylindrical or conical profiles) for your projected scale, then iterate by small adjustments.
Test with tuning reference and playability checks, noting how breath pressure and fingerings interact before finalizing the bore.
Best Woods for Wooden Flutes
When choosing wood for your flute, consider how tone and density affect resonance and projection.
You’ll also want a species that’s workable and dimensionally stable so the bore and holes hold up over time.
Balancing sonic qualities with ease of carving will get you the best results.
Tone And Density
What kind of wood gives your flute the sound you want? You choose density to shape warmth, brightness, and sustain. Denser timbers push overtones, giving clear, projecting tones; lighter woods yield breathy, intimate voices. Match density to musical goals and repertoire. Consider how resonance feels in your hands and soul:
- Dense: bold, focused, commanding presence.
- Medium: balanced, versatile, expressive nuance.
- Light: airy, intimate, gentle whisper.
Trust your ear when testing samples; small changes shift character. Play scales and simple melodies to hear sustain and attack. Let tone guide your wood choice more than looks alone.
Workability And Stability
Tone matters, but practicality will steer your final wood choice: workability and stability determine whether a blank becomes a reliable, playable instrument or a frustrating project. You’ll prefer woods that machine cleanly, hold edges, and resist tearing—maple, boxwood, and cocobolo excel.
Stability matters: quarter-sawn, well-dried stock reduces movement and cracking. Avoid unstable, resinous, or highly porous species unless you plan heavy stabilization.
Consider grain direction for bore accuracy and tuning, and test how the wood responds to drilling, sanding, and finishing. Choose woods that balance ease of toolwork with dimensional stability to guarantee long-term playability and tuning.
How Wood Density and Grain Shape Tone
Although you mightn’t notice it at first, the density and grain of the wood you use shape the flute’s sound in direct, measurable ways. You’ll hear brighter, more projecting tones from dense, tight-grained woods and warmer, mellower voices from lighter, open-grained pieces.
Grain direction influences resonance and stability; straight grain vibrates predictably, while interlocked grain scatters overtones. When selecting blanks, trust your ears and touch.
- Awe at a clear high register that cuts through silence
- Comfort in a rounded low end that soothes and grounds
- Surprise when a subtle grain detail transforms color and presence
Where to Buy Affordable Blank Stock
Now that you’ve felt how wood density and grain shape sound, you’ll want to find blank stock that matches those sonic goals without breaking the bank. Search specialized online hardwood suppliers offering flute, recorder, or instrument blanks; they list species, dimensions, and moisture content.
Check local lumberyards and cabinet shops for offcuts—ask for straight-grain pieces and quartersawn boards. Visit woodworking forums and social media groups where members sell surplus blanks or split orders to lower cost.
Consider reclaimed wood from furniture or flooring for character. Always inspect for cracks, wormholes, and excessive warp before buying to avoid wasted effort.
Essential Tools vs. Nice-to-Have Tools
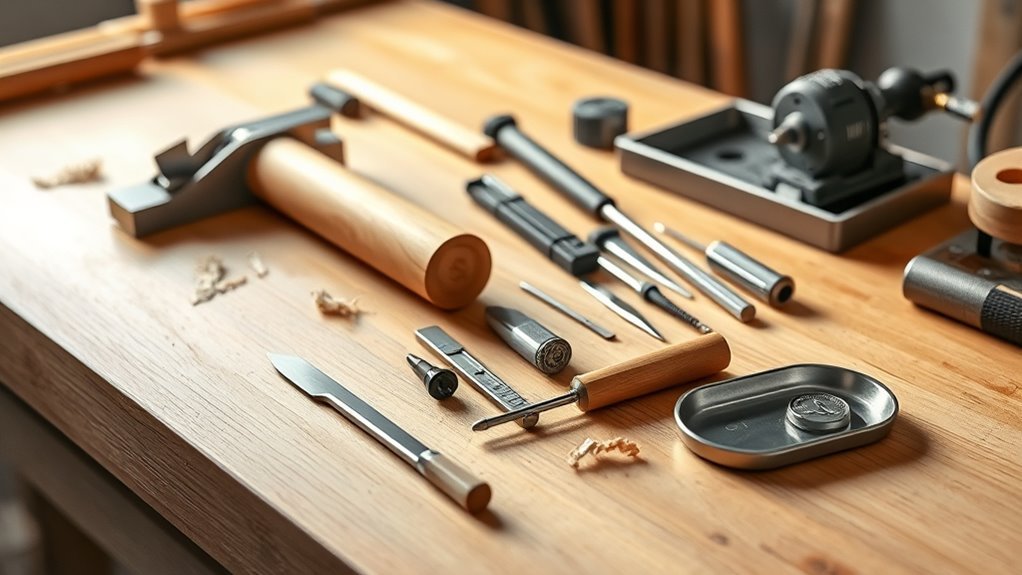
You’ll need a handful of essential carving tools—chisels, gouges, a spoke shave, and a coping saw—to shape the bore and tone holes accurately.
Get a reliable set of calipers, a ruler, and fine marking gauges for precise measurement and layout.
Optional finishing tools like sanders, burnishers, or buffing compounds make the flute look and feel better but aren’t strictly required to get a playable instrument.
Essential Carving Tools
When you start carving a wood flute, choose a small set of reliable tools that’ll do the heavy lifting: a sharp carving knife, a couple of chisels or gouges in different widths, a flat rasp or coarse file, and sandpaper in varying grits. You’ll rely on these essentials for shaping, hollowing, and refining the bore and exterior.
Keep tools sharp and well-maintained; dull blades make mistakes likelier. Store them safely and handle wood fibers with respect. Trust fundamentals before adding extras.
- Pride when a cut feels right
- Calm as shavings fall away
- Joy hearing the first clear tone
Measurement And Marking
Because accurate marks guide every cut and hole, start by choosing a few reliable measuring tools and a couple of extras you can add later. You’ll need a steel ruler for straight edges and a caliper for bore and wall thickness; both are essential.
Add a marking gauge to scribe consistent offsets and a combination square for perpendicularity. Use a sharp mechanical pencil or scribe for fine lines and waterproof ink for permanent reference.
A small protractor helps with embouchure angles. Nice-to-have items include a digital angle finder and marking knife, but they aren’t required to get precise, repeatable results.
Optional Finishing Tools
Curious which finishing tools you really need versus the extras that just make the job easier? You’ll want a few basics: sandpaper (various grits), a clean rag, and a simple finish like oil or wax. Those let you smooth, remove dust, and protect the wood.
Nice-to-have items speed things up or improve aesthetics but aren’t required. Pick what fits your budget and patience.
- Hand-sanding invites a tactile bond with the instrument.
- A micro-motor polisher feels like magic on grain.
- A spray gun makes finishes sing but costs more.
Safety Gear and Workshop Setup
Before you cut a single groove, set up a workspace that keeps both you and the wood safe: clear a sturdy bench, secure good lighting, and arrange your tools so you won’t reach across blades or noisy machines.
Wear eye protection, a dust mask or respirator rated for fine wood particles, and hearing protection when using power tools.
Use snug clothing, tie back hair, and avoid jewelry that can catch.
Clamp your blank securely and keep push sticks handy for small pieces.
Keep a dedicated dust-collection or vacuum nearby, maintain sharp tools, and have a first-aid kit and fire extinguisher within reach.
Marking the Blank for Drilling and Cutting
Start by scribing a centerline and marking the bore alignment so your drill and cuts stay true to the tube.
Lay out finger hole positions carefully with measured spacing and tune notes as you go.
Add clear cut and drill reference marks for each operation so you won’t lose orientation during routing or reaming.
Centerline And Bore Alignment
When you mark the centerline and bore alignment, you’re setting the single most important reference for every hole and cut that follows; get this wrong and the flute will be crooked or hard to tune. Use a square, knife, and pencil to transfer the lathe axis and bore center from ends to circumference. Sight along the line, double-check with calipers, and strike faint registration marks for drilling jigs. Clamp the blank securely and re-verify before the first pilot hole.
Trust your marks; they guide every tone and fit.
- Pride in precise lines
- Relief when checks match
- Joy at a true centerline
Finger Hole Layout
Once you’ve confirmed the centerline and bore alignment, lay out your finger holes from the mouth end using measured distances and the tuning chart you chose; mark each center with a fine pencil dot. Work sequentially, checking cumulative distance and hole spacing against the chart.
Transfer positions onto both exterior and centerline reference, noting hole diameters and planned vent types. Use a small square to verify marks are perpendicular to the centerline.
Label thumb and pinky holes clearly. Recheck every measurement before committing to drilling or cutting. Accurate, deliberate marking saves time and preserves tuning integrity throughout construction.
Cut And Drill Reference Marks
Before you pick up a drill or saw, mark all cut and drill reference points clearly on the blank so you can work quickly and accurately. Use the centerline, finger-hole layout, and end positions to place each reference mark.
Trace a sharp centerline, note hole centers with small crosses, and mark cut lines for ends and tuning slots.
Use a square and calipers to verify distances; tape can protect edges.
When you drill, go slowly on the first pass.
- You’ll feel confident.
- You’ll avoid costly mistakes.
- You’ll finish with pride.
Drilling a Straight Center Bore
Ready to drill the center bore? You’ll center the blank carefully, align your pilot mark, and clamp it securely to prevent wandering.
Use a sharp, straight bit sized for your desired bore and advance slowly to avoid tear-out and overheating. Withdraw the bit periodically to clear shavings and check alignment with your reference marks.
Use a sharp, straight bit sized to the bore, advance slowly, and withdraw often to clear shavings and check alignment.
Keep the drill axis parallel to the flute’s intended voice plane; small angles ruin tuning and response.
Maintain steady feed pressure and consistent speed.
After reaching final depth, sand the bore lightly with long strips to remove tool marks and verify smoothness before moving on.
Boring by Hand, Drill Press, or Lathe
You’ll pick a boring method based on your skill, tools, and how round and straight the bore must be.
If you’re using a hand tool, drill press, or lathe, center the blank carefully and use proper jigs or tailstock support to keep alignment.
Small errors in centering are amplified as you bore, so check alignment often and correct immediately.
Choosing the Right Tool
When you’re deciding how to bore the flute’s bore, match the tool to your skill, the wood, and the level of precision you want. You’ll choose by balancing control, speed, and risk: hand-boring feels intimate and forgiving; a drill press adds repeatable accuracy; a lathe gives smooth, fast removal but demands setup and safety. Think about grain direction, chip control, and your confidence.
- Hand boring: slower, soulful, low noise.
- Drill press: steady, reliable, less personal.
- Lathe: efficient, crisp, requires respect.
Pick the method that keeps the wood safe and your hands steady.
Aligning and Centering Work
How do you make sure the bore runs true before you cut? Align the blank by sighting along its length, using pointed centers or a steady rest to support ends.
If you’re using a drill press, chuck a centering bit, mark the center with an awl, and clamp to prevent walk.
On a lathe, true the tailstock and spindle, then bring a live center to touch the mark; adjust until the blank spins without wobble.
For hand-boring, use a pilot bit or dowel in a guide block.
Regularly test with a straight mandrel or rod and correct any runout before final boring.
Shaping the Outside for Comfort and Resonance
Once you start removing material from the outside, think about both feel and sound: taper the body where your hands grip, smooth edges where your lips or fingers rest, and keep the bore’s wall thickness even to preserve resonance. You’ll shape contours that invite play and project tone.
Work patiently with rasps, files, and scrapers; check symmetry and warmth in your palm. Sand progressively finer, finish with oil or wax to feel alive and protected. Let aesthetics follow ergonomics so the flute sings naturally.
- You’ll cherish its familiar curve.
- You’ll notice your breath connect.
- You’ll feel pride every time.
Open Flute Mouthpiece vs. Fipple Block
Deciding between an open mouthpiece and a fipple block defines how you’ll play and shape the flute’s sound: an open mouthpiece gives you direct control over embouchure and dynamic range, while a fipple block (like in recorders and tin whistles) fixes the air channel for immediate tone production and easier learning.
If you choose open, you’ll form the airstream with lips, allowing bends, subtle vibrato, and expressive timbre but demanding practice and careful headjoint shaping.
If you choose a fipple block, you’ll favor consistency, straightforward fingering and faster progress, though you’ll sacrifice some tonal flexibility and personal nuance in articulation.
Cutting the Fipple Windway and Labium
Now you’ll mark the windway dimensions precisely on the block and body, using calipers or a template to keep width and height consistent.
Then you’ll cut and refine the windway, testing fit frequently so airflow stays even.
Finally, shape the labium edge with fine files and scrapers until it produces a clear, focused tone.
Marking Windway Dimensions
Before you start cutting, lay out the windway and labium clearly on the head joint so you know exactly where you’ll remove material. Measure windway width, length, and depth with calipers; mark centerline and edges lightly with pencil.
Use a square and profile template to transfer angles; double-check alignment with the bore and mouthplate.
Mark relief areas for the labium gap, but don’t shape the edge yet. Keep marks shallow so they can be removed.
Trust tools, not guesswork.
- anticipation of clear tone
- careful focus on precision
- quiet confidence in your hands
Shaping Labium Edge
With your layout confirmed and marks light, you can begin cutting the windway and shaping the labium edge. Steady hands and sharp tools will determine how cleanly the air splits.
Start by routing or carving the windway to the planned depth and width, keeping walls parallel and smooth.
Form the labium bevel gradually, testing angles as you go; a 45° to 60° edge often works, but adjust for tone.
Keep the labium tip thin and crisp, removing tiny shavings and checking for symmetry.
Finish with fine scraping and sanding, then blow gently to gauge response and refine accordingly.
Forming and Voicing an Open Embouchure
How do you shape and tune an open embouchure so the flute sings cleanly? You refine the windway, edge angle, and window size, listening as you scrape and sand. Small changes alter attack, tone, and responsiveness; test frequently. Center the air stream, keep the labium crisp, and smooth inner surfaces to reduce turbulence.
You’ll adjust the ramp and bevel until registers speak evenly and overtones blend.
- anticipation: the first clear note
- patience: coaxing warmth from wood
- joy: when breath and design unite
Play often during voicing, trusting ear over measurements.
Laying Out Finger Holes for Accurate Scale
Once the embouchure sings, you’ll turn attention to finger holes: their placement and size set the flute’s tuning and scale. Mark a centerline and establish overall tube acoustics—length, bore, and wall thickness—since hole positions depend on effective speaking length.
Use a scale chart or tuner to calculate theoretical positions, then translate them onto the tube with precise measurements from the embouchure node. Prioritize lateral symmetry and consistent spacing for ergonomics.
Plan hole diameters relative to note pitch and cross‑check with frequency tables. Note that slight position shifts alter pitch more than small diameter changes, so measure carefully.
Drilling Finger Holes Cleanly
Now that your layout is set, you’ll mark each hole center carefully and double-check spacing before you touch the drill.
Pick a sharp brad-point or Forstner bit sized for each pitch and clamp the flute securely to prevent wandering.
To avoid tear-out, back the work with sacrificial wood and feed the bit slowly while keeping steady pressure.
Marking Hole Positions
Before you start drilling, lay out and mark your finger-hole positions accurately so the holes come out clean and in tune. Measure from the embouchure, use a template or tuner for placement, and mark lightly with a pencil. Double-check spacing and alignment along the bore, and transfer center points with an awl so bits won’t walk. Keep marks minimal so sanding erases them easily.
- Pride: precise marks make your instrument sing.
- Calm: clear layout removes guesswork and stress.
- Confidence: accurate centers let your drilling be steady and true.
Choosing Drill Bits
Which bits will give you clean, accurate holes without tear-out? You’ll pick bits that match hole size and wood type: brad-point for precision, Forstner for flat-bottom control, and small twist for pilot work. Use sharp bits and steady feed; let the bit cut, don’t force it. Clamp the flute, support exit, and back up with scrap when possible. Match drill speed to diameter and hardwood. Here’s a quick reference:
| Bit Type | Best For |
|---|---|
| Brad-point | Accurate edges |
| Forstner | Flat bottoms |
| Twist (small) | Pilot/start holes |
Preventing Tear-Out
After you pick the right bits and secure the flute, focus on stopping tear-out when drilling finger holes. You’ll prevent splintering by supporting the exit side, drilling slowly, and using sharp bits. Backing material and pilot holes make clean edges; a sacrificial board taped beneath catches fibers.
Slow feed and frequent clears reduce heat and tear. Finish holes with light sanding and a reamer for smooth walls. Remember: patience preserves tone and beauty.
- You’ll feel relief when cuts stay clean.
- You’ll trust your instrument more.
- You’ll pridefully share a flawless, singing flute.
Tune Holes by Ear and With a Tuner
Now that your finger holes are drilled and the bore is smooth, you’ll tune each hole by listening and checking with a tuner so the notes speak clearly and in tune.
Start by covering all holes, sound the fundamental, then uncover one hole at a time to hear its pitch. Use a chromatic tuner to read frequency; if a note is sharp, widen or smooth the hole edge slightly. If flat, make the hole marginally larger toward the direction needed. Re-check after each change.
Play scales and common phrases to guarantee intonation across registers, adjusting conservatively until the flute sings evenly.
Fine-Tune Pitch With Hole Size and Position
When you’re ready to fine-tune pitch, think of each hole’s size and placement as the last small levers that shape intonation across registers. You’ll open holes slightly larger to raise pitch or move them closer to the embouchure to sharpen notes; smaller or farther holes lower pitch. Adjust incrementally, rechecking with a tuner and by ear. Think about venting for overblown notes and coverage for leaks.
- Relief when a phrase finally sings true.
- Pride in small, deliberate adjustments.
- Quiet satisfaction hearing tuning settle.
Keep notes steady, document changes, and proceed patiently until balance feels right.
Choose a Tuning System: Diatonic, Pentatonic, Chromatic
You’ll pick the tuning system that fits how you want the flute to sing: diatonic offers the familiar seven-note scale for folk and simple melodies.
A pentatonic layout gives you a forgiving, consonant scale that makes tunes sound good with fewer holes.
If you need every semitone, a chromatic design is possible but demands tighter hole placement and more precise fingerings.
Diatonic Scale Basics
If you want a simple, familiar tuning for your wood flute, choose the diatonic scale: it gives you seven notes per octave (like the white keys on a piano) and fits well with folk melodies and straightforward fingering patterns.
You’ll tune or hole-place for a major diatonic set, learn whole and half step intervals, and design fingerings that favor scale runs. The diatonic gives you harmonic clarity and predictable tuning across octaves, letting you focus on tone and expression rather than complex chromatic mechanics.
- Warm, natural sound that comforts listeners
- Direct, singable melodies that move you
- Intimate, honest musical conversation
Pentatonic Scale Benefits
Because the pentatonic scale pares music down to five notes, you’ll get a very forgiving tuning that sounds right in almost any melodic context.
When you build a flute with pentatonic spacing, fingerings become simpler and gaps between tones feel natural, so beginners play pleasing phrases sooner. You’ll tune fewer holes precisely, saving time and reducing frustration.
The scale minimizes dissonance, making modal improvisation and folk tunes effortless. Use pentatonic tuning for open, resonant intervals that suit solo or ensemble settings without complex adjustments.
It’s ideal when you want musicality quickly from a straightforward, robust instrument.
Chromatic Scale Challenges
While a chromatic flute gives you every semitone and the freedom to play any key, it introduces significant tuning and hole-placement challenges that can frustrate builders and players alike. You’ll need precise measurements, patience, and frequent tuning checks as tiny shifts ruin intonation.
Balancing tone across registers demands careful bore shaping and slotting; leaning on theory helps but won’t replace trial and error. Expect to iterate on hole size and position, use tuning tools, and accept occasional compromises between equal temperament and natural resonance.
- Anxiety when a once-good note goes sharp
- Joy when a difficult semitone finally sings
- Frustration during endless adjustments
Play Test: Diagnosing Tone Problems
Once you’ve played through the basic notes, listen closely and note any unevenness, squeaks, weak tones, or notes that won’t speak — these clues tell you where to focus your adjustments during the play test.
Play each note slowly, varying breath pressure and embouchure to separate player issues from instrument faults. Check response across registers, long tones for stability, and slurred intervals for smoothness.
Tap each tone hole to confirm pitch centers and watch for dead spots or sudden jumps. Record problematic pitches and conditions (breath, fingerings).
These observations guide targeted corrections and prevent wasted trial-and-error later.
Fixes for Airy, Weak, or Squeaky Notes
Your play-test notes tell the story of what’s wrong; now use them to guide specific fixes for airy, weak, or squeaky notes. Start by isolating the problem fingerings and matching them to embouchure, hole edges, or minor bore irregularities. Try small, targeted adjustments before big changes.
- Breathe steady; reconnect with the sound so frustration becomes hopeful discovery.
- File tiny amounts off sharp hole edges; listen for clarity, not sanding for perfection.
- Check the labium edge and windway alignment; a millimeter shift can stop squeaks and restore warmth.
Retest after each tweak, document results, and proceed patiently.
Sanding Internals for Better Airflow
Because small internal roughness can disturb the airstream, you’ll sand the bore and windway carefully to smooth airflow without changing dimensions appreciably.
Because tiny internal roughness disrupts the airstream, sand the bore and windway carefully to smooth without altering dimensions.
Use long, flexible sanding strips or dowel-wrapped sandpaper so you follow the bore’s axis. Start with fine grit (220–320) to remove tool marks, then progress to 400–600 for a satin finish.
Keep strokes even, avoid digging, and check profile frequently with a light source and calipers.
For the windway and window edges, work gently with small folded abrasives to preserve radii.
Clean all dust with compressed air or a dry cloth before assembly.
Seal the Bore: Oil, Shellac, or Modern Finishes
After you’ve smoothed the bore and removed dust, you’ll want to protect that work by sealing the wood—unsealed grain will absorb moisture, swell, and alter tone and playability over time. Choose a finish that penetrates without clogging tone holes: tung or linseed oil soaks in and warms sound; shellac dries fast, seals well, and’s reversible for repairs; modern penetrating sealers offer stability and water resistance.
Apply thin coats, let each cure, sand lightly between. Test on scrap. Trust your ear and touch as you progress.
- Pride in a responsive bore
- Calm confidence in durability
- Joy when the tone opens
Exterior Finishes for Durability and Looks
Now you’ll pick a finish that balances protection, appearance, and how it affects tone.
Apply protective coatings carefully—thin, even layers and proper sanding between coats will give the best results.
Finally, plan for upkeep so the finish stays durable and attractive through handling and humidity changes.
Choosing The Right Finish
Which finish will give your flute the best balance of protection and tone? You want something that shields grain and resists moisture without deadening sound. Consider oil for warmth, lacquer for toughness, or wax for subtle sheen. Think about feel, aging, and ease of repair.
- Oil: intimate, natural feel that ages gracefully.
- Lacquer: confident, durable barrier for active players.
- Wax: soft, personal touch, easy to refresh.
Match finish to playing style and climate. Test on scrap wood, listen for resonance changes, and choose what connects emotionally while preserving acoustic clarity and longevity.
Applying Protective Coatings
Want your flute to look great and stay playable for years? Apply coats in a clean, dust-free area and follow grain direction.
Lightly sand between thin coats with fine grit, removing dust with a tack cloth.
Use a brush or wipe-on oil for penetrating finishes; spray or brush lacquer and polyurethane evenly, avoiding runs.
Allow full drying time and cure before handling.
Protect tone holes by masking or removing internal residue.
Work in well-ventilated conditions, wear a respirator when needed, and follow manufacturer instructions for temperatures and recoat windows.
Multiple thin coats beat one heavy coat for durability and appearance.
Maintaining Finish Over Time
How often should you inspect and refresh your flute’s exterior finish to keep it looking great and resisting moisture and wear? Check monthly for wear, reapply thin coats yearly or as needed, and sand lightly between coats if you notice roughness.
Clean with a soft cloth after playing and store in stable humidity.
- Pride when the wood gleams, knowing you cared for it
- Calm because stable finish protects tone and structure
- Joy as a restored sheen invites you to play
Regular, simple maintenance preserves appearance and prevents moisture damage so your flute endures.
Add Decorative Bindings, Inlays, or Stamps
Once the flute’s bore and holes are finished, add bindings, inlays, or stamps to personalize and protect it—you’ll both enhance appearance and reinforce stress points like the ends or joint areas. Choose materials—leather, thread, metal wire, shell, or wood veneer—and plan placement: ends, tenons, or decorative bands. Glue or wrap securely, trim flush, and sand lightly. For stamps, use non-toxic ink or shallow carving filled with contrasting resin. Test balance and play after each addition. Maintain simplicity to avoid altering tone.
| Material | Typical Use |
|---|---|
| Leather | End binding |
| Thread | Decorative bands |
| Metal wire | Reinforcement |
| Shell | Inlay accents |
| Stamp | Logos or dates |
Install Corks, Plugs, and Tuning Rings
Before you fit corks, plugs, or tuning rings, gather the right sizes and adhesives so each part seals and moves as designed. You’ll test fit corks dry, trim for snug contact, then glue lightly—avoiding excess that blocks bore.
Push plugs to seating marks; rotate to spread adhesive evenly. Install tuning rings so they slide but hold position; they adjust pitch subtly when moved.
Final check: air-tight joints, smooth sliding, no wobble. Follow these tactile steps and listen as adjustments change tone.
- Pride when parts click into place
- Satisfaction at a sealed, responsive bore
- Joy hearing the first clear note
Break-In and Maintenance Routines
After you’ve assembled and tuned the flute, plan a gentle break-in and simple maintenance routine to stabilize the wood and keep the bore responsive.
Play short sessions daily for the first two weeks, varying registers and dynamics to seat pads and let the wood adapt.
Wipe the exterior and bore after each use with a dry, lint-free swab; avoid excess moisture.
Apply a light coat of suitable bore oil sparingly every few months, rubbing off excess.
Check corks and plugs for fit, and tighten or replace as needed.
Inspect for cracks or loose joints, addressing issues promptly to prevent damage.
How Humidity and Storage Affect Tuning
Because wood breathes, changes in humidity and storage conditions quickly shift a flute’s dimensions and pitch, so you’ll want to control where and how you keep it. Store your flute in a stable environment: avoid damp basements and searing attics. Use a case with a humidity pack if your climate swings.
Check tuning after any long storage or seasonal change, and let the instrument acclimate before performing.
- You’ll feel relief when tuning stays steady.
- You’ll dread unexpected warps less with proper storage.
- You’ll trust your sound more when humidity is managed.
Playing Tips to Get Your Best Sound
When you want your wood flute to sing, focus first on a relaxed embouchure and steady airflow. Hold the flute gently; tension kills resonance. Use diaphragmatic support for even tone and control dynamics with breath, not throat.
Experiment with small lip aperture changes to refine pitch and timbre. Finger cleanly and lift slightly for articulations; practice tonguing syllables like “ta” and “da” to vary attack.
Tune with harmonic overtones by singing into the note and adjusting breath. Warm up gradually, play scales and long tones, and listen closely—match your ear to the instrument for consistent, expressive sound.
Troubleshooting Cracks, Warps, Seasonal Shifts
Good tone and steady breath won’t protect your flute from the effects of changing humidity and temperature, so you should also learn to spot and handle physical problems like cracks, warps, and seasonal shifts.
Check seams, tone holes, and bore regularly; small hairline cracks need immediate attention to stop spreading.
Stabilize your instrument: store it in a padded case with a humidity pack and avoid heaters or open windows.
If warping appears, consult a luthier before forcing correction.
Minor seasonal tuning shifts are normal; retune and adjust embouchure.
Be proactive to preserve sound and sentiment.
- Panic, then act calmly.
- Protect what you love.
- Seek help early.
Try Variations: Keyed, Multi-Chamber, or Duet
If you want to expand your flute’s range and playability, try variations like keyed systems, multi-chamber designs, or duet flutes to find what fits your music and hands.
Add simple keys to extend reach and improve tuning for accidentals; plan placement to maintain resonance and avoid weakening the bore.
Add simple keys to extend reach and tune accidentals—place them thoughtfully to preserve resonance and bore strength.
Consider multi-chamber layouts to create contrasting timbres or tuned registers—balance chamber sizes and connecting ports for smooth progressions.
For duet flutes, design paired bores or side-by-side tubes so two players can phrase together; align fingerings and pitch relationships.
Prototype carefully, test intonation, and refine mechanism ergonomics for reliable performance.
Document Designs and Iterate Effectively
Because you’ll want to reproduce and improve each flute reliably, document every design decision, measurement, and test result as you go. Keep a simple log: date, wood type, bore size, hole placements, tools used, and audio notes. Record failures as clearly as successes so you learn faster.
- Pride when a tone finally sings
- Frustration that pushes refinement
- Joy sharing a repeatable build
Iterate in short cycles: build, test, tweak, and retest. Compare recordings, note fingerings and tuning shifts, and keep sketches or photos. Your disciplined notes turn lucky experiments into consistent craft.
Best Books, Forums, and Courses for Makers
When you want to deepen your skills quickly, turn to a mix of well-regarded books, active forums, and focused courses that together cover theory, technique, and troubleshooting; each format fills gaps the others leave and gives you places to ask questions or find plans you can repeat.
Start with classics on acoustics and woodwind construction for foundations, then pick practical books with step-by-step patterns.
Join maker forums and subreddits to get feedback, photos, and measured advice.
Take a hands-on course or workshop to refine carving and voicing.
Combine reading, community troubleshooting, and guided practice to accelerate reliable flute making.
Frequently Asked Questions
Can I Make a Wooden Flute Entirely With Only Hand Tools at Home?
Yes — you can make a wooden flute entirely with hand tools at home. You’ll need basic carving, drilling, and measuring tools, patience, steady hands, and time to tune and refine the bore and finger holes accurately.
How Do I Legalize Selling Flutes I Build Commercially?
You register a business, get any local vendor permits and sales tax ID, comply with product safety and labeling laws, consider liability insurance, follow intellectual property rules, and keep clear records; consult a lawyer or accountant for specifics.
What Are Quick Ways to Sterilize Mouthpieces Between Players?
You can wipe mouthpieces with alcohol wipes, soak non-porous ones briefly in 70% isopropyl, or use UV-C sanitizers; for wood, use a quick steam or dilute hydrogen peroxide wipe and let them fully dry between players.
Can Wood-Flute Designs Be Adapted for Children’s Smaller Hands?
Yes — you can scale hole spacing, shorten overall length, and narrow diameter so kids can reach and grip comfortably; you’ll also adjust fingering patterns and ergonomics, ensuring toneholes and voicing remain tuned for playable sound.
Are There Health Risks From Certain Wood Species’ Dust or Oils?
Yes — some woods’ dust and oils can harm you. You’ll avoid risks by using PPE, dust extraction, and gloves, avoiding toxic species (like yew, cocobolo), and washing thoroughly after handling oily or exotic woods.
Conclusion
You’ve got the basics to make a wood flute that sings — pick a type, set your tube length and bore, and take care with drying and sealing to avoid cracks. Start simple, tune by ear or with a tuner, and iterate: small tweaks to bore, hole placement, or voicing make big differences. Use resources and forums, document each build, and don’t be afraid to experiment; practice and patience turn rough cuts into beautiful tone.