How to Make a Wooden Planter Box
You can build a sturdy wooden planter box in an afternoon using rot‑resistant lumber, exterior screws, and basic tools. Measure for the plants you want, cut panels for sides and a bottom, pre‑drill and assemble with glue and screws, then drill drainage holes. Line or seal the interior, add soil mix and plants, and finish with an outdoor sealer or paint. Follow simple sizing, drainage, and finishing steps and you’ll get durable, attractive results—keep going to learn specifics and tips.
Which Planter Box Fits Your Space?
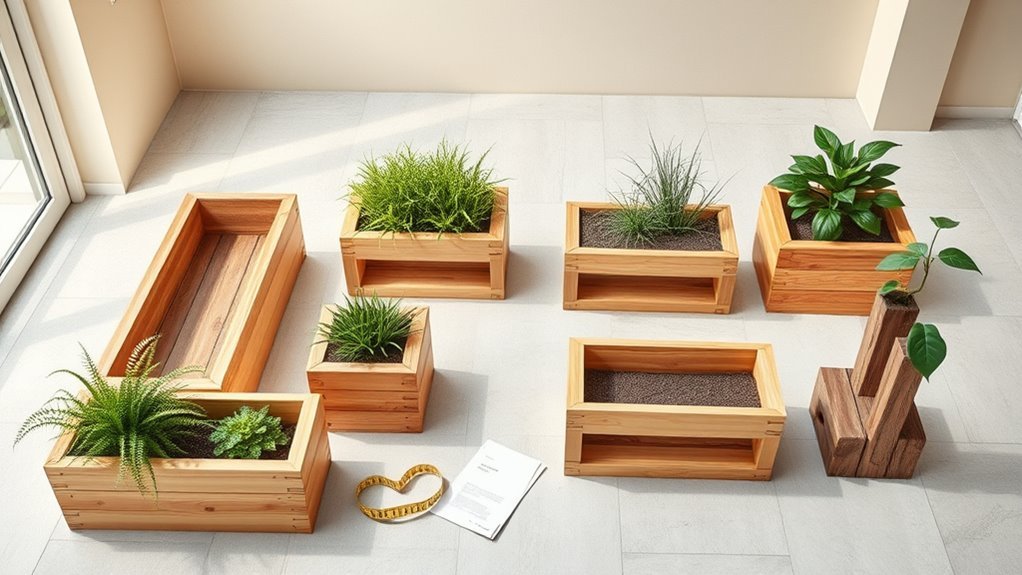
What kind of planter fits your space depends on where you’ll put it and what you’ll grow. You’ll want a shallow trough for herbs on a sunny windowsill, a deeper box for vegetables that need root depth, and a tall, narrow planter for a balcony to save floor space.
Consider weight if you’ll move it, drainage for healthy roots, and width to allow proper spacing between plants. Match planter size to mature plant dimensions so roots aren’t crowded.
Think about access for watering and harvesting, and pick dimensions that fit your spot without overwhelming it.
Choose the Best Wood for Planters
Once you’ve settled on size and placement, pick a wood that matches your planter’s function and exposure. Choose rot-resistant species like cedar or redwood for outdoor planters; they resist moisture and insects without heavy treatments.
Once size and placement are set, choose rot-resistant woods like cedar or redwood for outdoor planters.
Use pressure-treated lumber only if it’s labeled safe for gardens, or line the interior to prevent soil contact.
For indoor planters or decorative boxes, poplar, pine, or birch are affordable and paint well. Hardwood like teak or ipe lasts but costs more.
Match aesthetics, durability, and budget. Seal or oil exterior wood to extend lifespan, and guarantee proper drainage to avoid prolonged wetness.
Select Planter Size and Soil Depth
How deep will your plants really need to grow? Think about root depth: shallow herbs need 6–8 inches, most vegetables 12–18 inches, tomatoes and shrubs 18–24 inches.
Match planter depth to root requirements, leaving 1–2 inches below the rim for watering.
Width matters too—wider beds support more plants and stable root systems; allow space per plant according to mature size.
Consider soil volume for moisture retention and nutrients; deeper, wider planters need less frequent watering.
If space limits you, prioritize root depth over surface area.
Plan for drainage and ease of lifting when determining final dimensions.
Compare Raised, Freestanding, and Railing Planters
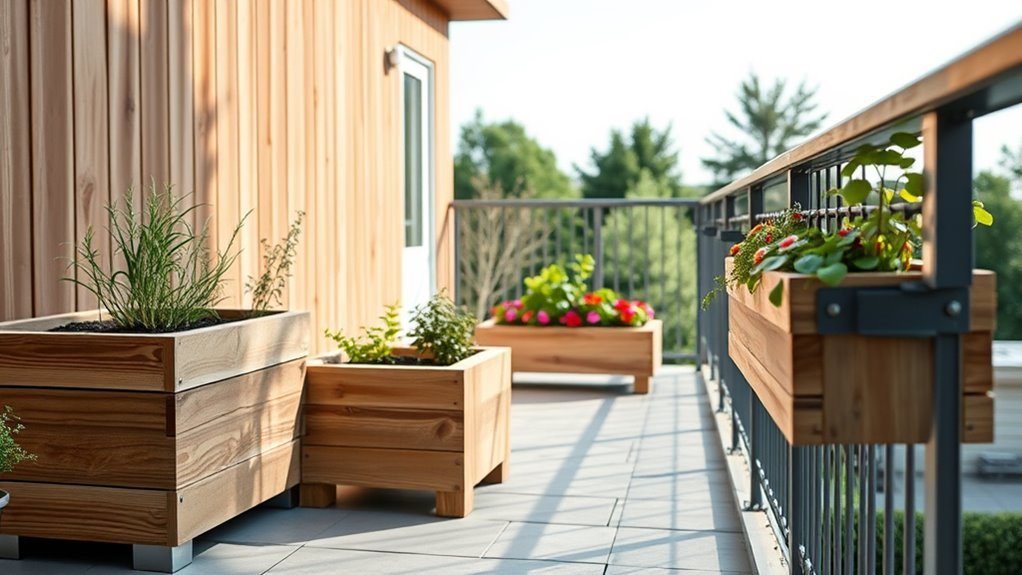
Curious which planter type fits your space and plants best? Raised planters lift soil, improving drainage and easing access for veggies or deep-rooted flowers. You’ll control soil composition and keep pests lower.
Freestanding boxes are versatile—move them, group them, or use them as focal points; they suit patios and entryways and let you choose height and footprint freely.
Railing planters save floor space and add greenery at eye level; they’re ideal for herbs and trailing blooms but need secure attachments and faster watering.
Match plant needs, mobility, and sunlight when choosing; each style affects maintenance and placement.
Budgeting: Materials and Tool Costs
Before you cut any wood, you’ll want a clear material cost breakdown so you know how much lumber, screws, liner, and finish will set you back.
Count on some essential tool expenses too—saws, a drill, sandpaper, and clamps are worth buying or borrowing.
I’ll also show quick budget-saving tips like using reclaimed wood or renting tools to keep costs down.
Material Cost Breakdown
When planning your wooden planter box, list every material and tool you’ll need and assign a price to each so you can see the true project cost at a glance. Break materials into categories: lumber (specify board feet or dimensions), screws/nails, exterior wood glue, stain/sealant, liner, soil, and optional hardware.
Note quantities and unit prices, then multiply for totals. Compare grades of lumber and finishes to weigh durability versus cost. Include small extras like sandpaper and corner brackets.
Sum subtotals to get a material-only budget, then add a contingency (5–10%) for waste or price variance.
Essential Tool Expenses
Now that you’ve tallied materials, factor in the tools you’ll need to actually build the planter box — some you may already own, others you’ll need to buy or borrow.
List essentials: measuring tape, square, pencil, circular saw or miter saw, drill with bits, screwdriver, clamps, sander or sandpaper, and a level.
Estimate costs: power tools are the biggest expense; hand tools are cheaper. Check whether you can borrow a saw or rent one by the day.
Don’t forget consumables like drill bits, blades, and screws.
Add a small contingency (5–10%) for replacements or unexpected needs.
Budget Saving Tips
If you want to keep costs down, prioritize smart choices that trim both material and tool expenses without sacrificing quality. Buy standard-size lumber to avoid cuts, choose rot-resistant inexpensive species, and shop sales or reclaimed wood. Rent specialty tools, borrow from friends, and invest only in quality items you’ll reuse. Measure twice, cut once, and avoid waste by planning panel layouts. Seal with affordable, long-lasting finishes. Track expenses to spot savings next build.
| Save on materials | Save on tools |
|---|---|
| Use standard sizes | Rent specialty tools |
| Reclaimed wood | Share with friends |
| Shop sales | Buy multitools |
| Bulk screws | Borrow for one-offs |
| Plan cuts | Maintain tools |
Tools for a Planter Weekend Build
Because you want the job done right over a weekend, gather a compact set of reliable tools that’ll handle cutting, fastening, measuring, and finishing the planter without overcomplicating the build.
You’ll need a circular saw or miter saw for straight cuts, a drill/driver with wood bits and screwdriver bits, and a set of clamps to hold pieces while fastening.
Add a speed square and tape measure for basic layout, a pencil, and a sanding block or random-orbit sander with 120–220 grit.
Finish with exterior wood screws, wood glue, and a weatherproof finish brush.
Safety gear: goggles, ear protection, and dust mask.
Measure and Mark Boards Accurately
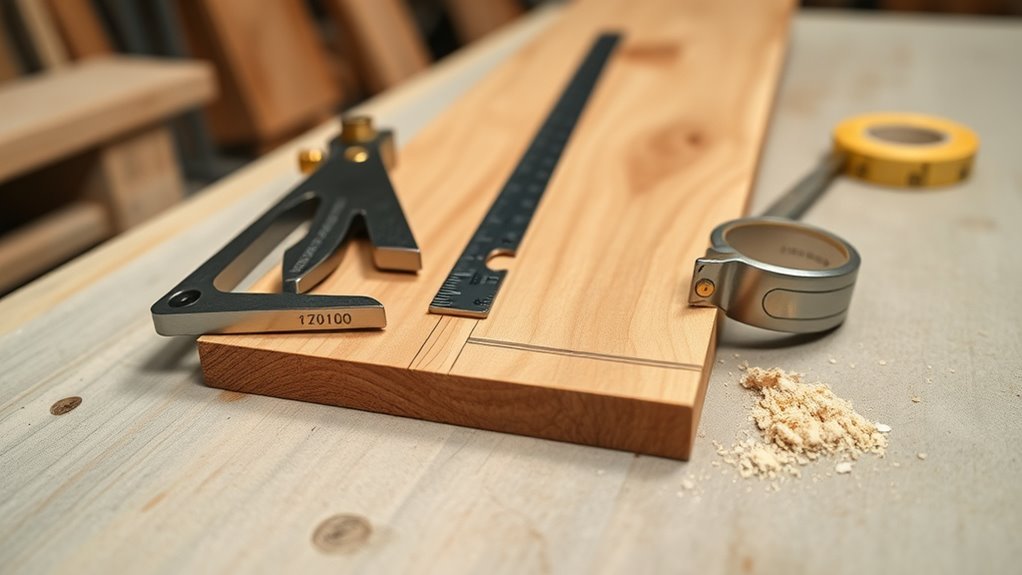
Before you cut, measure and mark each board carefully so your pieces fit together squarely and you waste as little wood as possible. Use a reliable tape, a combination square, and a sharp pencil. Work on a flat surface, double-check dimensions against your plan, and mark cut lines on the face that will be visible so you can orient boards consistently.
- Measure twice: confirm length, width, and thickness before marking.
- Use a square: transfer perpendicular lines for end cuts and joints.
- Mark clearly: scribe thin, dark lines and label each piece for placement.
Cutting Lumber Safely and Precisely
Before you cut, measure twice and mark clearly so you get the exact lengths you planned.
Pick the right saw for the job—circular or miter for long straight cuts, a jigsaw for curves—and match the blade to the wood.
Always clamp and support your lumber to keep it steady and safe while you cut.
Measure Twice Cut Once
- Use a reliable tape, square, and pencil; mark both faces and recheck distances.
- Clamp the board, sight along the line, and confirm blade clearance plus waste allowance.
- Dry-fit pieces before final cuts to ensure fit and adjust small discrepancies.
Follow this and you’ll conserve material, time, and frustration while keeping projects precise.
Choose The Right Saw
When you pick a saw, match it to the cuts you’ll make and the material you’ll use. Choose a handsaw for small rip cuts, a circular saw for straight long cuts, or a miter saw for precise angle cuts. Use a jigsaw for curves. Pick blade tooth count appropriate to hardwood or softwood. Always wear eye and hearing protection and follow blade-guard rules.
| Saw Type | Best For |
|---|---|
| Handsaw | Small rip cuts |
| Circular Saw | Long straight cuts |
| Miter Saw | Accurate crosscuts/angles |
| Jigsaw | Curves and cutouts |
Secure And Support Lumber
Since you’re about to cut lumber, clamp each board securely and support its full length so the blade can’t catch or bind. Position supports near the cut and at the ends; use sacrificial boards under the saw to prevent tear-out. Keep your work at a comfortable height to maintain control, and never let the offcut drop—support it until the blade stops.
Check blade sharpness and alignment before cutting, and mark cut lines clearly. Wear eye and hearing protection, and keep fingers well away from the kerf.
- Use clamps and roller stands.
- Add sacrificial backing.
- Confirm blade alignment and sharpness.
Sanding and Edge Preparation
Before you apply finish, sand the planter and clean up its edges so the wood feels smooth and the joints look crisp.
Begin with 80–100 grit to remove tool marks, then progress to 120, finishing with 180–220 for a fine surface.
Sand along the grain, not across it, to avoid scratches.
Lightly round sharp external corners with a block or sanding sponge to prevent splinters while keeping profiles neat.
Use a small file or sandpaper folded for tight joints.
Clean all dust with a brush and tack cloth before staining or sealing to guarantee even absorption and a professional result.
Layout Parts Before Assembly
Before you start fastening, lay out all the boards by size so you can spot any defects or mismatched pieces.
Check where screws, hinges, or brackets will go and mark their positions on the parts.
This quick layout helps you avoid surprises during assembly and speeds up the build.
Arrange Boards By Size
When you lay out your boards by size, group matching lengths and widths together so you can spot defects, plan grain orientation, and make efficient cuts. Lay them on a flat surface, face up, and align ends so you can compare straightness. Set aside warped or knotty pieces; mark any that need trimming.
Arrange boards in the order they’ll be used: sides, bottom slats, trim. This minimizes movement and mistakes once you start cutting and fastening. Double-check measurements against your cut list and note grain direction for appearance and strength before you begin assembly.
- Inspect and sort
- Align and mark
- Order by use
Check Hardware Placement
Now that your boards are arranged and marked, lay out all hardware—screws, brackets, corner braces, and any hinges or feet—next to the matching parts so you can see how everything fits together. You’ll verify lengths, counts, and fastener types, ensuring nothing prevents flush joints or countersinking. Test-fit brackets and mark pilot-hole centers on the wood. If parts clash, adjust placement or choose different hardware. Organize labeled piles so you won’t scramble during assembly. Use the quick reference table below to confirm common placements and avoid surprises.
| Part | Typical Placement |
|---|---|
| Screws | Edges, pilot holes |
| Brackets | Inside corners |
| Braces | Long sides |
| Feet/Hinges | Bottom/exterior |
Fastening: Screws, Nails, Joinery Options
If you want a planter that stays square and weatherproof, choosing the right fastening method matters as much as picking the wood. You’ll pick screws for strong, removable connections and corrosion-resistant exterior screws for longevity. Nails are faster but can loosen; use ring-shank or galvanized nails for temporary assembly.
Concealed joinery like biscuits or pocket holes gives clean faces and extra alignment without visible fasteners. Consider expansion gaps and sealant where fasteners penetrate.
- Screws: strength, serviceability, use exterior-rated stainless or coated.
- Nails: speed, use ring-shank/galvanized for holding.
- Pocket holes/biscuits: hidden, neat, align parts.
Building Strong Corner Joints
Fastening choices lay the groundwork, but the joint is what actually keeps the planter square and load-bearing at the corners.
You’ll pick a joint that matches your skills and tools: butt joints reinforced with screws and glue for simplicity, rabbet or lap joints for increased glue surface, or miters with splines for clean faces.
Always clamp while glue cures, predrill screw holes to prevent splitting, and stagger fasteners so wood tension stays balanced.
Add corner blocks or metal brackets inside for extra strength if needed.
Sand and seal exposed end grain to reduce moisture wicking and prolong joint life.
Step‑by‑Step Base and Side Assembly
Start by measuring and cutting your boards to the exact dimensions so everything fits squarely.
Next, assemble the base by aligning the slats or panel and fastening them for a sturdy foundation.
Finally, attach the sides to the base, checking for squareness and reinforcing the corners as you go.
Measure And Cut
Before you cut anything, double‑check your measurements and mark each board clearly so every piece fits the base and sides precisely. Measure twice, transfer marks with a square, and label parts (base slats, side panels, end pieces).
Use a sharp saw and clamp boards to prevent drift. Cut slowly, follow the lines, and sand ends for snug joints. Keep scrap nearby to test fit before final assembly.
- Measure and label each board for its role.
- Clamp and cut with a steady guide.
- Sand ends and dry‑fit pieces for accuracy.
Assemble The Base
With your pieces cut and dry‑fitted, lay out the base slats on a flat surface so their edges are flush and the grain runs the same direction. This makes screwing and gluing much easier and keeps the planter looking tidy.
Position two longer support cleats across the underside perpendicular to the slats, centered and spaced for drainage. Apply a thin bead of exterior wood glue to each contact, clamp temporarily, then drive corrosion‑resistant screws through the cleats into every other slat.
Countersink screws slightly and wipe excess glue. Let the assembly cure fully on a level surface before moving to the next step.
Attach The Sides
Once the base is cured and flat, stand the side panels upright against its edges, aligning corners squarely and matching grain or face orientation so the seams look consistent.
Hold one panel, clamp it to the base, then predrill holes to prevent splitting. Apply exterior wood glue along the base edge and inside corner joints, wipe squeeze‑out, and fasten with galvanized screws or finishing nails.
Repeat for remaining sides, checking squareness after each attachment and adjusting clamps as needed.
Seal interior seams with silicone for waterproofing if desired.
- Clamp securely
- Predrill & fasten
- Check squareness
Reinforce the Bottom for Weight
Because soil and plants add a lot of weight, you’ll want to reinforce the planter’s bottom so it won’t sag or split over time. Add a 1/2″ plywood panel and cross-brace beneath the floor; screw and glue them to distribute load. Use exterior-grade screws and wood glue, spacing screws every 6–8″. For very large boxes, add a center joist or metal angle for extra support. Seal edges to prevent moisture wicking. Check for level and tighten fasteners after a week of settling.
| Part | Material | Fastener |
|---|---|---|
| Floor panel | Plywood | Screws |
| Cross-brace | 2×2 | Screws |
| Center support | 2×4/angle | Screws |
Installing Drainage Without Leaks
After reinforcing the bottom, you’ll want to add reliable drainage so water exits without seeping into the wood or pooling in corners.
Drill evenly spaced 1/2″ holes in the center area, slope the base slightly toward them, and seal exposed screw heads.
Raise a small bed of coarse gravel or broken terracotta over the holes to keep soil from clogging them.
Line the perimeter seam with exterior-grade silicone where boards meet the bottom to prevent seepage.
Check for leaks by pouring water and inspecting all joints; reapply sealant where dampness appears until the planter stays dry externally.
- Drill holes
- Add gravel bed
- Seal joints
Choosing a Liner: Plastic, Fabric, Cedar
Wondering which liner will give your planter the best balance of moisture control and durability? You’ll choose based on plant needs and maintenance.
Plastic liners hold moisture well and protect wood, but punch drainage holes and avoid trapping roots.
Fabric liners drain and aerate soil, reducing rot while letting excess escape—good for herbs and annuals.
Cedar planks or boards act as a natural liner, resisting decay and blending with the box; they slow moisture transfer but won’t fully waterproof.
Whichever you pick, secure the liner to prevent gaps, guarantee proper drainage, and consider replacing it when it shows wear.
Building a Self‑Watering Wooden Planter
If you want a planter that cuts down on watering and keeps roots healthy, a self‑watering wooden box is a smart next step—this design stores a reservoir beneath the soil and wicks water up as plants need it.
You’ll build a waterproof reservoir, a false bottom with wicking material, and a fill tube. Use rot‑resistant wood, seal interior surfaces, and add overflow drainage to prevent waterlogging.
Planting soil should sit above the wicking layer with a barrier to keep it separate. Maintain by topping off the reservoir and flushing annually to prevent salt buildup.
- Plan reservoir size
- Install wicking layer
- Add fill/overflow
Trim and Decorative Finishing Details
When you’re ready to dress the planter, add trim and decorative details that both protect edges and sharpen the overall look—think capped corners, applied rails, or a simple bead molding along the top lip.
Measure and cut trim to fit snugly; miter corners for clean joins. Pre-drill and use corrosion-resistant screws or exterior adhesive for a lasting bond.
Rout a small drip edge to channel water away from joints.
Sand smooth, fill gaps with exterior wood filler, then prime.
Finish with outdoor paint, stain, or spar urethane for protection and cohesive style that complements your garden.
Add Legs, Casters, or Mounts
Before you attach legs, casters, or mounting hardware, decide how you’ll use the planter—raised for easy access, mobile for patio rearranging, or fixed to a wall or railing—and pick hardware rated for outdoor use and the planter’s load.
Measure and mark attachment points, strengthen corners or add internal blocks where screws will bite.
For legs, use corrosion-resistant bolts and ensure level height.
For casters, choose locking, outdoor-grade wheels and spread weight across multiple mounts.
For mounts, anchor into studs or use heavy-duty railing brackets.
Test stability with soil and plants, then tighten fasteners after a short trial period.
- Choose hardware type and rating
- Reinforce attachment points
- Test and retighten after loading
Weatherproofing Options: Sealer, Oil, Paint
You’ll choose between sealers, natural oils, or paint depending on how much protection and maintenance you want.
Compare sealer types for breathability and UV resistance, consider oils for easy upkeep and enhanced grain, and use paint if you need maximum weather protection and color.
Next we’ll cover pros, application tips, and longevity for each option.
Sealer Types Compared
Wondering which finish will keep your planter looking good and protect it from the elements? Compare sealers by penetration, film, and breathability.
Pick a penetrating sealer if you want natural grain visibility and moderate water resistance.
Choose a film-forming sealer (polyurethane or spar varnish) for stronger surface protection and easier cleaning, though it can peel over time.
Use a breathable sealer if you need moisture exchange to prevent rot in thicker wood.
- Penetrating sealer — preserves look, soaks into wood.
- Film-former — tough surface, higher sheen options.
- Breathable sealer — prevents trapped moisture, prolongs lifespan.
Natural Oil Benefits
How do natural oils protect wood while keeping its look unchanged? You’ll soak grain with oils like tung, linseed, or walnut to repel moisture, reduce cracking, and slow rot without forming a surface film.
Oils penetrate, nourishing fibers and enhancing natural color subtly rather than hiding texture. They’re easy to reapply: sand lightly, wipe on, and buff out excess.
For outdoor planters, combine oil with periodic maintenance every season or two. Oils won’t give the same abrasion or UV resistance as films, so expect gradual patina; still, they’re ideal if you want a natural, low-build finish that’s repairable.
Paint Protection Tips
If you prefer a more finished look or greater weather resistance than oils provide, paint and sealers give stronger protection for outdoor planters. You’ll prep by sanding, cleaning, and applying a primer suited to exterior wood.
Use exterior-grade acrylic paint for color and UV defense, and add a clear exterior sealer or spar urethane for extra moisture resistance. Let each coat dry fully and sand lightly between coats.
- Choose primer + exterior acrylic paint for adhesion and UV protection.
- Finish with a breathable exterior sealer to block moisture without trapping it.
- Recoat every 2–3 years as needed.
Picking Stain or Paint Color
Want a natural, weathered look or a bold pop of color? You’ll pick stain for grain, paint for coverage. Consider sunlight, surrounding plants, and maintenance: stains age gracefully but need recoat; paints hide flaws and offer brighter choices. Test samples on scrap wood, view at different times of day, and think about color temperature—warm tones cozy, cool tones modern. Match exterior-grade products to climate and seal with outdoor clear coat. Use this quick reference:
| Finish Type | Durability | Best Use |
|---|---|---|
| Stain | Moderate | Natural grain |
| Paint | High | Bright, solid color |
Prepare Soil Mix and Layering
Now you’ll pick a soil mix suited to your plants—potting mix for annuals, cactus mix for succulents, or a loam-based blend for vegetables.
Add a drainage layer of coarse gravel or broken pots at the bottom to keep roots from sitting in water.
Top the mix with compost or aged manure and a bit of slow-release fertilizer.
Then layer and tamp gently for even settling.
Choosing The Right Soil
Before you fill the box, decide on a soil mix that drains well yet holds enough moisture for roots to access. Choose a balanced potting mix rather than garden soil; it’s lighter and sterile.
Blend in organic matter to feed plants and improve texture. Check pH for your chosen plants and adjust with lime or sulfur if needed.
Aim for a mix that’s fluffy, not compacted, so roots can grow.
- Use quality potting mix as base.
- Add compost or well-rotted manure (20–30%).
- Include perlite or coarse sand for aeration.
Adding Drainage Layer
When you assemble the planter, add a drainage layer to keep roots from sitting in water and to promote healthy airflow; this simple step prevents soggy soil and root rot.
Spread 1–2 inches of coarse material—gravel, broken terracotta, or nursery pots—across the bottom so excess water can collect away from roots.
Place a breathable landscape fabric or a layer of coarse sand above the gravel to keep soil from washing into the void.
Make sure the planter’s drainage holes are clear and slightly raised so water exits freely.
Check periodically and remove compacted material to restore proper flow.
Layering Organic Amendments
How will you build a nutrient-rich, well-draining mix that keeps plants happy season after season? Start by layering amendments to balance moisture, nutrients, and structure. Mix equal parts compost and high-quality potting soil, then fold in chunky materials for aeration. Top with a light mulch to conserve water.
- Add compost for slow-release nutrients and beneficial microbes.
- Stir in perlite or coarse sand to improve drainage and prevent compaction.
- Blend in shredded bark or coconut coir to retain moisture without sogginess.
Check pH and adjust with lime or sulfur as needed before planting.
Plants for Shallow, Medium, Deep Boxes
Because your planter’s depth determines root space and water needs, choosing the right plants for shallow, medium, or deep boxes makes all the difference.
For shallow boxes (3–6 inches), pick shallow-rooted herbs and succulents like thyme, chives, oregano, sedum, and alpine strawberries. They thrive with less soil and dry quickly.
Medium boxes (6–12 inches) suit most annuals and herbs: basil, parsley, marigolds, pansies, and lettuce need moderate root depth and consistent moisture.
Deep boxes (12+ inches) handle larger vegetables and perennials—tomatoes, peppers, dahlias, and small shrubs—supporting vigorous roots and retaining moisture longer.
Planting Layout for Herbs and Flowers
Think about each plant’s sunlight and shade needs when you arrange herbs and flowers so sun-lovers sit where they’ll get full light and shade-tolerant varieties stay protected.
Group compatible plants together—basil with tomatoes or marigolds with herbs—to boost growth and deter pests.
Stagger heights and root depths so taller or deeper-rooted species don’t crowd smaller ones.
Sunlight And Shade Needs
When you plan your wooden planter, match each herb and flower to the light they’ll actually get—full sun plants like basil and marigolds need at least six hours of direct light.
While parsley, chives, and many shade-tolerant flowers will do fine with morning sun or bright indirect light.
Place tallest, sun-loving specimens where they won’t shade smaller, shade-preferring plants.
Rotate the planter periodically to guarantee even growth.
Use soil depth and drainage to support sun plants’ higher evaporation rates; add mulch for shade plants to retain moisture.
- Map light zones across the planter.
- Group by sun needs.
- Rotate weekly.
Companion Planting Ideas
Now that you’ve arranged plants by light, you can plan specific pairings that boost growth, repel pests, and make the most of space.
Place basil near tomatoes to enhance flavor and deter flies. Tuck marigolds at edges to repel nematodes and beetles.
Pair chives with roses or lettuce to reduce aphids. Plant mint in a separate pot to avoid overcrowding roots but use it nearby to repel ants.
Combine lavender with sage and thyme for drought-tolerant aroma and pollinator appeal.
Use taller plants like rosemary at the back to shade delicate seedlings, maximizing vertical and horizontal space efficiently.
Watering and Fertilizing Routines
Although your planter box needs consistent moisture, overwatering can harm roots and invite disease, so you’ll want a simple routine that matches your plants’ needs. Check soil moisture by finger—water when top inch feels dry. Use a watering can or drip to wet evenly; avoid puddles.
Feed lightly with balanced, slow-release fertilizer at planting, then monthly during the growing season for veggies and flowering annuals. Adjust frequency for containers, which dry faster.
- Monitor: check moisture and drainage daily in heat.
- Watering method: soak thoroughly, let excess drain.
- Fertilizing: follow product rates; cut back for foliage plants.
Winter Care and Seasonal Storage
As cold weather approaches, you’ll want to winterize your planter by emptying soil, trimming dead roots, and sealing any exposed wood.
If you’re storing the box long-term, clean and dry it thoroughly, apply a coat of preservative, and keep it in a dry, sheltered spot off the ground.
These steps will prevent rot and cracking so your planter’s ready next season.
Winter Preparation Steps
Before frost hits, take practical steps to protect your wooden planter so it lasts through the cold. Empty annuals, trim perennials, and remove debris. Clean soil from corners and check for rot or loose joints; repair small issues now so they don’t worsen.
- Lift and elevate: place planter on blocks or feet to prevent ground moisture wicking.
- Cover smartly: use breathable frost cloth or tarp loosely to block ice while allowing airflow.
- Dry and seal edges: let wood dry after cleaning, then apply a thin coat of exterior sealer to exposed cut ends and fastenings.
Long-Term Storage Tips
When you’re done with basic winterizing, store your planter where it’ll stay dry, ventilated, and out of direct sunlight to prevent warping and mold.
Clean and dry the box thoroughly, removing soil, debris, and trapped moisture.
Elevate it off the floor on blocks or pallets to allow air circulation and avoid ground dampness.
Loosely drape a breathable cover to shield from dust while preventing condensation.
Check periodically for pests, cracks, or finish failure, and reapply a protective sealant if needed.
Before spring use, inspect joints and hardware, tighten or repair as necessary.
Repairing Rot and Loose Joints
If you find soft, crumbling wood or joints that wobble, tackle rot and loose connections first so your planter stays sturdy and safe. Remove soil and lift the box; dry the area and probe damaged spots. Cut away rotten wood to sound material, treat remaining wood with a preservative, and replace removed pieces with matching, pressure-treated or rot-resistant lumber.
Tighten or replace screws and add wood glue at joints; use clamps until cured. Seal seams with exterior caulk and finish with water-repellent stain.
- Inspect and mark damage.
- Excise rot; fit new pieces.
- Reinforce joints and seal.
Upgrades: Trellis, Drip, Better Liners
To boost your planter’s productivity and ease of care, add a trellis for climbers, a drip system for steady watering, and a better liner to protect the wood and soil.
Install a simple lattice or vertical poles anchored to the box; train vines with ties and prune for airflow. Fit a low‑pressure drip line with a timer or manual valve to deliver consistent moisture and reduce disease.
Choose a durable liner—heavy gardening fabric, pond liner, or food‑safe plastic with drainage holes—and add a gravel layer to prevent soil contact with wood. These upgrades extend lifespan and simplify maintenance.
Eco Options: Reclaimed Wood, Non‑Toxic Finishes
Alongside upgrades like trellises and drip lines, you can make your planter greener by choosing reclaimed wood and non‑toxic finishes. You’ll save trees, add character, and avoid chemical leaching.
Inspect reclaimed boards for rot, nails, and contaminants; sand and seal gaps.
Choose finishes labeled food‑safe or low‑VOC, like plant‑based oils or water‑based sealers, to protect wood without harming soil or roots.
Line the interior with breathable fabric if you want extra protection.
- Source: check history, structural soundness, and contaminants.
- Finish: prefer food‑safe oils or water‑based sealers.
- Prep: clean, sand, and test before planting.
Quick Planter Variations for Small Spaces
When space is tight, you can still grow herbs, salad greens, or a burst of color by choosing planters that fit narrow balconies, windowsills, or stair landings. Think vertical pockets, railing boxes, and stackable pots that maximize planting area without crowding your living space.
Opt for shallow boxes for lettuces, deeper narrow planters for roots, and modular stackables to layer microclimates. Mount slim troughs on railings, hang pocket planters on walls, or build a tiered shelf with removable wooden pots.
Use lightweight soil mixes, guarantee drainage, and group plants by water need so maintenance stays simple and efficient.
Common Beginner Mistakes to Avoid
Narrow-space solutions are great, but small planters magnify mistakes that can kill plants fast. You’ll want to plan drainage, soil depth, and material treatment carefully so roots don’t suffocate or rot. Avoid cheap shortcuts that shorten planter life.
- Overwatering: Small volumes dry or stay wet quickly; use drainage holes and fast-draining mix.
- Wrong soil depth: Don’t cram deep-rooted plants into shallow boxes; match depth to plant needs.
- Untreated wood or toxic finishes: Seal with plant-safe products and allow full cure before planting.
When to Replace Your Planter Box
If your planter shows persistent rot, major cracks, or warped sides that compromise drainage and root space, it’s time to replace it rather than patch it up.
Inspect annually: check joints, bottom boards, and screw holes for weakness. If repairs won’t restore structural integrity or waterproofing, build a new box.
Consider plant needs—deep roots and heavy soil need sturdier construction.
Salvage sound hardware and untreated lumber for other projects.
When you replace, choose rot-resistant wood, proper drainage, and a liner if needed.
Replacing on time prevents plant loss, saves effort, and keeps your garden healthy and tidy.
Frequently Asked Questions
Can I Use Pressure-Treated Pine for Edible Plant Boxes?
You can, but avoid older pressure-treated pine treated with arsenic (CCA); newer ACQ or CA-treated lumber is safer. Line the box with heavy plastic and use untreated soil, or choose cedar, redwood, or food-safe alternatives instead.
How Do I Ship or Transport a Completed Large Planter?
You’ll secure the planter to a pallet or skid, strap it tightly, protect corners with foam or blankets, cover with shrink wrap, label weight and orientation, and use a freight carrier or moving truck with a liftgate for safe transport.
What Permits Are Needed for Attached Balcony Planters?
You’ll likely need building or structural permits and landlord or HOA approval; some cities require ornamental planting permits or wind/weight assessments. Check local municipal codes, your lease, and submit drawings; consult your building department first.
How to Childproof Planters Against Tipping Hazards?
You secure planters by anchoring them to railings or walls, using heavy-bottom inserts, low center-of-gravity designs, anti-tip brackets or straps, and locking lids; inspect fastenings regularly, and keep tempting plants out of children’s reach.
Are There Fire-Resistant Treatments for Wooden Planters?
Yes — you can treat wooden planters with fire-retardant sprays, intumescent coatings, or pressure‑impregnated fire-retardant preservatives. You’ll follow manufacturer instructions, guarantee proper ventilation while applying, and reapply periodically for sustained protection.
Conclusion
You’ve got the basics to pick, build, and maintain a planter box that fits your space and budget. Choose rot-resistant wood, match depth to plant roots, and decide between raised, freestanding, or railing styles. Use reclaimed materials and non‑toxic finishes when you can, avoid common beginner mistakes like poor drainage, and replace boxes once they rot or warp. Start small, learn as you go, and enjoy fresher flowers and veggies at home.