How to Make Wooden Bed Frame
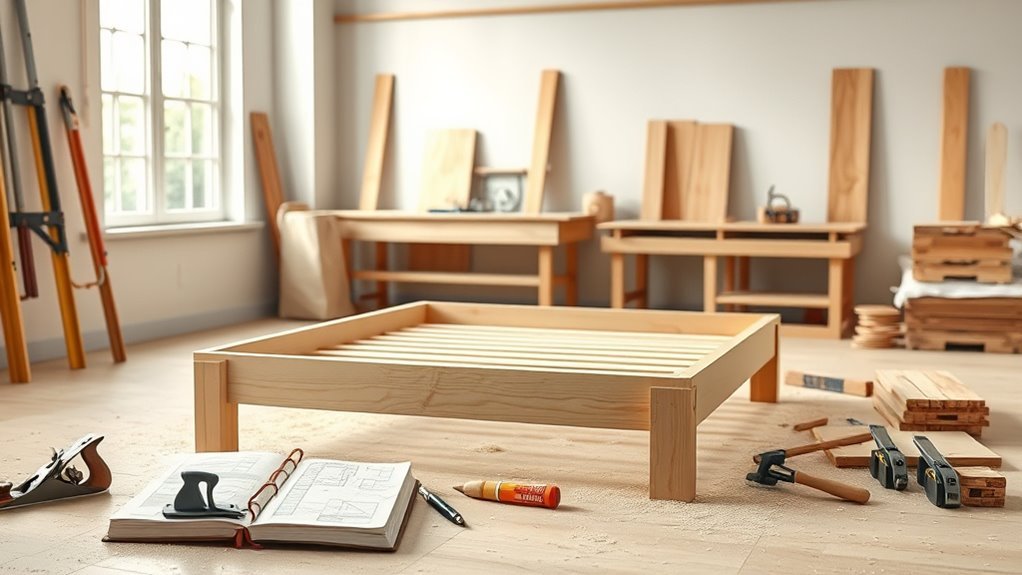
You can build a sturdy wooden bed frame in a weekend with basic tools, common lumber, and a simple platform plan: four legs, two side rails, two end rails, and slats or a plywood deck. Measure your mattress, cut parts accurately, pre‑drill holes, clamp and square the frame, add a center support, then sand and finish. Follow a checklist for materials, hardware, and safety gear, and keep time for trial fits—keep going to learn detailed steps and tips.
Project Overview: Weekend Wooden Bed Frame
Curious how quickly you can build a sturdy bed? You’ll complete a solid wooden frame over a weekend using basic tools and common lumber.
The plan focuses on a simple platform design: four legs, two side rails, two end rails, and slats or a plywood deck for mattress support.
Materials list, cut dimensions, fasteners, and a straightforward assembly sequence keep things efficient.
You’ll prep parts, assemble the rectangle, attach legs, add support beams, and fasten slats, then sand and finish.
This approach minimizes complexity while delivering strength and a clean look for immediate use.
Who Should Build a Bed Frame (Skills and Time)
If you’ve handled basic power tools and followed a few simple plans before, you can confidently build this weekend bed frame. Beginners with patience and attention to measurement can succeed too, though total novices should set aside extra time to learn safe tool use.
You should tackle this if you can measure accurately, cut straight, and follow step sequences. Expect a full weekend: plan for shopping, cutting, assembly, sanding, and finishing.
If you lack time, steady focus, or tolerance for minor mistakes, hire help. Team up if heavy lifting or complex joinery exceeds your comfort level.
Standard Mattress Sizes and Frame Dimensions
Before you cut a single board, confirm the mattress size you’ll use and the exact inside dimensions the frame must support.
Measure mattress length, width, and thickness; note manufacturer tolerances.
Standard US sizes: Twin 38″×75″, Twin XL 38″×80″, Full 54″×75″, Queen 60″×80″, King 76″×80″, California King 72″×84″.
Add clearance for bedding and ease of installation—typically 1/4″ to 1/2″ per side.
For slatted beds, allow mattress depth plus 2″ for support.
Convert to metric if needed.
Record inside frame dimensions, not exterior; plan rail widths and hardware positions accordingly before cutting.
Quick Material Cost Estimate and Budget Plan
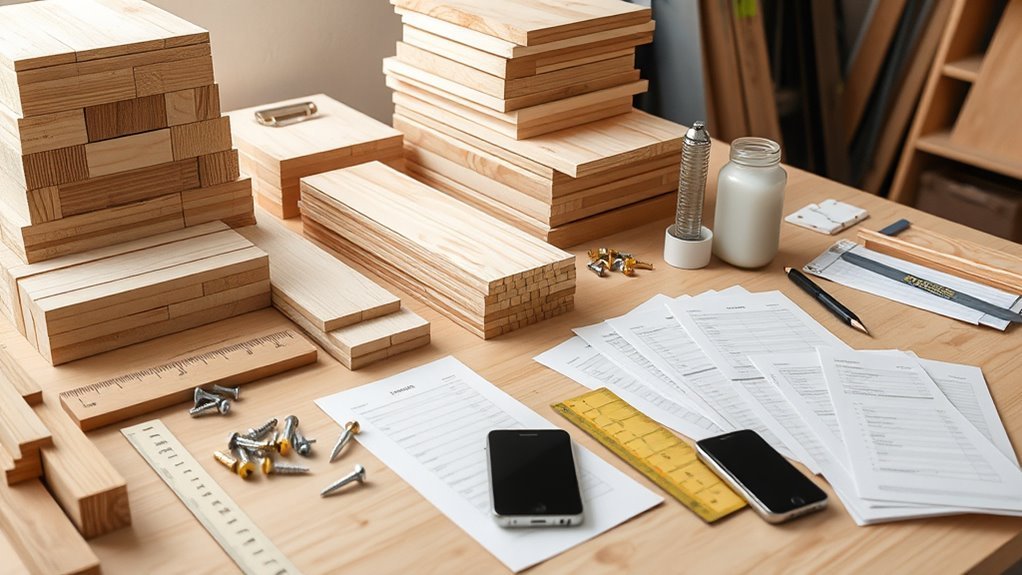
Start by listing every material and hardware piece you’ll need—lumber by board type and length, fasteners, glue, slats or plywood, finish, and any metal brackets—then assign unit costs to each so you can total a realistic materials-only figure.
Next, estimate waste (cutting mistakes, defects) as a percentage and add tool rental or purchase costs if needed.
Allocate a contingency (10–15%) and compare prices from two suppliers to spot savings.
Track labor hours if you’re valuing your time.
- Tally item, unit price, and quantity
- Include delivery or shipping fees
- Account for taxes
- Add protective finish amount
- Reserve for misc. fasteners
Which Wood Species Are Best for Bed Frames
Choosing the right wood species shapes your bed’s strength, appearance, and aging, so consider hardness, stability, cost, and grain when deciding.
You’ll likely favor oak for durability and classic grain, maple for smooth, hard surfaces that resist dents, or walnut for rich color and higher cost. Cherry darkens beautifully with age if you want warm tones.
If budget matters, poplar can be painted and machines well.
For light modern looks, ash or birch offer straight grain and good strength.
Match species to your finish plan, joinery method, and expected wear to get a bed that lasts.
Pros/Cons: Solid Wood, Plywood, Engineered Lumber
When you weigh solid wood, plywood, and engineered lumber for a bed frame, you’ll trade off durability, cost, and appearance differently for each material. You’ll choose solid wood for strength and repairability but pay more and face movement with humidity.
Plywood gives stability, affordability, and layered strength though edges need finishing.
Engineered lumber (MDF, particleboard) stays flat, cuts costs, and accepts veneers, yet it can sag and resist fasteners less well.
Match material to budget, finish, and expected lifespan.
- Solid wood: long-lived, refinishes well
- Plywood: stable, strong cross-grain
- MDF: smooth, cheap
- Particleboard: lightweight, weak at joins
- Veneers: improve looks, hide cores
Choosing Board Sizes and Lumber Grades
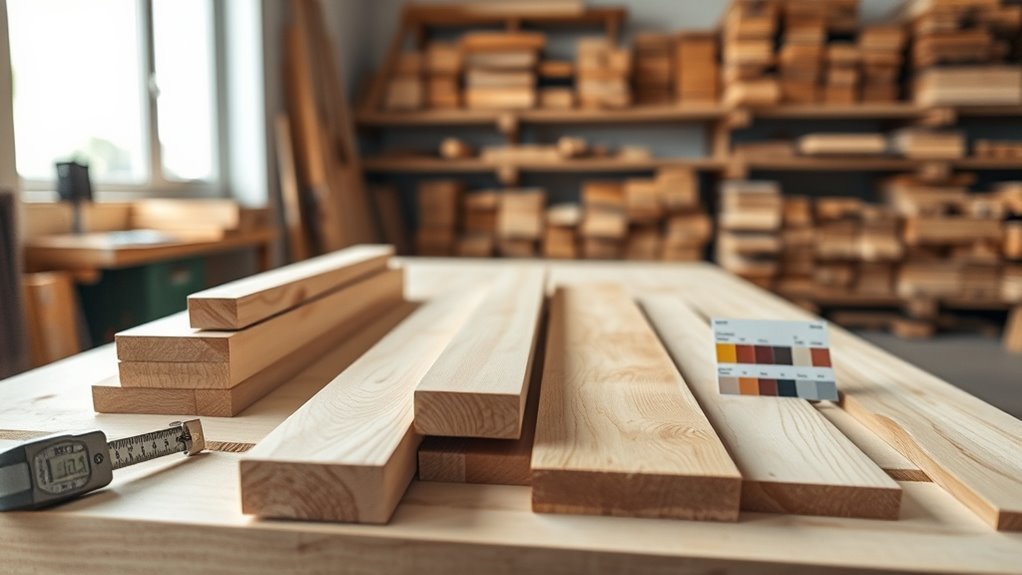
Now you’ll pick board widths and thicknesses that match the frame’s strength and look—wider boards read cleaner but may cup, while thicker stock gives more rigidity.
Check lumber grade and quality for straightness, knots, and defects that affect joinery and finish. Choosing the right combination keeps your bed sturdy and reduces surprises during build.
Board Widths And Thickness
Although you’ll be guided by your bed’s design and mattress size, selecting the right board widths and thicknesses comes down to balancing strength, appearance, and cost. You’ll pick thicker boards (1-1/2″ or more) for legs and rails to resist bending, while slats can be thinner (3/4″–1″) if spaced properly.
Wider boards minimize joints but can cup; narrower boards join more easily. Consider how edge profile and joinery affect effective thickness. Measure load paths and use consistent thicknesses where parts meet so fasteners work properly.
- Use 1-1/2″ for structural rails and legs
- Slats: 3/4″–1″
- Top rails: 1″–1-1/4″
- Avoid overly wide single boards
- Match thickness at joints
Lumber Grade And Quality
Having picked board widths and thicknesses, you’ll next decide on lumber grade and quality to match strength, appearance, and budget. Choose kiln-dried, straight boards to minimize warping.
For visible frame parts, pick clear or select grades with minimal knots and consistent grain; they take stain and finish well. For internal supports, common or structural grades save money while providing required strength.
Inspect each board for splits, large knots, and excessive resin pockets. If you want longevity, opt for hardwoods or cabinet-grade softwoods.
Balance aesthetics, load requirements, and cost to make a durable, attractive bed frame.
Essential Tools for a Weekend Build
Before you pick up lumber, gather a compact set of tools that’ll let you build a sturdy bed frame over a weekend: a circular saw (or miter saw) for straight cuts, a drill/driver with a good set of bits, a tape measure and combination square for accurate layout, clamps to hold parts while you fasten them, and sandpaper or an orbital sander for finishing.
You’ll also want a work surface and safety gear. Plan tool placement, test blade and bit sharpness, and keep fasteners handy. Proper prep speeds the job and improves fit, alignment, and final appearance.
- Workbench or sawhorses
- Hearing and eye protection
- Carpenter’s pencil and marking knife
- Block plane or chisel
- Vacuum or broom for cleanup
Fasteners and Hardware for a Strong Frame
When you’re ready to join the parts, choose fasteners and hardware that match the loads and joinery you’re using—screws for long, clamping holds; bolts and washers where pullout resistance matters; and metal brackets or corner plates for repeatable, square connections. Use coated screws for durability, carriage bolts for leg junctions, and confirm bolt lengths plus washer sizes. Pre-drill to avoid splitting, and countersink where needed. For slats, use screws or slat clips. Keep hardware accessible for future tightening.
| Component | Fastener | Typical use |
|---|---|---|
| Rails | Screws/bolts | Longitudinal strength |
| Legs | Bolts/washers | Shear and pullout |
| Corners | Brackets | Squareness and stiffness |
Safety Gear and Shop Setup Tips
Before you start cutting and assembling, put on proper PPE — safety glasses, hearing protection, and a dust mask — to protect your eyes, ears, and lungs.
Keep your workbench organized with tools and fasteners within reach and a clear space for measuring and clamping.
A tidy layout and reliable gear will cut mistakes and keep you safer while building the frame.
Personal Protective Equipment
Curious what you really need to stay safe while building a bed frame? You’ll want essential personal protective equipment every time you work. Wear eye protection for flying debris, hearing protection with loud tools, and a dust mask or respirator when sanding or cutting.
Sturdy gloves protect hands from splinters and sharp edges, and wear supportive, closed-toe shoes to prevent foot injuries. Inspect gear before use, replace damaged items, and keep PPE clean.
- Safety glasses or face shield
- Ear muffs or plugs
- N95 or better respirator
- Cut-resistant gloves
- Steel-toe or reinforced work shoes
Organized Workbench Layout
Now that you’ve got the right PPE, set up your workbench so safety gear and tools are within easy reach and hazards are minimized. Position fire extinguisher, first-aid kit, and eye wash nearby but not obstructing workspace.
Mount tool holders for frequently used items and label drawers for fast retrieval. Keep clamps and measuring tools at one end, cutting tools on the other to prevent accidental contact.
Make certain good lighting and clear floor space to avoid trips. Route cords away from walkways and secure dust collection.
End each session by returning tools, wiping surfaces, and sweeping debris for a safe start tomorrow.
How to Read a Simple Bed Frame Plan
When you look at a simple bed frame plan, start by identifying the main views—top, side, and front—and note the scale so you know how the drawing relates to real dimensions.
Read labels for parts: rails, slats, legs, headboard.
Read the labeled parts—rails, slats, legs, headboard—to quickly identify each component before building.
Check overall dimensions and clearances, and spot joinery symbols and hardware notes.
Confirm material thickness and any centered or offset measurements.
Use the plan to visualize assembly sequence before cutting.
- Note reference lines and centerlines for alignment.
- Interpret dimension lines and arrowheads carefully.
- Match part labels to a parts list.
- Watch for hidden lines showing internal joints.
- Verify fastener types and locations.
Measure and Mark Lumber Accurately
Pick the right tools—tape measure, combination square, and a pencil or marking knife—so your dimensions start correct.
Mark cutting lines clearly and score them if you’ll rip or crosscut for cleaner edges.
Before you cut, check corners and posts for squareness and plumb so assembled parts fit without forcing.
Choose Measurement Tools
Because accurate cuts start with accurate lines, choose measuring tools that you trust and know how to use. You’ll rely on them for repeatable parts, square corners, and consistent gaps. Keep tools clean, calibrated, and within reach.
- Tape measure: pick a durable 25′ with a clear blade and reliable hook.
- Combination square: use for 90° checks and marking edges.
- Speed square: quick rafter and angle layout, also stops on edges.
- Calipers or marking gauge: set precise offsets for joinery.
- Pencil and sharp utility knife: transfer marks cleanly without smudging or widening lines.
Mark Cutting Lines
How do you transfer measurements to lumber so cuts come out true? Lay the board flat on a stable surface, measure from a fixed reference edge, and scribe marks with a sharp pencil or marking knife.
Use a combination square to extend the line across the face; clamp a straightedge or square to guide long marks.
For repeating cuts, mark one piece, then use it as a template to transfer locations with a pencil or center punch.
Label each part (headboard, side rail) and indicate cut orientation.
Double-check numbers, then cut along the marked lines with steady motion and proper blade alignment.
Verify Squareness And Plumb
Once your parts are cut, verify squareness and plumb before assembling so joints sit tight and the frame tracks true. You’ll check corners, faces, and posts with simple tools, correcting any twist or bow before fastening. Work on a flat surface, clamp assemblies, and re-measure after each adjustment.
Confirm diagonals match for square, use a framing square on joints, and sight plumb lines on uprights. Small errors now compound, so be precise.
- Measure both diagonals; adjust until equal
- Use a framing square at every corner
- Check plumb with a level or plumb bob
- Shim and clamp as needed
- Re-measure after temporary fastenings
Cutting Rails and Slats Cleanly
When you cut the rails and slats cleanly, your bed frame will fit together squarely and look professional; use sharp blades, steady feeds, and the right setup to avoid tear-out and inaccurate lengths.
Measure twice, mark clearly, and clamp pieces to a sacrificial fence or stop block so every cut repeats accurately.
Feed wood against the blade rotation, keep consistent pressure, and let the tool do the work.
Use a zero-clearance insert or backing board to reduce splintering.
For long rails, support both ends to prevent sagging.
Label parts as you cut so assembly stays organized and efficient.
Making Square, Straight Joints Every Time
Get your setup square and double-check it before you cut so every joint starts true.
Cut accurately and use clamps to hold parts firmly while you test-fit and fasten.
Small adjustments now save you from crooked joins later.
Square Setup And Checking
Although careful measuring matters, squaring your bed frame setup is the step that guarantees straight, tight joints every time. You’ll position rails and legs on a flat surface, use a reliable square and tensioned string, and check diagonals until they match.
Make small adjustments at clamps and corner blocks, then recheck before any permanent fastening.
- Confirm work surface is level and stable.
- Use a framing square on each corner for 90° accuracy.
- Measure both diagonals; they must be equal.
- Run a taut line along long edges to spot bowing.
- Recheck after lightly torquing fasteners.
Accurate Cutting And Clamping
If you want joints that fit tight and true, start by cutting each piece to exact length and squaring ends with a sharp blade or well-tuned saw; then clamp immediately to prevent movement while you check for alignment.
Measure twice, mark clearly, and cut with a guide or miter box for repeatable accuracy.
Use a sanding block or shooting board to fine-tune faces.
Apply clamps evenly—one near the joint and another to control twist—checking for gaps and flush surfaces.
Square the assembly with a carpenter’s square, adjust pressure, then let adhesive set or drive fasteners while clamps hold everything rigid.
Headboard Designs That Look Custom
Want a headboard that looks like it was made just for your room? You can craft one that feels custom by choosing scale, material, and detail that echo your décor. Start with a strong silhouette, then add texture or trim to elevate it. Consider finishes that match bedding and wall color for cohesion. Use simple joinery and hidden fasteners to keep lines clean. Attach it securely to the frame or wall for stability.
- Tall, flat panel with routed edge
- Upholstered board with button tufting
- Shiplap planks arranged horizontally
- Geometric inlay using contrasting woods
- Floating shelf integrated above headboard
Building a Matching Footboard
Ready to balance your bed’s look? You’ll mirror the headboard’s style by copying its height, profile, and trim, scaling for mattress and room proportions.
Ready to balance your bed’s look by mirroring the headboard’s height, profile, and trim to scale.
Pick the same wood and finish; stain a scrap to confirm match. Cut rails and posts to precise lengths, sand edges, and pre-drill for clean joints.
If your headboard used decorative panels or molding, reproduce those elements on the footboard but simplify if clearance or foot traffic demands.
Dry-fit components, adjust for straightness, then glue and screw assemblies.
Finish with sanding and sealed coat so the footboard complements the headboard.
Assembling Side Rails and Center Support
Now you’ll align the side rails carefully so the frame sits square and the mattress will lay flat.
Make sure each joinery connection is tightened and locked—bolts, brackets, or mortise-and-tenon should fit snugly.
Finally, install a sturdy center support with legs or a beam to prevent sagging and distribute weight evenly.
Aligning Rails Precisely
Before you fasten anything, lay the side rails and center support in their designated positions and check that the bed sits square. You’ll align rails by measuring diagonals, setting equal gaps at head and foot, and ensuring the center support is parallel to rails.
Use clamps and temporary screws to hold parts while you verify dimensions. Tap components lightly with a mallet to seat joints without forcing them.
- Measure both diagonals; adjust until equal
- Confirm equal overhang at head and foot
- Verify center support is centered and level
- Clamp rails flush to posts
- Recheck measurements before final fastening
Securing Joinery Connections
Start by fastening the side rails to the posts and locking the center support into place so the frame can’t shift during final assembly. Use clamps to hold joints square while you drive screws or insert bolts.
Countersink fasteners and apply glue in mortises or dadoes for permanent strength; wipe excess glue quickly.
When using bolts, tighten evenly and check alignment before final torque. Add corner brackets or wood blocks where stress concentrates.
Tap in dowels or biscuits for added shear resistance.
Finally, inspect every connection, remove clamp pressure gradually, and recheck for gaps or looseness before moving to slat installation.
Installing Center Support
How will you align the side rails and center support so the bed sits flat and carries weight evenly? You position the center rail so its top edge matches the rail height, clamp it, and check squareness. Fasten with bolts or brackets, then add a support leg at midspan. Test with downward pressure and adjust shims under the leg if needed.
- Measure rail height at several points before fastening
- Use temporary clamps and a square for alignment
- Pre-drill bolt holes to prevent splitting
- Install an adjustable center leg for fine leveling
- Recheck after adding slats and mattress
Slats vs Platform Deck: Which to Choose?
When you’re deciding between slats and a platform deck, focus on support, airflow, and mattress compatibility—slats offer breathability and some give, while a solid platform delivers uniform support and a lower profile. You’ll pick slats if you want lighter weight, easier material use, and better ventilation for foam mattresses. Choose a platform if you need rigid support for innersprings or want a sleeker look. Consider slat spacing, thickness, and fastening; for platforms, ensure flatness and durable surface. Balance mattress type, noise, and long-term sagging risk when making your decision.
| Feature | Best For |
|---|---|
| Airflow | Slats |
| Support | Platform |
| Ease | Slats |
Reinforcing the Center: Legs, Brackets, Cleats
Because the middle of the bed takes the most weight, you’ll want to add dedicated center support — typically a leg (or legs), metal brackets, and cleats — to prevent sagging and keep the frame stable over time.
Add a dedicated center support—legs, brackets, and cleats—to prevent sagging and keep the frame stable.
You’ll position a center rail under the mattress, fit adjustable legs to floor level, and fasten steel brackets to join rail and outer rails.
Cleats under slats spread load across the center rail.
Check alignment and tighten hardware after loading the mattress.
- place center leg(s) at thirds or continuous rail
- use heavy-duty L or T brackets
- run a full-length center rail
- shim for level
- bolt hardware through, not just into end grain
Joinery Options: Pocket Screws, Dowels, Mortise
Although you can fasten a bed frame with simple screws, choosing the right joinery—pocket screws, dowels, or mortise-and-tenon—makes the structure stronger and longer-lasting.
You’ll pick pocket screws when you want speed and concealed hardware; they’re great for rails and face frames but rely on screw grip.
Dowels give hidden, repeatable alignment; drill accurately and use glue for shear strength.
Mortise-and-tenon is traditional and toughest for load-bearing corners and rails; it takes layout and fitting but rewards you with rigidity without metal.
Match joinery to your skill, tools, and desired look to build a durable frame.
When to Use Metal Brackets and How to Hide Them
If you need quick, reliable reinforcement—especially at mattress-support points, corner joins, or where slats meet rails—use metal brackets to take shear and racking loads that wood joinery alone might struggle with.
You’ll pick brackets when load concentration, easy disassembly, or retrofit strengthening matter. Install flush or recessed to minimize profile; counter-sink screws and fill heads. Paint or bronze-spray brackets before fitting for a uniform finish. Conceal with wood plugs, trim caps, or slotted cleats that screw into brackets.
Test joint movement after hiding hardware.
- Choose bracket size for load and screw length
- Pre-drill to avoid splitting
- Use stainless for humidity
- Match finish to frame
- Trim covers for tight fit
Keeping the Frame Level and Square While Assembling
After you’ve fitted and concealed any brackets, keep the frame level and square as you assemble to guarantee the mattress sits flat and joints don’t rack later.
Place the frame on a flat surface; use a carpenter’s level on long rails and crosspieces.
Measure diagonals—matching lengths confirm squareness—adjust by shifting corners until equal.
Clamp corners and temporarily screw one corner, recheck levels and diagonals before final fasteners.
Use spacer blocks to maintain consistent gaps and prevent twisting.
Recheck after adding slats or center supports.
Work methodically: small adjustments now save time and prevent squeaks or structural failure later.
Adjusting Width and Length for Custom Mattresses
Measure your mattress precisely before cutting any parts so the frame fits snugly without gaps.
If the mattress is nonstandard, adjust the headboard, footboard, and side rails by trimming or adding material to match your measurements.
Test-fit components as you go to guarantee square corners and even support.
Measuring Mattress Precisely
Because mattresses vary by a few inches and factory sizes aren’t always exact, you’ll want to record the mattress’s true length and width before cutting any lumber.
Measure across the top edge and repeat for both ends and the center to catch tapering.
Check thickness and any pillow-top bulge so side rails clear corners.
Note the seam and label orientation for head/foot alignment.
Record measurements clearly and double-check before proceeding.
- Use a metal tape measure, not a cloth tape.
- Measure to the nearest 1/8 inch.
- Measure mattress on a flat, firm surface.
- Have an assistant hold the tape.
- Mark measurements on paper and photo.
Modifying Frame Components
When your mattress measurements differ from standard sizes, you’ll need to alter the headboard, footboard, and side rails so the frame fits snugly without binding the mattress.
Measure mattress length and width twice, note thickness, then mark new rail positions.
Shorten or extend side rails using scarf joints or new sections; guarantee endgrain glue and screws reinforce seams.
Trim headboard and footboard width or add filler panels for symmetry.
Keep a 1/2-inch clearance around mattress for bedding movement unless using fitted rails.
Recheck diagonals for squareness before final fastening and finish sanding to protect edges.
Adding an Adjustable Headboard or Footboard
If you want flexibility for sleeping positions or future room changes, adding an adjustable headboard or footboard is a practical upgrade that you can build into your wooden bed frame. It lets you raise, lower, or remove the board without dismantling the whole bed.
Plan clear slots or metal brackets on the frame sides, choose a lightweight board, and allow access for hardware adjustments. Drill pocket holes for stability, align the board so it stays level at each height, and use stops to prevent slipping.
Plan clear side slots or brackets, use a lightweight board, add pocket holes, and install stops to keep heights level.
Test movement under load and secure fasteners.
- Slot-and-pin bracket system
- Removable cleats
- Telescoping metal posts
- Quick-release pins
- Rubber stops for noise
Sanding, Filling, and Surface Prep Basics
After you’ve confirmed the headboard or footboard fits and moves smoothly, get the frame ready for finish by sanding, filling, and prepping the surfaces. Start with 80–120 grit to remove tool marks, then 150–180 grit for smoothing. Sand along the grain and check joints for gaps.
Use wood filler or epoxy for holes and tight-fitting dowel or screw countersinks; overfill slightly, let cure, then sand flush. Clean dust with a tack cloth or vacuum, and inspect for raised grain—lightly re-sand if needed.
Mask hardware and adjacent surfaces; you’re aiming for an even, clean surface ready for finish.
Choosing Stain, Paint, and Sealers
Since the finish you pick will determine the bed’s look, durability, and maintenance, decide now whether you want to highlight the wood’s grain, cover it completely, or simply protect it.
Choose stain for color depth and grain enhancement, paint for solid color and repairability, or clear sealer for natural tone and moisture resistance.
Match sheen to use: matte hides flaws, gloss resists scuffs.
Consider indoor VOCs and dry times. Test on scrap.
Plan compatibility between stain and topcoat.
Sand between coats lightly.
Store products per labels.
- Test color and absorption on scrap
- Pick compatible stain and sealer
- Balance sheen and wear
- Prefer low-VOC options
- Account for drying times
Applying Finishes for Durability and Cleaning
Now that you’ve picked a stain or sealer, choose a finish that balances toughness and ease of cleaning—polyurethane for heavy use, water-based varnish for low odor, or wax for a softer sheen.
Apply thin, even coats and sand lightly between layers so the finish bonds well and resists scratches.
For maintenance, wipe spills promptly with a damp cloth and recoat every few years where wear shows to keep the wood protected.
Choosing The Right Finish
When you pick a finish for your wooden bed frame, think about how you’ll use and clean it—durability, appearance, and maintenance should guide the choice. Choose a finish that matches bedroom use: high-traffic needs tougher protection; bedroom aesthetics favor satin or matte sheens. Consider VOCs, drying time, and whether you’ll recoat later. Test on scrap wood to confirm color and feel.
Pick oil for warmth, varnish for abrasion resistance, lacquer for fast curing, or waterborne polyurethane for low odor.
- Oil penetrates, enhances grain, needs periodic reapplication
- Varnish resists scratches and moisture
- Lacquer dries quickly, is durable
- Polyurethane provides clear, hard surface
- Shellac adds warmth but isn’t waterproof
Maintenance And Cleaning
Although a good finish protects the wood, you’ll still need a simple cleaning and maintenance routine to keep the bed frame looking and performing its best.
Wipe dust weekly with a soft, dry cloth to prevent grit from scratching the finish. For spills or sticky spots, use a damp cloth with mild soap, then dry immediately.
Reapply a protective coat—wax, oil, or polyurethane—every one to three years depending on wear.
Tighten hardware and check joints seasonally to avoid stress.
For scratches, touch up with matching stain or a repair marker, then seal the repair to restore protection.
Quick Decorative Trims, Inlays, and Moldings
If you want to elevate your bed frame without a major rebuild, quick decorative trims, inlays, and moldings let you add character fast and with minimal tools. You’ll be surprised how small details change the whole piece.
You can apply thin edge molding, routed grooves, or simple inlay strips to highlight panels, conceal joints, or frame the headboard. Choose contrasting wood or paint for impact, prefinish pieces for speed, and test fit before glue.
Keep profiles low to avoid snagging sheets and maintain strength.
- applied edge molding
- routed dado accents
- veneer inlay strips
- corner rosettes
- cove molding runs
Upholster a Headboard Step‑by‑Step
Now you’ll pick fabric and foam that match your style and comfort needs, considering durability and thickness.
Cut and glue or staple the foam to the headboard.
Then pull the fabric taut and secure it around the edges.
Finish with trim or piping to hide staples and give a clean, professional look.
Choose Fabric And Foam
Before you start cutting or stapling, pick fabric and foam that suit both the look you want and the level of comfort you need; the right materials make upholstery easier and the finished headboard more durable. Choose a durable fabric with enough give for curves and patterns that match your room. Select foam density for support—higher for firmness, lower for plush. Consider a batting layer for smoothness and edge definition. Buy extra fabric for matching and mistakes.
Test fabric for abrasion and lightfastness. Measure twice and order samples when possible to confirm color and hand before committing.
- Fabric weight and weave
- Foam density and thickness
- Batting type and loft
- Colorfastness and abrasion rating
- Allowance for pattern matching
Attach Padding And Trim
With your fabric and foam chosen and measured, it’s time to attach the padding and trim so the headboard looks and feels finished.
Lay foam on the plywood, smooth wrinkles, and spray adhesive in sections to secure it.
Wrap batting over the foam for softness, stapling at the back every 2–3 inches, pulling taut but not distorted.
Position your fabric, center it, then staple from the center outward, folding corners neatly.
Add decorative trim or welt along edges with a staple gun or upholstery glue for a clean seam.
Inspect for lumps, adjust tension, and trim excess fabric for a polished result.
Save Costs Without Losing Strength
Even if you’re watching your budget, you can build a bed frame that’s sturdy and safe by choosing materials and joinery that give the best strength-to-cost ratio. You’ll save by using wisely selected lumber, efficient layouts, and simple hardware without compromising load capacity.
Prioritize long grain support, reinforce joints where stress concentrates, and repurpose quality offcuts. Don’t skimp on fasteners at critical points. Plan cuts to minimize waste and buy slightly larger stock to allow for mistakes.
- Use kiln-dried pine for rails and hardwood for legs
- Employ pocket screws and glue at joins
- Rip wider boards into rails
- Buy common-length lumber in bulk
- Reuse quality metal brackets
Common Build Mistakes and How to Avoid Them
Don’t rush your cuts—incorrect measurements are the fastest way to end up with a wobbly or unusable frame. Check and recheck dimensions and dry-fit parts before gluing or screwing anything.
Also use strong joinery methods (mortise-and-tenon, pocket screws with glue, or reinforced dowels) so the bed won’t fail under load.
Incorrect Measurements
How did you measure that board—by eye or with a square? You’ll want precise cuts; small errors compound, leaving a wobbly frame or misaligned slats. Measure twice, mark once, and use reliable tools.
Clamp guides for repeatable cuts, confirm diagonals for squareness, and test-fit pieces before final assembly. Keep a notepad for cut lists and double-check mattress dimensions against frame allowances.
- Use a calibrated tape and a carpenter’s square every time
- Mark cut lines with a sharp pencil, not smudged chalk
- Cut slightly oversized, then trim to fit
- Label parts immediately after cutting
- Re-measure after plan changes
Weak Joinery Techniques
When joints are weak, your bed won’t stay square or carry weight safely, so you need to get joinery right from the start. Avoid relying solely on glue or short screws; they’ll fail under repeated load. Use proper joints—mortise and tenon, pocket screws with glue and clamps, or dowels—and size fasteners to the lumber.
Dry-fit components, check squareness, then glue and clamp securely. Reinforce high-stress points with corner blocks or metal brackets where hidden. Sand mating faces for full contact.
Inspect and tighten hardware after a few weeks. Good joinery prevents sagging, squeaks, and dangerous collapse.
Fixing Squeaks, Sagging, and Loose Joints
If your bed creaks, sags, or has loose joints, you can usually diagnose and fix the problem without ripping the whole frame apart. Inspect hardware, tighten bolts, and isolate the noise by having someone shift weight while you listen.
Reinforce weak slats with blocking or add a center support leg. Use wood glue and clamps for minor joint gaps; consider shim or replace worn fasteners.
Lubricate metal-on-metal contact with graphite or wax, not oil that attracts dust. Test after each repair and retighten after a few nights to ensure stability.
- Tighten bolts and screws
- Add center support
- Replace or reinforce slats
- Glue and clamp loose joints
- Lubricate contact points
Disassemble and Move Your Bed Safely
Before you start taking the frame apart, remove the mattress and all bedding so nothing gets damaged or in the way.
As you disassemble, label each piece and keep fasteners together in sealed bags so reassembly’s straightforward.
Wrap legs and rails with moving blankets or cardboard to protect the wood during transport.
Remove Mattress And Bedding
Ready to clear the bed so you can start disassembly? Remove pillows, toppers, and bedding first, folding or bagging items to keep them clean.
With a partner, lift the mattress straight up and slide it off the frame; use handles if present. If it’s heavy, tilt slightly and walk it out to avoid strain.
Vacuum the frame and under the mattress area before moving parts.
Place bedding in labeled bags or bins (clean vs soiled) and set the mattress on its side in a protected spot.
Keep small loose items like pillow protectors together to prevent loss.
- Two-person lift for safety
- Use mattress handles
- Fold and bag linens
- Vacuum under frame
- Store mattress upright
Label And Protect Parts
When you start taking the bed apart, label each piece and protect finished surfaces so reassembly and moving go smoothly. Use numbered stickers or masking tape with clear notes for rails, legs, slats, and hardware; note orientation and which side faces out.
Wrap headboard and footboard in moving blankets or bubble wrap, and cushion corners with foam or cardboard.
Bundle slats and secure with straps or rope, keeping screws and brackets in labeled bags taped to the corresponding part.
Photograph complex joints for reference.
Handle pieces carefully to avoid dings, and load them flat in the vehicle to prevent warping.
Compact Frame Designs for Small Rooms
How can you fit a sturdy wooden bed into a tight room without sacrificing style or storage? Choose compact designs that prioritize footprint, circulation, and multipurpose elements. You’ll favor low-profile frames, simple headboards, and raised platforms that keep the room airy.
Measure precisely, plan clearance around doors and windows, and select slatted supports for lighter construction. Use tapered legs or recessed bases to create visual space. Finish with light stains or paint to enhance openness while protecting wood.
- Slim-profile side rails for narrower clearance
- Wall-mounted headboard to save floor area
- Corner-friendly footboard designs
- Foldable or removable slats for access
- Rounded corners for tight movement
Converting a Platform to Drawers or Storage
If you want more storage without changing the room’s footprint, convert the platform into built-in drawers or cubbies that slide beneath the mattress. Measure clearance and mattress height, then plan drawer depth and face alignment so bedding clears smoothly.
Use sturdy runners or full-extension slides rated for load; reinforce frames with center supports to prevent sag. Cut matching drawer boxes from plywood, assemble with glue and screws, and fit faces to hide gaps.
Add stops to prevent overtravel and ventilation holes for airflow. Finish with paint or sealant, and test each drawer under load before regular use.
Using Reclaimed and Eco‑Friendly Materials Safely
Because reclaimed and eco-friendly materials can save resources and add character, you should still treat them with care. You’ll inspect boards for rot, nails, and chemical residues, test stability, and sanitize surfaces before cutting or joining.
Choose salvaged wood with sound grain, avoid pressure-treated lumber indoors, and wear a respirator when sanding old finishes. Seal and finish with low‑VOC products to protect wood and occupants.
- Inspect for structural damage and embedded metal
- Test for lead or other hazardous coatings
- Remove contaminants before assembly
- Use mechanical fasteners suited for reclaimed timbers
- Prefer low‑VOC finishes and adhesives
Maintenance Schedule to Extend Frame Life
After you’ve treated and sealed reclaimed timbers, keeping the frame in good shape means following a simple, regular maintenance schedule. Inspect bolts, screws, and joints monthly, tightening anything loose.
After sealing reclaimed timbers, follow a simple monthly maintenance routine: inspect and tighten bolts, screws, and joints.
Every three months, dust and vacuum around slats and joints to prevent grit wear.
Twice a year, check finish for scratches or wear; spot-sand and reapply finish where needed.
Watch for wood movement or cracks seasonally, especially after humidity shifts; address small cracks with wood filler and clamp until cured.
Lubricate metal brackets or hinges yearly.
Keep mattress weight evenly distributed and rotate mattress regularly to reduce localized stress.
When to Hire a Pro or Buy a Ready Frame
When your project needs precision joints, complex headboard work, or load-bearing guarantees beyond your tools and skill, hire a pro; you’ll save time and avoid costly mistakes.
If you value custom design, have unusual mattress sizes, or need integrated storage, a pro can deliver reliable results and warranties.
If budget or timeline are tight, buying a ready frame makes sense—look for sturdy materials and return policies.
Consider resale value, delivery/assembly options, and local regulations before deciding.
- Structural complexity (can you guarantee safety?)
- Custom measurements or odd layouts
- Time versus cost tradeoffs
- Warranty and liability needs
- Tool access and experience
One‑Weekend Build Timeline and Milestones
If you’re organized and realistic about your skills, you can complete a simple wooden bed frame in a single weekend by following a clear sequence of tasks and sticking to time-boxed milestones. Plan Friday evening for cutting and prepping parts, Saturday for assembly and bracing, and Sunday for sanding, finish, and test fit. Set timers: don’t overrun steps. Work methodically, check alignments, and invite a helper for heavy lifting. Celebrate small wins to keep momentum.
| Dawn | Focus | Feeling |
|---|---|---|
| Friday | Prep cuts | Anticipation |
| Saturday | Assemble | Satisfaction |
| Sunday | Finish | Pride |
Material and Hardware Shopping Checklist
Because a good shopping list keeps the weekend on track, you’ll want to gather lumber, fasteners, and finishing supplies before you start cutting. Measure twice, buy a little extra, and choose kiln‑dried hardwood or quality pine for strength.
Pick screws and bolts rated for furniture; grab wood glue, sandpaper, and a finish that matches your room. Don’t forget hardware for slats and center support. Keep receipts and note dimensions so returns are simple.
- Kiln‑dried lumber (headboard, rails, slats)
- 3″ and 1¼” wood screws, carriage bolts
- Wood glue and clamps
- Sandpaper (80–220) and finish
- Center‑support hardware and brackets
Frequently Asked Questions
Can I Build a Bed Frame That Supports an Adjustable Mattress Base?
Yes — you can build a bed frame to support an adjustable base. You’ll reinforce the perimeter, provide open slats or a flat platform, allow clearance for movement, and secure wiring while keeping the base accessible and ventilated.
How Do I Childproof or Lower a Bed for Toddlers Safely?
Lower the mattress to the floor or a few inches above, add guard rails or foam bumpers, remove sharp edges, secure slats, use non-toxic finishes, keep bedding snug, and supervise until they consistently sleep safely through the night.
Can I Integrate Under-Bed Lighting or Power Outlets?
Yes — you can integrate under-bed lighting and power outlets; you’ll plan wiring routes, use low-voltage LED strips with proper transformers, install GFCI-protected outlets, secure components against kids, and guarantee ventilation and code-compliant electrical work.
What Do I Need to Know for Building a Canopy or Four‑Poster Bed?
You’ll need sturdy posts, strong joinery, proper mattress support, accurate measurements, balanced height, weathered or sealed wood, compatible canopy hardware, load-bearing corner brackets, precise drilling, and safety checks; plan for fabric drape, clearance, and finishing.
How to Ensure Bed Frame Meets Rental Property Regulations?
Check local building and fire codes, confirm load limits and egress requirements, use approved materials and fasteners, secure anchors to prevent collapse, keep clearances for smoke alarms, document compliance, and get inspections or written landlord approval.
Conclusion
You’ve got a clear plan and the skills to finish this weekend, so go for it. Measure twice, cut once, and pick durable wood that fits your budget. Follow the timeline, keep fasteners tight, and seal the frame to reduce maintenance. If you hit snags, call a pro instead of risking the mattress or your back. Enjoy the finished bed—sleep better knowing you built something sturdy and made to last.