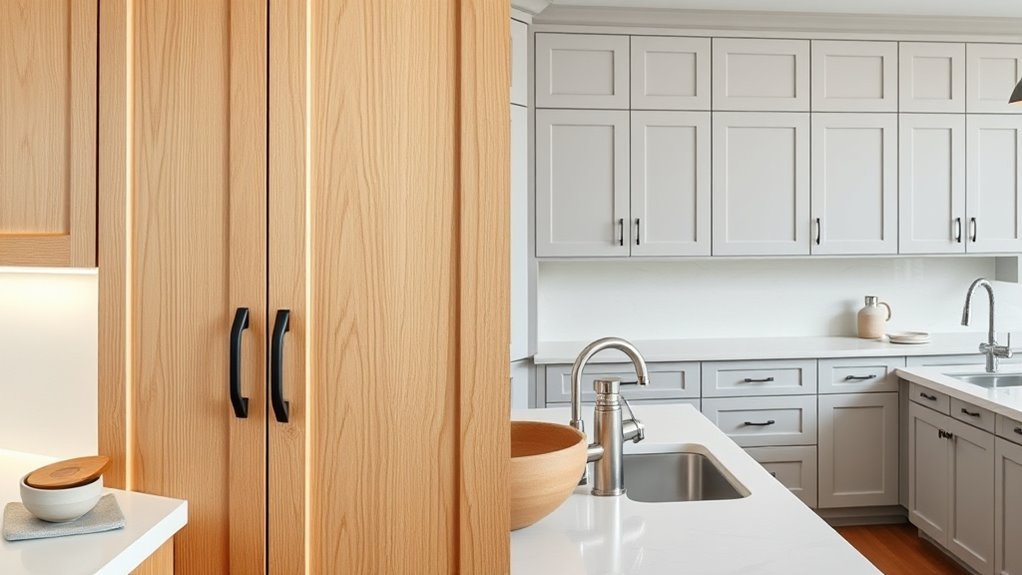
How to Modernize Oak Cabinets
You can modernize oak cabinets without a full replacement by evaluating their condition, choosing refresh versus refacing, and updating finishes and hardware. Start by checking for warping, water damage, or loose joints; simple cosmetic issues can be fixed with sanding, gel stain or paint, and a clear topcoat. Swap outdated knobs and add soft-close hinges for an instant lift. Plan your budget, test finishes, and follow step-by-step guidance to learn practical techniques and next steps.
Should You Refresh or Replace Oak Cabinets?
When deciding whether to refresh or replace your oak cabinets, start by evaluating their condition, budget, and how long you’ll stay in the home.
If doors and boxes are solid, plan a refresh: sand, stain or paint, swap hardware, and add trim or glass inserts to modernize without heavy cost.
Choose replacement if cabinets sag, have water damage, or layouts limit functionality.
Factor labor, disposal, and long-term value—replacing raises resale appeal but costs more.
If you’ll stay years, invest in replacement; if selling soon, a tasteful refresh can boost appeal affordably and quickly.
Quick Summary: How This Guide Helps (What You’ll Learn)
Because you’re weighing options and want clear next steps, this guide quickly shows what to expect: how to decide between rejuvenating or replacing oak cabinets, practical cost and timeline ranges, paint and stain techniques, hardware and trim updates, and when to call a pro.
You’ll get step-by-step processes for prepping, painting, and staining, plus tips for choosing modern colors and finishes. Learn which hardware styles and hinge swaps give the biggest impact, how to refresh doors versus full replacements, and simple trim or lighting upgrades.
Quick Oak Cabinet Condition Check
Now that you know the options and outcomes, take a quick look at your cabinets to see which route makes sense: refresh, refinish, or replace.
Check doors and drawers for warping, loose joints, or water damage. Test hardware and hinges—do they squeak, stick, or show corrosion? Inspect finishes for deep scratches, peeling, or heavy staining that won’t sand out.
Check doors, drawers, and hardware for warping, loose joints, corrosion, deep scratches, or water damage.
Open cabinets to smell for mildew or pests.
Note structural issues: sagging shelves, rotten frames, or missing support.
Photograph problem areas and list repairs versus cosmetic fixes so you can compare cost, effort, and expected lifespan.
When to Refresh Oak Cabinets Instead of Replacing Them
If your cabinets are structurally sound—doors square, frames solid, and shelves holding weight—revitalizing is usually the smarter choice than replacing; you’ll save time, money, and landfill waste by focusing on finishes, hardware, and minor repairs.
Choose revitalizing when damage is cosmetic: faded stain, scratched surfaces, outdated color, or tired hardware. Revitalizing suits functional hardware upgrades (soft-close hinges, new pulls), simple repairs (glue, hinge adjustments), and style updates (paint, stain, trim).
Replace only when water damage, warped carcasses, severe rot, or persistent structural issues exist. Revitalizing keeps character, minimizes disruption, and delivers modern results when bones are good.
Setting a Realistic Budget to Modernize Oak Cabinets
Start by deciding the scope of your project—whether you’re doing a full overhaul or just updating finishes and hardware.
Add up material costs for paint, stains, new hinges or pulls, and any tools or rentals you’ll need.
Then set aside contingency funds (usually 10–20%) for unexpected repairs or extra supplies.
Determine Project Scope
Wondering how much you should plan to spend to modernize oak cabinets? Start by defining scope: decide whether you’ll refinish, paint, replace doors, update hardware, or reconfigure layout.
List tasks room-by-room and prioritize must-haves versus nice-to-haves. Factor labor—DIY or pro—and time constraints that affect cost.
Identify structural needs like repairs or soft-close hinges and which elements require permits. Keep a contingency (10–20%) for surprises.
With a clear scope, you can set realistic budget limits, avoid scope creep, and get accurate quotes without prematurely estimating specific material prices.
Estimate Material Costs
Now that you’ve defined the project scope, translate those decisions into a materials list so you can build a realistic budget. Tally everything from primer and paint to new hardware, hinge kits, filler, and sandpaper. Price items online and at local stores, accounting for quantities and waste.
Prioritize cost vs. quality—cheap hardware can cheapen the result, but mid-range finishes often suffice. Keep receipts and compare unit costs to avoid overbuying.
Use this checklist to guarantee nothing’s missed:
- Paint or stain gallons (include primer)
- Sanding supplies and abrasives
- Cabinet hardware (knobs, pulls, hinges)
- Caulk, wood filler, tape
- Brushes, rollers, masking supplies
Allocate Contingency Funds
Because surprises are almost guaranteed in a renovation, set aside a contingency—typically 10–20% of your materials and labor estimate—to cover unexpected costs like extra primer, damaged cabinet parts, or shipping delays.
Decide on a percentage based on project complexity: 10% for simple repainting, 15–20% for structural changes or custom work.
Track actual expenses against your budget so you can adjust the contingency if costs rise.
Keep contingency funds accessible but separate from daily spending to avoid accidental use.
If you don’t spend it, roll the remainder into upgrades, higher-quality hardware, or professional touch-ups.
Choose a Style: Modern, Transitional, or Farmhouse (Visual Cues)
Decide which aesthetic speaks to you—modern favors clean lines and minimal hardware, *blending* simple trim with softer details.
Farmhouse embraces open shelving and rustic accents.
Think about color and finish choices: stark whites or matte blacks for modern, warm neutrals for *intermediate*, and painted or distressed finishes for farmhouse.
Use those visual cues to guide trim updates, hardware swaps, and where to add or remove shelving.
Clean Lines And Hardware
When you pick a style—modern, hybrid, or farmhouse—your cabinet lines and hardware should speak the same visual language. You’ll want streamlined profiles for modern, softened edges for transitional, and simple, sturdy shapes for farmhouse.
Choose pulls and knobs that match proportion and finish to avoid visual clutter. Keep visible joinery minimal and favor recessed or slab doors for a clean look. Hardware placement should be consistent and ergonomic.
- Match scale to door size
- Use simple silhouettes for modern
- Opt for mixed textures in transitional
- Pick robust, functional pieces for farmhouse
- Keep spacing uniform and purposeful
Color And Finish Choices
How do you want your space to feel—sleek and minimal, warm and layered, or rustic and welcoming? Choose finishes that match.
For modern, go matte whites, cool grays, or deep charcoals; keep oak grain muted with opaque paint or thin-stain.
For transitional, pick soft neutrals—greige, navy, or muted greens—and a satin finish to balance warmth and refinement.
For farmhouse, favor milkpaint tones, whites, or soft blues with distressed edges and a matte or low-sheen topcoat to suggest age.
Consistent hardware and trim color unify the look; test samples on cabinet faces before committing.
Open Shelving And Trim
Now that you’ve narrowed finishes and colors, think about how open shelving and trim will reinforce that style. Choose modern for minimal, thin metal brackets and floating shelves; transitional for mixed materials and simple crown; farmhouse for chunky wood, beadboard backs, and open plate racks. Pick trim that complements door profiles and avoids clutter. Use consistent hardware lines and spacing to unify old oak with your chosen vibe. Balance open shelving with closed storage to hide clutter.
- Keep lines clean
- Match materials to finish
- Use modest shelf depth
- Limit decorative trim
- Consider structural support
How Existing Cabinet Finishes Affect Your Options
Because the finish already on your oak cabinets determines what you can and can’t do next, start by identifying it—paint, stain, lacquer, or raw wood—and check for any clear topcoat.
Identify your cabinet’s finish—paint, stain, lacquer, or raw wood—then check for any clear topcoat before proceeding
Painted surfaces need adhesion testing; oil- or shellac-based paints may require stripping or deglossing.
Stained cabinets can be refreshed with a new stain or painted after thorough sanding and conditioning.
Lacquered or polyurethane finishes resist penetration; you’ll likely need sanding or a chemical deglosser before repainting.
Raw oak gives you the most flexibility for staining or sealing.
Match your prep to the finish to avoid adhesion and durability problems.
Which Oak Grain and Tones Work for Modern Kitchens
You’ll want to pick oak with a subtle, tight grain for a cleaner, more contemporary look.
Warm honey undertones keep the space inviting if you’re leaning toward natural finishes.
Stained gray finishes are ideal when you want a cooler, more modern palette.
Consider samples in your kitchen light to see which tone and grain read best in the room.
Warm Honey Undertones
When you want a modern kitchen that still feels inviting, warm honey undertones in oak strike the right balance between contemporary and cozy. You’ll choose oak with a golden base and subtle amber streaks to brighten spaces without feeling dated.
Pair these tones with matte hardware and soft whites to keep lines clean. Avoid heavy orange finishes; instead, opt for clear or slightly amber stains that enhance natural grain.
Maintain consistency across cabinets and trim so warmth reads intentional, not accidental.
- Golden base complements neutral palettes
- Amber streaks add depth
- Matte hardware modernizes
- Soft whites balance warmth
- Clear stain preserves grain
Subtle Tight Grain
If you want oak that reads modern, choose boards with a subtle, tight grain that keeps the pattern quiet and streamlined. You’ll favor plainsawn or mixed-cut oak with narrowly spaced rays that avoid heavy cathedral patterns.
Select lighter, even tones—soft beige, pale caramel, or near-neutral blond—that let minimalist hardware and clean lines stand out. Tight grain reduces visual busyness, so your counters, backsplashes, and fixtures become focal points.
When shopping, examine full doors in room light, not small samples. Prioritize consistency across pieces; matching grain direction and tone delivers the calm, contemporary look you’re after.
Stained Gray Finishes
Because gray stains can neutralize oak’s warmth, pick grain and tone combinations that reinforce a modern vibe rather than fight it. You’ll favor tight, even grain for a sleek look; cathedral grain can read busy under translucent gray.
Cooler grays with blue undertones suit lighter, fine-grained oak; warm greiges work on mid-tone plank oak. Test stains on full-size samples, not scraps, to see how pore absorption alters tone.
Finish with a low-sheen protective coat to retain depth without gloss.
- Choose tight grain for minimal texture
- Match undertone to cabinet color
- Use full-size samples
- Prefer translucent stains
- Seal with low sheen
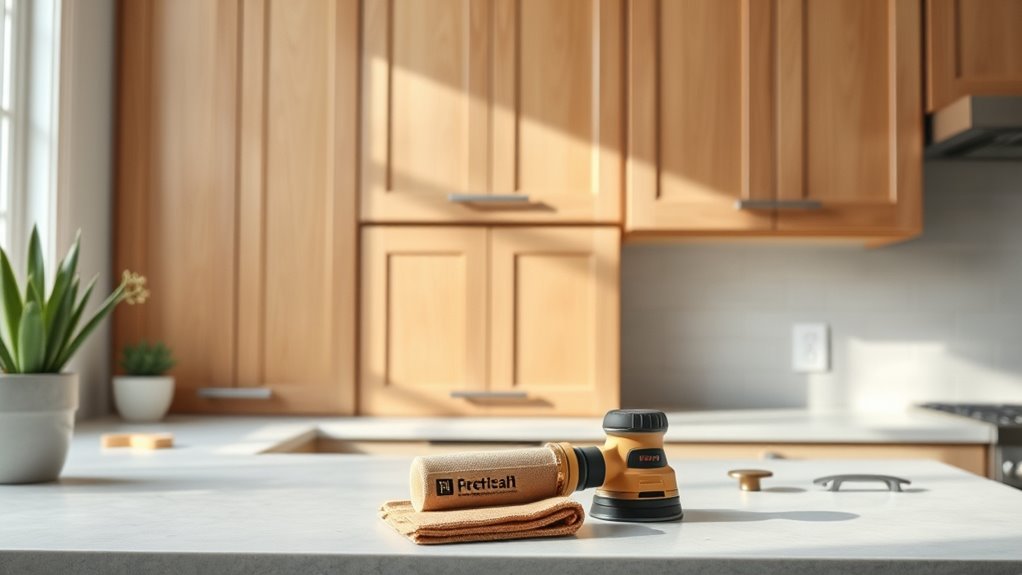
Tools & Supplies You’ll Need for Common Oak Updates
Before you start stripping, sanding, or painting, gather the essential tools and supplies so the job goes smoothly and safely. You’ll need scrub pads, mineral spirits, and a stripper for old finishes.
Get assorted sandpaper (80–220 grit), a random-orbit sander, sanding blocks, and tack cloths.
For painting or staining, buy high-quality brushes, foam rollers, stain pads, and a durable primer and topcoat suitable for cabinets.
Grab wood filler, a putty knife, painter’s tape, drop cloths, respirator, gloves, and safety goggles.
Finally, keep replacement hardware and a screwdriver set handy for quick swaps and measurements.
Quick Cosmetic Fixes Under a Day for Oak Cabinets
While you’re not ripping out cabinets or repainting the whole kitchen, you can make oak look fresh in a single day with a few targeted fixes. You’ll update appearance and function without major work. Tackle visible wear, brighten hardware, and refine edges to modernize instantly. Focus on quick, high-impact tasks that don’t require stripping or deep prep.
- Replace dated knobs and pulls with streamlined hardware
- Touch up scratches and chips with matching markers
- Lightly sand and reapply clear finish to dull areas
- Add adhesive veneer or laminate to worn cabinet faces
- Swap hinges for soft-close models to improve feel
Cleaning & Prepping Oak for Refinishing
Before you refinish, check the wood for cracks, warping, and deep stains so you know what repairs you’ll need.
Strip or sand off the old finish thoroughly to get down to raw wood.
Finish by cleaning and degreasing every surface so the new finish will adhere properly.
Assess Wood Condition
If the oak feels sticky, rough, or looks blotchy, you need to assess its condition before refinishing so you know what cleaning and prep steps to take. Inspect for stains, water rings, gouges, and raised grain. Smell for mold or mildew.
Test a hidden spot with a damp cloth and mild cleaner to see if dirt lifts or finish dissolves. Note veneer edges and loose trim. Measure discoloration depth to decide sanding vs. spot treatment. Record findings so you can plan supplies and time.
- stains vs. finish issues
- surface grime
- raised grain
- structural damage
- veneer integrity
Remove Old Finish
Ready to strip that old finish? You’ll work systematically: remove hardware, tape adjacent surfaces, and sand with medium-grit paper to dull sheen.
Use a chemical stripper on intricate areas—follow label directions, ventilate, and wear gloves and eye protection.
Scrape softened finish gently with a plastic or wooden scraper, avoiding gouges.
Switch to fine-grit sandpaper for smoothness and to feather edges between bare wood and remaining finish.
Vacuum and brush away dust frequently to prevent scratches.
Check for tannin bleed or stubborn spots and repeat stripping locally if needed before moving on to cleaning and degreasing.
Clean And Degrease
Once the finish is stripped, clean and degrease the oak thoroughly to guarantee new stains or paints adhere evenly; you’ll remove oils, dust, and solvent residues with the right cleaners and a methodical approach.
Start with a vacuum and tack cloth to lift loose grit, then apply a trisodium phosphate (TSP) solution or dedicated degreaser following manufacturer directions.
Work small sections, scrub with a soft brush along the grain, then rinse with clean water and blot dry.
Allow full drying time before sanding or staining.
Test a hidden spot first to confirm no adverse effects on the wood.
- Vacuum debris first
- Use TSP or degreaser
- Scrub along the grain
- Rinse and blot dry
- Test a hidden area
Sanding Oak: Tips for a Smooth Surface
Before you apply any stain or paint, sand oak carefully to remove finish, smooth grain-raising fibers, and create a uniform surface that accepts coatings evenly. Start with 120–150 grit to strip varnish, then progress to 180–220 grit for a smooth profile; don’t skip grits.
Use a random-orbit sander on flat areas and hand-sand curved details with a sanding block or folded paper. Keep the sander moving to avoid gouges, and sand with the grain.
Wipe dust with a tack cloth and vacuum crevices. Inspect under bright light, re-sanding any raised areas so primers or paints lay down flawlessly.
Staining Oak to Reduce Orange Tones
If you want to tone down oak’s natural orange cast, choose stains and prep methods that neutralize warm pigments rather than amplify them. Test stains on scrap or hidden areas, and sand to bare wood so dye soaks evenly.
Pick cooler-toned stains—gray, taupe, or brown with blue undertones—or use a pre-stain conditioner sparingly to prevent blotching. Wipe excess stain quickly to avoid deep orange uptake.
Seal with a clear topcoat that doesn’t amber.
- Test on scrap before committing
- Sand to remove old finish
- Use cooler-toned stains
- Wipe excess promptly
- Choose non-ambering topcoat
When to Use Gel Stain on Oak (And How)
When you’re working with heavily grained or pre-finished oak that won’t accept thin stains evenly, gel stain is a good option because it sits on the surface and gives more control.
You’ll want to clean and degloss the wood, sand lightly, apply the gel with a cloth or brush in small sections, wipe off excess, and topcoat after it cures.
Follow manufacturer instructions for drying times and test on a scrap to confirm color before committing.
When To Gel-Stain
Because oak’s open grain can make traditional stains blotchy, you’ll reach for gel stain when you want consistent color without heavy prep.
Use it when cabinets have uneven absorption, patched areas, or when you want to hide previous finishes. It’s also ideal if you need a darker, more uniform look without stripping to bare wood.
Choose gel stain when time is limited and you prefer fewer coats for predictable results.
- uneven grain or blotchy patches
- previously stained or varnished surfaces
- patched or repaired sections
- desire for uniform, darker tone
- limited prep time or stripping
Gel Stain Application Steps
Now that you’ve picked gel stain for its consistent coverage over oak’s open grain and patched areas, you’ll want a clear, step-by-step approach to get reliable results.
Start by cleaning cabinets with deglosser or TSP, then sand lightly to remove finish sheen.
Stir gel stain—don’t shake—to avoid bubbles.
Apply with a lint-free cloth or foam brush in small sections, rubbing along the grain and working into pores.
Wipe excess promptly for lighter tones, leave longer for depth.
Let dry per manufacturer instructions, then assess and repeat for additional coats.
Finish with a compatible topcoat for protection and wear resistance.
Clear Coats & Sealers That Protect Without Darkening Oak
If you want to keep oak’s natural warmth and grain while adding durable protection, choose clear coats formulated to remain non-yellowing and low-ambering. You’ll preserve tone and figure by selecting waterborne polyurethanes, conversion varnishes, or acrylics designed for light woods. Test on scrap or inside cabinet to confirm appearance.
Apply thin, even coats, sanding lightly between layers for adhesion. Maintain good ventilation and follow cure times to avoid tackiness.
- Use waterborne polyurethane for minimal ambering
- Consider conversion varnish for toughness
- Choose UV-stable additives if exposed
- Sand between coats with fine grit
- Test before full application
Painting Oak Cabinets for a Contemporary Look
When you paint oak cabinets for a contemporary look, strip or degloss the surface and fill prominent grain with a toner or grain filler so the finish reads smooth and modern rather than rustic. Sand evenly, clean dust, and mask hardware.
Use thin, even coats to avoid brush marks and run lines. Sand lightly between coats for a flawless feel. Reinstall or update pulls with minimalist hardware to reinforce the contemporary aesthetic.
Consider removing doors for easier painting and drying. Let each coat cure fully before handling. Finish by inspecting for drips or uneven texture, correcting them with focused sanding and touch-ups.
Best Primer & Paint Types for Oak Cabinet Surfaces
You’ll want to start by choosing a primer that blocks tannin bleed and promotes adhesion—shellac or high-hide oil-based primers work well on oak.
For paint, semi-gloss or satin waterborne enamel gives durability and easy cleaning while showing less brushwork than flat finishes.
Proper sanding, deglossing, and using a bonding primer are what’ll guarantee the coating sticks and lasts.
Best Primer Types
Because oak has a strong grain and natural oils, choosing the right primer matters more than you might think.
You’ll want a primer that blocks tannins, bonds to oily wood, and creates a stable base for paint.
Use shellac-based primers for stubborn stains and tannin bleed; oil-based primers for deep adhesion on raw oak; water-based bonding primers for lower odor and good adhesion; stain-blocking latex primers for previously finished surfaces; and adhesion-promoting primers when you’ve sanded smooth or used a sealer.
- Shellac-based for tannin blocking
- Oil-based for raw oak grip
- Water-based bonding for low odor
- Stain-blocking latex for finished surfaces
- Adhesion primers after sanding
Ideal Paint Finishes
How do you pick the right finish for oak cabinets so the paint looks smooth, resists wear, and shows off—or tames—the grain? Choose satin or semi-gloss for durability and easy cleaning; eggshell softens a bold grain without hiding it; high-gloss highlights imperfections but boosts wipeability. Use water-based acrylic enamel for quick drying and low yellowing; alkyd lends leveling and hardness. Match sheen to room use: kitchens need tougher finishes. Consider touch-up ease and longevity when deciding.
| Finish Type | Best Use |
|---|---|
| Satin | Balance of sheen and durability |
| Semi-gloss | High-traffic areas |
| Eggshell | Grain-softening |
| High-gloss | Maximum wipeability |
Prep And Adhesion
Before you paint oak cabinets, prep and adhesion determine whether the finish will look smooth and last, so strip oils, sand to dull the grain, and remove dust and grease.
You’ll choose a high-adhesion primer—shellac-based for stubborn tannins or an adhesion-promoting acrylic for sealed surfaces.
Scuff-sand between coats, use a deglosser if you skip sanding, and tack-cloth before priming.
For paint, use a durable acrylic enamel or waterborne alkyd for cabinetry; they level well and resist wear.
Seal with a clear protective topcoat if needed.
- Shellac-based primer for tannin bleed
- Adhesion-promoting acrylic for presealed wood
- Deglosser option
- Waterborne alkyd paint
- Clear protective topcoat
Two-Tone Paint Ideas That Work With Oak Cabinets
When you want a fresh look without replacing your oak cabinets, two-tone paint offers a high-impact, low-cost solution that balances warmth and contrast.
Choose a lighter shade—creamy white, soft gray, or pale sage—for upper cabinets to open sightlines.
Paint upper cabinets a lighter shade—creamy white, soft gray, or pale sage—to visually open the space.
For the bases, opt for a richer tone—navy, charcoal, or deep green—to ground the room.
Keep wood grain accents or stain island fronts to honor oak’s character.
Coordinate hardware finishes and countertop tones for cohesion.
Test swatches under your kitchen light and on actual cabinet panels.
Commit to one bold contrast and one neutral to avoid visual clutter.
How to Paint Oak Cabinets Without Brush Marks
If you want smooth, professional-looking oak cabinets, the key is preparation and the right technique: sand to remove glossy finish and open the grain, degrease thoroughly, apply a high-quality bonding primer, then use a short-nap roller or a paint sprayer and thin, even coats rather than heavy brush strokes.
Lightly sand between coats, remove dust, and avoid overworking wet paint. Use quality waterborne enamel or acrylic paint for flow and durability. Work in good light and consistent temperature for even drying.
- Sand with 120–220 grit
- Clean with TSP substitute
- Use bonding primer
- Thin coats, multiple passes
- Sand between coats
How to Distress Oak Subtly Without Losing Modern Appeal
After you’ve achieved a smooth, painted finish, you can add subtle distressing to give oak cabinets character without losing a modern feel. Work sparingly: focus on high-touch areas like edges, corners, and around recessed panels. Use fine-grit sandpaper or a sanding block, lightly exposing underlying color or wood grain.
Distress irregularly but intentionally—short strokes and gentle pressure prevent overdoing it. Wipe dust, then seal with a clear matte or satin topcoat to protect and mute shine. Step back often to ensure balance.
The goal is lived-in warmth, not heavy antiquing, so keep marks minimal and controlled.
Replacing Hardware to Instantly Modernize Oak Cabinets
Because hardware is both visible and functional, swapping knobs and pulls instantly updates oak cabinets without a full remodel. You can refresh appearance and ergonomics quickly: remove dated pieces, note hole spacing, and install new hardware that complements finish and style.
Tighten fittings, use threadlocker on metal-to-wood connections, and test operation. Consistent placement and alignment make a professional difference. Consider replacing hinges for smoother doors and soft-close function.
- Measure existing hole centers before buying replacements
- Keep original screws if they fit new hardware
- Use a template for uniform placement
- Match finish tones to other fixtures
- Replace damaged backplates too
Choosing Modern Knobs & Pulls for Oak
When you pick knobs and pulls for oak, focus on scale, finish, and ergonomics so the new hardware complements the wood instead of competing with it. You’ll choose proportions that suit door size, pick finishes that harmonize with oak’s tone, and prefer grips that feel comfortable. Matte black, brushed nickel, or aged brass modernize without clashing. Mix knobs on doors with pulls on drawers for balance. Test a few pieces before committing.
| Size | Finish | Use |
|---|---|---|
| Small | Matte black | Upper cabinets |
| Medium | Brushed nickel | Base drawers |
| Large | Aged brass | Pantry doors |
Updating Hinges, Slides, and Soft-Close Mechanisms
Although hinges and slides are easy to overlook, swapping them out will dramatically improve how your cabinets look and perform. You’ll replace worn hardware with full-overlay hinges, undermount soft-close slides, and high-quality dampers to quiet doors and drawers.
Pick finishes that match new pulls, measure mounting patterns, and test alignment before final screws. Soft-close upgrades prevent slamming and extend cabinet life, while heavy-duty slides handle modern cookware.
If DIY isn’t for you, a pro can guarantee precise fit and smooth operation.
- Reduce noise
- Improve alignment
- Increase load capacity
- Match finishes
- Extend lifespan
Refacing Doors vs Full Cabinet Replacement: Decision Guide
Deciding whether to reface your cabinet doors or replace the entire cabinet box comes down to budget, condition, and how long you want the outcome to last.
Decide between refacing doors or replacing boxes based on budget, condition, and desired longevity.
If cabinet boxes are sturdy, refacing saves money and time by replacing doors, drawer fronts, and veneers while keeping layout and storage intact.
Choose full replacement when boxes are warped, moldy, or you need a new footprint—it lets you reconfigure storage and upgrade materials for longevity.
Factor in labor, disposal, and alignment issues.
You’ll also weigh resale value: replacements cost more but often add greater appeal and durability.
When to Replace Just the Doors and Drawer Fronts
If the cabinet boxes are still square, dry, and functioning, you can usually replace just the doors and drawer fronts to get a fresh look without a full overhaul.
Factor how much change you’ll get for the budget you have—new fronts can be high-impact but won’t fix warped boxes or broken hinges.
Also make sure the new door style and proportions match your existing cabinet frames so the result looks intentional, not pieced together.
Assess Structural Cabinet Condition
When you’re deciding whether to replace only the doors and drawer fronts, start by checking the cabinet boxes for structural issues like water damage, sagging shelves, loose joints, or warped frames. If the boxes are sound, swapping cosmetic parts is usually the most cost-effective route.
Inspect hinge mounting, cabinet bottoms, and interiors for soft spots or mold. Test drawers and doors for alignment and smooth operation. Measure shelf supports and check for plumbing leaks behind cabinets.
If you find major damage, full replacement may be safer. Otherwise, new doors plus hardware refreshes give big visual impact.
- Check for water stains
- Test hinge integrity
- Probe for soft wood
- Measure shelf level
- Inspect back panels
Budget Versus Impact
Because you can get a major visual upgrade without rebuilding the box, replacing just the doors and drawer fronts is often the smartest move for tighter budgets—you’ll pay far less in materials and labor while still changing style, finish, and hardware.
You should weigh cost versus impact: new faces refresh appearance and functionality, hide wear, and let you invest in higher-quality hinges and pulls.
Keep frames, shelving, and layout if they’re sound to save thousands. Reserve full replacement for warped boxes, plumbing or layout changes, or when you need different storage.
Prioritize visible elements for biggest aesthetic return on a modest spend.
Match Door Styles Carefully
Before swapping in new doors and drawer fronts, assess how their style will blend with any remaining exposed oak—frames, panels, or trim—so the result looks intentional rather than pieced together. You’ll want cohesive proportions, consistent rail and stile widths, and complementary profiles.
Pick door faces that respect existing sightlines and hardware spacing so hinges and pulls sit right. If you keep frames, match overlay type (full, partial, or inset). Test a sample door next to trim before committing.
- Match rail and stile proportions
- Keep overlay consistent
- Coordinate hardware locations
- Consider profile depth
- Test a full-size sample
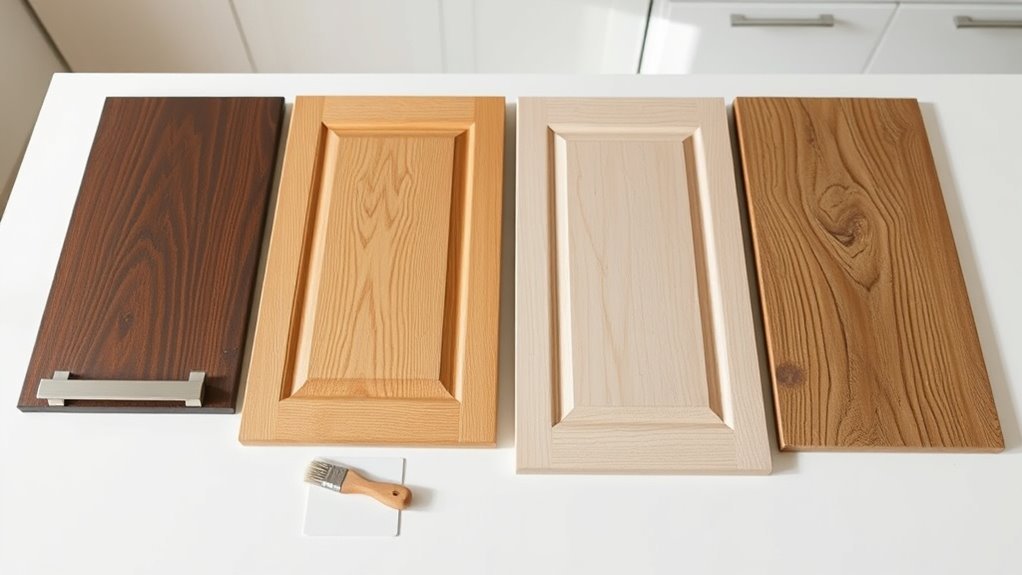
Picking New Door Styles That Fit Oak Carcasses
While oak carcasses give you a sturdy, classic foundation, the door style you choose defines the room’s whole vibe. Pick doors that balance oak’s grain—slab for clean lines, shaker for transitional looks, or flat-paneled for a softer modern feel. Consider hardware, edge profiles, and hinge type so installation stays straightforward. Test a sample door against your existing carcass finish and lighting before committing. Use the table below to compare key traits and decide quickly.
| Style | Mood |
|---|---|
| Slab | Minimal, modern |
| Shaker | Timeless, transitional |
| Flat-panel | Subtle, updated |
Budget-Friendly Refacing Materials & Finishes for Oak
If you want to refresh oak cabinets without breaking the bank, refacing with thin, affordable materials and smart finishes gives you big impact for less time and expense. You can swap doors or apply veneer, paint, or laminate over existing faces to modernize grain and color.
Choose peel-and-stick veneer or thermofoil for quick installs, water-based paint for durability, and oil or wax for subtle sheen. Match hardware to the new finish for cohesion.
Consider surface prep and edge banding to hide seams and extend life.
- Peel-and-stick wood veneer
- Thermofoil panels
- High-quality laminate
- Water-based cabinet paint
- Edge banding materials
Adding Trim, Crown Molding, or New Toe Kicks
When you trim and crown your oak cabinets or swap in new toe kicks, you’ll instantly change their silhouette and give the whole kitchen a finished, intentional look.
You can add simple shiplap trim for a cleaner line, or choose a molded crown for a traditional-to-contemporary transition.
Paint or stain trim to match or contrast—matte white crown brightens, dark stained toe kicks ground the scheme.
Install toe kicks with recessed kick plates for a streamlined base.
Measure carefully, use backer blocks where needed, and caulk seams before painting.
These small details make cabinets look custom without a full replacement.
Open Shelving & Glass Inserts to Break Up Heavy Oak
Think about where open shelving will make the most impact—between upper cabinets, over appliances, or flanking a range—to break up heavy oak and create visual lightness.
Choose glass insert styles that match your aesthetic: clear for display, frosted for softness, or textured for subtle pattern.
Place shelves and inserts strategically so they balance the room and showcase the items you want seen.
Open Shelving Placement
Where should you place open shelving to make heavy oak feel lighter and more intentional? Place shelves where they interrupt large expanses of oak—between cabinets, above appliances, or beside windows—to break mass and introduce negative space.
Keep sightlines clear and balance storage with display so the room reads airy, not cluttered. Use matching or contrasting brackets for cohesion, and stagger heights to guide the eye.
- Break long runs of cabinet faces
- Frame a window or cooktop
- Replace upper cabinets in a small zone
- Keep frequently used items within reach
- Balance closed storage nearby for clutter control
Glass Insert Styles
Because glass softens oak’s visual weight, swapping a few solid door fronts for glass inserts or adding framed glass shelves instantly lifts the look of the room.
Choose clear glass to showcase curated dishware, frosted for subtlety, or seeded for vintage texture. Match muntin patterns to your cabinet style—simple grids for modern, divided lights for traditional—and keep frames slim to avoid bulk.
Install interior lighting to highlight contents and create depth. Limit glass runs to one or two sections so oak still anchors the space.
You’ll get visual balance and a lighter, updated kitchen without a full remodel.
How to Retrofit Glass Doors Into Oak Cabinet Frames
Want to give your oak cabinets a lighter, more modern look? Retrofit glass doors by removing recessed panels, measuring accurately, and fitting glass inserts into the existing rails and stiles. You’ll need to select tempered or laminated glass, new glazing strips or rubber gaskets, and appropriate adhesive or small molding to secure the glass.
Remove hardware, label doors, and work on a flat surface. Refinish or paint the frame edges for a clean seal. Reattach hinges and adjust alignment.
- Measure twice, cut once
- Use safety-rated glass
- Keep existing frames intact
- Protect finished surfaces
- Test door operation after install
Lighting & Hardware Placement to Reduce Visual Weight
When you balance lighting and hardware placement, you can make heavy oak feel lighter and more contemporary by drawing the eye to bright, open planes and slim details.
Aim recessed or puck lights under cabinets to wash vertical grain and reduce shadowed bulk.
Install thin, linear pulls horizontally on drawers and vertically on tall doors to emphasize clean lines; stagger handle heights for rhythm without clutter.
Use concealed hinges and slim backplates so hardware disappears at a glance.
Choose finishes that reflect light—matte brushed nickel or black for contrast, polished for sparkle—so fixtures highlight shape, not weight.
Countertop, Backsplash, and Wall Colors That Pair With Oak
When you’re pairing countertops, backsplashes, and walls with oak, warm neutrals like creamy beiges and soft taupes will enhance the wood’s natural glow and keep the room feeling cohesive.
If you want a modern edge, pick high-contrast combos — think charcoal or black countertops with crisp white walls to make the oak pop.
You can mix both approaches by using warm neutral walls and a bold, dark surface or backsplash for focal impact.
Warm Neutrals With Oak
Because oak has warm, honeyed undertones, pairing it with similarly warm neutrals creates a cohesive, inviting look that still feels updated. You can choose countertops, backsplashes, and paint that enhance oak’s glow without veering into dated territory.
Aim for subtle variation in tone and texture to keep the palette layered and modern. Consider matte finishes and natural materials to balance sheen.
- Creamy alabaster walls to brighten without coolness
- Buttery quartz countertops for warmth and durability
- Sandstone or travertine backsplash for organic texture
- Warm greige for a subtle contrast
- Soft terracotta accents for depth
High-Contrast Modern Combos
If you want oak to read contemporary, push its warmth against stark, graphic elements—think charcoal counters, glossy white subway tile, and richly saturated wall paint—to create crisp visual drama that still feels balanced.
Pair dark quartz or honed granite with oak to ground the room; the contrast sharpens grain without overpowering warmth. Use bright white or pale grout-backed tile to reflect light and keep the scheme fresh.
For walls, choose deep teal, slate blue, or almost-black green to add sophistication. Keep metal finishes matte black or brushed brass for cohesion.
Limit patterns so the contrast reads intentional, not chaotic.
Flooring, Appliances, and Fixtures That Complement Oak Cabinets
Although oak’s warm grain dominates the room, you can balance or elevate it by choosing flooring, appliances, and fixtures that create contrast and cohesion.
Pick cool-toned floors like gray porcelain or wide-plank engineered wood to mute warmth.
Matte black or brushed stainless appliances add modern edge without clashing.
Choose fixtures with clean lines—sleek faucets, simple pulls—to simplify the visual field.
Keep finishes consistent: one metal tone for lighting and hardware.
Add a neutral, low-contrast rug to anchor zones and protect floors.
- Cool gray or neutral floors
- Matte black appliances
- Brushed stainless accents
- Simple linear fixtures
- Consistent metal finishes
Intermediate DIY Projects for Oak Cabinets
When you’re ready to go beyond simple hardware swaps, intermediate DIY projects let you reshape oak cabinets’ style and function without a pro. You can strip varnish, sand to smooth grain, and apply paint or stain for a cleaner look. Add inset panels, trim moulding, or glass inserts to modernize doors. Upgrade functional elements like soft-close hinges, pull-out shelves, and LED under-cabinet lighting to boost daily use.
| Project | Impact |
|---|---|
| Glass inserts | Lightens visual weight |
| Pull-out shelves | Improves access |
| Trim moulding | Adds contemporary detail |
When to Hire a Pro: Carpentry, Painting, or Refacing Help
Since big changes can expose hidden issues and demand precise skills, you’ll want a pro for jobs that go beyond basic DIY. If your cabinets need structural fixes, complex trim, full refacing, or a flawless paint finish, hire someone with experience. Pros save time, prevent mistakes, and often have warranties.
Get estimates, check portfolios, and confirm licensing or insurance. Know when to call help: if routing hinges, matching veneers, or correcting warping exceed your skills, don’t gamble.
- Structural repairs or framing alterations
- Full cabinet refacing or veneer work
- Complex paint spraying and color matching
- Custom trim or molding installation
- Hardware relocation requiring precision
Common Post-Update Problems and How to Fix Them
After you update oak cabinets, you may spot a few predictable issues—peeling paint, visible brush strokes, sticky doors, or mismatched stain—and most have straightforward fixes you can handle without redoing the whole job.
After refinishing oak cabinets, expect minor issues—peeling paint, brush marks, sticky doors—and simple fixes.
If paint peels, sand edges, apply primer, and repaint thin coats. Smooth brush marks with fine sandpaper between coats or switch to a foam roller for the final coat.
For sticky doors, adjust or replace hinges and clean with a mild solvent to remove residue.
If stain tones clash, use glaze or a tinted poly to unify color.
Tighten hardware and touch small flaws promptly.
Estimating ROI & Resale Appeal of Updated Oak Cabinets
If you upgrade oak cabinets thoughtfully, you can boost both your kitchen’s curb appeal and your home’s resale value without overspending. You’ll want to balance cost and impact: painting, hardware, and selective refacing often deliver the highest ROI.
Think like a buyer—neutral colors, quality finishes, and functional layouts sell. Track local comparable sales to estimate value added, and factor labor versus DIY. Avoid trendy choices that may date quickly.
- Prioritize neutral paint and durable topcoat
- Replace dated hardware with modern pulls
- Reface doors instead of full replacement
- Improve interior organization
- Keep modifications consistent with home style
Frequently Asked Questions
Can Oak Cabinets Be Safely Microwave-Refinished in Place?
Yes — you can safely microwave-refinish oak cabinets in place if you remove hardware, mask nearby surfaces, use low-odor, heat-safe products, ventilate well, and test a small area first; proceed cautiously to avoid warping or burns.
Will Modern Finishes Affect Cabinet VOC Emissions and Indoor Air Quality?
Yes — modern finishes can affect VOC emissions and indoor air quality. You’ll see lower-VOC and water-based options reduce off-gassing, but you should ventilate, check product labels, and let finishes cure fully before regular occupancy.
Can I Maintain Original Oak Hardware for Authenticity While Modernizing?
Yes — you can keep original oak hardware for authenticity while modernizing. You’ll refresh finishes, tighten fittings, maybe replate or clear-coat hardware, and coordinate new paint or hardware accents so everything feels cohesive and updated.
Are There Insurance or Permit Issues When Altering Built-In Cabinetry?
Yes — you might need permits for structural changes or electrical/plumbing work, and altering built-ins can affect home insurance coverage or claims. Check local codes, your policy, and notify your insurer before major modifications to avoid surprises.
How Do Humidity Changes Affect New Finishes on Oak Cabinets?
Humidity fluctuations make your new finishes expand, contract, and sometimes craze or peel; you should control moisture, use flexible finishes and proper sealing, allow acclimation, and avoid rapid swings to keep the finish stable and long-lasting.
Conclusion
You’ve got options: refresh if the cabinets are structurally sound, replace if they’re warped, moldy, or beyond repair. Set a clear budget, try intermediate DIYs like sanding, paint, or new hardware, and call a pro for carpentry, refacing, or complex finishes. Watch for adhesion, hinge alignment, and stain-show-through problems, and factor ROI if you’ll sell. With practical choices, you can modernize oak cabinets affordably and boost both function and resale appeal.
