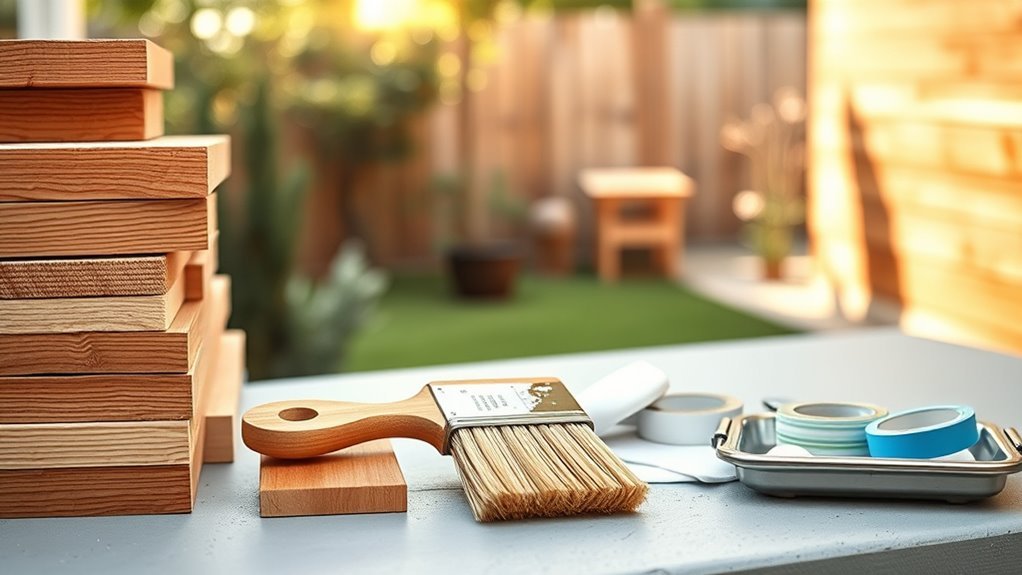
How to Protect Cedar Wood
You can protect cedar by cleaning and drying it, sanding lightly, and sealing end grain to slow moisture uptake. Apply a penetrating oil or a UV‑resistant, mildew‑inhibiting stain (two thin coats) and reapply periodically where water stops beading. Use proper drainage, elevate wood off soil, and keep ventilation and vegetation trimmed. For joints, use flexible exterior sealant and inspect annually. Follow product directions for prep and recoats, and keep going for more practical tips.
Quick Guide: How to Protect Cedar Now
If you want to protect cedar right away, start by cleaning the surface—remove dirt, mildew, and any loose fibers with a stiff brush and mild detergent, then rinse and let it dry completely.
Next, sand rough spots lightly to open the grain and remove splinters.
Repair cracks or loose boards with exterior-grade wood filler or stainless steel fasteners.
Apply a clear preservative or UV-blocking treatment designed for cedar, following label directions, and work with the grain.
Recoat as recommended and inspect yearly for wear, mold, or insect activity so you can address issues promptly.
Choosing the Best Finish for Cedar
When you’re choosing a finish for cedar, think about how much protection and natural look you want. Natural oil finishes soak in and bring out grain.
Penetrating stains add color while still feeding the wood, and clear sealers give surface protection without changing tone.
Pick the type that fits your maintenance comfort and exposure conditions.
Natural Oil Finishes
Curious about keeping cedar looking natural while protecting it? Choose natural oil finishes like tung, linseed, or blend oils to nourish and repel moisture without hiding grain.
You’ll apply thin coats, rubbing in with a cloth or brush, then wipe excess to avoid sticky buildup. Oils penetrate and darken cedar subtly, enhancing warmth while allowing the wood to breathe.
Reapply annually or when water no longer beads. Sand lightly between treatments and clean surface first.
Oils won’t form a hard film, so expect more frequent maintenance than varnish, but you’ll retain cedar’s tactile, matte appearance and natural scent.
Penetrating Wood Stains
Because penetrating stains soak into cedar rather than sitting on top, they give durable color and UV protection while keeping the wood’s texture and grain visible. You’ll choose based on porosity, exposure, and desired color depth.
Apply with a brush or rag, work along the grain, and wipe excess to avoid blotches. Recoat as tint fades; spot-test first. Maintenance is straightforward—clean, dry, then reapply.
Pick oil- or water-based formulas depending on drying time and cleanup.
- Oil-based: deeper penetration, longer open time.
- Water-based: quicker dry, lower odor.
- Semi-transparent: balance color and grain.
Clear Protective Sealers
Although clear sealers don’t add color, they protect cedar from moisture, UV damage, and wear while keeping the wood’s natural look, so you’ll pick a product based on exposure, desired sheen, and maintenance needs. You’ll choose between penetrating oils for deep protection, film-forming varnishes for durability, and water-based finishes for easy cleanup. Apply thin coats, sand lightly between coats, and recoat as recommended. Test a small area first. Below is a quick comparison to help you decide.
| Type | Advantage | Best Use |
|---|---|---|
| Oil | Deep penetration | Decks, siding |
| Varnish | Tough film | Trim, furniture |
| Water-based | Low odor | Indoor cedar |
| Hybrid | Balance | High-traffic areas |
How Cedar Resists Rot : And Why It Still Needs Protection
While cedar naturally resists rot thanks to its tight grain and natural oils that repel moisture and inhibit fungal growth, it’s not immune to decay over time—especially in wet, shaded, or poorly ventilated locations. You should still protect cedar to prolong life and appearance. Regular maintenance and sensible installation reduce risk.
Cedar resists rot but isn’t immune—protect, maintain, and ensure drainage and airflow to prolong its life.
- Keep cedar dry: guarantee drainage, slope, and airflow to prevent prolonged dampness.
- Clean and inspect: remove debris, check for soft spots or discoloration, and address problems early.
- Use protective barriers: breathable sealers or finishes that shed water but allow moisture to escape.
Match Finishes to Cedar Uses: Siding, Decks, Furniture, Fences
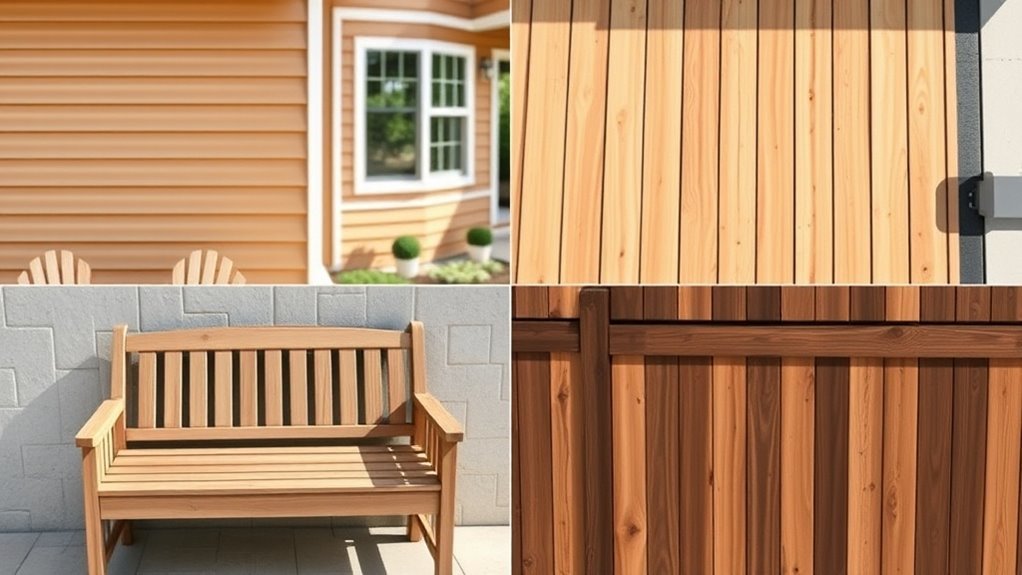
Now that you know why cedar still needs protection despite its natural rot resistance, pick finishes based on how you’ll use the wood: siding, decks, furniture, and fences each face different wear and moisture patterns and as a result need different products and maintenance schedules. Choose breathable, UV-resistant finishes for siding to prevent moisture trapping. For decks, use durable slip-resistant sealers and recoat annually. Furniture benefits from thin, penetrating oils and touch-ups. Fences need weatherproofing with water repellents and periodic staining. Use the table to compare priorities.
| Use | Priority | Maintenance |
|---|---|---|
| Siding | Breathability | 3–5 years |
| Decks | Durability | 1 year |
| Furniture | Appearance | Touch-up |
Stain Options for Cedar: Transparent, Semi‑Transparent, Solid
You can choose a transparent stain to highlight cedar’s natural grain while still letting the wood breathe.
A semi‑transparent option gives some color and UV protection but sacrifices a bit of visible texture.
If you need maximum hiding power and uniform color, pick a solid stain for full coverage and long‑lasting protection.
Transparent Stain Benefits
Because transparent stains let the grain and natural color of cedar show through, they’re the best choice when you want to preserve the wood’s appearance while adding UV and water protection. You’ll keep that warm, natural look while slowing weathering and fading.
Application stays simple, and touchups blend more seamlessly than with heavier coatings. Choose quality UV inhibitors and recoat as needed to maintain protection.
- Enhance appearance: shows grain and natural tones.
- Protect: reduces UV damage and repels moisture.
- Maintain easily: simple reapplication and spot repairs keep cedar looking fresh.
Semi‑Transparent Tradeoffs
While semi‑transparent stains let some of cedar’s grain and color show through, they add more pigment and UV protection than transparent options, so you’ll get a stronger shield against fading without completely hiding the wood’s character.
You’ll sacrifice some natural variation for consistency: semi‑transparent products mask minor defects and even out tone while preserving texture. They usually need reapplication less often than clear finishes but more often than solids.
Choose higher‑quality pigments and oil‑based or hybrid formulas for deeper penetration and flexibility.
Test samples on scrap or an inconspicuous area to confirm color, coverage, and maintenance frequency before committing.
Solid Stain Coverage
Moving from semi‑transparent options that balance protection and grain, solid stains offer the strongest hide and longest-lasting defense for cedar. You’ll lose natural grain visibility, but gain superior UV and moisture blocking, hide imperfections, and simplify color matching.
Apply to clean, dry wood with a brush or sprayer for even coverage. Expect longer intervals between reapplications, typically 4–7 years depending on exposure.
- Prep: Sand, clean, and prime any bare or weathered areas for adhesion and uniform tone.
- Apply: Two thin coats, allowing recommended dry time.
- Maintain: Inspect annually and touch up as needed.
Oil Vs. Water‑Based Sealers for Cedar: Pros and Cons
When choosing a sealer for cedar, you’ll quickly face a simple trade-off: oil-based products penetrate and enhance the wood’s natural color and grain, while water-based sealers sit more on the surface and preserve a lighter, more natural look.
You’ll choose oil if you want richer tone, deep penetration, and easier spot repairs; oils also repel moisture well but may darken wood and need reapplication more frequently in harsh conditions.
Choose water-based if you prefer quicker drying, lower odor, easier cleanup, and more stable color over time; they can form a tougher film but may show wear on high-traffic surfaces.
Clear Finishes and UV Inhibitors for Cedar
Because cedar’s natural oils don’t block sunlight, you’ll need a clear finish with UV inhibitors to slow graying and breakdown while keeping the wood’s color and grain visible. Choose a finish labeled for UV protection and exterior use.
Apply thin coats, sanding lightly between layers for adhesion. Reapply periodically as the finish thins or water no longer beads.
- Pick a high-quality spar varnish or exterior polyurethane with UV blockers.
- Test on scrap cedar to confirm clarity and appearance before full application.
- Maintain by cleaning and re-coating every 1–3 years depending on exposure.
Selecting Preservatives and Mildewcides for Outdoor Cedar
Clear finishes with UV blockers protect cedar’s look, but they won’t stop fungal decay or mildew if the wood stays damp, so you’ll also need preservatives and mildewcides designed for exterior use.
Choose water-repellent preservatives that penetrate and leave the surface breathable, avoiding film-forming products that trap moisture.
For mildew, pick broad-spectrum mildewcides labeled for exterior wood; copper-based or zinc borate additives work well when compatible with your finish.
Follow manufacturer instructions for dilution, dwell time, and reapplication intervals.
Spot-test in an inconspicuous area for color change.
Reapply after heavy weathering or when moisture exposure increases.
Test Finishes on Scrap Cedar: Adhesion, Color, and Cure
Before you coat a finished project, test each finish on scrap cedar to confirm adhesion, color, and cure—you’ll catch problems without risking the real piece. Work in the same light and temperature as the final placement. Apply finishes the same way you’ll later—brush, wipe, or spray—and follow manufacturer drying times.
- Adhesion: sand, apply, let cure, then tape and try peeling to check bond.
- Color: view wet and dry, note variations and how grain shows through.
- Cure: wait full cure time, then test hardness and solvent resistance before committing.
Preparing New Cedar for Finishing
Before you apply any finish, wipe the cedar with a dry brush or tack cloth to remove dust, mill glaze, and sawdust that can prevent proper adhesion.
Check the board’s moisture content with a moisture meter—aim for 12% or lower for exterior projects and 8–12% for indoor pieces.
If the wood’s too damp, let it acclimate in a dry, ventilated space until the meter reads in range.
Surface Cleaning Before Finish
Once you’ve got your new cedar in place, inspect it for mill glaze, dust, and loose fibers—these surface contaminants will block stain or sealant from penetrating evenly. Start by dry-brushing with a stiff natural-bristle brush along the grain to remove loose material.
Then vacuum or blow off dust, and wipe with a lint-free cloth.
If mill glaze persists, use a mild deck cleaner or diluted TSP substitute per label, scrubbing gently and rinsing thoroughly.
Allow the surface to dry fully before finishing.
- Brush along the grain
- Vacuum/blow and wipe
- Clean stubborn glaze, rinse and dry
Moisture Content Check
After cleaning and letting the cedar dry, check its moisture content so your finish will bond and cure properly. Use a reliable moisture meter; pin meters read internal moisture, while pinless meters assess surface and near-surface levels.
Aim for 12% or lower for exterior finishes, or follow manufacturer recommendations for specific products. Test multiple boards and several spots per board—end grain often holds more moisture.
If readings are too high, let the wood acclimate in a dry, ventilated area, or use fans and dehumidifiers to speed drying. Only apply finish once readings are consistently in the acceptable range.
Cleaning Weathered Cedar Before Finishing
If your cedar looks gray or feels rough from exposure, you’ll need to clean it thoroughly so finishes will penetrate and adhere properly. Start by removing surface dirt and pollen with a soft-bristled brush or low-pressure wash (≤500 psi) to avoid damaging fibers.
Apply a wood cleaner or oxygen bleach solution to lift mildew and weathered wood; follow product instructions and rinse well.
Let the cedar dry completely—at least 48 hours in warm, dry conditions—before sanding lightly with fine-grit paper to open the grain.
Finally, inspect for remaining stains and repeat cleaning if necessary.
- Soft brush or low-pressure wash
- Oxygen bleach cleaner
- Dry 48+ hours before sanding
Remove Old Paint and Stain Safely From Cedar
First, confirm whether the existing coating is paint or penetrating stain so you know if sanding, stripping, or a chemical remover is appropriate.
Pick a stripper labeled safe for cedar and low-VOC, and wear proper protection when you apply it.
Finish with gentle sanding and a soft scraper to avoid gouging the grain before you recoat.
Assess Paint Type
Wondering whether you can strip that old finish without damaging the cedar? You’ll first identify the paint or stain type to pick safe removal steps. Test a small hidden area: look for peeling, film-forming gloss, or pigment penetration. Note age and previous treatments; older lead-based paints need different handling than modern acrylics.
Check adhesion with a fingernail—if it flakes, it’s likely a surface film. Smell can hint at oil vs. water-based products. Record your findings before proceeding so you can choose appropriate methods and protective measures that preserve cedar grain and integrity.
- Test a hidden patch
- Check adhesion
- Note age and smell
Choose Safe Stripper
How will you remove old paint or stain without harming the cedar’s soft grain? Choose a stripper labeled safe for softwoods and low-VOC; they’ll strip coatings without swelling or raising the grain.
Look for gel or paste formulas that cling to vertical surfaces and limit runoff. Test a small hidden area first to confirm effectiveness and drying time.
Apply with a soft brush, then gently lift softened finish with a plastic scraper or nylon scrub pad—avoid metal tools.
Neutralize per product instructions, rinse lightly, and let the wood dry fully before any further treatment to prevent trapping moisture.
Gentle Surface Preparation
Before you refinish cedar, remove old paint or stain gently to preserve the wood’s soft grain and natural oils. Start by testing a small area with a safe, citrus- or soy-based stripper, following product directions and wearing gloves and eye protection.
Work with the grain using a plastic scraper, avoiding metal tools that gouge. Rinse thoroughly, neutralize if required, and let the wood dry fully before sanding.
- Use a low-toxic stripper and spot-test first.
- Scrape with plastic tools, then sand lightly with fine grit.
- Rinse, neutralize, and air-dry completely before finishing.
Sanding Cedar: Grit Progression and Technique
Because cedar’s soft grain can clog and scratch if you skip steps, you’ll want to follow a deliberate grit progression and sanding technique to get a smooth, even surface without tearing the wood.
Start with 80–100 grit only if you must remove deep blemishes; otherwise begin at 120. Move to 150–180 then finish with 220 for fine projects.
Sand with the grain, not across it, and use light, even pressure—especially near edges to avoid rounding.
Change or clean abrasives often to prevent clogging.
For corners and contours, use sanding pads or folded paper to maintain control and consistency.
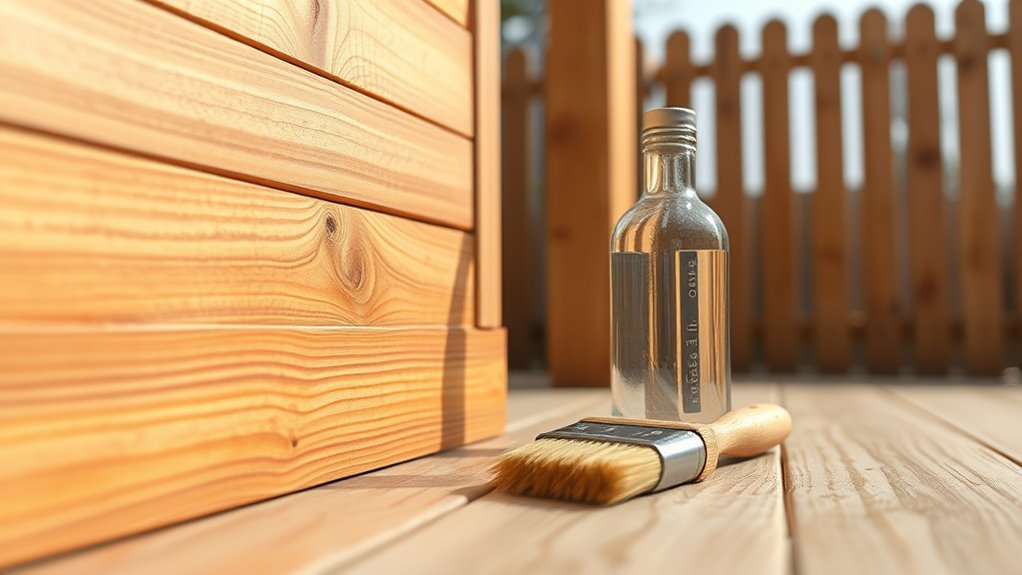
Apply Oil Finishes to Cedar Properly
When you apply oil to cedar, work methodically to enhance the wood’s natural warmth and protect it from moisture and UV damage. Prepare by cleaning and sanding to an even, receptive surface. Test the oil on a scrap to confirm absorption and color.
Apply thin coats with a lint-free cloth or brush, following grain; wipe off excess after 10–15 minutes to avoid sticky buildup. Allow full drying between coats—usually 24–48 hours—then recoat until satisfied. Maintain annually or as needed.
- Use penetrating oils (teak, tung, or linseed) for protection and tone.
- Remove puddles promptly to prevent blotches.
- Ventilate while drying.
Apply Water‑Based Finishes to Cedar Properly
Before you start, sand and clean the cedar so the finish will adhere evenly.
Pick a water‑based product suited for exterior cedar and check VOC, UV protection, and tint options.
Apply thin, even coats with adequate drying time between them to get durable, streak‑free results.
Surface Preparation Steps
Although cedar takes finishes well, proper surface prep determines how long a water‑based finish will last and how evenly it looks. You should clean, sand, and dry the wood before you apply any product.
Remove dirt, pollen, and old loose finish with a mild detergent and a soft brush; rinse thoroughly.
Sand with 120–150 grit along the grain to open pores for adhesion, then wipe with a tack cloth.
Allow the wood to dry completely—48 hours in shade is typical.
Test a small area for absorption and smoothness before you coat the entire surface.
- Clean
- Sand
- Dry
Choosing The Right Finish
Now that the surface is cleaned, sanded, and dry, pick a finish that matches how the cedar will be used and what look you want.
For exterior projects, choose a water‑based stain or sealer with UV inhibitors and mildewcide to preserve color and resist weathering.
For furniture or indoor pieces, a clear or lightly tinted water‑based varnish highlights grain without ambering.
Make certain the finish is labeled for softwoods and allows breathability to avoid trapped moisture.
Test your chosen product on a scrap to confirm appearance and adhesion.
Select low‑VOC formulas for safety and easier cleanup.
Application And Drying
When you’re ready to apply a water‑based finish to cedar, work in a well‑ventilated, dust‑free area and follow the manufacturer’s instructions for thinning, mixing, and application method. Sand lightly with fine grit, remove dust, and test the finish on scrap cedar.
Apply thin coats with a synthetic brush or foam applicator, maintaining the grain direction. Allow each coat to dry fully per label times, lightly scuff between coats, and avoid heavy buildup that traps moisture.
Monitor temperature and humidity; cooler or humid conditions slow curing. Finish with a final inspection for uniform coverage and smoothness.
- Prep: sand, clean, test.
- Apply: thin, grain‑wise coats.
- Cure: follow dry times, scuff between coats.
Brushing, Spraying, or Wiping: Best Methods for Cedar
Choosing how you’ll apply finish or preservative to cedar—by brushing, spraying, or wiping—depends on the look you want, the product you’re using, and the project’s size.
Brushing gives control, pushes finish into grain, and works best for small areas or rough surfaces; use a natural-bristle brush for oil-based products.
Brushing offers control, forces finish into the grain, and suits small or rough areas—use natural-bristle brushes for oil-based finishes.
Spraying covers large areas fast and gets into tight spots, but you’ll need masking and thinner coats to avoid runs.
Wiping with a rag or pad suits thin, penetrating oils and offers even absorption with minimal buildup.
Match method to product instructions, surface texture, and cleanup abilities.
How Many Coats of Finish Does Cedar Need?
Although the exact number of coats depends on the product and exposure, most cedar projects need two to three coats to get proper protection and an even appearance. You’ll choose based on porosity, finish type, and how exposed the wood will be.
Start with a thin, penetrating coat to seal fibers, then add build with subsequent coats for color and wear resistance. Don’t overapply; excess finish can bead or peel.
Inspect after the first coat for coverage gaps and grain raise. For best results, follow manufacturer guidance and test a small area before finishing the whole piece.
- Assess porosity and exposure
- Apply an initial thin coat
- Add one or two build coats
Drying and Recoat Times for Cedar Finishes
Because drying and recoat times vary by finish type, temperature, humidity, and wood condition, you should plan your project schedule around the manufacturer’s specified windows. Read product labels for minimum and maximum recoat times.
Oil, penetrating stains, and spar urethanes often dry faster than film-forming paints or heavy-bodied varnishes. Test a small area to confirm tack-free time in your conditions.
Allow additional time in cool or humid weather, and shorten intervals only if label permits. Sand lightly between coats when recommended, remove dust, and avoid applying subsequent coats outside the specified window to guarantee adhesion and even curing.
Preventing Lap Marks and Runs on Cedar
When you apply finishes to cedar, work steadily and keep a wet edge so you don’t create lap marks or runs. Move along one section at a time, maintaining even stain or finish thickness. Don’t over-brush — that drags partially dried finish and leaves streaks. If runs start, catch them immediately with a clean brush and gentle tipping motion.
- Use a quality brush or pad and load it evenly to avoid excess buildup.
- Blend each pass into the wet edge; stop and restart at natural breaks.
- Monitor drying conditions—temperature and humidity change flow and open time.
Sealing Cedar End Grain and Joints
Start by sealing the end grain to slow moisture absorption and prevent splitting.
Use a flexible exterior sealant at joints so the finish moves with the wood without cracking.
Leave proper expansion gaps and check them periodically to keep seals effective.
Seal End Grain First
Seal the end grain and any exposed joints first, since those areas soak up finish much faster than the faces and determine how the whole piece withstands weathering. You’ll work faster and get more uniform protection if you prep and seal these spots before finishing the rest. Use a brush or dauber to force finish into fibers, coat cut ends generously, and let soak time ensure penetration. Reinforce joints where water can enter, wiping excess to avoid drips.
- Clean and sand ends, remove dust before sealing.
- Apply two thin coats, allowing soak and drying between.
- Inspect for missed spots; recoat as needed.
Use Flexible Sealants
Because end grain and joints move with moisture and temperature, you’ll want a flexible sealant that stays elastic rather than a hard, brittle filler that will crack and let water in. Choose a high-quality, paintable silicone or polyurethane designed for exterior wood; these adhere well to cedar and handle seasonal movement.
Clean and dry surfaces before applying, tooling the bead to ensure full contact and no gaps. Avoid overfilling tight joints—use a backing rod when needed to control depth.
Allow full cure before finishing. Inspect seams annually and replace any sealant that’s pulled away or lost elasticity to keep water out.
Maintain Expansion Gaps
When joints and end grain are left without proper expansion gaps, seasonal swelling and shrinkage will force sealant and fasteners to fail. So you’ll want to plan and maintain gaps that let the wood move freely while still shedding water.
You should size gaps per cedar width and local climate, protect exposed end grain with a breathable sealer, and avoid rigid fillers that lock movement.
Inspect joints annually and after extreme weather, clearing debris and replacing failed sealant.
Use backer rod where needed to control sealant depth and adhesion, and keep fasteners loose enough to permit natural movement.
- Measure and space
- Use backer rod
- Inspect yearly
Annual Cedar Siding Maintenance Checklist
If you want your cedar siding to look and perform its best year after year, follow a short annual checklist to catch small issues before they become expensive repairs.
Walk the perimeter, noting loose, cracked, or warped boards and fasteners; tighten or replace as needed.
Walk the perimeter, checking for loose, cracked, or warped boards and fasteners; tighten or replace as needed.
Clean dirt, mildew, and pollen with a gentle detergent and soft brush, rinsing thoroughly.
Check caulking around windows, doors, and trim; reseal gaps to prevent moisture intrusion.
Inspect finish or stain for fading or peeling; touch up or recoat where protective film is compromised.
Trim nearby vegetation to keep airflow and reduce moisture against the siding.
Seasonal Cedar Decking Maintenance Schedule
Although cedar stands up well to weather, you’ll get the longest life and best appearance by following a simple seasonal maintenance schedule—inspect and clean in spring, protect and repair in summer, check fasteners and finishes in fall, and store or cover furniture and accessories in winter.
You should inspect boards for rot, wash away dirt and mildew, and let the deck dry before applying products.
In summer, sand rough spots, replace damaged boards, and apply preservative or oil as needed.
In fall, tighten screws and recoat worn areas.
In winter, keep snow off and avoid de-icers that harm cedar.
- Inspect and clean
- Protect and repair
- Check and store
Refresh Cedar Furniture Each Spring
Each spring you should clean your cedar furniture thoroughly to remove dirt, pollen, and mildew that can degrade the wood.
After it’s dry, inspect for wear and reapply a protective finish to restore water resistance and UV protection.
Doing this annually will keep your pieces looking good and lasting longer.
Clean Surface Thoroughly
Now that warmer weather’s here, give your cedar furniture a thorough cleaning to remove winter grime and restore its natural warmth. Start by sweeping loose debris, then rinse with a gentle spray. Mix mild soap and water—avoid harsh detergents—and scrub along the grain with a soft brush. Rinse thoroughly and let pieces dry completely in shade to prevent warping.
- Test a small hidden area first to check color change or damage.
- Use a soft-bristled brush and mild cleaner; don’t sand yet.
- Allow 24–48 hours of dry, ventilated conditions before any further work.
Reapply Protective Finish
With the wood clean and fully dry, it’s time to reapply a protective finish to preserve cedar’s color and resist moisture.
Choose a penetrating oil, clear sealer, or semi-transparent stain designed for cedar; avoid film-forming varnishes that trap moisture.
Test a small area to confirm appearance.
Apply thin, even coats with a brush or rag following grain, wiping excess after a few minutes.
Allow recommended drying time between coats and cure fully before use.
Refinish yearly in spring or when water no longer beads.
Maintain by lightly sanding rough spots and touching up high-wear areas as needed.
Protect Cedar Fences From Ground Moisture
How can you keep cedar fence posts from rotting where they meet the ground? You’ll prevent moisture wicking and extend life by isolating wood from soil and promoting drainage.
Treat exposed post bottoms with a preservative, set posts on concrete or gravel footings, and avoid burying untreated ends.
Use rot-resistant post anchors or metal saddles to lift wood above grade.
Apply a breathable sealer to cuts and exposed end grain.
Keep vegetation and mulch away from bases so air circulates.
Inspect annually for soft spots and replace hardware if corroded to maintain the moisture barrier.
- Treat and seal exposed ends
- Use gravel/concrete footings or metal anchors
- Maintain clear, drained perimeter
DIY Repairs for Cracked or Split Cedar Boards
First, you’ll assess each board to determine if the crack is cosmetic or structural and whether the piece can be saved.
Then you’ll choose a repair method—wood glue and clamps for tight splits, epoxy or wood filler for wider gaps, or board replacement if the damage compromises strength.
I’ll walk you through the tools, materials, and step-by-step techniques so you can make lasting repairs.
Assessing Board Damage
Start by inspecting each cedar board closely—look along the grain for hairline cracks, checks, or splits that penetrate more than a quarter inch, and note whether they run across or along the board.
You’ll also check for rot by probing soft spots with a screwdriver and look for discoloration, mold, or raised grain from moisture.
Measure gap widths and mark boards that flex under pressure.
Photograph damage for records and future comparison.
Prioritize safety: wear gloves and eye protection when probing.
Use these three quick checks to decide if a board needs repair or full replacement.
- Visual and tactile scan
- Soft-spot probe
- Gap measurement
Repair Techniques Explained
Repairing cracked or split cedar boards is something you can often do yourself with a few basic tools and the right filler technique. Begin by cleaning debris and drying the wood.
For hairline cracks, inject exterior wood glue or a two-part epoxy, clamp if needed, then sand flush.
For wider splits, open the crack slightly, fill with epoxy mixed with cedar-colored pigment or wood filler, press in backing material for deep voids, and smooth.
Replace severely compromised boards.
Finish repaired areas with a primer and exterior-grade stain or sealer to match protection levels and prolong the repair’s life.
When and How to Replace Rotten Cedar Boards
When cedar boards show soft spots, deep cracks, or active fungal growth, it’s time to replace them rather than try to patch them. Neglecting seriously rotten boards lets moisture spread and undermines the whole structure.
You’ll remove damaged boards, inspect framing for rot, and match new cedar for grain and thickness. Cut back to sound wood, treat exposed framing with a preservative, and fasten replacements with stainless steel or hot-dipped galvanized fasteners. Finish with a suitable sealer or stain to restore protection.
- Remove and assess damaged areas.
- Treat framing and fit matched boards.
- Fasten securely and finish immediately.
Spot‑Treat Mildew and Algae on Cedar
If mildew or green algae are spotting your cedar, tackle them promptly with a targeted cleaner to prevent staining and surface degradation. Wear gloves and eye protection. Test the cleaner on a hidden area to confirm it won’t lighten or harm the wood.
Apply a mildew/algae remover or a diluted bleach-free oxygen bleach solution, scrub gently with a soft brush along the grain, and rinse thoroughly. Let the wood dry completely before applying any preservative or finish.
For small spots, repeat treatment until stains lift; for widespread growth, consider professional cleaning to avoid damage and guarantee even results.
Fix Gray Weathering and Discoloration on Cedar
Although cedar naturally weathers to a gray patina, you can restore its original color by removing the surface oxidized layer and any embedded grime. Use a soft-bristle brush and oxygen-based cleaner to lift dirt; rinse thoroughly and let dry.
For deeper gray, apply a wood brightener to neutralize tannins and reopen the grain. Spot-test first to avoid uneven results.
- Scrub with oxygen cleaner, rinse, dry.
- Apply wood brightener per instructions; rinse and dry.
- Lightly sand rough raised grain only, then clean before finishing.
Finish or protect promptly to slow repeat weathering.
Strip and Refinish Old Cedar Correctly
Now that you’ve removed gray weathering and brightened the wood, it’s time to strip and refinish old cedar to restore protection and appearance.
Start by testing a small area with a cedar-safe stripper; follow label directions and use a plastic scraper and nylon brush to lift finish without gouging grain. Rinse thoroughly, let wood dry 24–48 hours, then sand lightly with 120–150 grit along the grain to smooth raised fibers.
Choose a UV-resistant, penetrating finish or oil for a natural look; apply thin, even coats, wiping excess, and allow full cure between coats for lasting protection and easy maintenance.
Prevent Insect Damage to Cedar
Because cedar naturally deters many pests, you don’t want to take its resistance for granted—inspect regularly and address vulnerabilities before insects move in. Check for cracks, damp areas, and soil contact; repair or replace damaged boards and keep vents clear so wood stays dry.
Apply a borate-based treatment to vulnerable interior or hidden cedar where insects might start; it’s low-toxicity and long-lasting.
Store firewood away from structures and trim vegetation so cedar gets airflow and sunlight. Monitor annually and after storms, and treat early signs of infestation to prevent costly damage.
- Inspect for moisture and entry points
- Use borate treatments where appropriate
- Keep wood elevated and vegetation trimmed
Remove Sap and Resin From Cedar
Sap and resin come in different forms, so you’ll want to identify whether it’s fresh, dried, or mixed with dirt before you start.
Use safe removal methods like mild solvents or warm soapy water with a plastic scraper to avoid damaging the cedar.
After cleaning, take steps to prevent future buildup by trimming nearby branches and applying a protective finish.
Identify Sap Types
When you’re dealing with sticky deposits on cedar, the first step is to identify whether it’s fresh sap, hardened resin, or a blend of both, because each behaves differently and needs a different removal method.
You’ll inspect color, tackiness, and location: fresh sap is often clear to amber and very sticky; resin darkens and hardens over time; mixed deposits show both wet and brittle zones.
Knowing which you have lets you choose appropriate treatment next. Check for tree proximity and recent weather to infer freshness.
- Color and sheen
- Tactile test
- Context clues (location, weather)
Safe Removal Methods
Although resin and sap look similar, they require different approaches, so start by matching your method to the deposit’s type and the cedar’s finish.
For fresh sap, gently blot with a soft cloth and warm soapy water, then pat dry.
For stubborn or aged resin, use a small amount of mineral spirits or citrus-based solvent on a cloth, testing an inconspicuous spot first.
Work with the grain, using light pressure and repeat short applications rather than scrubbing.
Rinse the area with mild soap, dry thoroughly, and consider a light sanding only if the finish allows.
Dispose of solvent-soaked rags safely.
Prevent Future Buildup
Want to keep resin and sap from coming back onto your cedar? You can prevent buildup by keeping the wood clean, sealed, and sheltered.
Regularly wash with mild soap and water, then dry thoroughly so residues don’t accumulate.
Apply a breathable sealer or oil to repel sap while allowing moisture to escape.
Trim nearby trees and branches to reduce sap drips and airborne debris.
Inspect monthly and remove early deposits with mineral spirits or a dedicated cleaner before they harden.
Stay proactive and you’ll avoid stubborn resin that damages finishes and attracts dirt.
- Maintain cleanliness
- Seal appropriately
- Reduce nearby sources
Improve Cedar Durability With Deck Oils and Enhancers
If you want cedar to stay attractive and resist weathering, treating it with deck oils and enhancers gives you a practical, low-maintenance option. You’ll choose penetrating oils or water-repellent preservatives that soak into the grain, nourishing fibers and reducing moisture absorption.
Apply on clean, dry wood following manufacturer instructions; thin coats penetrate better than heavy films. Reapply annually or as finish wear indicates, especially on horizontal surfaces.
Pick products with UV inhibitors to slow color fading and mildew-resistant formulas for humid areas. Test a small patch first to confirm appearance.
Proper application preserves texture and extends the life of your cedar.
Ventilation and Design Tips to Reduce Cedar Moisture
To keep cedar drier you’ll want to plan for clear airflow paths that let wind and sun move moisture away from the wood.
Incorporate roof overhangs and proper flashing to deflect water, and use raised, slatted supports so air can circulate beneath boards.
These simple design choices cut drying time and reduce rot risk.
Proper Airflow Paths
Because cedar needs consistent air movement to stay dry and last, you should design and position elements so air can flow freely around the wood. Position boards with a small gap, mount siding off substrates, and avoid trapping pockets where moisture can sit.
You’ll speed drying and reduce rot risk by encouraging cross-ventilation and preventing stagnation.
- Leave uniform gaps between boards for circulation and drainage.
- Use breathable cladding assembly and raised mounting to permit backside airflow.
- Keep landscaping and trim clear of cedar surfaces to promote wind and sun exposure.
Check paths seasonally and adjust to maintain continuous airflow.
Roof Overhangs And Flashing
When you design roof overhangs and flashing with cedar in mind, you’ll keep moisture off the wood and speed drying after rain or snow. Extend overhangs to shield siding and trim from direct runoff; even modest projections reduce wetting and staining.
Fit continuous, correctly sloped flashing at roof-wall intersections, around chimneys, and over windows to divert water away from cedar joints. Use corrosion-resistant metal and seal seams with compatible sealant.
Confirm flashing terminates over drip edges so water sheds clear of cedar. Regularly inspect and replace damaged flashing to prevent hidden leaks that promote rot and mold growth.
Raised And Slatted Supports
Flashing and overhangs keep most water off cedar, but you still need a way for any residual moisture to dry quickly. Raise cedar off ground and allow airflow beneath decks, cladding, and planters so wood won’t sit in damp.
Use slatted designs that let wind pass and sun reach surfaces, reducing mold and rot.
- Elevate: keep a 1–2 inch gap from soil or concrete to prevent capillary moisture.
- Slats: space boards 1/8–1/4 inch for cross-ventilation while maintaining appearance.
- Inspect: check supports seasonally, tighten fasteners, and replace warped pieces promptly.
Fasteners and Hardware Choices for Cedar Projects
Choose fasteners and hardware that resist cedar’s natural oils and acidic tannins to prevent staining, corrosion, and premature failure.
Use stainless steel (Type 304 or better for exterior) for screws, nails, and hinges. Silicon bronze works well for high-end joinery and marine exposure.
Avoid plain steel and galvanized fasteners that can react with cedar.
For hidden joints, use coated or stainless connectors and structural screws rated for exterior use.
Match hardware finish to expected moisture and salt exposure.
Pre-drill to prevent splitting, apply compatible sealants where metal meets wood, and periodically inspect and replace corroded pieces.
Best Paints and Primers for Painted Cedar
After selecting corrosion-resistant fasteners, you’ll want paint and primer that safeguard cedar’s tannins and natural oils while letting the wood breathe. You should pick a high-quality oil-based or stain-blocking acrylic primer to stop tannin bleed and promote adhesion.
Use breathable topcoats—microporous acrylic latex paints—so moisture escapes and paint film doesn’t peel. Prep matters: clean, dry, and sand lightly before priming.
- Choose a tannin-blocking primer rated for exterior wood.
- Use microporous acrylic latex for topcoats; it resists UV and allows vapor transmission.
- Spot-prime end grains and repaired areas to ensure uniform protection.
Cost Vs. Longevity: Pick a Cedar Protection Strategy
You’ll want to weigh upfront costs against how long a finish will protect your cedar. Cheaper sealers and stains save money now but may need reapplying more often.
While higher-quality paints or oil finishes cost more up front yet extend intervals between maintenance.
Think *regarding* long-term value—total lifetime cost and effort—not just the initial price.
Initial Cost Comparison
Deciding how to protect cedar comes down to balancing upfront expense against how long the treatment will last — and that balance will determine your real cost over time. You’ll compare product price, application effort, and frequency of reapplication.
Cheap sealers cost less now but need repeat coats; premium stains cost more upfront and often require less maintenance. Factor tools rental or contractor fees, and choose based on your budget and willingness to recoat.
- Cheap clear sealers: low price, frequent reapply.
- Mid-range stains: moderate cost, occasional refresh.
- High-end finishes: higher initial cost, less frequent work.
Long-Term Value
While balancing upfront cost against durability, think in regards to years not dollars per can. You want protection that lasts so you replace less often. Compare options by lifespan, maintenance, and total cost over time. Pick finishes that match your tolerance for upkeep: oils need reapplication, good stains last longer, and paints can offer longest barrier if prepped correctly. Factor labor, appearance, and environmental exposure when estimating replacement cycles. Use this quick reference to weigh choices and plan budgets so cedar stays beautiful with minimal surprises.
| Finish | Typical Lifespan |
|---|---|
| Oil | 1–3 years |
| Stain/Paint | 5–15 years |
Eco‑Friendly and Low‑VOC Finishes for Cedar
Choosing eco-friendly, low‑VOC finishes for cedar helps you protect the wood and the environment without sacrificing appearance or durability. You’ll pick water‑based stains, natural oil blends, or plant‑derived sealers that let cedar breathe, resist UV, and limit chemical exposure. Apply thin, even coats and recoat as needed to maintain protection. Regular inspection and gentle cleaning prolong finish life without harsh solvents.
Choose low‑VOC, eco‑friendly cedar finishes—water‑based stains, natural oils, or plant sealers—and maintain with thin coats and gentle care.
- Water‑based stains: quick drying, low odor, good UV resistance.
- Natural oils (citrus, tung blends): enhance grain, easy spot maintenance.
- Plant‑derived sealers: biodegradable, low toxicity, clear protection.
Tools & Supplies Checklist: Finishing, Cleaning, Repairs
Before you start any finish, cleaning, or repair work on cedar, gather a compact set of reliable tools and supplies so the job goes faster and yields consistent results.
You’ll need fine- and medium-grit sandpaper, sanding block, tack cloth, and a vacuum with brush attachment for dust removal.
Pack a natural-bristle brush, foam brush, or lint-free cloths for applying finishes, plus gloves and eye protection.
Include a mild wood cleaner, oxygen bleach for stains, and a soft nylon scrub brush.
For repairs, bring exterior wood filler, a putty knife, stainless-steel or galvanized fasteners, and a caulk gun with exterior sealant.
Common Mistakes That Shorten Cedar Lifespan
If you skip routine maintenance or use the wrong products, cedar will age faster and need replacement sooner. You’ll shorten its life by letting dirt, moisture, and UV accumulate, using oil-based stains meant for other woods, or painting without proper primers that trap moisture. Preventable choices matter.
- Letting moisture sit: Don’t block drainage or leave mulch and debris against cedar; rot follows.
- Using incorrect finishes: Avoid interior-only or non-breathable coatings that peel and trap water.
- Neglecting cleaning: Skip deep cleaning and mildew, dirt, and salts will degrade fibers and finishes.
How to Inspect Cedar for Early Failure Signs
When you inspect cedar regularly, you’ll catch small problems before they become costly failures; look for soft spots, cracks, raised fasteners, and areas where the grain looks swollen or discolored. Walk the structure, probing suspect areas with a screwdriver tip—soft timber and crumbling edges signal rot.
Check joints, end grain, and flashing for gaps or trapped moisture. Lift trim and test seams for loose nails or screws that pierce protective coatings. Smell musty odors near siding or decking; mildew often precedes decay.
Document findings with photos, mark priorities, and schedule targeted repairs to stop deterioration early.
Professional Vs. DIY Cedar Finishing: Decision Guide
Noticing early signs of distress lets you decide whether you can fix the issue yourself or need a pro, because the scope of repairs and the finish you want determine the skill and tools required. You’ll weigh time, budget, and desired outcome.
Spotting early distress helps you choose DIY for simple fixes or call a pro for complex, long-lasting results.
DIY suits routine maintenance, simple sanding, and single-coat finishes. Professionals handle complex prep, precise color matching, and long-lasting multi-coat systems.
- Assess: measure damage, time, and confidence before starting.
- Cost: compare tool and material expenses versus a pro’s quote.
- Outcome: pick DIY for adequate protection; choose pros for durability and warranty.
When to Call a Pro for Cedar Repair or Restoration
Because cedar issues range from minor surface wear to structural rot, you’ll want a pro when the damage exceeds what you can confidently repair with basic tools and a weekend.
Call a professional if you see widespread rot, deep cracking, structural sagging, or insect infestation. Also hire help for large-scale refinishing, complicated joinery, or when matching historic finishes matters.
If water intrusion recurs despite your fixes, a pro can diagnose flashing, drainage, or ventilation problems.
Professionals have specialized tools, replacement lumber access, and finish-matching skills that save time and prevent costly mistakes, especially on roofs, siding, and load-bearing elements.
Track Maintenance History and Warranty Tips for Cedar
If you want cedar to last, keep a simple, consistent record of what you do and when you do it — stains, repairs, inspections, and product purchases — so you can spot patterns, prove routine care for warranty claims, and schedule future upkeep confidently.
You’ll protect warranty rights by keeping receipts, product labels, and photos showing pre- and post-work conditions. Note application dates, weather, and who performed work.
Organize documents digitally with backups and a short log entry after each task. Use clear entries to speed claims and decisions.
- Record dates, products, and conditions
- Save receipts, labels, and photos
- Back up records digitally
Quick Seasonal Checklist to Protect Your Cedar
Keeping a clear maintenance log makes seasonal care easier, so use your records to guide this quick checklist.
Spring: inspect for mold, clean with a mild detergent, reseal any faded areas, and tighten loose fasteners.
Summer: check for sun damage, apply UV-protective finish if needed, and trim nearby plants to improve airflow.
Fall: clear debris from surfaces and gutters, touch up sealant around joints, and store cushions off wood.
Winter: remove snow promptly, avoid de-icing chemicals on cedar, and check for water pooling after thaws.
Note dates and actions so future maintenance stays efficient and predictable.
Frequently Asked Questions
Can Cedar Be Pressure‑Treated for Extra Durability?
Yes — you can have cedar pressure‑treated for extra durability, but it’s less common; you’ll pay more, risk altering appearance and scent, and should use proper preservatives and finish to maintain rot, insect resistance and longevity.
Will Cedar Finishes Affect Its Natural Scent?
Yes — finishes can mute cedar’s scent, though some preserve or slightly alter it. You’ll keep more aroma with penetrating oils or light clear finishes; heavy varnishes or paints tend to reduce the fragrance considerably.
Are There Finishes Safe for Food‑Contact Cedar Surfaces?
Yes — you can use food‑safe finishes like mineral oil, walnut oil, or FDA‑compliant beeswax blends; you’ll reapply periodically, avoid solvent‑based varnishes, and guarantee cures fully before contacting food to keep cedar safe and fragrant.
How Do Finishes Perform on Reclaimed or Kiln‑Dried Cedar?
Finishes generally adhere better to kiln‑dried cedar than reclaimed, so you’ll get more uniform absorption and durability; reclaimed often needs extra prep and sealing for consistent results, but both accept oils, varnishes, and water‑based finishes.
Can I Finish Cedar in Very Cold or Humid Conditions?
You can, but you shouldn’t when conditions are very cold or overly humid; finishes won’t cure properly. Wait for recommended temperature and humidity ranges, or use fast‑curing products and climate‑controlled drying to guarantee proper adhesion.
Conclusion
You’ve got the know-how to keep cedar looking and performing its best. Pick a finish that matches the use—transparent for furniture, semi‑transparent for siding, solid for high‑UV exposure—apply and recoat on schedule, and tackle repairs early. Do routine inspections each season, track treatments and warranties, and call a pro for major structural or rot issues. With simple maintenance and timely action, your cedar will stay beautiful and durable for years.
