How to Refinish a Hardwood Floor
You’ll start by clearing the room, inspecting boards for damage, and measuring for materials. Sand old finish with progressively finer grits, repair gouges and squeaks, and clean all dust between steps. Test stain on scrap, apply evenly, then seal with your chosen water- or oil-based finish in thin coats, allowing proper drying and curing before use. Protect the floor and maintain humidity; keep going to learn detailed tools, timings, and troubleshooting tips.
Quick Step-by-Step: Refinishing a Hardwood Floor
Before you start, clear the room, remove baseboards if needed, and gather your sander, abrasives, vacuum, tack cloths, stain, brushes or applicator pads, and finish—because being organized saves time and prevents mistakes.
Sand the floor progressively with coarse to fine grits until smooth. Vacuum thoroughly, then wipe with tack cloths.
Repair gaps or nails, then test stain on a scrap.
Apply stain evenly, wipe excess, and let it dry fully.
Lay down finish in thin, consistent coats, sanding lightly between coats if required.
Allow proper cure time, reinstall trim, and enjoy your refreshed floors.
Decide: DIY vs. Pro – Cost, Damage, and Floor Type
When you’re weighing DIY against hiring a pro, focus on three practical factors: cost, potential for damage, and your floor’s species and condition.
You should estimate rental and material costs, compare them to contractor quotes, and factor in time and skill. Consider thicker, valuable species or complex layouts—pros reduce risk.
DIY suits simple, forgiving floors if you’re careful. If sanding mistakes, gouges, or finish failures would be costly, hire help.
- Budget vs. expertise
- Risk of irreversible damage
- Floor species and age
- Time and disruption
Decide based on risk tolerance, finances, and expected results.
Inspect Wood and Floor Condition Before You Start
You’ve weighed costs and risks, so next you should inspect the wood to know exactly what you’re dealing with.
Walk the room slowly, looking for deep scratches, gouges, stains, and water damage.
Tap boards to find loose or hollow spots; mark squeaks and areas that need fastening.
Check for previous repairs, mismatched boards, and nail pops.
Note finish thickness and whether the surface has multiple layers of coatings.
Identify edges, thresholds, and any changeover strips that complicate sanding.
Photograph problem areas and list necessary repairs so you can address structural or cosmetic issues before refinishing.
Measure the Room and Estimate Time and Materials
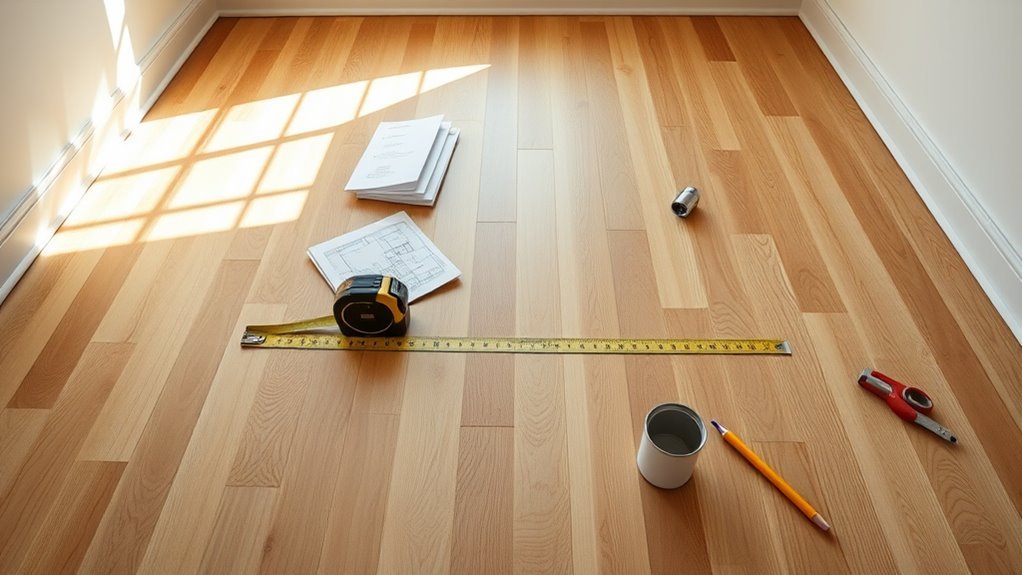
Because accurate measurements drive every decision, take time to measure the room carefully so you can estimate materials and schedule work. Measure length and width, note alcoves, closets, and cutouts, then calculate square footage. Add 10–15% for waste and pattern matching.
Estimate sanding time by square footage and obstacles; factor in drying times between coats. Plan for primer/sealer and finish coverage per manufacturer specs. Confirm delivery times for materials and set realistic work blocks, including cleanup.
- Measure twice, record dimensions
- Include doorways and connectors
- Add waste allowance
- Schedule drying and buffer time
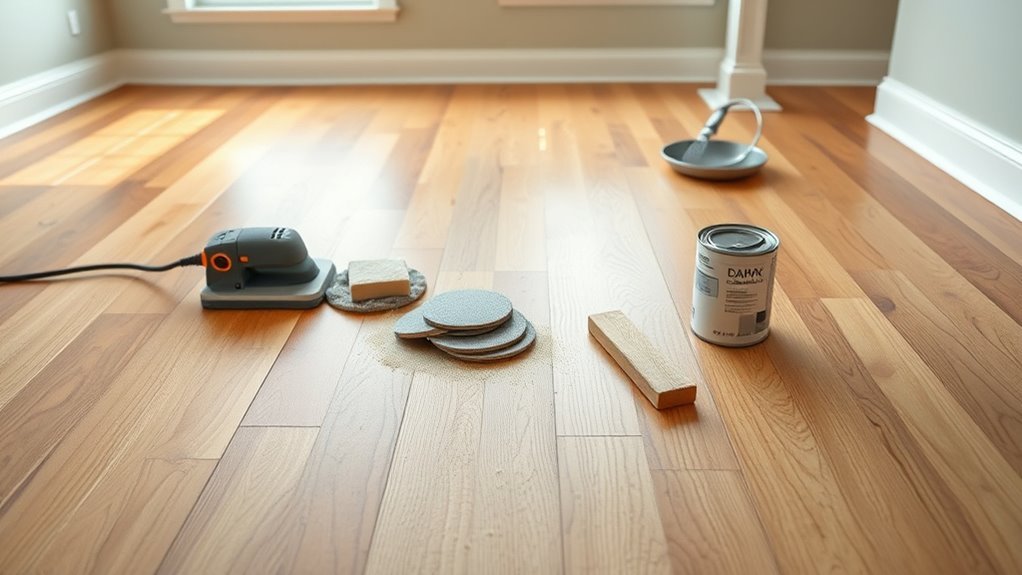
Essential Tools and Consumables for Refinishing Hardwood Floors
Before you start sanding or staining, gather the essential tools and consumables so the job runs smoothly and you don’t interrupt work to hunt for supplies.
Before sanding or staining, gather all tools and supplies upfront to keep the job smooth and uninterrupted
You’ll need a drum or orbital floor sander, edging sander, and sandpaper of varying grits (36–120). Get a shop vacuum, tack cloths, and microfiber rags for dust control.
Collect wood filler, putty knives, and a straightedge for repairs.
For finishing, have brushes, lambswool applicators, foam rollers, mixing sticks, and quality finish (polyurethane or oil-based).
Don’t forget respirators, safety glasses, knee pads, painter’s tape, and replacement sanding belts.
Prep the Room and Set Up Dust and Safety Controls
Start by clearing the room of furniture, rugs, and anything that could trap dust or get damaged.
Seal doorways and vents with plastic sheeting and tape to keep sanding dust contained.
Put on a respirator, safety goggles, and hearing protection before you begin.
Clear The Room
While you move furniture and fixtures out of the way, set up a clear workflow and protect anything you can’t remove—light fixtures, built-ins, and vents—so dust and finish won’t damage them.
You’ll clear small items, curtains, and rugs, label and stack removed pieces, and unplug electronics.
Create an organized staging area for hardware and trim so reinstalling is quick.
Put down temporary floor protection at entry paths to avoid tracked grit.
Wear a dust mask while handling dusty items and keep a trash bin handy for debris.
- Remove loose items and clear surfaces
- Label and bag fasteners
- Protect immovable fixtures
- Create a staging zone
Seal Off Dust
How will you keep dust confined to the work area? Seal doors and vents with painter’s plastic and high-quality tape, cover doorways with zipper plastic door systems for access, and block HVAC returns to prevent spread.
Lay adhesive-backed floor protection at thresholds. Turn off forced-air systems or close dampers, and run a window exhaust fan blowing outward to create negative pressure.
Position box fans with filters in windows to direct dust outside. Keep plastic barriers secured to baseboards and trim to avoid gaps.
Clean frequently with a HEPA-shop vacuum and tack cloths to limit airborne dust during the project.
Ensure Personal Safety
Having contained dust, turn your attention to protecting yourself and anyone nearby before sanding begins. You’ll prep the room, post warnings, and set up controls to limit exposure. Close vents, cover doorways with plastic, and install a negative air machine or box fan with a HEPA filter pointing out a window.
Wear PPE: N95 or P100 respirator, eye protection, hearing protection, and knee pads. Keep a fire extinguisher and first-aid kit accessible. Limit access to children and pets, and rotate workers to reduce fatigue.
- Use certified respirators
- Seal HVAC returns
- Maintain ventilation
- Keep emergency gear nearby
Choose Sandpaper Grits and the Right Sanding Sequence
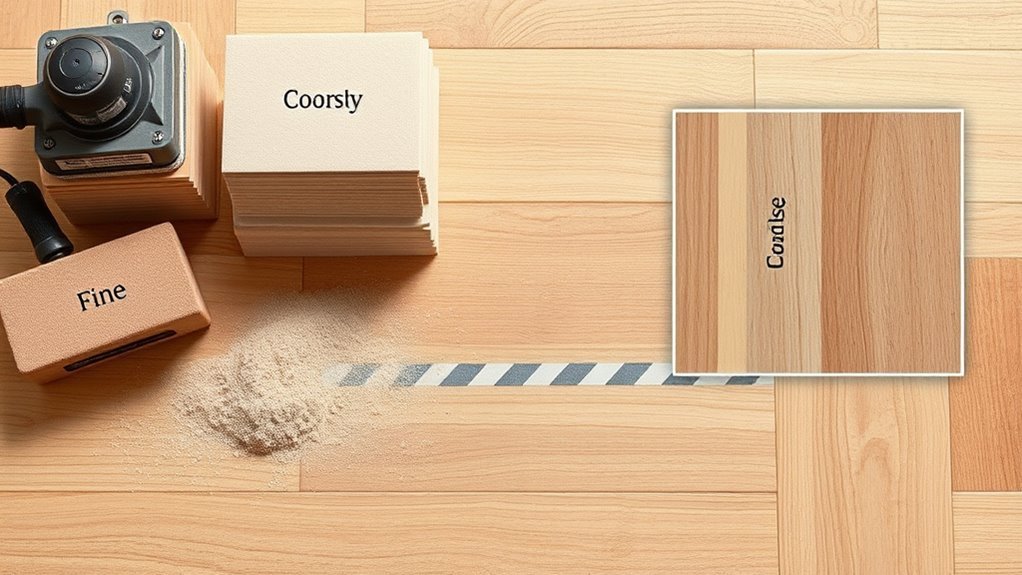
Start with a coarse grit to remove old finish and level scratches.
Then move to a medium grit to smooth the surface.
After that, finish with a fine grit to create an even, ready-to-stain or seal base.
Follow the sequence without skipping grits to avoid swirl marks and guarantee a uniform result.
Start With Coarse Grit
Although coarse grit seems aggressive, you’ll want to begin with it to remove old finish, deep scratches, and uneven boards efficiently. You control the machine, keep it moving, and let the grit do the work—don’t linger or gouge.
Choose 36–40 grit for heavily damaged floors or 50–60 grit for moderate wear. Work along the grain, overlap passes, and check progress frequently. Blend edges with an edger before switching grits. Clean thoroughly between steps to avoid abrasive contamination.
- Start coarse to expose bare wood
- Avoid stopping in one spot
- Replace clogged sandpaper promptly
- Inspect for low spots and nails
Progress Through Medium
With the coarse pass exposing bare wood and leveling major defects, switch to medium grits to smooth scratches left by the heavier paper and refine the surface for fine sanding.
Choose 60–80 grit after a very aggressive coarse step, or 80–100 grit if you started more gently. Work evenly with the drum or orbital, overlapping passes and keeping the machine moving to avoid dips.
Change discs when scratches become uniform and coarse marks disappear. Vacuum between grit changes and inspect under good light.
Proper medium progression guarantees the finish will adhere evenly without requiring extra aggressive correction.
Finish With Fine
Why settle for anything less than a glass-smooth surface when a final pass of fine grit will make your finish lay flawless? You’ll choose 80–100 grit for initial leveling, 120–150 grit to remove scratches, then 180–220 grit for final smoothing.
Move with the grain, keep machines moving to avoid gouges, and check for raised fibers between passes. Clean dust thoroughly before sealing.
- Start coarser, finish finer
- Progress in logical grit steps
- Inspect and touch up between passes
- Remove all dust before finish
Follow that sequence and your topcoat will sit evenly, reflecting light and resisting wear.
How to Use a Drum Sander, Edger, and Detail Sander
Before you power up any machine, get familiar with the drum sander, edger, and detail sander so you can work efficiently and avoid costly mistakes.
Inspect each tool: check belts, pads, and dust ports.
Start with coarse grit on the drum sander, push steadily with the drum’s rotation, and overlap passes slightly.
Use the edger for perimeter sanding, keeping it moving to prevent gouges.
Finish tight spots and corners with the detail sander, switching to finer grits as the surface evens.
Always control dust with a vacuum, wear eye and hearing protection, and test settings on scrap before proceeding.
Sand Without Gouges: Techniques and Common Fixes
Now that you know how to handle the drum sander, edger, and detail sander, focus on techniques that prevent gouges and how to fix them quickly if they occur.
Keep sandpaper fresh, move the machine steadily, and never linger in one spot. Use proper grit progression and check drum alignment frequently.
If a shallow gouge appears, blend it with finer grit. For deeper gouges, cut a small crescent with a chisel and patch with matching wood filler or an epoxy mix, then sand smooth.
- Maintain steady motion
- Change grit progressively
- Check equipment alignment
- Repair deep gouges before finishing
Repair Gaps, Squeaks, and Damaged Boards Before Finishing
Once you’ve removed old finishes and sanded flat, tackle gaps, squeaks, and any damaged boards so your finish goes down on a stable, seamless surface.
Fill narrow gaps with color-matched wood filler or stained rope for a long-lasting look; press filler firmly and level it flush with a putty knife.
For wider gaps, glue and drive thin splines or install slivers cut from matching wood.
Fix squeaks by locating loose tongues, then secure with screws through the tongue or use angled screws from below joists.
Replace badly warped or rotten boards, acclimate and nail them tightly before final sanding.
Test Stain Samples and Pick a Hardwood Floor Color
With repairs complete and the surface flat, you’ll want to test stain samples to be sure the color works with your light, furniture, and room feel. Cut small sections or use scrap boards, apply each stain, and let them dry fully—colors shift as they cure and with your finish.
After repairs and sanding, test stain on scrap boards and view fully cured samples in varied light.
View samples at different times and from several angles. Take photos and compare against upholstery and wall paint before committing.
- Test on actual floorboards or similar wood species
- Use the same finish you’ll apply later
- Observe in morning and evening light
- Narrow choices to two before deciding
Apply Stain Evenly and Control Final Color
Because stain soaks and lays differently across boards, you’ll work methodically to apply it evenly and control the final tone. Begin by mixing enough stain for the entire room so color remains consistent; stir periodically.
Apply with a clean rag or applicator in the wood’s direction, working in manageable sections. Wipe excess promptly to avoid blotches, following manufacturer dwell times.
Blend overlaps by feathering edges into already stained areas. For uneven boards, use a pre-conditioner or dilute stain to even absorption.
Inspect under good light, adjust with light touch-ups, and let the color dry fully before sealing.
Choose a Finish: Oil-Modified vs. Water-Based Polyurethane
Now you’ll pick between oil-modified and water-based polyurethane based on how the floor will be used, how it will age, and how quickly you need it back in service.
Oil-modified tends to be tougher and yellows (amber) over time, while water-based stays clearer but can be slightly less forgiving under heavy wear.
Also note that water-based dries much faster and lets you apply more coats in a day compared to the slower-curing oil-modified formulas.
Durability And Wear
Wondering which finish will stand up to daily life in your home? You want a surface that resists scratches, scuffs, and foot traffic. Oil-modified polyurethanes cure into a tough, flexible film that tolerates wear well and often needs fewer recoats.
Water-based polyurethakes dry harder and resist abrasion and yellowing from sunlight, so they hold up under heavy use with faster recoat times. Choose based on traffic, pets, and maintenance willingness.
Consider these durability factors:
- Scratch and abrasion resistance
- Cure time and recoating schedule
- Flexibility for seasonal wood movement
- Long-term maintenance and spot repair
Appearance And Ambering
If you want your floor’s color to stay true, consider how oil-modified and water-based polyurethanes change wood tones over time.
Oil-modified finishes deepen and add a warm amber patina, enriching grain contrast and hiding minor imperfections; they’ll give maple or pine a honeyed look.
Water-based polyurethanes remain clear, preserving original hues and cool undertones, so they suit lighter species and modern palettes.
You’ll pick oil-modified for a vintage, cozy feel or water-based for a crisp, natural appearance.
Also consider future maintenance: ambering accumulates gradually, so choose the aesthetic you want long-term.
Drying Time Differences
How fast do you need your floor back in service? You’ll choose based largely on dry and cure times. Water-based poly dries to the touch in 1–2 hours and you can recoat in 2–4 hours, so rooms return to light use faster.
Oil-modified takes 6–8 hours to dry to the touch and 24 hours or more before recoating; full cure can take weeks. Consider traffic, humidity, and temperature when scheduling.
- Water-based: quick recoat, lower odor
- Oil-modified: slower, deeper cure
Humidity slows both finishes. Faster dry means quicker project completion.
How to Apply Finish Coats for a Smooth Result
When you’re ready to apply finish coats, work methodically and keep each pass steady so you avoid lap marks and bubbles. Start with a thin, even first coat using a high-quality applicator, follow grain direction, and maintain a wet edge. Lightly buff between coats with fine-grit screen, vacuum, and tack-rag. Apply 2–3 coats depending on traffic, allowing manufacturer-recommended recoat times. Edge carefully with a brush, feathering into rolled areas. Inspect under good light for dust nibs and level issues; correct them before the next coat.
| Step | Tool | Tip |
|---|---|---|
| 1 | Applicator | Thin coats |
| 2 | Brush | Feather edges |
| 3 | Screen | Light buff |
| 4 | Vacuum | Remove dust |
| 5 | Light | Inspect surface |
Drying, Curing, and When to Reopen the Room
Wondering how long you should wait before moving furniture back in? You’ll need to distinguish drying (surface tack-free) from curing (full chemical hardness). Follow manufacturer times: water-based dries faster, oil-modified takes longer. Keep ventilation steady, moderate temperature, and low humidity to speed curing without forcing it. Don’t rush — premature traffic can dent or cloud the finish.
- Wait at least 24–48 hours for light use
- Delay heavy furniture and rugs 7–30 days per product
- Use felt pads and lift, don’t slide items
- Test a hidden corner before full reoccupation
Observe manufacturer guidelines and common sense.
Maintain and Protect Your Newly Refinished Hardwood Floor
Once the finish has cured, keep your hardwood looking great by adopting a simple routine of regular cleaning, protective habits, and prompt care for spills or scratches.
Sweep or vacuum with a soft-brush attachment daily, and use a damp (not wet) mop with a manufacturer-approved cleaner weekly.
Place felt pads on furniture legs and use rugs in high-traffic zones and entryways to trap grit.
Maintain stable indoor humidity (35–55%) to minimize gaps or cupping.
Wipe spills immediately with a soft cloth.
For minor surface marks, use a touch-up kit recommended for your finish; avoid harsh chemicals or abrasive tools.
Avoid and Fix Common Refinishing Mistakes
Keeping up maintenance helps prevent many problems, but refinish jobs can still go wrong — and knowing common mistakes lets you avoid them or fix them quickly. You’ll spot issues early by inspecting finish, edges, and sanding uniformity. If blotches or raised grain appear, sand lightly and recoat; for drip marks, sand smooth and reapply thin coats. Humidity-related cupping needs conditioning before finishing. Avoid rushing between coats and using wrong grit or incompatible products.
Regular inspections and proper prep prevent refinish problems—sand lightly, recoat thinly, control humidity, and follow product directions.
- Test finish and stain in an unseen area first
- Keep consistent sanding direction and grits
- Use recommended drying times and temperature
- Clean dust thoroughly before coating
Frequently Asked Questions
Can Refinished Hardwood Be Installed Over Radiant Floor Heating?
Yes — you can install refinished hardwood over radiant heating, but you’ll need engineered planks, acclimate them, keep surface temperatures below about 80°F, use proper adhesives or floating methods, and follow manufacturer and installer guidelines carefully.
Will Refinishing Change Floor Height Affecting Doors/Thresholds?
Yes — refinishing can raise the floor slightly, and that might affect door clearances or thresholds. You’ll usually sand and refinish within a small thickness, but thicker finishes or added layers may require trimming or adjustments.
Can Pets Stay in the Home During Sanding and Finishing?
No, you shouldn’t keep pets in the home during sanding and finishing; they’ll inhale dust and fumes, get irritated, and risk paw damage. You should arrange temporary boarding or stay elsewhere until floors fully cure and ventilate well.
How Do I Dispose of Rags With Oil-Based Finish Safely?
You should soak used rags in water, lay them flat to dry separately, then bag and seal them for proper hazardous-waste disposal; don’t bunch them up or discard while wet, and follow local disposal regulations for solvents.
Is Refinishing Suitable for Engineered Hardwood With Thin Veneer?
Generally no — you can’t sand thin-veneer engineered hardwood much without hitting the core. You should check veneer thickness; if it’s under about 2–3 mm, consider screening, refinishing lightly, or replacing rather than aggressive sanding.
Conclusion
You’ve got this — refinishing your hardwood floor revives its beauty and protects your investment. Whether you DIY or hire pros, inspect the wood, measure carefully, gather the right tools, and take your time sanding, staining, and sealing. Follow drying and curing times, start with thin finish coats, and protect the surface while it cures. With routine maintenance and quick fixes for wear, your refinished floors will look great and last for years to come.