How to Refinish a Wooden Door
You can refinish a wooden door yourself by evaluating damage, removing hardware, stripping or sanding the old finish, repairing gouges, and testing stains on a hidden spot. Sand with progressively finer grits, clean dust, then apply stain or paint in thin, even coats, sanding lightly between layers. Finish with a protective clear coat, let it fully cure, and reinstall hardware carefully. Keep going to learn step-by-step tips, tool choices, and timing for best results.
Why Refinish a Door: And What to Expect
Why refinish a door now? You’ll restore character, protect wood, and avoid costly future repairs. Expect to strip old finish, sand blemishes, and repair minor dings or loose trim. You’ll choose stain or paint and match sheen to room use; exterior doors need weatherproofing.
Plan for proper ventilation, dust control, and drying time between coats. Tools include scrapers, sandpaper, brushes or sprayer, and safety gear. A small door takes a day; detailed or exterior doors need more.
You’ll save money over replacement, increase curb appeal, and extend the door’s lifespan with proper prep and finish.
Decide: Refinish or Replace Your Wooden Door
Now that you know what refinishing involves and what to expect, decide whether to refinish or replace by weighing condition, cost, and long-term goals.
Inspect the door: structural damage, rot, or warped panels usually mean replacement; superficial wear, scratches, or old finish suggest refinishing.
Structural damage, rot, or warping calls for replacement; scratches or surface wear can be fixed by refinishing.
Compare expenses: refinishing saves money if hardware and frame are sound; replacement can be smarter if energy efficiency or design change is a priority.
Consider time and skill: do you want a weekend project or a quick swap?
Use this quick checklist to guide you:
- Condition: repairable or ruined?
- Cost: budget vs. value?
- Goals: style, efficiency, longevity?
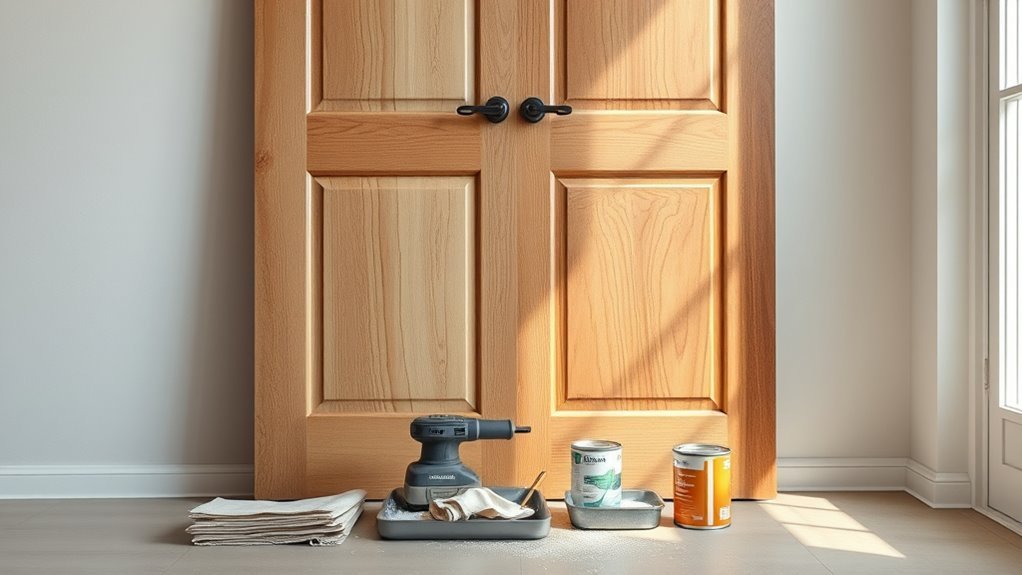
Tools for Door Refinishing
Before you begin, gather the right tools so the job goes faster and the finish looks professional. You’ll need sandpaper (80, 120, 220 grit), sanding block, and an orbital sander for large flat areas.
Have a putty knife and wood filler for gouges, plus tack cloths and a vacuum to remove dust.
Use a paint stripper and scrapers if removing old finish, and chemical-resistant gloves and goggles.
Keep quality brushes, foam applicators, or a lint-free rag for stain and sealer application.
Also prepare a screwdriver, drop cloths, painter’s tape, and a small brush for trim and grooves.
Finish Types: Interior vs Exterior Doors
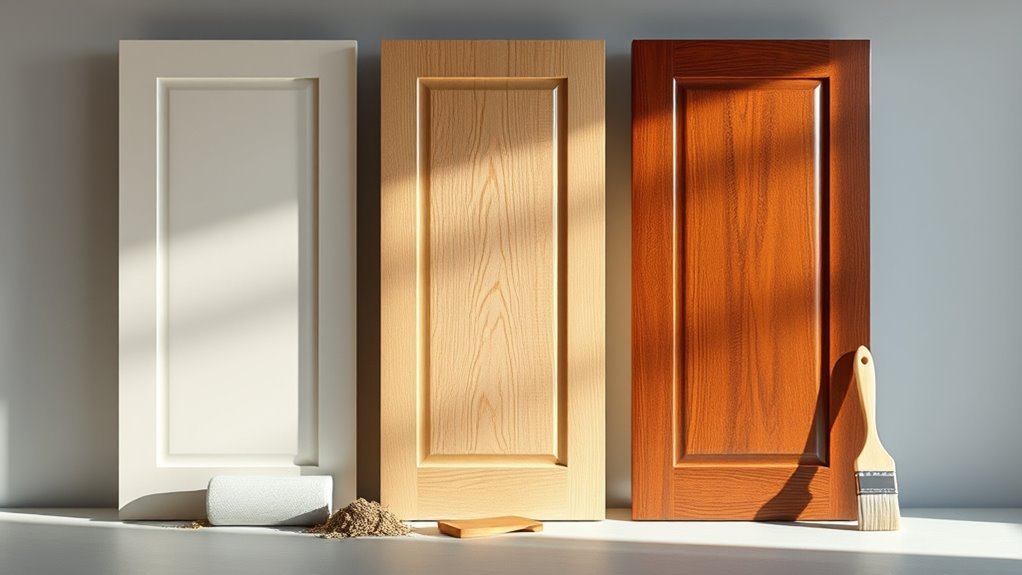
Although both interior and exterior doors need protection and style, they demand different finish types because of where they’ll live and how they’ll be used. You’ll choose based on exposure, wear, and maintenance.
- Exterior: Use durable, UV-resistant finishes like spar varnish or exterior-grade polyurethane to resist weather, moisture, and sun. Expect periodic recoat.
- Interior: Pick lower-VOC polyurethanes, water-based finishes, or oil-based varnishes for warmth and easier cleaning. Gloss level affects durability and look.
- Decorative: For both, consider stains, sealers, or paint as topcoat foundations to match aesthetics while ensuring the chosen finish bonds properly.
Safety Gear and Workspace Setup
Because you’re working with solvents, dust, and power tools, set up a well-ventilated, well-lit workspace and wear appropriate protective gear.
Use a respirator rated for organic vapors and fine dust; safety goggles that seal; hearing protection for sanders; and nitrile gloves when handling chemicals.
Lay down drop cloths and disposable plastic to catch debris and protect floors.
Keep a fire extinguisher nearby and store solvents in closed containers away from heat.
Arrange tools on a stable workbench within reach, and position the door on sawhorses or a door stand to avoid strain.
Keep a first-aid kit accessible.
Remove Hardware Without Damage
Before you strip or sand, protect surrounding surfaces with drop cloths or painter’s tape so finish and hardware can’t get scratched.
As you remove knobs, hinges, and screws, label each part and bag matching fasteners to keep track of where they go.
Store small pieces in a sturdy container so nothing gets lost while you work.
Protect Surrounding Surfaces
When you remove knobs, hinges, and strike plates, work methodically and protect the surrounding finish so you don’t nick the door or frame. Lay down a drop cloth and tape thin strips of painter’s tape around hardware edges you’ll leave in place to shield adjacent paint and varnish. Use a soft block under the door if it’s off hinges to prevent rubbing. Keep screwdriver tips steady to avoid slips.
- Remove screws slowly to avoid gouges.
- Cover exposed screw holes to stop stray finish.
- Use felt pads where tools contact the surface.
Label And Store Parts
Now that the hardware’s off and nearby surfaces are protected, label each piece as you remove it and store parts together to keep reassembly simple. Use small bags or labeled envelopes for screws, hinges, and strike plates, noting their location (top hinge, latch side).
Wrap delicate pieces in soft cloth to prevent nicks, and keep matching sets together. Place bulky items in a shallow box, and attach a diagram or photo showing placement and screw lengths.
Store everything in a safe, dry spot near the work area so you won’t misplace parts or struggle guessing where each item belongs when reinstalling.
Take the Door Off Hinges Safely
Before you lift the door, gather a screwdriver, a helper or a door jack, and safety glasses so you’ve got everything at hand.
Support the door firmly—have a partner hold it or use a brace—so it won’t shift when the pins come out.
Remove the hinge pins carefully, keeping screws and hardware organized to avoid damage.
Gather Necessary Tools
As you prepare to remove the door, gather a few specific tools so the job goes quickly and without damage. You’ll need items that let you work accurately and protect finishes.
Have a flathead screwdriver or hammer and punch to drive hinge pins, a Phillips or square driver for screws, and a set of thin pry tools to ease sticky paint without marring wood.
Also get safety glasses and work gloves. Keep small containers for screws and labels for hinge locations.
Check that your tools are in good condition so you don’t strip fasteners or chip the door edge.
- Flathead screwdriver / hammer and punch
- Phillips/square driver
- Thin pry tools
Support The Door Properly
Since the door can be heavy and awkward, support it firmly while you remove the hinge pins and lift it out.
Place a sturdy sawhorse or tall workbench beneath the door edge to hold weight.
Have a helper steady the opposite side, or use a padded stand and ratchet straps to prevent tipping.
Keep fingers clear of hinge knuckles and align supports near the center of gravity to avoid sagging.
If working alone, slide a dolly or a stack of foam blocks under one end as you lower slowly.
Check that the door rests evenly before transporting to your workspace.
Remove Hinges Carefully
Ready to take the door off its hinges? You’ll want steady support and the right tools. Place a block under the door, open it slightly, and have a helper hold it.
Use a screwdriver or drill to remove hinge pins or screws, starting from the bottom hinge to reduce binding. Keep parts organized.
- Remove bottom hinge first to prevent sagging.
- Label screws and hinges to match placement.
- Use a padded surface to lay the door flat.
Carefully lift the door free with your helper, set it on supports, and proceed to refinish without warping or damage.
Cleaning the Door: Dirt, Grease, and Wax
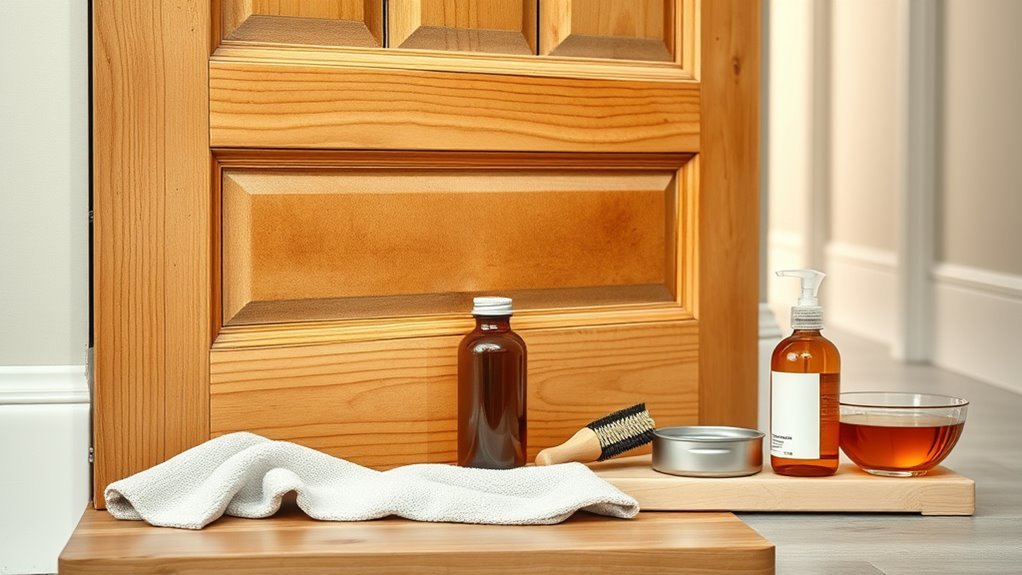
Before you sand or strip, remove all dirt, grease, and wax so the finish will adhere properly. Wipe the door with a soft cloth to remove loose dust.
Mix a mild detergent with warm water and scrub with a nonabrasive sponge, rinsing often.
For greasy spots, apply a small amount of mineral spirits on a clean rag and test in an inconspicuous area first.
To remove wax buildup, use a commercial wax remover or a solvent recommended for finish prep, following label instructions.
Dry thoroughly, then run your hand over the surface to confirm it’s clean and residue-free before proceeding.
Identify Your Door’s Current Finish
Start by running your hand over the door to inspect the surface texture—smooth, slightly orange-peeled, or heavily layered finishes tell you a lot.
Use a small solvent test (denatured alcohol, lacquer thinner, or mineral spirits) in an inconspicuous spot to see what softens or wipes away.
While you’re at it, note the hardware condition so you can decide whether to remove, protect, or replace hinges and knobs before refinishing.
Inspect Surface Texture
Although you might be enthusiastic to sand or paint, take a close look at the door’s surface first—you’ll need to know whether it’s raw wood, stained, varnished, painted, or coated with a clear polyurethane. Run your hand over panels and edges to feel smoothness, raised grain, or brush marks. Look for gloss differences and tiny cracks where finish has failed. Note where repairs or filler hide texture. Record findings so your prep matches the surface.
- Smooth, glossy — likely lacquer/urethane.
- Slightly textured — possibly varnish or shellac.
- Painted or chalky — needs deglossing or stripping.
Test With Solvent
Now that you’ve noted the surface feel and gloss, verify the finish type with a simple solvent test. Work in a ventilated area, wear gloves, and choose denatured alcohol, lacquer thinner, and acetone.
Dab each solvent on a discrete spot using a cotton swab, wait a few seconds, then rub gently. If the finish softens or dissolves with alcohol, it’s shellac; lacquer thinner attacks lacquer; acetone will affect some modern varnishes or polyurethanes.
No change means a cured polymer finish or multiple coats. Record results and photograph spots. That tells you which stripper or sanding approach will safely remove the finish.
Note Hardware Condition
Before you remove the door, check the hardware closely so you know what to protect, replace, or reuse. Look for corrosion, loose screws, or worn finishes that affect removal and refinish choices. Decide if you’ll mask, remove, or swap pieces.
- Remove: hinges and knobs that can be cleaned or replated.
- Protect: fixed hardware you’ll keep; tape and paper will save finishes.
- Replace: irreparable items—new hardware often completes a refinish.
Label parts and store screws in labeled bags. Noting condition now saves time and prevents damage during sanding, staining, or sealing.
When to Use a Chemical Stripper
If the finish on your door is thick, multilayered, or has stubborn varnish and paint that won’t sand away, reach for a chemical stripper to save time and effort. Use one when sanding would take excessive time, when intricate moldings hide old finish, or when previous coatings are oil-based over latex, making sanding messy and ineffective.
Choose a stripper if you want to preserve wood detail or avoid deep gouges from aggressive sanding. Don’t use it for lightly worn single-coat finishes — sanding and recoat are faster.
Match stripper type to finish and your comfort with handling strong products.
Safely Apply and Remove Chemical Strippers
Pick a stripper formulated for your door’s finish and wood species, and read the label to confirm it’s suitable.
Put on nitrile gloves, eye protection, and a respirator if the product warns of fumes, and cover nearby surfaces and vents.
Apply and remove the stripper following the directions and dispose of waste safely to avoid damage or injury.
Choose The Right Stripper
Wondering which chemical stripper will give you the cleanest, safest result? You’ll pick based on finish type, wood condition, and removal method.
Water-based strippers are low-odor and work well on thin finishes.
Solvent-based cut through multiple coats faster.
Caustic strippers remove stubborn varnish but need careful neutralization.
Match stripper strength to buildup to avoid wood damage.
Test a small, inconspicuous spot to confirm effectiveness and time-to-penetrate.
Dispose of waste per label directions.
If you’ll use heat or scraping afterward, choose a stripper that softens the finish rather than one that just blisters it.
- Water-based
- Solvent-based
- Caustic
Protect Yourself And Area
Now that you’ve chosen a stripper that matches your finish and removal plan, protect yourself and your work area before you open the container. Work outdoors or in a well-ventilated space, keep children and pets away, and cover nearby surfaces with disposable plastic or kraft paper.
Wear chemical-resistant gloves, eye protection, long sleeves, and a respirator rated for organic vapors. Read the label and follow dwell times precisely.
Apply stripper with a disposable brush or paddle, scraping softened finish with a plastic scraper. Collect residue in sealed containers, neutralize per instructions, and dispose of waste at a hazardous-waste facility.
Dry Sanding vs. Wet Sanding: Which to Use?
When you’re preparing a wooden door for refinishing, choosing between dry sanding and wet sanding will shape your workflow and the final look. You’ll pick dry sanding for speed and easy cleanup; it’s great for removing finish and leveling small defects.
Wet sanding gives exceptionally smooth results and reduces dust, so it’s ideal before a final finish coat or on fine-grain woods. Consider surface and desired outcome:
- Dry sanding — fast, aggressive, good for stripping and shaping.
- Wet sanding — slower, finer, minimizes dust, best for final smoothing.
- Match method to wood type and finish goals.
Sandpaper Grits and Sanding Sequence
Because the grit sequence you choose controls how quickly defects disappear and how smooth the surface ends up, start by matching grits to the job.
If you’re removing old finish or deep scratches, begin with 60–80 grit to level the surface.
Move to 100–120 grit to eliminate the coarse scratches left behind.
For final smoothing before finish, use 150–220 grit; higher counts (320–400) suit ultra-smooth, clear finishes.
Always sand with the grain, inspect between grits, and remove dust before switching.
Change or clean abrasive when it clogs to keep cuts consistent and avoid uneven staining.
Using Power Sanders Safely
When you pick a power sander, choose the type and grit range that match the door’s wood and the job’s stage so you don’t over-attack the surface.
Use a sander with a dust-collection port and wear a mask and eye protection to keep dust out of your lungs and eyes.
Keep the work area ventilated and connect a shop vac or dust extractor to minimize cleanup and airborne particles.
Choosing The Right Sander
Although a detail sander feels right for trim, you’ll want to match the sander type to the job: orbital sanders for flat panels, random-orbit for quick, swirl-free finish work, and a palm or detail sander for edges and grooves.
You’ll pick based on surface, finish goal, and control. Consider power, pad size, and ergonomics so you won’t fatigue. Match grit progression to sander aggressiveness. Test on scrap to confirm results before committing.
Balance price versus features; reliable dust hookup and variable speed matter. Use this checklist:
- Surface type
- Desired finish
- Control and comfort
Dust Control And Safety
If you’re using a power sander, control the dust at the source and protect yourself: hook the sander to a vacuum or use a dust-collection bag. Run it on an appropriate grit to avoid excessive sanding.
Wear an N95 or P100 respirator, eye protection, and hearing protection. Keep the work area ventilated or use a shop vac with a HEPA filter to prevent fine particles from spreading.
Work methodically, avoid pressing too hard, and sand with the grain.
Clean frequently: vacuum after each session, wipe surfaces with a damp cloth, and dispose of dust safely.
Keep bystanders clear and store tools properly when finished.
Sanding Carved Panels and Moldings
Because carved panels and moldings hold dust and detail, you’ll need gentler tools and a steady hand to sand them without rounding edges or damaging profiles. Use soft sanding techniques: hand-sanding with folded fine-grit paper, sanding sponges shaped to contours, and careful strokes following the grain. Work light, test frequently, and vacuum debris from crevices.
- Choose 220–320 grit for final smoothing.
- Use foam or folded paper to preserve ridges.
- Keep a soft-bristle brush and tack cloth nearby.
Finish by checking profiles under raking light; stop when surfaces are uniformly smooth.
Repair Gouges, Cracks, and Holes
Now that carved details are smooth and dust-free, you can focus on repairing gouges, cracks, and holes so the finish will look professional. Inspect the door under good light, tapping thin cracks with a utility knife to reveal depth. Remove loose fibers and dust, then fill small holes and shallow gouges with wood filler, pressing firmly and overfilling slightly.
For deeper voids or splits, use glued wood patches or epoxy putty shaped to grain. Let repairs cure fully, then sand level with fine-grit paper, blending edges into surrounding wood. Clean the area before priming or staining to guarantee a seamless result.
Get Paint Out of Joints and Grooves
Start by evaluating paint build-up in the joints and grooves so you know how much material you’ll need to remove.
Use precision tools—like a stiff nylon brush, a micro chisel, or a rotary tool with a fine bit—to work paint out without widening the gaps.
Clean the area afterward and protect surrounding wood with masking tape or filler to prevent damage.
Assess Paint Build-Up
Before you strip the whole door, check its joints and grooves for paint build-up so you can plan the right tools and technique. Walk the door edge to edge, noting cracked paint, layers, and sealed joints. Lightly press to feel ridges and test mobility at hinges and panels. Record problem areas and prioritize.
- Quantity: estimate layers to gauge effort.
- Location: pinpoint tight corners and decorative grooves.
- Condition: note brittle, flaking, or well-adhered paint.
This assessment steers your approach, helps avoid damage, and tells you whether chemical, heat, or mechanical removal will likely be needed.
Use Precision Tools
When paint’s settled into tight joints and carved grooves, you’ll need precision tools to remove it without gouging the wood. Use a small, sharp scraper or a single-edge razor blade held nearly flat to lift paint from seams.
For carved details, switch to dental picks, micro-spatulas, or a pointed wooden toothpick to tease flakes free.
Warm stubborn enamel gently with a heat gun on low, then pick away softened paint.
Work with the grain, keep tools clean, and change blades often to avoid tearing.
Finish by vacuuming debris and brushing joints clear before further refinishing.
Clean And Protect
How do you keep dirt, paint chips, and moisture from ruining freshly stripped grooves? You’ll clear debris with a soft-bristle brush, then vacuum passages to remove loose grit. Use a cotton swab dampened with mineral spirits to lift stubborn paint, drying immediately. Seal and protect raw wood with a thin coat of sanding sealer or dewaxed shellac, working into joints.
- Clean: brush, vacuum, solvent swab.
- Dry: forced air or gentle heat, ensure no moisture remains.
- Protect: sealant to block moisture and future paint adhesion.
Follow these steps so grooves stay crisp and ready for finish.
Choose a Stain: Color, Species, and Translucency
Because the right stain ties the door to your home’s look, choose color, species, and translucency with purpose. Pick a color that complements trim, floors, and hardware—warm tones for cozy rooms, cool tones for modern spaces.
Match stain to the wood species you have: oak takes medium washes, walnut needs less pigment to show grain, cherry deepens over time.
Decide translucency: transparent highlights grain, semi-transparent balances color and texture, opaque hides imperfections.
Consider light exposure; darker, more opaque stains resist sun fading visually.
Aim for a cohesive finish that enhances character without overpowering the room.
Test Stain on Scrap or a Hidden Spot
Before you stain the whole door, try your chosen color on a scrap piece or an inconspicuous spot like the inside edge.
Match the wood’s grain direction when you apply the test so the result reflects how the full surface will look.
Note the drying time on that sample, since absorption and color can change as it cures.
Choose An Inconspicuous Area
When you’re ready to stain, pick a hidden spot or a scrap piece of the same wood and apply the finish there first so you can see the true color and how the wood absorbs it. Choose areas like the inside edge, underside of a rail, or a recessed panel—places that won’t be obvious if the shade’s different.
Test each finish you’re considering, let it dry fully, and inspect under the light you’ll use in the room.
Use this checklist to decide:
- Color match and depth
- Drying behavior and blotching
- Surface feel and sheen
Trust the test; it prevents costly mistakes.
Match Wood Grain Direction
If you want the stain to look seamless, follow the grain rather than across it—this keeps brush strokes and absorption consistent so adjoining pieces blend visually. Before staining the visible door, test on a scrap or hidden edge to confirm direction and color. Work with long, even strokes that match the grain; short strokes will read as noise. Check the test spot after wiping and drying to ensure absorption matches. Use this quick chart to pace your test:
| Spot | Stroke | Result |
|---|---|---|
| Edge scrap | Long | Smooth |
| Hidden jamb | Long | Even |
| Visible face | Long | Unified |
Assess Stain Drying Time
After matching the grain and confirming stroke direction, test the stain on a scrap or a hidden edge to gauge drying time under your shop conditions. You’ll learn how long tackiness lasts, whether color shifts as it cures, and how many coats are realistic in a day.
Note temperature, humidity, and ventilation — they change cure speed.
- Record tack test times (touch, recoat, full cure).
- Compare color after 1 hour, 4 hours, and 24 hours.
- Adjust thinner, drying additive, or schedule based on results to avoid blotchiness or extended wait.
Apply Stain Evenly: Brushes, Rags, and Wipes
Although brushes give you control and rags offer speed, the tool you pick will determine how evenly the stain soaks into the wood; choose based on the grain, the stain type, and the door’s profile.
Use a natural-bristle brush for oil-based stains and detailed panels, working with the grain and keeping light, consistent strokes.
For open-grain wood, wipe on with a lint-free rag to avoid puddles; wipe off excess in the same direction.
Foam applicators suit thin, water-based stains on flat surfaces.
Always test on a scrap, maintain a wet edge, and sand between coats for uniform absorption.
Choose Paint and Prep With Primer
Wondering which paint will hold up and look best on your door? You’ll pick a durable, exterior-grade latex or oil-based paint depending on exposure and desired sheen.
Sand smooth, wipe away dust, and fix dents with wood filler. Apply a high-quality primer to promote adhesion, block stains, and create an even base.
- Choose primer: stain-blocking for tannin bleed, bonding for glossy surfaces, or oil-based for raw wood.
- Match paint type: latex over latex primer, oil over oil primer.
- Prep thoroughly: sand between coats, remove dust, and allow full dry times before handling.
Paint a Door for a Smooth, Drip-Free Finish
When you paint, work from the top down and use thin, even coats to prevent drips and achieve a glassy finish.
Use a high-quality angled brush for panels and a mini-roller for flats to keep strokes uniform. Maintain a wet edge; overlap slightly and feather out excess paint.
Watch edges and recesses for pooling, tipping with the brush immediately to smooth. Let each coat dry fully per label directions, then lightly sand with fine-grit paper or a sanding pad before recoating.
Remove dust with a tack cloth, then apply the next thin coat until coverage is flawless and smooth.
Compare Clear Finishes: Polyurethane, Varnish, Oil
After you’ve got paint or stain looking smooth, you’ll want to pick the right clear finish to protect and enhance the door’s surface. You’ll choose based on durability, appearance, and maintenance.
- Polyurethane: Tough, water-resistant, good for high-traffic doors; can amber over time.
- Varnish: Durable with UV resistance—great for exterior doors; usually flexible and repairable.
- Oil (e.g., tung, linseed): Enhances grain with a natural feel; easier spot-repairs but less protective.
Consider sheen, drying time, and recoat intervals. Test a sample on an inconspicuous spot to confirm look and compatibility before finishing the whole door.
Apply Sealer/Topcoat Without Brush Marks
Pick a finish that suits the door’s use and your skill level, then sand and clean the surface thoroughly so the topcoat lays down smoothly.
Use the right brush or applicator and keep a wet edge, working with the grain to avoid visible strokes.
Thin coats and light, even passes will dry flat and reduce the need for heavy sanding between layers.
Choose The Right Finish
Because the right sealer and topcoat determine both durability and appearance, you’ll want to choose products and an application method that prevent brush marks while protecting the door. Pick a sealer compatible with your topcoat—oil-based under oil, water-based under water—to avoid adhesion issues.
Consider sheen: satin hides imperfections; gloss shows them. For smooth results, favor quick-leveling formulas and thin coats applied evenly with a foam applicator or high-density roller.
Evaluate dry time and recoat window so you can sand lightly between coats if needed.
- Match chemistry.
- Choose sheen strategically.
- Use leveling application.
Prep Surface Thoroughly
Want smooth, brush-mark–free results? Start by cleaning the door thoroughly—remove grease, dust, and old finish residue with a degreaser and fine sanding sponge.
Fill holes and gouges, let filler cure, then sand flat with progressively finer grits, finishing with 220–320 grit for an even tooth.
Wipe surfaces with a tack cloth or lint-free rag dampened with mineral spirits to lift unseen dust.
Make certain hardware is masked or removed and temperature/humidity are within the finish manufacturer’s recommended range.
A perfectly prepped surface minimizes brush drag and helps your sealer or topcoat lay down uniformly.
Apply With Proper Technique
How do you get a flawless, brush-mark–free sealer or topcoat? You’ll work clean, thin, and deliberate. Choose a high-quality brush or foam applicator and thin the finish per label to improve flow. Maintain a “wet edge,” stroke with the grain, and don’t overwork edges. Lightly sand between coats with fine grit and remove dust.
- Prep: tack cloth, tack rag, stable temperature.
- Apply: thin coats, long strokes, keep wet edge.
- Finish: light sanding, wipe, final coat.
Let each coat cure fully before handling; patience prevents runs, bubbles, and brush marks.
Drying, Recoats, and Ideal Curing Conditions
While you can speed up drying with warmth and airflow, patience matters most: proper recoat timing and curing conditions prevent tackiness, visible brush marks, and adhesion failures.
Check product label for recommended dry and recoat times; test by touching an inconspicuous edge—no tack means you can recoat.
Thin, even coats dry faster than thick ones.
Maintain moderate temperature (60–80°F) and low humidity; avoid direct sun and dusty locations.
Allow full cure before heavy use—days to weeks depending on finish.
If solvents smell strong or finish feels soft, extend curing time rather than rushing the next step.
Reinstall Hardware and Replace Locks/Hinges
Once your finish feels fully cured to the touch and odors have mostly dissipated, it’s time to reinstall hardware and decide whether to replace locks or hinges. Inspect screws, strike plates, and mortises; clean debris and check for alignment. If components are worn, replace them to avoid future binding.
When reattaching, start screws by hand to prevent cross-threading and tighten evenly.
- Remove old parts gently to preserve paint and wood.
- Match replacement hinge size and screw length for proper fit.
- Test latch and lock operation before rehanging to confirm smooth function.
Reinstall carefully to protect your refinished work.
Weatherproof Exterior Doors and Thresholds
Before you hang the door back up, take time to weatherproof the frame and threshold so your refinishing effort stays protected from drafts and moisture.
Inspect and replace worn weatherstripping around the jamb and beneath the door; choose compressible foam or silicone bulb seals for tight closure.
Inspect and replace worn weatherstripping around the jamb and under the door; use compressible foam or silicone bulbs for a tight seal
Fit a new threshold or adjust the existing one so it mates evenly with the door bottom, preventing gaps.
Apply a bead of exterior-grade silicone where threshold meets frame to seal joints.
Finish exposed wood with marine or exterior-grade varnish.
Test for drafts and make small adjustments until the seal is snug and continuous.
Prevent Common Refinishing Mistakes
Don’t sand too aggressively or you’ll leave gouges that show through the finish.
Pay attention to humidity when you strip and refinish, because high moisture can cause swelling and poor drying.
Take these precautions and you’ll avoid common setbacks that cost time and money.
Avoid Sanding Gouges
When you sand a door, work with the grain and use light, even pressure to avoid gouges that are hard to hide later. Gouges catch stain unevenly and force patching, so stay deliberate. Keep sandpaper clean, switch to finer grits before edges, and test progress on an unseen spot.
If a gouge appears, stop and assess—you’ll often do better filling and blending than over-sanding. Remember tool control: hand-sanding near panels, orbital for flats.
Follow this three-point checklist:
- Start coarse, finish fine.
- Sand with the grain, not across it.
- Inspect frequently and correct small flaws promptly.
Control Humidity Levels
If you want a smooth, durable finish, control the humidity in the workspace—moist air can swell wood and slow drying, while overly dry air can cause cracking and poor adhesion. You should check humidity with a reliable hygrometer and aim for 40–60% relative humidity and a stable temperature around 65–75°F (18–24°C).
Use a dehumidifier or humidifier to correct extremes, and avoid refinishing right after rain or in direct sun. Let finishes cure fully between coats if humidity rises.
Monitoring conditions prevents runs, blushing, and adhesion failures, so plan timing and equipment accordingly.
Fix Runs, Bubbles, and Uneven Sheen
Although a smooth finish is the goal, runs, bubbles, and uneven sheen are common—but you can fix them without stripping the whole door. Assess the problem: small runs sand level with 320-400 grit, bubbles pop with a needle and smooth; dull spots buff with ultra-fine pad.
Clean dust, then feather in thin coats of finish, overlap evenly. Let each coat dry fully; sand lightly between coats to blend sheen.
- Sand low spots gently.
- Thin recoats correct texture.
- Final light buff unifies sheen.
Work patiently, test a hidden area, and avoid heavy coats that cause repeats.
Maintain a Refinished Door for Longevity
Because proper care keeps your work looking fresh, you should establish simple, regular maintenance habits for a refinished door to extend its life and appearance. Wipe with a soft, damp cloth weekly, dry immediately, and use mild soap for stubborn dirt. Check hardware and hinges quarterly, tighten screws, and lubricate moving parts. Inspect finish annually for wear; touch small chips with matching stain or clear coat. Protect from direct sunlight and extreme moisture. A visual checklist helps.
| Weekly | Quarterly | Annually |
|---|---|---|
| Dust | Tighten | Inspect |
| Wipe | Lubricate | Touch-up |
| Dry | Check fit | Recoat if needed |
Quick Refreshes for Painted Doors (No Refinish)
When you want to freshen a painted door without stripping or refinishing, small, targeted fixes deliver fast, visible results. You can erase wear and update style with minimal tools and time. Focus on cleaning, repairing, and accenting to make the door look cared-for.
- Clean: wipe with mild detergent, remove grime from panels and hardware, then dry thoroughly.
- Repair: fill chips with wood filler, sand smooth, touch up with matching paint or marker for tiny nicks.
- Accent: replace or polish hardware, add a fresh knob, or apply a subtle accent color to trim.
Cost Comparison: DIY vs. Hiring a Pro
Curious whether you should tackle the door yourself or hire a pro? You’ll save on labor when DIYing: expect to pay only materials—sandpaper, stain, brushes, sealant—usually $30–$150.
A pro adds expertise, speed, and tools; their labor and disposal fees often raise costs to $150–$500 per door, higher for ornate or exterior doors.
Factor hidden expenses: mistakes, replacement hardware, or ventilation equipment if you lack experience.
Consider your skill, time, and tolerance for risk. If budget’s tight and you’re careful, DIY can win; if you want flawless, fast results, hiring a pro is worth it.
Time Estimate and Step-by-Step Checklist
If you’re refinishing a single interior door, plan on about 3–8 hours total from start to finish; exterior or ornate doors can take a full day or more. You’ll move through clear stages: prep, strip/sand, repair, finish, and cure. Work efficiently, and don’t rush drying times.
- Remove hardware, mask surroundings, and clean surface.
- Strip or sand to bare wood, fill holes, sand smooth, and tack cloth.
- Stain or paint in thin coats, seal, reattach hardware, and let cure per product directions.
This checklist keeps you on schedule and guarantees a durable, professional result.
When to Hire a Pro for Door Refinishing
Although you can tackle many door refinishing jobs yourself, you should hire a pro when the work involves extensive structural damage, complex joinery, or historic finishes that need preservation. You’ll want expertise if the door has rot, warped panels, delicate veneers, lead-based paint, or custom hardware. A pro speeds up restoration, guarantees matching finishes, and protects value on period pieces. Expect higher cost but better longevity and fewer mistakes. Use the table to weigh concerns and decide.
| Issue | Signs to Watch | Pro Recommended |
|---|---|---|
| Rot | Soft, crumbling wood | Yes |
| Joinery | Loose joints | Yes |
| Finish | Layered, historic | Yes |
| Paint | Lead risk | Yes |
Quick Curb-Appeal Tips After Refinishing
A freshly refinished door can lift your whole home’s curb appeal in minutes, so focus on small, visible updates that complement the new finish. You’ll want to prioritize contrast, cleanliness, and welcoming touches that make the door pop.
A freshly refinished door instantly boosts curb appeal—prioritize contrast, cleanliness, and welcoming details to make it pop.
- Replace hardware: swap dated knobs and hinges for finishes that match the stain or paint.
- Add lighting: install or update a porch light to highlight the door’s color and improve safety.
- Refresh trim and planters: touch up trim paint, add matching house numbers, and place simple, seasonal plants for balanced symmetry and instant charm.
Frequently Asked Questions
Can I Refinish a Door That Has Lead-Based Paint?
Yes — but you shouldn’t DIY it if the paint’s lead-based; you’ll need proper testing, containment, certified abatement or a licensed renovator, HEPA cleanup, and strict disposal rules to protect yourself and others from toxic dust and chips.
How Do I Match Stain Color to Existing Nearby Trim?
Use small test patches on scrap wood from the same species, compare under room lighting, adjust with toner or glaze, note stain and finish sheen, let dry, then match by blending layers until the trim color visually aligns.
Will Refinishing Affect a Door’s Fire-Rating or Insulation?
Refinishing usually won’t change a door’s fire-rating if you keep its original fire-rated core and don’t add thick materials, but you should check label/codes; insulation might slightly change with added coatings or fills, so verify first.
Can I Refinish a Door With Veneer or Laminate Surfaces?
Yes — you can refinish veneer or laminate, but you’ll need to test adhesion, sand lightly, use appropriate primer or bonding primer, and choose compatible paint or stain; if damaged, consider replacing panels or reglueing veneer first.
How Do I Prevent Paint/Stain From Bleeding Under Masking Tape?
Use high-quality painter’s tape, press edges firmly, seal tape edges with clear shellac or matching base color, remove tape while finish is tacky, and work in thin coats so paint or stain won’t wick underneath.
Conclusion
Refinishing your wooden door can refresh your home’s look and protect the wood for years. If the door’s solid and damage is minor, you’ll save money and learn a handy skill by doing it yourself; choose the right finish, gear up safely, and follow the steps methodically. For extensive rot or complex finishes, call a pro. With patience and the right prep, you’ll boost curb appeal and enjoy a door that looks—and lasts—like new.