How to Reupholster Dining Chair
If you’re handy with basic tools and want to refresh a dining chair without buying new furniture, you can tackle reupholstery yourself. You’ll remove the seat, check the frame and springs, replace foam and batting, and stretch new fabric tightly before stapling it in place. I’ll walk you through the tools, step‑by‑step techniques, common repairs and finishing touches so you end up with a sturdy, professional-looking seat—and the confidence to do the next one.
Who Should Reupholster a Dining Chair : What This Guide Covers
If you enjoy hands-on projects, want to save money, or wish to personalize your dining room, you should consider reupholstering a dining chair. This guide covers what tools and materials you’ll need, a clear step-by-step process, and tips for finishing touches so you can tackle the job confidently whether you’re a beginner or have some DIY experience.
You’ll benefit if you like restoring pieces with vintage charm, follow current upholstery trends, or need a budget-friendly refresh. You’ll learn required tools, fabric selection, padding options, and finishing details.
Quick Step‑by‑Step Reupholstering Dining Chairs
Once you’ve gathered your tools and chosen your fabric, reupholstering a dining chair is a straightforward sequence you can complete in an afternoon.
Start by removing the seat and stripping old fabric and padding. Inspect the frame, replace foam if needed, then layer batting for smoothness.
Remove the seat, strip old fabric and padding, inspect the frame, replace foam, then layer batting for smoothness.
Use the old cover as a template, cut new fabric with extra for stapling, minding fabric patterns and color coordination with your room.
Pull fabric taut, staple evenly, fold corners neatly, trim excess, and reattach the seat.
Finish with a final inspection, smoothing wrinkles and adding optional decorative nails for polish.
Upholstery Tools & Materials for Dining Chairs
When you’re ready to reupholster dining chairs, having the right tools and materials on hand makes the job faster, cleaner, and more professional-looking. You’ll need a staple gun, hammer, screwdrivers, foam, batting, and durable upholstery fabric—pick Fabric patterns that match your room and preferred Upholstery styles. Organize supplies and measure carefully.
| Tool | Purpose |
|---|---|
| Staple gun | Secure fabric |
| Foam/batting | Comfort and shape |
| Screwdriver/hammer | Disassembly and tacking |
Choose high-quality fabric and appropriate foam density. Keep extra staples and matching thread handy to finish edges neatly and confidently.
Is This Chair Worth Saving? Check Frame, Springs, Repairs

Before you dive into reupholstering, take a close look at the chair’s structural bones—frame, joints, and springs—to decide if it’s worth saving. You’ll test wobble, examine glue lines, and press along rails for cracks.
Replaceable springs and loose joints are fixable; shattered frames or pervasive rot may not be. Consider historical significance and artistic value—period pieces or crafted joins might justify repair costs.
Tally parts, time, and tools against replacement price. If repairs are straightforward and the chair appeals to you, proceed; if structural failure dominates, redirect effort to a sturdier candidate.
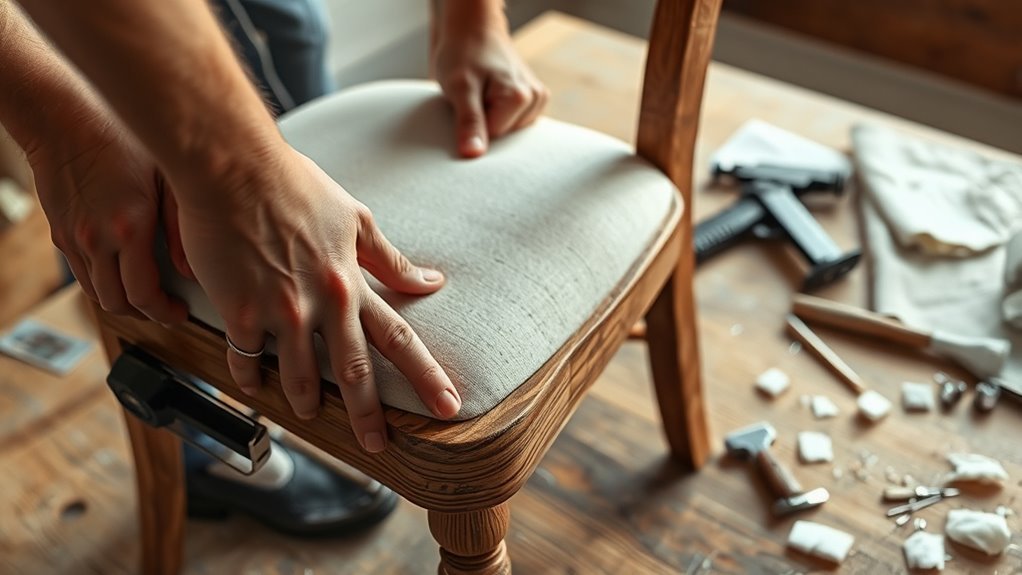
Safely Removing the Seat and Stripping Old Fabric
While you’re working, keep the chair steady and your tools organized so removing the seat is quick and safe. You’ll flip the chair, unscrew mounting bolts, and lift the seat carefully.
While you work, stabilize the chair, keep tools organized, flip it, unscrew bolts, and lift the seat carefully
Pry out staples and tacks with a flathead and pliers, removing old foam and fabric in layers. Inspect the frame and note any loose joints to fix later.
Save decorative embellishments like trim or tacks if you plan to reuse them. Photograph the underside for reference to fabric placement and stapling pattern to aid reassembly and color coordination choices later.
- Relief at progress
- Pride in repair
- Excitement for renewal
- Calm focus
Choosing Fabric, Foam, and Batting: Durability, Cleaning, Cost
You’ve removed the old cover and inspected the frame, so now pick materials that match how the chair will be used and how much care you want to give it. Choose durable upholstery fabric—tightly woven synthetics resist abrasion and stains; natural blends feel nicer but may need more upkeep. Consider fabric pattern for hiding spills or matching décor.
Select foam density for comfort and longevity; higher density keeps shape longer. Add batting for smooth edges and a plush look.
Balance cost against expected wear and frequency of upholstery cleaning; opt for removable covers or stain-resistant treatments if needed.
Cutting Templates and Preparing Foam and Batting
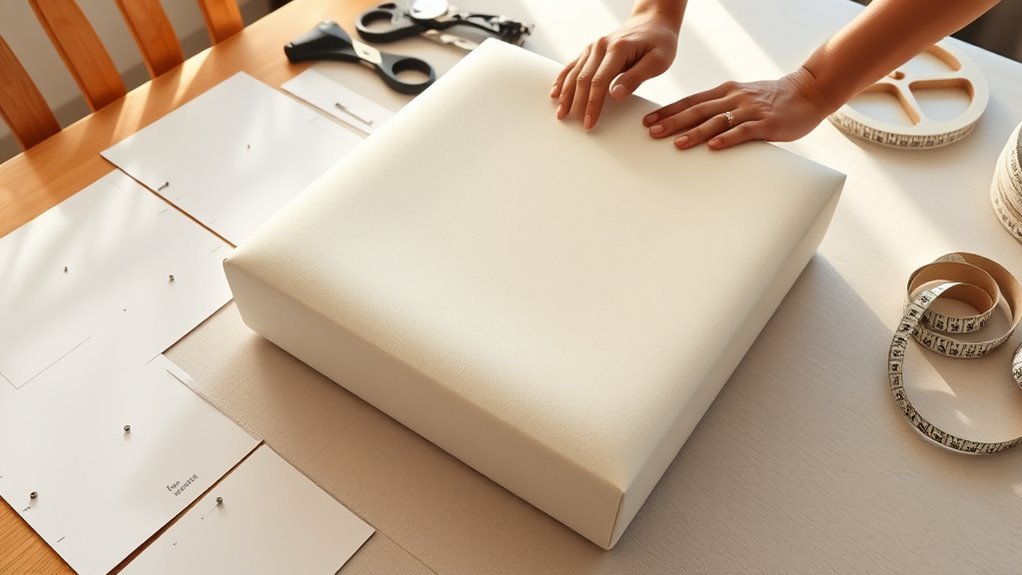
Once you’ve chosen your fabric and foam, make a precise template from the old cover or a sheet of kraft paper so your cuts fit the seat exactly. Transfer that outline to foam and batting, marking corners and edges.
Make a precise kraft-paper template, transfer outlines to foam and batting, mark corners, and trim for a perfect fit
When cutting templates, add 2–3 inches for stapling and trim incrementally to test fit.
For preparing foam, use a sharp electric knife for clean edges and glue spray sparingly to secure layers.
Layer batting over foam, smoothing wrinkles as you go.
Your careful prep saves time when you upholster and gives a professional, comfortable result.
- Pride in handmade renewal
- Calm from careful planning
- Joy at neat edges
- Confidence in lasting comfort
Stretching and Stapling Fabric for Clean Edges and Corners
Before you start stapling, pull the fabric taut over the seat so it lays smooth and centered; this keeps patterns aligned and prevents puckering when you secure the edges.
Work from the center of each side, using even fabric stretching and placing staples every 1–2 inches. Flip and check alignment as you go.
For corners, trim excess fabric, fold tidy pleats, and use precise corner folding to create smooth, flat edges without bulk.
Use a final pass of staples near corners to lock folds. Trim excess fabric close to staples and press the top surface smooth.
Reattaching the Seat and Securing Hardware Correctly
After you’ve smoothed the top and trimmed loose threads, flip the seat over and align it with the chair frame so the screw holes match. Keep the screws you saved handy and check that any brackets or metal plates sit flush.
Hold the seat steady, insert screws by hand, then tighten with a screwdriver—don’t overtighten. Test for wobble, adjust shims if needed, and ensure fabric stays taut beneath.
Once secure, consider decorative upholstery nails later for accents and plan chair leg polishing to complete restoration. Small checks prevent squeaks and loosening.
- Pride in craftsmanship
- Relief at stability
- Joy in renewed beauty
- Confidence to continue
Finishing Touches: Trim, Upholstery Nails, Ironing, Inspection
With the seat reattached and hardware snug, focus on the finishing touches that give your chair a polished look.
Trim excess fabric close to staples, leaving just enough to prevent fraying.
Add batting or welt cord where seams meet for a neat edge.
Choose upholstery nails or decorative tacks that enhance color coordination and complement fabric patterns—space them evenly and tap gently.
Lightly steam or iron the visible fabric from the underside or with a press cloth to avoid shine.
Inspect seams, edges, and nail heads for uniformity and safety, making small adjustments until everything sits clean and secure.
Troubleshooting: Seams, Wrinkles, Loose Staples and Longevity Tips
If seams start to gape, wrinkles appear, or staples loosen, you can fix most issues quickly without stripping the seat again. Check staple tension, add targeted seam reinforcement with small stitches or hot glue under the fabric, and smooth folds with a steamer for wrinkle prevention.
Tighten loose staples or replace them near the problem area, and press fabric taut from the center outward. For longevity, rotate cushions, avoid direct sun, and clean spills promptly.
Trust your hands—minor fixes keep chairs looking fresh and extend life.
- Relief when a quick fix saves the day
- Pride in repairing, not replacing
- Comfort from restored seating
- Confidence to tackle more projects
Frequently Asked Questions
Can I Reupholster Chairs With Tufted or Buttoned Backs?
Yes—you can; tufted repair and button replacement are doable. You’ll remove fabric, replace or reattach buttons with strong thread and anchors, refill padding if needed, then restitch or re-tuft carefully for a neat, durable finish.
How Do I Match New Upholstery to Existing Dining Room Decor?
Pick fabrics that echo existing hues and scale: use fabric patterns to balance bold prints with solids, prioritize color coordination with walls, curtains, and tableware, and test swatches in room light before committing.
Are There Eco-Friendly Fabric and Foam Alternatives?
Yes — you can choose eco friendly materials and sustainable fabrics like organic cotton, hemp, linen, recycled polyester, or Tencel, and plant-based or recycled foam alternatives; you’ll reduce waste and support greener, low-VOC options.
Can I Reupholster Antique Chairs Without Losing Value?
Yes — you can reupholster antique chairs without losing value if you preserve original materials, use period-appropriate fabrics, document work, consult a furniture appraisal, and consider professional antique restoration to maintain authenticity and provenance.
What Safety Precautions for Using a Staple Gun Indoors?
You should wear safety gear like gloves, eye protection, and earplugs, ensure good ventilation precautions by opening windows or using fans, secure your workspace, keep fingers clear, unplug when not in use, and follow stapler manufacturer instructions.
Conclusion
You’ve got the skills to give a dining chair new life. Follow the steps: inspect the frame, remove the seat, replace foam and batting, stretch and staple fabric neatly, fold corners, trim excess, then reattach and add trim or nails. Check for wrinkles, secure loose staples, and tighten hardware. With care and the right tools you’ll save money and get a refreshed, durable chair that looks great and lasts for years.