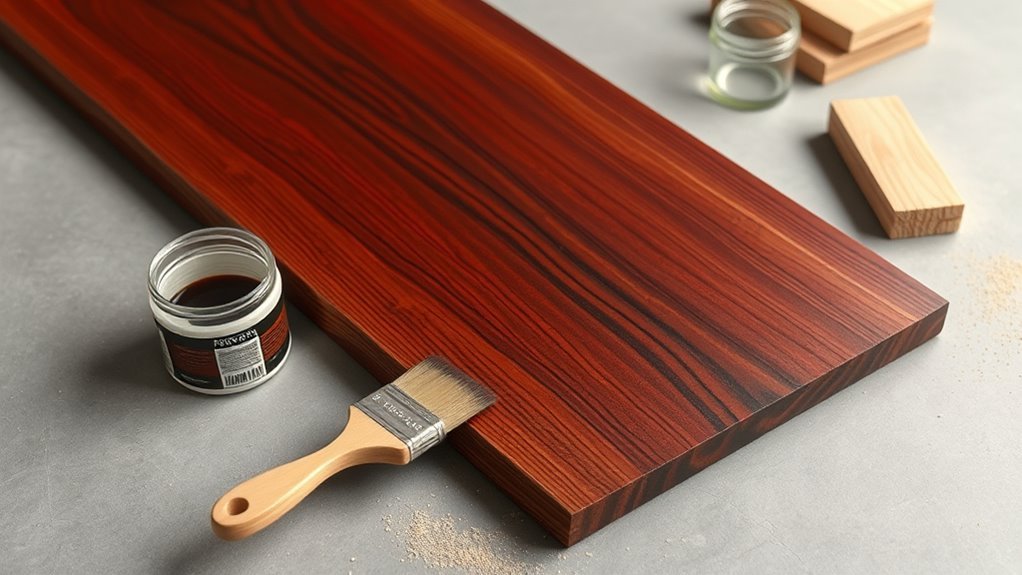
How to Stain Mahogany Wood
You’ll start by sanding with the grain, cleaning dust, and testing for sapwood or old finish; use a pre‑stain conditioner or dye on mahogany to prevent blotching and enhance figure. Apply thin, even coats of oil, water, gel, or dye stain, wipe excess with a lint‑free cloth, and build depth by layering light tones before sealing. Sand lightly between coats and finish with polyurethane or oil. Keep going to learn tips for flawless results.
Quick Answer: How to Stain Mahogany Successfully
If you want a rich, even finish on mahogany, start by sanding with progressively finer grits. Raise and remove the grain with a light dampening.
Apply a compatible wood conditioner or grain filler where needed, then stain with thin, even coats—wiping off excess promptly—and finish with a clear sealer suited to the stain.
Use a conditioner or filler where needed, stain in thin even coats—wipe excess—and finish with a compatible clear sealer.
You’ll prep carefully, test stain on scrap, and work with the wood’s natural color. Apply stain evenly along the grain, wipe consistently, and let each coat dry fully before evaluating.
Use light sanding between coats and a protective clear topcoat to ensure durability and depth.
Why Mahogany Stains Differently Than Other Woods
Because mahogany’s grain structure, natural oils, and density differ from many common domestic woods, it soaks up and reacts to stains in its own distinctive way. You’ll notice a tighter, interlocking grain that accepts pigment unevenly compared with open-grain woods, producing richer, darker tones in some areas.
Its natural oils can resist water-based stains, so you’ll get blotching or slow absorption unless you prep properly. Dense heartwood often yields more uniform color than sapwood.
Because of these traits, you should choose compatible stains and test on scrap or hidden areas to predict final color and sheen before finishing.
What to Inspect on Mahogany Before You Start
Before you touch stain or sandpaper, walk the piece over carefully to note surface condition, grain orientation, and color variation. Check for these specifics so your stain soaks and looks consistent.
Before staining, inspect grain, color, and flaws—test a small area to ensure even absorption.
- Look for dents, scratches, or gouges that need filling before staining.
- Identify sapwood versus heartwood; sapwood accepts stain differently.
- Note grain direction for sanding and wiping to avoid streaks.
- Test a small, inconspicuous area with your chosen stain and conditioner.
Record observations and mark trouble spots. That prep prevents surprises, helps you choose sanding grit and conditioner, and guarantees more even, predictable results when you start staining.
Workspace and Lighting for Staining Mahogany
Set up in a well-ventilated area so fumes don’t build up while you work.
Make sure your lighting is even and shadow-free so you can see the stain color and coverage accurately.
Use a stable, clean work surface to prevent spills, dust, or wobble from ruining the finish.
Well-Ventilated Area
Where will you work so the stain goes on evenly and safely? You’ll pick a well-ventilated area to avoid fumes and speed drying. Open windows and doors, or use box fans to push air across the workspace. Keep the space clean to prevent dust settling into wet stain.
- Position fans to move air out, not stir dust
- Work with the grain to minimize sanding dust
- Wear a respirator rated for organic vapors
- Keep rags in a metal container with a lid for safety
Good airflow protects your health and improves stain performance without compromising finish.
Even, Shadow-Free Lighting
Good airflow keeps dust out of the stain, but you also need lighting that shows every square inch evenly so you can judge color and spot flaws.
Position multiple cool white LEDs overhead and at floor level to eliminate shadows from your hands and tools. Use diffusers or shop lights with wide beams to create uniform illumination across the piece.
Keep bulbs at consistent color temperature (around 4000K–5000K) so stain tones read true.
Move the work or lights slowly while inspecting from different angles; subtle grain contrasts and pooling reveal themselves only under steady, even light.
Adjust until the surface looks consistent.
Stable, Clean Work Surface
Because even slight wobble or grit can ruin a stain, you’ll want a flat, stable work surface cleared of dust and clutter before you begin. Set up near even, shadow-free lighting and keep traffic away so you won’t bump your piece. Wipe the surface and the wood with a tack cloth just before staining, and use risers or padded blocks to elevate the work for full access.
- Use a level and sturdy table or workbench
- Protect the bench with clean kraft paper or a drop cloth
- Elevate the piece on soft blocks to avoid sticking
- Keep lint-free cloths and tack cloths handy
Tools and Materials Checklist for a One-Day Mahogany Refinish
Before you start, gather every tool and material you’ll need so the job stays on schedule and you don’t waste time hunting supplies mid-refinish.
Before you begin, assemble all tools and materials so the refinish stays on schedule and uninterrupted
You’ll need fine-grit sandpaper (220–320), sanding block, tack cloths, and a vacuum with brush attachment.
Grab wood cleaner/degreaser, staining cloths or foam brushes, stain chosen for mahogany, and a small brush for grain work.
Include wipe-on oil or polyurethane, a stir stick, disposable gloves, rags for cleanup, and a respirator rated for solvents.
Have painter’s tape, drop cloths, mixing cups, and a timer to manage drying and recoat intervals.
Removing Old Finishes and Glue Safely From Mahogany
First, you’ll identify the existing finish—shellac, lacquer, varnish, or polyurethane—because each strips differently and affects how you proceed.
Use the gentlest safe method that removes the finish without raising or scorching the mahogany grain.
For glue, soften with a compatible solvent or careful heat and scrape lightly to avoid gouging the wood.
Assess Finish Type
How can you tell what’s on your mahogany so you can remove it safely? Inspect finish sheen, scratch patterns, and smell to identify lacquer, shellac, varnish, or modern polyurethane. Test a hidden spot: denatured alcohol removes shellac; lacquer thinner attacks lacquer. Note build-up where glue was used—different from finish. Record observations before starting.
- Look for brush marks or sprayed, cloudy surface.
- Rub a cotton swab with alcohol in a corner.
- Try a small solvent patch with lacquer thinner elsewhere.
- Use a sharp probe to see if finish flakes or peels.
This assessment guides safe removal choices without guessing.
Safe Glue Removal
When you remove old finishes from mahogany, you’ll often find dried glue residue along joints and seams that needs careful attention so you don’t damage the wood; start by testing a hidden spot. Use a plastic scraper, warm water, and a mild solvent like denatured alcohol for hide glue. Work gently along the grain, avoid metal scrapers that gouge, and keep the surface damp to soften glue. After removal, neutralize solvents, let the wood dry fully, and lightly sand with fine grit before staining. Consult a professional for stubborn or animal-based glues.
| Tool | Solvent | Tip |
|---|---|---|
| Plastic scraper | Water | Along grain |
| Cloth | Alcohol | Test first |
| Sandpaper | Denatured | Fine grit |
When to Use Chemical Strippers on Mahogany
Although mahogany often takes stain well without heavy preparation, you’ll want to reach for a chemical stripper when the finish is old, multi-layered, or contains stubborn sealers like lacquer or shellac that sanding alone won’t remove evenly.
Use a stripper when you need to:
- Remove multiple varnish or lacquer layers that resist abrasives.
- Access intricate carvings where sanding damages detail.
- Eliminate shellac that bleeds or repels stain.
- Strip previously stained or painted surfaces for a uniform base.
Wear gloves, goggles, and work in ventilation. Test a small area, follow product directions, and neutralize residues before proceeding to finish.
How to Sand Mahogany for Even Stain Absorption
Before you stain, make sure the mahogany is clean, dry, and free of old finish or filler so the surface will take color evenly.
Start with a coarser grit and work through a fine progression, always sanding with the grain to avoid scratches that show under stain.
Finish with a tack cloth and a light test stain to confirm the absorption is uniform.
Preparing The Surface
Want the stain to look smooth and even? You’ll prep the surface to accept stain uniformly. Clean dust and oils, check for dents, and remove old finish. Work methodically and don’t rush.
- Remove hardware and mask surrounding areas to avoid stray grit.
- Wipe with mineral spirits, then let wood dry completely.
- Fill small gouges with matching grain filler; sand flush once cured.
- Lightly scuff glossy surfaces so stain wets evenly.
Finish by vacuuming and tack-clothing to eliminate particles. With a clean, stable surface, your stain will penetrate consistently and produce a professional, even result.
Sanding Progression And Grain
When you sand mahogany, work through progressive grits to open the pores evenly and avoid sanding burns that cause blotchy stain absorption. Start with 120–150 grit to remove mill marks, then move to 180, finishing at 220 for most projects. For very fine pieces, go to 320.
Always sand with the grain to prevent scratches that show under stain. Lightly feather edges and use a sanding block to keep pressure even. Vacuum and tack cloth between grits.
Test on scrap or an inconspicuous area to confirm uniform absorption before staining the final piece.
Why Grain Direction Matters When Sanding Mahogany
Because mahogany’s pores and fibers run visibly across its surface, sanding with the grain keeps scratches small and uniform so stain soaks evenly. You’ll notice sanding against the grain creates crosswise scratches that catch stain and produce blotches. Work light, follow long boards’ fiber direction, and use steady pressure to avoid gouges. Pay attention at edges and curved profiles where grain shifts.
- Sand along the visible grain to preserve smooth reflection
- Blend gradual shifts where grain changes direction slowly
- Remove sanding dust before staining for even penetration
- Check progress under angled light to spot stray cross-scratches
Which Sandpaper Grits to Use and When for Mahogany
Before you apply any stain, you’ll want to prepare the surface with progressively finer grits—start around 120 to remove machine marks, move to 180 to smooth, and finish with 220 for a clean base.
For the final sanding pass, use a light touch with 220–320 grit along the grain to close the pores and avoid burnishing. That final smoothness makes the stain absorb evenly and brings out mahogany’s natural luster.
Preparing The Surface
Although mahogany takes stain beautifully, getting a smooth, even finish depends on using the right sandpaper grits at each stage. You’ll start coarse to remove imperfections, progress through medium grits to refine the surface, and stop before the final sanding pass to avoid overworking the wood.
Always sand with the grain, keep pressure even, and clean dust between steps.
- 80–100 grit: remove dents, old finish, or deep scratches
- 120–150 grit: smooth rough areas and blend repairs
- 180 grit: refine the surface and open pores for stain
- 220 grit: prepare for conditioning and staining without burnishing
Final Sanding Pass
You’ve already worked through the coarser grits to remove defects and opened the pores with 180 grit. Now the final sanding pass is about refining the surface so stain lays down evenly.
Move to 220 grit for a smooth, receptive surface—light, even strokes with the grain. If the mahogany will get a very light wash or natural oil, stop at 220.
For ultra-satin or clear finishes, go to 320 grit but avoid overbuffing, which can clog pores and resist stain.
Always clean dust between grits, inspect under good light, and test a scrap piece to confirm absorption before staining.
How to Clean Mahogany Before Conditioning or Staining
Want the stain to soak in evenly and look its best? Clean mahogany thoroughly after sanding to remove dust, oils, and residues so your finish adheres and appears uniform. Work methodically: vacuum, tack, wipe, and dry.
- Vacuum with a soft-brush attachment to lift grit from pores.
- Wipe with a lint-free cloth dampened with mineral spirits to remove oils and sanding residue.
- Use a tack cloth for a final pass, avoiding waxed or gummy wipes.
- Let the wood fully dry and recheck under light for remaining dust or smudges before conditioning or staining.
Do You Need a Pre-Stain Conditioner for Mahogany?
Because mahogany absorbs stain fairly evenly compared with some open-grain woods, you don’t always need a pre-stain conditioner—but using one can help if you’re working with thin stains, blotchy grain, or a piece with mixed-density areas.
If you want more predictable color, especially with light or transparent stains, a conditioner reduces streaking and patchiness.
For small projects or when using gel or oil-based stains that penetrate uniformly, you can skip it.
Test a scrap or inconspicuous area first to judge absorption. If results look uneven, apply a conditioner per product instructions before staining for a smoother, more consistent finish.
How to Choose a Pre-Stain Conditioner for Mahogany
When choosing a pre-stain conditioner for mahogany, consider how well it penetrates open versus tight grain so you get even color.
Pick a solvent- or oil-based product based on your stain type and drying time preferences—solvent dries faster, oil gives longer working time.
Test the conditioner on a scrap to confirm compatibility before treating your piece.
Wood Grain Compatibility
Although mahogany accepts stain well, its open and tight grain patterns respond differently to pre-stain conditioners. So you’ll want to match the conditioner to the wood’s porosity and figure.
You’ll assess grain by sanding and inspecting end grain. Open pores need heavier filler or longer-acting conditioners, while tight-grained pieces benefit from lighter, quick-penetrating formulas.
Test on scrap or hidden areas and note absorption and color uniformity. Choose a conditioner that evens tone without sealing too much.
Consider these factors when selecting:
- pore openness (open vs. tight)
- figured areas (flame, ribbon, interlocked)
- prior finishes or residues
- test patch results
Solvent And Oil Base
If you’re aiming for deep, even penetration on mahogany, pick your pre-stain conditioner based on solvent and oil base—solvent-based formulas penetrate fast and evaporate quickly, while oil-based ones soak in slower and leave longer working time.
You’ll choose solvent-based when you want rapid, uniform absorption and quick recoating; they’re ideal for projects with tight schedules and for cutting through oily surfaces.
Pick oil-based when you need extended open time to adjust application, or when the wood’s natural oils demand a gentler approach.
Always test on scrap mahogany, follow manufacturer directions, and guarantee proper ventilation for solvent products.
When You Can Skip Conditioner and Rely on Sanding
Because mahogany’s tight, even grain often accepts stain uniformly, you can skip a pre-stain conditioner when the board’s well-sanded and defect-free.
Because mahogany’s tight, even grain takes stain uniformly, a well-sanded, defect-free board often needs no pre-stain conditioner.
Inspect the wood for tear-out, sapwood, or raised grain; if it’s consistent, sanding alone gives an even tone.
Sand to an appropriate grit progression, remove dust thoroughly, and test a scrap or hidden area to confirm absorption and color.
Rely on sanding when you want a natural, immediate finish without conditioner chemicals.
- Sand progressively to 180–220 grit
- Clean all dust with a tack cloth
- Test on scrap first
- Avoid sanding marks or burnishing
Choose Oil vs Water-Based Stain for Mahogany
You’ll notice oil-based stains sink into mahogany and highlight its rich grain while giving longer open time and easier blending.
Water-based stains dry faster and clean up with soap and water, but they can raise the grain and may need extra coats for depth.
Consider the look you want and how much working time and cleanup convenience matters to choose between them.
Oil-Based Stain Benefits
When working with mahogany, oil-based stains soak into the grain and bring out the wood’s rich, warm tones with minimal blotching, so they’re often the best choice for deep, even color. You’ll appreciate how they highlight natural figure, penetrate evenly, and resist early water spotting.
Application feels forgiving—wiping and reworking gives control. Drying is slower, letting pigments settle for depth. Clean-up requires mineral spirits, so plan accordingly.
- Enhances grain depth and natural warmth
- Penetrates for consistent, long-lasting color
- Longer working time for careful application
- Better initial moisture resistance
Water-Based Stain Tradeoffs
Although water-based stains dry faster and clean up with soap and water, they behave differently on mahogany than oil-based products and demand some adjustments to your prep and technique. You’ll notice lighter penetration, more pronounced grain, and faster open-coat setting; sand finer, condition with a pre-stain or sealer, and work quickly. Water-based colors stay truer and resist yellowing, but they can raise the grain and highlight sapwood contrast. Test on scrap, apply thin coats, and finish with a compatible topcoat. Choose based on look, durability, and workflow.
| Advantage | Tradeoff |
|---|---|
| Fast drying | Less penetration |
| Easy cleanup | Raises grain |
| True color | Highlights sapwood |
| Low odor | Requires quick work |
| Non-yellowing | Needs compatible finish |
How Dye Stains Differ From Pigmented Stains on Mahogany
Because mahogany’s rich grain and natural luster are what you want to highlight, choosing between dye and pigmented stains matters. You’ll pick dyes when you want translucency and deep, even color that follows the grain; they penetrate and enhance figure without masking it.
Pigmented stains sit more on the surface, offering opacity, UV resistance, and easier color correction. Consider these tradeoffs:
- Dye: sheer, brilliant color, fast penetration, accentuates grain.
- Pigmented: hides minor flaws, more forgiving, better lightfastness.
- Dye layering: mixes smoothly, tricky to control.
- Pigmented sanding: easier to touch up and adjust.
When to Use Gel Stain on Mahogany Surfaces
If you want a finish that behaves more like a surface coat than a penetrating dye, gel stain is worth considering for mahogany. You’ll choose gel when you need even color on previously finished, patched, or uneven grain areas, or when sanding back to bare wood isn’t practical. It’s ideal for vertical surfaces and furniture where runs are a concern, and when you want buildable color without blotching. Apply thin coats, wipe excess, and let each layer cure before light sanding or topcoating.
| Situation | When to use gel |
|---|---|
| Previously finished | Yes |
| Vertical pieces | Yes |
| Blotchy areas | Yes |
| Bare new stock | Sometimes |
How Stain Opacity Affects Mahogany Grain Visibility
When you choose a stain with high opacity, you’ll mask much of mahogany’s natural figure and create a more uniform color. You’ll hide ray fleck and subtle grain contrasts, which helps if the surface has blemishes or you want a consistent appearance.
Lower-opacity stains penetrate and reveal depth, showing patterns and chatoyance. Consider opacity when matching pieces or preserving character.
- High opacity: conceals grain, evens tone
- Low opacity: reveals texture, enhances depth
- Semi-opaque: balances concealment and grain
Test first: assess visibility and finish interaction.
Decide based on whether you want character or consistency.
How to Select Stain Color to Enhance Mahogany’s Tone
Although mahogany already carries rich reddish-brown tones, choosing a stain lets you enhance warmth, deepen contrast, or neutralize redness to match your design. Decide whether you want warmer amber, cooler brown, or a darker espresso look.
Consider the room’s light: natural light favors deeper tones, low light benefits from warmer hues.
Match stain undertone to existing finishes—gold, brass, or black hardware each pair differently.
Pick transparent or semi-transparent formulas to keep grain clarity, or slightly pigmented stains to even tone.
Balance your choice with surrounding woods and fabrics so mahogany complements rather than clashes.
How to Test Stain Color on Scrap or an Inconspicuous Spot
After you’ve narrowed your stain options, always test them on a scrap piece or an out-of-sight area of the mahogany so you know exactly how the wood will take the color. You’ll see grain response, absorption, and final tone before committing.
Prepare the sample like the project surface: sand, clean, and condition if you’ll on the main piece. Apply stains in separate labeled areas and let them dry fully.
Evaluate under the light you’ll normally use. Consider these quick checks:
- Contrast with surrounding pieces
- Depth after one coat
- Grain enhancement or blotchiness
- True color in room lighting
How to Mix and Thin Stain Properly for Mahogany
Because mahogany soaks and shows pigment differently than other woods, mix and thin stains to suit its natural oiliness and grain density so you’ll get an even, predictable finish.
Because mahogany absorbs pigment unevenly, adjust stain mixtures to its oiliness and grain for an even finish
Start with the manufacturer’s stain; stir thoroughly to reincorporate pigments. If the color’s too strong or blotchy, thin sparingly with the recommended solvent—usually mineral spirits for oil-based stains or water for water-based—adding small amounts and testing between mixes.
Keep ratios documented so you can reproduce results. Strain the final mixture through a fine mesh to remove lumps.
Work quickly; re-stir occasionally during application to maintain uniformity and color consistency.
Best Brushes, Rags, and Applicators for Staining Mahogany
When you pick the right tools—natural-bristle brushes for oil-based stains, lint-free cotton rags for wiping, and foam or microfiber applicators for smoothing—you’ll control how evenly mahogany accepts pigment and highlight its grain without leaving streaks or lint.
Choose a good-quality natural-bristle brush for edges and detail; use foam pads on flats to avoid brush marks. Keep several lint-free rags for wiping excess and blending. Use microfiber applicators for delicate pieces.
Clean and store tools properly to preserve performance. Replace foam or rags when saturated to prevent uneven absorption and contamination.
- Natural-bristle brush
- Foam pad
- Lint-free cotton rags
- Microfiber applicator
How Do You Apply Stain for Consistent Penetration and Color?
If you want even penetration and consistent color, work methodically across small, manageable sections so the stain has the same open time on every area.
Begin by testing grain direction; apply with the grain using a quality applicator for smooth, even film.
Test the grain first; apply with it using a quality applicator for a smooth, even film.
Work one plank or panel at a time, keeping edge-to-edge wet lines to avoid lap marks. Use light, overlapping passes and maintain a wet edge.
If excess pools, gently blot with a clean rag.
For pores or end grain, pre-condition or slow-absorbing techniques help.
Monitor surface uniformity and adjust speed or pressure for consistent absorption.
How Long Should You Leave Stain on Mahogany Before Wiping?
Although mahogany soaks up stain more evenly than open-grain hardwoods, you’ll still want to time your wipe-off to control depth of color. Let stain sit based on desired tone and product directions: lighter looks need quick wipes, deeper tones need longer dwell. Test on scrap or an inconspicuous area first.
Typical ranges:
- 2–5 minutes for subtle enhancement.
- 5–10 minutes for medium depth.
- 10–20 minutes for pronounced richness.
- Longer than 20 minutes only for very dark, even coats; monitor to avoid blotching.
Work in consistent sections and follow the stain manufacturer’s recommendations for best results.
How to Wipe Stain to Avoid Streaks and Buildup
Wipe along the grain to follow the wood’s natural lines and prevent visible streaks. Use a clean, lint-free cloth and remove any excess stain before it sets to avoid buildup in pores and corners.
Work steadily and check your progress under good light so you catch and fix streaks right away.
Wipe With The Grain
Because the wood’s grain directs how stain absorbs, always rub and wipe along those lines to prevent streaks and buildup. You’ll follow the grain from end to end, keeping pressure even and motions smooth so the color lays uniformly. Pay attention to tricky areas like joints and curves; they need the same directionality.
- Use a clean, lint-free cloth and fold it for control.
- Keep strokes long and continuous, not short or back-and-forth.
- Check orientation frequently under good light to spot streaks early.
- Rest your wrist, not the cloth, to maintain consistent pressure and flow.
Remove Excess Stain
When the stain has soaked in for the recommended time, blot away the surplus with a clean, lint-free cloth so the finish stays even and doesn’t pool in crevices. Work with the grain, using light, consistent strokes to lift excess without smearing. Turn or refold the cloth frequently to avoid redepositing stain.
For edges and details, use a folded cotton swab or foam brush to remove buildup. Inspect in good light and buff any streaks immediately.
If a section feels tacky, wait the full dry time before lightly sanding and reapplying; patience prevents blotches and uneven color.
How to Prevent and Fix Blotching on Mahogany
If you want even, consistent color on mahogany, you’ll need to prevent and correct blotching before you apply your topcoat. Start by testing on scrap to see absorption.
Seal open-grain or end-grain with a thin coat of sanding sealer or diluted shellac to equalize porosity.
When blotches appear after staining, lift stain with a damp cloth or denatured alcohol, sand lightly, then reapply a conditioner before restaining.
For severe unevenness, strip and recondition the surface.
- Test on scrap or hidden area first
- Use a pre-stain conditioner on porous zones
- Sand between attempts lightly
- Work quickly and evenly
How to Layer Multiple Stain Tones for Depth and Warmth
To build depth and warmth on mahogany, layer stains of different tones rather than relying on a single coat—start with a light, transparent base and add darker or warmer glazes where you want contrast.
Work on a clean, sanded surface. Apply the base thinly, wiping excess to keep grain visible.
Start with a clean, well-sanded surface and apply a thin, wiped-on base to keep the grain visible.
After drying, test glaze tones on scrap or hidden areas.
Use soft brushes or lint-free cloths to apply glazes sparingly, focusing on edges, panels, and figure.
Blend shifts quickly to avoid hard lines.
Let each layer cure fully before adding more.
Finish with a protective clear topcoat to seal and unify tone.
How to Darken Mahogany Without Hiding the Grain
Although you want a richer, darker finish, you don’t have to smother mahogany’s grain to get it—use transparent stains, thin glazes, and controlled build-up so the figuring stays visible while the overall tone deepens. You’ll work gradually, testing on scraps and wiping excess to preserve contrast. Emphasize depth, not opacity.
- Start with a clear conditioner or sanding sealer to guarantee even absorption.
- Apply a transparent oil or water-based stain in light coats, wiping promptly.
- Use thin tinted glaze layers to deepen color without filling pores.
- Finish with a translucent varnish, buffing between coats for clarity.
Safe Ways to Speed Stain Drying: Heat, Airflow, and Additives
To speed stain drying on mahogany, you can apply controlled heat, boost airflow, or use approved drying additives.
Use low, even heat sources and keep air moving with fans to prevent blotching or raising the grain.
If you choose additives, pick ones labeled for oil- or water-based stains and follow the manufacturer’s instructions.
Use Controlled Heat
When you need a faster turnaround without damaging the finish, controlled heat is a reliable tool for speeding stain drying on mahogany—used carefully, it helps solvents dissipate and the film set more quickly. You’ll want to apply low, even warmth and monitor the piece to avoid blotching, lifting, or tacky spots. Keep heat indirect and modest; extreme temperatures ruin pigments and binders.
- Use a thermostatic space heater set to 70–80°F (21–27°C)
- Keep heaters at least 3–4 feet away for even warmth
- Check surface tack every 15–30 minutes
- Stop heat if color shifts or grain raises
Improve Airflow And Additives
If you want stain to dry faster without risking heat damage, focus on improving airflow and using safe additives. Good ventilation moves solvents away from the surface and small, compatible accelerants can help the film set evenly.
Position fans to create gentle cross-ventilation, not direct blasting that can cause dust adhesion or uneven drying. Open windows and doors when humidity is low.
For additives, choose manufacturer-recommended drying agents or fast-dry stains formulated for mahogany; test on scrap first. Use minimal amounts—overuse alters color and penetration.
Monitor temperature and humidity; adjust airflow and additive use to achieve even, consistent drying.
How to Sand Between Coats for a Silky Finish
Although the finish looks good after the first coat, sanding between coats is the step that gives mahogany its silky, professional feel. You’ll wait until the previous coat is fully dry, then gently abrade the surface to remove dust nibs and raise adhesion. Use light, even pressure and follow the grain to avoid scratches. Clean thoroughly before the next coat.
- Use 320–400 grit sandpaper for topcoats.
- Consider a fine sanding sponge for edges and contours.
- Wipe with a tack cloth or lint-free rag.
- Inspect under bright light for imperfections before recoating.
This preps smooth, uniform layers without cutting the stain depth.
How to Choose a Sealer for Stained Mahogany
Why pick a specific sealer for stained mahogany? You want protection without hiding the rich grain or altering color. Choose a sealer that’s compatible with your stain, dries clear, and won’t amber excessively. Consider drying time, sheen, and ease of application.
| Consideration | Why it matters |
|---|---|
| Compatibility | Prevents lift-off or blotching |
| Clarity | Preserves mahogany’s depth |
| Drying time | Affects project schedule |
| UV resistance | Reduces color shift outdoors |
| Recoatability | Simplifies finish layers |
Test a swatch first. Apply thin, even coats and sand between if needed for a smooth, lasting result.
Pick Oil, Varnish, Lacquer, or Polyurethane for Mahogany
Now you’ll compare oils, varnishes, lacquers, and polyurethane so you can pick the right finish for mahogany. Consider how each finish affects color, sheen, and feel as well as the level of protection they offer.
Also weigh durability and upkeep—some finishes need regular rubbing or recoating, while others resist wear with minimal maintenance.
Finish Type Comparison
When choosing a finish for mahogany, consider how much color depth, sheen, and surface protection you want, because oils, varnishes, lacquers, and polyurethanes each change the wood’s look and durability in different ways. You’ll pick based on appearance, application ease, and drying time.
Oils enhance grain and warm color; varnishes build a durable film with ambering; lacquers dry fast and offer high sheen options; polyurethanes give tough clear coats. Match finish to use and desired visual effect.
- Oil: natural depth, easy touch-up
- Varnish: warm, protective film
- Lacquer: fast, high gloss
- Polyurethane: clear, resilient coating
Durability And Maintenance
Although each finish alters mahogany’s look, you should choose primarily by how much wear resistance and upkeep you’re willing to do.
If you want low maintenance and maximum protection, go with polyurethane—water- or oil-based forms resist scratches, moisture, and yellowing differently, so pick based on color stability.
Varnish gives a durable, UV-resistant coating for outdoor pieces but takes longer to cure.
Lacquer dries fast and builds a smooth, repairable film but scratches easier.
Oils like tung or boiled linseed penetrate, deepen grain, and are easy to refresh, though they offer less surface protection and need periodic reapplication.
How to Apply Oil Finishes to Enrich Mahogany Color
Since oil finishes penetrate the grain and deepen mahogany’s natural warmth, you’ll want to prepare the surface and choose the right oil before you start—both affect color, sheen, and durability. Sand smooth to 220 grit, remove dust, and test oil on an inconspicuous area.
Apply thin coats, wipe off excess, and let each cure per manufacturer directions. Reapply until you reach depth and feel you like.
- Use tung or boiled linseed for warm, rich tone.
- Consider Danish oil for easier application.
- Wipe with lint-free cloths.
- Allow full cure before light use or polishing.
How to Spray or Brush a Clear Coat Without Runs
If you want a smooth, clear finish without runs, control how much finish you lay down and how quickly you move—too much at once is the usual culprit. Work in thin, even passes; start and stop off the edge to avoid buildup.
For spraying, keep the nozzle 8–12 inches away, overlap passes by 50%, and maintain a steady, brisk motion.
For brushing, load the brush lightly, apply with the grain, and level quickly with long strokes.
Watch humidity and temperature—too cold or humid slows drying and encourages sagging.
Sand lightly between coats with fine grit and remove dust before the next pass.
How Many Topcoat Coats You Need for Durability
When you want a finish that stands up to wear, think in terms of layers: each topcoat adds protection, smoothness, and UV resistance, so plan for enough build to match the piece’s purpose.
For mahogany, you’ll usually apply multiple thin coats rather than one thick one. Lightly sand between coats for adhesion and remove dust.
Consider usage, exposure, and desired sheen when choosing number of coats.
Factor in how the piece will be used, its exposure, and the sheen you want when deciding coat count.
- Low-traffic decorative pieces: 1–2 coats
- Dining tables and daily-use furniture: 3–4 coats
- Floors or heavy-use surfaces: 5+ coats
- Exterior or sun-exposed items: add UV-resistant coats
How to Fix Common Staining Mistakes on Mahogany
If you spot uneven color patches on your mahogany, don’t worry—you can usually even them out with light sanding and a touch-up coat.
For tackiness, wait for full cure, then thin coats or a soft pad rub with mineral spirits can help smooth the finish.
Blotches often come from uneven absorption, so strip or sand the affected area and reapply a conditioner before restaining.
Uneven Color Patches
Notice how blotchy or streaky patches can ruin an otherwise beautiful mahogany finish? You can correct uneven color by evaluating causes and acting deliberately. Lightly sand problem areas with fine grit, wipe dust, and test an area. If grain soaks unevenly, apply a wood conditioner before re-staining.
For small defects, use tinted wipe-on stain to blend edges; for larger zones, feather stain from center outward to avoid hard lines. Seal when uniform.
- Sand gently with 220 grit
- Use pre-stain conditioner on soft areas
- Blend with wipe-on stain
- Finish only after color matches
Tackiness And Blotches
Because solvents, excess stain, or slow-drying finishes can leave tacky spots and blotches, you’ll want to diagnose the cause before you try fixes. First, feel the surface—tackiness suggests incomplete cure or solvent entrapment; blotches mean uneven absorption or contamination.
Remove tackiness by wiping with a lint-free cloth dampened with mineral spirits, then let the piece dry fully in warm, ventilated conditions.
For blotches, sand lightly with fine-grit paper, clean with tack cloth, and reapply a thin, even coat of stain or sealer; use a pre-stain conditioner on end grain.
Test on scrap before finishing the whole project.
How to Remove Excess Stain or Blotches After Drying
When blotches or puddles show up after the stain dries, you’ll need to correct them before sealing—doing so promptly gives you the best chance of an even finish.
Lightly sand the affected area with fine-grit paper, working with the grain until the excess fades. Wipe dust with a tack cloth, then test a small spot with a damp cloth to confirm evenness.
If stain remains uneven, use a clean rag dampened with mineral spirits to lift surplus, then let dry fully.
- Sand gently, follow grain
- Remove dust thoroughly
- Use mineral spirits sparingly
- Recheck before sealing
How to Repair Small Scratches and Finish Damage Later
Start by evaluating how deep the scratch is so you know whether it needs a light touch-up or some filler and sanding.
For shallow marks you can blend color with a matching stain pen or diluted dye, while deeper gouges may need wood filler and careful sanding.
Finish by feathering the repaired area into the surrounding finish and applying thin coats so the repair is seamless.
Assess Scratch Depth
If you want a clean, lasting repair, first determine how deep the scratch goes into the mahogany—surface, through the finish, or into the wood itself. Inspect under good light, run your fingernail across it, and note color change or bare wood. Use a magnifier for fine checks.
- Surface: barely visible, only affects finish.
- Finish-through: finish removed, wood intact.
- Into-wood: fibers gouged or missing.
- Hidden damage: check edges, joints, and inside corners.
Record depth and location before choosing repair materials. Accurate assessment saves time and prevents overworking or under-repairing the piece.
Blend Finish Seamlessly
Wondering how to make that scratch disappear into the surrounding mahogany? You’ll clean the area, then gently sand the scratch with fine-grit paper to feather edges.
Test a matching stain on an inconspicuous spot, adjust color with diluted pigment if needed, and apply thin coats until the shade blends. Let each coat dry fully, then lightly burnish with ultra-fine steel wool for smoothness.
If finish is damaged, touch with a compatible clear coat, blending overlap outward. Finally, polish the repair with paste wax or rubbing compound so the repaired area reads as one continuous surface.
How to Maintain Stained Mahogany Day-to-Day
Because daily care prevents small issues from becoming big repairs, maintaining stained mahogany is mostly about consistent, simple habits you can do in minutes. Wipe dust with a soft, dry cloth to avoid buildup. Keep sunlight and humidity in check to prevent fading and warping. Use coasters and pads to protect the surface from heat and liquids. Inspect finishes regularly and touch up tiny nicks promptly.
- Dust weekly with a microfiber cloth.
- Use felt pads under objects.
- Avoid harsh cleaners and spray directly on wood.
- Rotate decorative items to limit localized sun exposure.
These steps keep finish and color lasting.
How to Clean and Restore a Finished Mahogany Piece
When you need to refresh a finished mahogany piece, start with gentle surface cleaning using a soft cloth and a mild wood cleaner to remove dust and grime.
For minor scratches, you can rub in a matching wood marker or use a fine abrasive pad with a blending polish to minimize their appearance.
Finish by applying a quality furniture polish or thin layer of wax to rejuvenate the sheen and protect the surface.
Gentle Surface Cleaning
Before you refinish or restain, give the finished mahogany a gentle clean to remove dust, oils, and light grime that dull its luster. You’ll protect the finish and reveal true color by working carefully and minimally.
- Dust with a soft microfiber cloth, following the grain to avoid tiny scratches.
- Mix mild dish soap with warm water (a few drops per quart) for sticky spots; wring the cloth well.
- Rinse with a separate damp cloth, then dry immediately to prevent water marks.
- Finish with a gentle, non-silicone furniture polish applied sparingly to restore sheen.
Removing Minor Scratches
How deep is the scratch? If it’s superficial, rub a soft cloth with a small amount of furniture polish or lemon oil along the grain; that’ll reduce its appearance.
For slightly deeper hairline scratches, gently buff with fine steel wool (#0000) soaked in mineral oil, following the grain until smooth. Clean residue, then apply a matching wax stick or color-matched touch-up marker, blending edges with a soft cloth.
For tiny gouges, fill with colored wood filler, let dry, sand lightly, and finish with touch-up stain.
Always test treatments in an inconspicuous spot first to guarantee color match.
Rejuvenating Finish Sheen
Although age and everyday use dull mahogany’s rich luster, you can bring back a deep, even sheen with careful cleaning and gentle restoration.
Start by dusting and testing cleaners in an inconspicuous spot. Use products designed for finished wood; harsh solvents strip the finish.
Work in small sections, following grain direction.
After cleaning, apply a light restorative polish or paste wax to even sheen and protect. Buff gently with a soft cloth until you see uniform glow.
- Dust thoroughly first
- Use mild wood cleaner or mineral spirits test
- Apply polish/wax sparingly
- Buff with soft cloth until even
How Humidity and Temperature Affect Stain Results
When you stain mahogany, humidity and temperature directly change how the wood absorbs and dries the finish, so controlling them gives you more predictable color and an even coat. You’ll want moderate conditions: high humidity slows drying and raises blotch risk; low humidity can flash-dry and leave streaks. Warm temps speed absorption but can deepen color; cold temps slow cures and trap solvent. Monitor readings and adjust stain or drying time. Use acclimation and proper ventilation to stabilize conditions and avoid surprises.
| Condition | Effect |
|---|---|
| High humidity | Slow drying, blotching |
| Low humidity | Flash-dry, streaks |
| Warm | Faster absorption, darker |
| Cold | Slow cure, pale |
How to Adapt Your Process for Indoor vs Outdoor Mahogany
Because indoor and outdoor mahogany face different moisture, UV, and wear conditions, you’ll need to change prep, stain choice, and finishing steps to get the right protection and appearance.
Indoor and outdoor mahogany require different prep, stains, and finishes to withstand moisture, UV, and wear.
For indoor pieces, focus on grain enhancement and smooth finishes; outside, prioritize UV blockers and moisture seals. Adjust sanding, stain type, and sealer accordingly.
- Indoor: use oil-based stain for depth, lighter topcoat for sheen control.
- Outdoor: choose UV-resistant, marine-grade stain or spar varnish.
- Prep: thoroughly sand indoors; for outdoors, clean, dry, and use wood brightener.
- Finish: indoor polyurethane; outdoor spar urethane with periodic recoat.
How to Approach Mahogany Veneers vs Solid Mahogany
If you’re working with mahogany veneer rather than solid mahogany, you need to treat it more gently and think about finish penetration and edge treatment differently.
With veneer, avoid heavy sanding that can burn through the thin face; use fine grit and light touch. Test stains and sealers on scrap or hidden edges to confirm absorption and color.
Use gel stains or wipe-on products to reduce risk of bleed-through and lap marks. Protect veneer edges with solid wood trim or edge banding before finishing.
For solid mahogany, you can sand more aggressively and expect deeper stain penetration.
How to Refinish Antique Mahogany Without Losing Patina
Although the goal is to refresh the piece, you’ll want to preserve the original patina that gives antique mahogany its character, so approach cleaning and refinishing with restraint and careful testing.
Start by testing cleaning and finish removal in an inconspicuous spot.
Use mild cleaners, avoid aggressive stripping, and work slowly to retain aged coloration.
When repairing, match grain and tone; use reversible conservation glues for structural fixes.
Lightly blend scratches with fine steel wool and compatible finish.
Finish with thin coats of shellac or wax to enhance depth without obscuring patina.
- Test first
- Clean gently
- Repair minimally
- Finish subtly
How to Reproduce a Factory or Vintage Stain Look on Mahogany
When you want a consistent factory or vintage mahogany look, start by identifying the original tones and sheen so you can match grain, color, and finish behavior rather than guessing. Examine under good light, note red, brown, or amber undertones, and test small inconspicuous areas.
Strip to bare wood if needed, or gently scuff for adhesion. Use water- or oil-based dyes to recreate depth; apply dye, then wipe to control intensity. Layer with a translucent toner or glaze to refine hue.
Match sheen with the final topcoat—satin, semi-gloss, or gloss—and sand between coats for a uniform, factory-like finish.
How Much Time and Money Does Staining Mahogany Take?
Now that you’ve matched tones and sheen, let’s look at the time and cost involved so you can plan the project. Staining mahogany varies: small pieces take a few hours, larger furniture needs a day or two with drying between coats.
Budget depends on stain quality, sandpaper, and finish; expect modest costs for a DIY touch-up, higher for premium products.
- Prep and sanding: 30–90 minutes for small items
- Stain application: 15–30 minutes per coat
- Drying time: 2–24 hours between coats
- Finish coats and cure: 1–3 days overall
Plan accordingly for drying and contingencies.
Tools and Materials Checklist and Timeline for One-Day Jobs
If you’re aiming to finish a small mahogany piece in a day, gather the right tools and materials up front so you won’t waste time mid-project. You’ll need 220–320 and 400-grit sandpaper, tack cloths, wood conditioner (if using), stain, stain applicators (foam or lint-free cloths), brushes for edges, wood gloves, respirator, drop cloth, stirring stick, and a small can opener.
Timeline: 0–30 minutes—setup and initial sanding; 30–60—clean and condition (if used); 60–90—apply first stain coat; 90–150—wipe and dry; 150–210—apply finish coat and allow initial cure before handling.
Troubleshooting Quick Reference: Causes and Fixes for Staining Issues
Even with careful prep and the right materials, staining mahogany can throw a few common problems your way; knowing likely causes and quick fixes saves time and frustration. You’ll troubleshoot blotchy color, tacky finish, uneven absorption, and grain-raising quickly if you recognize signs and act.
- Blotchy or streaky stain: sand gently, apply wood conditioner, re-stain thin coats.
- Tacky or slow-drying finish: ensure proper temperature/humidity, thin the finish, increase ventilation.
- Uneven absorption: clean surface, feather edges, use gel stain for consistency.
- Raised grain or rough feel: sand with fine grit, wipe with damp cloth, reapply finish.
Pro Tips to Get a Professional Mahogany Stain Every Time
When you want a consistent, showroom-quality mahogany stain, adopt a few pro habits—test on scrap, control the environment, and work in thin, even coats—so every step builds predictably toward the result.
Sand progressively to 220–320 grit, remove dust with tack cloth, and condition open-grain areas to prevent blotching.
Apply stain with a lint-free cloth or high-quality brush, follow the wood’s grain, and wipe excess promptly for uniform absorption.
Let coats dry fully, lightly scuff between layers, and finish with compatible topcoats.
Maintain consistent temperature and humidity, and label mixes so you can replicate the exact hue.
Frequently Asked Questions
Can I Stain Mahogany Over Paint or Varnish Without Stripping First?
No, you shouldn’t; you’ll need to remove paint or sand/strip varnish to guarantee stain penetrates evenly. If you skip that, stain won’t soak in, adhesion fails, and finish will look blotchy or peel prematurely.
Will Staining Mahogany Darken Sapwood Differently Than Heartwood?
Yes — you’ll see sapwood darken differently than heartwood because sapwood absorbs stain more readily and has lighter natural color; test stains, consider preconditioning or a toner to even appearance, and adjust coats for uniformity.
How Do I Match Stain on Mahogany After Wood Repairs or Patching?
You’ll test stains on scrap, tint fillers to match, and feather edges into surrounding finish. Sand, use dyes before stain, apply thin layers, and adjust with glaze or toner until repaired area blends with the original grain and color.
Are There Health Risks Specific to Mahogany Dust or Stain Fumes?
Yes — mahogany dust can irritate lungs and cause allergic reactions; stain fumes can cause headaches, dizziness, or long-term effects with chronic exposure. You should wear a respirator, ventilate well, and use gloves and eye protection.
Can I Use Stain on Mahogany That’s Been Bleached or Color-Corrected?
Yes — you can stain bleached or color-corrected mahogany, but you’ll need to test first. Sand smoothly, use a conditioner or wash if needed, then apply stain evenly; expect lighter, less predictable results.
Conclusion
You’ve got the essentials to stain mahogany like a pro. Take time to inspect and prep, pick the right products, and work in good light and ventilation. Follow the one-day checklist and timeline, watch for blotching or grain rise, and use the troubleshooting tips if problems pop up. With patience and these pro tips, your mahogany will develop a rich, even finish that highlights its natural beauty and lasts for years.