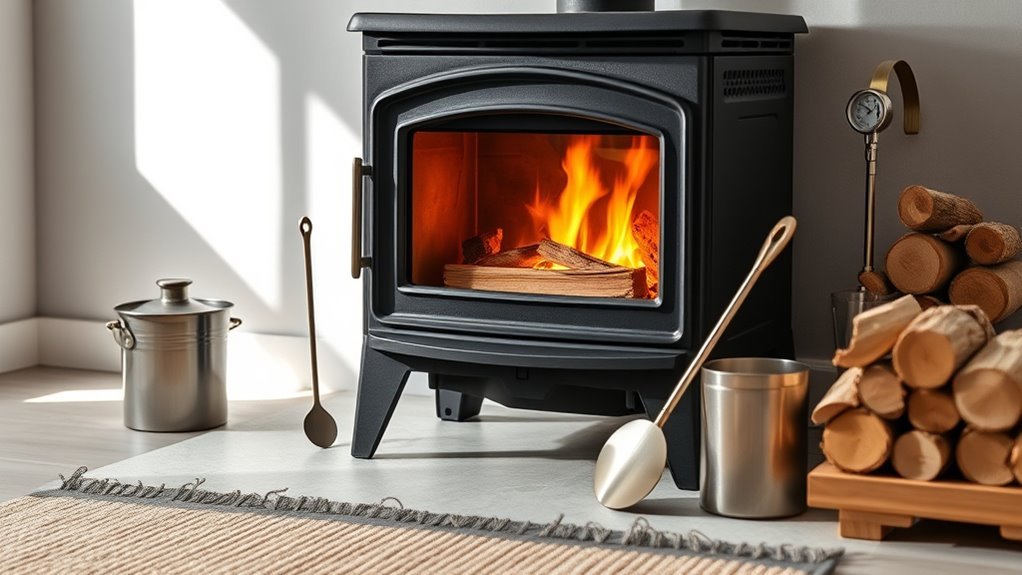
How to Use Wood Burning Stove
You’ll get safe, efficient heat by using well-seasoned hardwood, preparing the stove and flue, and controlling airflow for a hot, clean burn. Open the flue, clear ash, and lay a tinder nest with kindling in a teepee before lighting; add small logs once flames are steady. Close the door but leave a small air intake, adjust dampers gradually, and monitor for creosote or smoke. Keep tools, gloves, a thermometer, and a plan for routine inspection if you want more guidance.
Quick Steps to Safely Light and Maintain a Wood Stove
Before you light your wood stove, make sure the flue is open and the stove is clean of ash so air can flow freely; this prevents smoke backdrafts and improves combustion.
Open the flue and clear ash first so air flows freely, preventing backdrafts and ensuring clean combustion.
Start with small kindling arranged for good airflow, then add a couple of small logs once the kindling’s burning strong.
Use dry, seasoned wood to reduce creosote.
Adjust the air intake to maintain a steady, visible flame—don’t smother it.
Check seals and handles for leaks or looseness.
Empty ashes regularly into a metal container with a lid.
Monitor the stove while it’s burning and never leave it unattended.
What a Wood Stove Does: And What to Expect
When you light and tend a wood stove properly, it becomes a reliable heat source that warms a room quickly, radiates steady heat for hours, and can cut heating bills when used efficiently. You’ll notice a cozy glow, dry warmth that’s gentler than blasts from a furnace, and a comforting routine of stoking and checking fuel.
Expect variable warmth depending on wood quality and air settings, and occasional ash removal. With good habits, you’ll feel safe, economical, and connected to your home’s rhythms.
- Warmth that hugs you on cold nights
- The calm of a crackling fire
- Pride in self-reliance
- Savings you can measure
- A simple, steady ritual
Choose the Right Stove for Your Home and Needs
Because a stove shapes how you heat, look for one sized and rated for your space and lifestyle. Measure room volume and check stove BTU or kW output so it matches, avoiding oversized units that short-cycle or undersized ones that struggle.
Consider installation limits: chimney type, clearances, and floor protection.
Choose between freestanding, insert, or pellet-assisted models based on aesthetics and efficiency.
Think about controls, air-wash systems, and secondary combustion for cleaner burns.
Factor in fuel access and storage, maintenance needs, and budget.
Have a qualified installer confirm compatibility and local code compliance before purchase and placement.
Best Wood for Wood Stoves: Heat and Clean Burn

If you want the most heat and the cleanest burn, pick dense, well-seasoned hardwoods like oak, maple, beech, or birch—these give higher heat output, longer burn times, and less creosote buildup than softwoods or green wood.
You’ll notice steadier warmth and fewer smoky smells when you load quality logs, and your stove will need less frequent cleaning. Avoid resinous softwoods for main fuel; use them sparingly for quick kindling.
Prioritize wood that’s dry and free of rot or paint. Choosing the right wood saves time, protects your chimney, and makes evenings cozier.
- Comfort
- Pride
- Safety
- Warmth
- Ease
How to Season and Store Firewood Correctly
To get the most heat and the cleanest burn, you’ll need to season your wood properly by splitting it, stacking it off the ground, and letting it dry for 6–12 months.
Store your firewood in a well-ventilated, covered spot with the cut ends facing out to keep rain off and airflow moving.
Use a moisture meter or the knock-and-listen method to check that logs are around 15–20% moisture before burning.
Seasoning Wood Properly
Want your stove to burn hot, clean, and reliably? You’ll season wood by cutting to size, splitting, and stacking for airflow. Keep rounds off the ground and face cut ends outward so moisture escapes. Check moisture with a meter—under 20% is ideal—then let wood cure for 6–12 months depending on species. Rotate stock so older wood gets used first. Don’t burn green or overly wet logs; they smoke, foul your stove, and waste heat.
- Imagine brighter flames
- Feel the cozy warmth
- Hear less creaking and pop
- Smell cleaner air
- Enjoy safer evenings
Optimal Firewood Storage
Now that your wood’s been cut, split, and checked for moisture, you need a storage plan that keeps it dry, ventilated, and ready to burn.
Stack wood off the ground on pallets or rails to avoid rot and pests. Face cut ends outward for faster drying and allow air to circulate through tight, organized rows.
Cover the top with a tarp or a slanted roof, leaving sides open to prevent trapped moisture.
Store seasoned wood at least a few feet from your house to reduce insect and fire risk.
Rotate stock: use older wood first and replenish exposed stacks regularly.
Moisture Testing Methods
Because damp wood won’t burn well, you’ll want to confirm your firewood’s moisture content before stacking or using it. Use a moisture meter for quick, accurate readings—aim for 15–20%. If you don’t have one, split a log and check for dark, damp-looking heartwood or use the “sound” test: dry wood rings, wet thuds.
Oven-dry tests and thumb-pressure checks work but take effort. Rotate and retest stored wood after rain or seasonal changes. Keep a simple log of test dates so you trust your stock.
- Relief when logs ignite instantly
- Pride in a clean, efficient fire
- Comfort from cozy warmth
- Confidence in safe burning
- Satisfaction of well-seasoned wood
Prep Checklist: Stove Setup, Clearances, and Venting
Before you light your first fire, make sure the stove’s placement, clearances, and venting meet safety and manufacturer requirements so you won’t have to backtrack later.
Before your first fire, confirm stove placement, clearances, and venting meet safety and manufacturer requirements.
Check floor protection and use approved hearth materials; the stove must sit level and secure.
Measure side, rear, and top clearances to combustible walls and follow listed distances or installed shields.
Verify chimney height, cap, and draft requirements; the flue should be straight where possible and free of obstructions.
Use proper stove pipe, seal joints with high-temperature sealant, and install carbon monoxide and smoke detectors.
Schedule an inspector or certified installer if unsure.
Step-by-Step: Start a Clean, Hot Wood Stove Fire
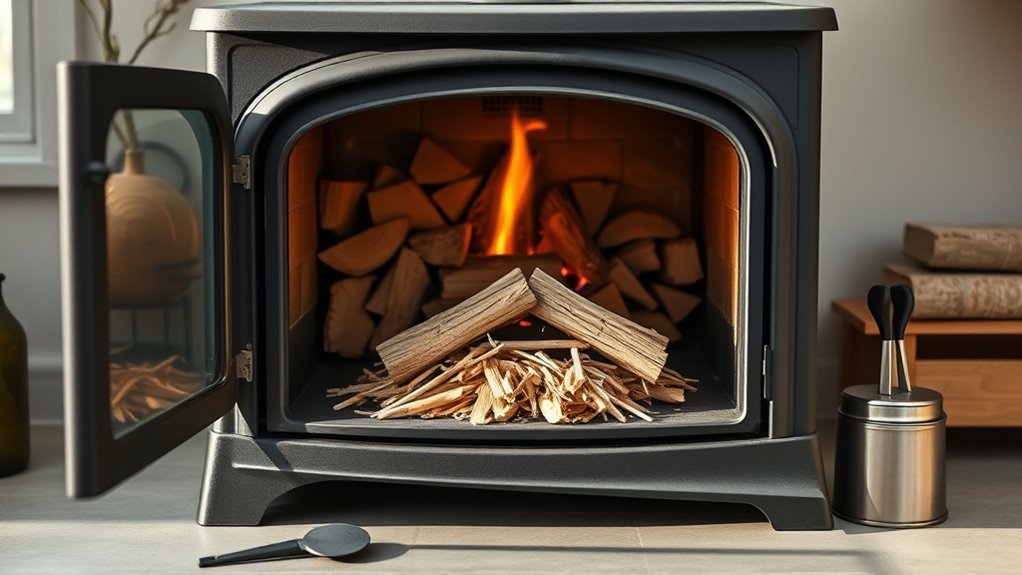
With the stove set, vented, and detectors in place, you’re ready to build a clean, hot fire that heats efficiently and keeps emissions low. Gather seasoned hardwood, kindling, tinder, a lighter or matches, and gloves.
Lay a small tinder nest, add kindling in a teepee, light gently, then place two small logs once flames steady. Close the door but leave the air slightly open to encourage a strong clean burn.
Monitor through the glass, add fuel before flames die, and avoid overloading.
Enjoy steady warmth and the comfort of a responsibly tended fire.
- Cozy satisfaction
- Calm focus
- Warmth shared
- Confident control
- Quiet pride
Control Airflow: Dampers, Vents, and Draft Basics
To get consistent heat and clean burns, you’ll need to learn how the primary air control and secondary air intake work. Adjust the dampers and vents to increase or restrict draft depending on whether you’re starting, sustaining, or banking the fire.
You’ll quickly see how small tweaks to airflow change burn rate and efficiency.
Primary Air Control
How do you get the fire to behave the way you want? You control oxygen through the primary air: the main damper or vent that feeds combustion. Open it for lively flames and quick warmth; close it to slow the burn and save fuel.
Watch flames, listen to the stove, and adjust in small steps. Seal gaps and keep vents clear so settings respond predictably. Practice until you trust the stove’s temperament.
- Pride when you master steady heat
- Comfort from a gentle, controlled glow
- Relief knowing fuel lasts longer
- Confidence in safe operation
- Calm watching purposeful flames
Secondary Air Intake
Why does secondary air matter? You’ll use secondary air to burn smoke and gases above the fire, improving efficiency and reducing creosote.
Open the secondary vent once the fire is established; it feeds oxygen to the upper combustion zone, sustaining hotter, cleaner flames without overfeeding the base. Adjust gradually—small changes affect combustion noticeably.
Watch flame color and fuel consumption: bright, stable flames mean good secondary burn; smoky, lazy flames mean you need more.
Keep air passages clean and unobstructed for consistent flow. Use manufacturer guidance for vent positions, and inspect seals so secondary intake works reliably and safely.
Draft Adjustment Techniques
Because airflow controls how cleanly and efficiently your stove burns, learning to adjust dampers and vents is one of the most important skills you’ll develop. You’ll watch how small moves change flame behavior: open intake for bright, fast fires; close slightly for long, steady heat.
Check chimney draft—strong draft prevents smoke, weak draft chokes combustion. Make adjustments gradually, giving the stove a few minutes to respond. Use a stove thermometer and listen for sputters or roaring; both tell you when to tweak settings.
Safety first: never force a closed flue if smoke backs up.
- Relief when smoke clears
- Pride in efficient fires
- Calm from steady warmth
- Confidence tuning draft
- Satisfaction saving fuel
Diagnose Weak Drafts, Backdrafts, and Smoke Issues
If your stove’s draft feels weak or you’re getting smoke into the room, start by checking air supply, chimney condition, and flue settings—these three factors account for most problems and are quick to inspect. You’ll verify vents aren’t blocked, confirm chimney cap and liner are intact, and assure flue is opening fully. Test draft on a cold morning, then relight with small kindling to observe airflow. Address downdrafts by adding a barometric damper or adjusting house ventilation. If problems persist, consult a chimney professional to avoid hazards.
| Check | Action |
|---|---|
| Air supply | Clear vents |
| Chimney | Inspect cap |
| Flue | Open fully |
| Persistent | Call pro |
Build and Maintain a Long-Lasting Overnight Fire
When you want a steady, low-maintenance fire that lasts overnight, stack dense, well-seasoned hardwoods, create a deep bed of hot coals, and set the air control just low enough to slow combustion without smothering the flame.
You’ll arrange larger logs toward the back, keep small kindling confined, and let the embers do most of the work.
Check seals and flue before bed, leave a small vent for oxygen, and monitor first few nights to learn burn rate.
Trust the stove’s heat to outlast your evening routine and wake to warm, glowing coals.
- Comfort that steadies you
- Quiet warmth all night
- Confidence in your preparation
- Pride in an efficient burn
- Calm waking to glowing coals
Adding Logs Safely to a Hot Wood Stove
When you add logs to a hot stove, use heat-resistant gloves and a poker or tongs to keep your hands safe.
Open the stove door slowly to avoid a rush of sparks or smoke, and stand to the side as you feed the wood in.
Place logs gently to maintain the fire’s stability and close the door securely.
Use Protective Tools
Although the stove’s door glows hot, you can add logs safely by using the right protective tools and techniques. Wear heat-resistant gloves, use long tongs or a poker, and keep a sturdy log holder nearby so you don’t fumble.
Pick dry, sized logs to minimize sparks and steady placement. Keep a fireproof mat underfoot and a small, covered bucket for ash at hand.
Move deliberately, avoid sudden reaches, and let embers settle before adjusting fuel.
- Relief as you work confidently
- Pride in doing it right
- Calm from controlled motion
- Safety that reassures loved ones
- Comfort in steady warmth
Proper Door Technique
How do you open and close the stove door without letting heat or sparks escape? You’ll keep the fire contained by cracking the door slowly to equalize pressure, then pausing before opening fully.
Use heat-resistant gloves and a poker or log lifter; never reach in. Hold the door slightly ajar while you slide a dry, seasoned log in toward the rear, avoiding crowding.
Close the door gently until it latches; don’t slam. Watch for sparks or excessive smoke, and adjust air controls after closing to stabilize the burn.
Practice this routine calmly to stay safe and efficient.
Maximize Heat Output & Room Distribution
If you want the most heat from your wood stove, stack and burn seasoned hardwoods, control airflow, and place the stove where it can share warmth with the main living area. You’ll arrange logs for steady combustion, use the damper to tune burn rate, and add a stove fan or ceiling fan to circulate warmth.
Keep pathways clear so heat spreads, and open interior doors slightly to balance room temperatures. Watch fireplace tools and gloves for safe handling. Small adjustments make a big difference in comfort and efficiency.
- Cozy evenings that wrap you in warmth
- Pride in a job done well
- Peaceful, glowing ambiance
- Confidence in efficient heating
- Satisfaction from shared comfort
Reduce Creosote: Signs, Prevention, and Cleaning
Along with maximizing heat, you should pay attention to creosote buildup in your stove and chimney because it can reduce efficiency and create a serious fire hazard.
Watch for black, flaky deposits, a tarry smell, or smoky odors when doors are closed.
Prevent buildup by burning well-seasoned hardwood, maintaining hot, efficient fires, avoiding smoldering, and using properly sized kindling.
Use a stove thermometer to keep ideal temperatures.
For light deposits, sweep accessible areas with a wire brush or approved creosote remover.
For stubborn or heavy tar layers, hire a professional cleaner.
Dispose of ash safely and check seals to limit smoke leakage.
Inspect and Maintain Your Chimney & Flue
Because your chimney and flue channel combustion gases and creosote out of your home, you should inspect them regularly to catch problems early and keep your stove running safely and efficiently. Check for cracks, loose mortar, blockages, animal nests, and rust.
Regularly inspect your chimney and flue for cracks, blockages, rust, and animal nests to keep your stove safe and efficient.
Look up the flue with a flashlight and down from the attic if safe; use a mirror or camera for tight spots. Schedule professional sweeping annually or more with heavy use. Repair damaged liners and caps promptly to prevent leaks and fires.
Keep documentation of inspections and repairs to track changes and protect your home.
- Fear of unseen danger
- Relief after a clean sweep
- Pride in a safe hearth
- Confidence in prompt repairs
- Comfort knowing you’re protected
Ashsafety: Remove, Store, and Dispose of Ashes
Before you scoop ashes, make sure they’re completely cold—stir and let them sit 24–48 hours to be safe.
Use a metal shovel and store ashes in a sealed metal container with a lid on a noncombustible surface away from the house.
When the container’s full, dispose of ashes according to local rules—many areas allow burying or mixing with garden soil, but check regulations first.
Cold Ash Handling
How do you handle ash safely? You wait until ashes are cold for at least 48 hours, stir occasionally to check for hidden embers, then scoop with a metal shovel into a sturdy, noncombustible container with a tight lid. Don’t use plastic or cardboard.
Transport the container outside on a nonflammable surface, away from structures and combustibles, and keep children and pets clear. Check local regulations for disposal or recycling options.
You’ll feel calmer knowing you reduced risk and protected your home.
- Relief at a task completed responsibly
- Confidence in preventing fire
- Pride in careful stewardship
- Comfort for family safety
- Calm from orderly routine
Safe Ash Storage
What should you do with the cold ashes once you’ve removed them? Place them in a sturdy, metal ash container with a tight-fitting lid; don’t use plastic or cardboard.
Keep the container on a noncombustible surface and away from walls, fabrics, and combustibles.
Store ashes outdoors or in a ventilated area to prevent moisture buildup and odor.
Mark the container clearly and check ashes for hidden embers before moving.
Never leave the container where children or pets can access it.
Inspect the container periodically for rust or damage, and replace it if integrity is compromised to maintain safe storage.
Proper Ash Disposal
Wondering how to finish the job safely? You’ll remove ashes only when cool, scoop them into a metal container with a tight lid, and store that container outdoors on a noncombustible surface. Don’t use plastic or cardboard. Label the container and keep it away from structures, dry leaves, and children’s reach.
Before disposal, double-check for hidden embers; sprinkle water if unsure. Dispose according to local regulations—some areas allow curbside, others require transfer stations.
- Relief that danger’s reduced
- Confidence in your routine
- Calm knowing rules protect others
- Pride in responsible care
- Peace from prepared action
Routine Stove Cleaning: Glass, Gaskets, and Surfaces
Keeping your stove’s glass, gaskets, and surfaces clean not only makes it look better but helps it run safely and efficiently. Wipe cooled glass with a damp cloth and ash for stubborn marks, using stove glass cleaner if needed. Check door gaskets for wear; replace frayed seals to keep drafts out. Clean exterior surfaces with mild detergent, avoiding abrasive pads. Inspect hinge and air vents, removing soot gently with a soft brush. Schedule these tasks monthly during use.
| Task | Frequency | Tool |
|---|---|---|
| Glass | Monthly | Damp cloth/ash |
| Gaskets | Quarterly | Gasket replacement kit |
| Surfaces | Monthly | Mild detergent |
Common Mistakes That Lower Efficiency or Raise Risk
Regular cleaning and proper maintenance cut down many problems, but some common mistakes still undo those efforts and either waste fuel or create hazards. You might stack wet wood, choke the airflow, overload the firebox, ignore bad seals, or block the flue — each choice costs you heat and safety. Avoid shortcuts and stay alert.
- Stacking damp wood that smolders and fills your home with smoke.
- Choking airflow to “save wood” and producing creosote quickly.
- Overloading the firebox, risking cracked glass or warped metal.
- Ignoring worn gaskets that let smoke sneak out.
- Blocking the flue during operation.
When to Call a Pro: Service, Repairs, and Inspections
If you’re unsure about a repair or inspection, call a professional—especially for issues that affect safety or performance.
Schedule annual chimney and flue inspections, and get immediate help for persistent smoke, unusual odors, or carbon monoxide alarm triggers.
Hire a tech if you suspect creosote buildup, a cracked firebrick, warped baffles, or damaged seals.
Don’t attempt major stove modifications, blocked flues, or complex gasket replacements yourself.
A pro will test draft, clean hidden creosote, repair masonry, and verify clearances meet code.
Keep service records and address recommended repairs promptly to protect your home and keep the stove efficient.
Accessories That Improve Wood Stove Performance
You’ll get better safety and efficiency by adding a few simple accessories. Heat-resistant gloves protect your hands when loading wood.
Stove-top thermometers help you keep the fire burning at the right temperature.
High-efficiency dampers let you control airflow for cleaner combustion.
Consider these items to make your stove safer and more economical.
Heat-Resistant Gloves
Though gloves might seem like a small detail, heat-resistant gloves are essential for safe, efficient wood-stove use. They let you load fuel, adjust dampers, and move hot tools without hesitation.
You’ll want gloves with long cuffs, heat-rated materials, and a good grip so you can handle logs and poker with confidence. Inspect them regularly for wear, keep them dry, and replace when insulation breaks down.
They protect your hands and let you tend the fire quickly, reducing risky fumbling. Choose comfort and dexterity so tasks feel natural, not cumbersome.
- Relief when tasks are hot
- Confidence reaching in
- Calm during windy nights
- Pride in safe handling
- Comfort tending warmth
Stove-Top Thermometers
Gloves protect your hands while you work at the stove, but a stove-top thermometer protects the stove itself by showing when the fire’s running at the right temperature. You mount the gauge on the stove’s top or flue and watch the dial or digital readout to keep combustion within the safe, efficient range.
Maintaining correct surface temperature reduces creosote buildup, improves heat output, and prevents overheating. You’ll learn how to adjust fuel and air based on readings, avoid guesswork, and extend stove life.
Choose a quality, calibrated thermometer and check it periodically for accuracy to get reliable feedback.
High-Efficiency Dampers
When you fit a high-efficiency damper to your stove or flue, it gives you precise control over airflow so the fire burns cleaner and longer. You’ll notice steadier heat, less fuel waste, and fewer emissions.
Adjusting the damper helps you slow the burn overnight or boost it quickly on cold mornings. Install and seal it properly, test for smooth operation, and pair it with a stove-top thermometer.
Regular checks prevent creosote buildup and maintain efficiency. You’ll feel safer, save money, and enjoy cozier rooms when you master damper adjustments.
- Comfort that soothes
- Pride in efficient use
- Relief from cold
- Joy in saving
- Peace of mind
Using a Wood Stove in Small or Tight Spaces Safely
If you’re fitting a wood stove into a small or tight space, plan placement and clearances carefully to prevent heat damage and guarantee proper airflow. Measure required clearance from manufacturer and local code, and keep combustible materials, curtains, and furniture well beyond that line.
Use noncombustible hearth pads and wall shields where allowed to reduce clearance needs. Verify adequate ventilation and an external fresh-air intake if the room is sealed.
Install a carbon monoxide detector nearby and a smoke alarm in the dwelling. Maintain clearances for stove pipe and chimney access for inspection and cleaning.
Never overload the stove; burn clean, dry wood.
Seasonal Shutdown and Startup Checklist for Wood Stoves
Because your stove sits unused for months, you should follow a simple seasonal shutdown and startup checklist to keep it safe, efficient, and ready to use. You’ll protect your home and extend the stove’s life by performing clear, deliberate steps before and after winter.
Inspect flues, clean ash, and seal drafts so returns are warm and worry-free. Keep records of maintenance and schedule professional inspections when needed.
- Remember the comforting glow you’ll miss if you neglect chimney cleaning.
- Feel safer knowing vents are clear.
- Enjoy pride in a well cared-for stove.
- Relish smoke-free starts.
- Cherish reliable warmth.
Frequently Asked Questions
Can I Cook Directly on My Wood Stove Surface?
Yes, you can cook directly on your wood stove surface, but you’ll need heavy-duty cookware, consistent heat, and caution for hot spots, creosote, and soot; clean the surface regularly and avoid delicate or non-heatproof utensils.
Are Pellet Stove Fuels Interchangeable With Wood Stoves?
No, you shouldn’t interchange pellet fuels with wood stoves; pellets require a pellet stove’s feed and combustion system, and wood stoves need seasoned cordwood or approved wood fuel, or you risk damage, poor burning, and safety hazards.
How Do Pets Affect Stove Placement and Safety?
Pets increase risk, so you’ll place your stove farther from traffic areas, use barriers or screens, secure cords and fuel, supervise animals, maintain clearances, install guards to prevent burns, and guarantee adequate ventilation to protect pets and home.
Will Using Chemical Fire Starters Damage the Stove?
They can, yes. You shouldn’t use chemical fire starters regularly because they can corrode metal, leave toxic residues, clog flues, and produce hazardous fumes; use dry kindling, natural starters, or approved products to protect the stove and air quality.
Can I Install a Wood Stove on a Wooden Floor Without Hearth Tiles?
No, you shouldn’t install a wood stove directly on a wooden floor without adequate protection; you’ll need a noncombustible hearth or approved floor protector sized per code, maintain clearances, and follow local building and installer requirements.
Conclusion
You’ve now got the basics to light, feed, and maintain a wood stove safely—pick the right model, burn seasoned hardwood, and use proper accessories. Keep vents clear, have annual inspections, and call a pro for repairs you can’t handle. In small spaces be cautious with clearances and ventilation. Follow seasonal startup and shutdown steps so your stove runs cleanly and efficiently, keeps your home warm, and gives you reliable heat all winter.