How to Wash Wooden Toys
You can safely clean most wooden toys with a soft, barely damp cloth and mild soap or a 1:4 white vinegar solution, wiping along the grain and drying immediately to avoid warping. Spot-clean sticky messes with a soft brush or cotton swab, rinse lightly, then air-dry in a shaded, ventilated area. Avoid soaking, bleach, steam, or abrasive pads; reapply food-safe oil if finish looks dry. Keep going for tips on tougher stains, sanitizing, and repairs.
Who This Guide Is For and What You’ll Learn
Whether you’re a parent, caregiver, daycare operator, or gift-giver, this guide shows practical, safe ways to clean and care for wooden toys so they last and stay hygienic. You’ll learn which cleaning methods suit sealed versus unfinished wood, how to remove common grime and stains without damaging finishes, and when to use gentle soap, vinegar solutions, or spot treatments.
You’ll also get simple drying, deodorizing, and storage tips to prevent mold and warping, plus safety cues for inspecting toys and knowing when restoration or replacement is needed. Follow these focused, practical steps to keep toys safe and durable.
Quick Answer: Safe, Fast Steps to Wash Wooden Toys
Now that you know who this guide is for and what you’ll learn, here’s a quick, practical rundown you can follow right away.
Wipe loose dirt with a dry cloth.
Mix mild dish soap with warm water; dampen—not soak—a soft cloth.
Wipe the toy, following the grain, then rinse the cloth and wipe again to remove soap.
Dry immediately with a clean towel.
For crevices, use a soft brush or cotton swab dipped and squeezed dry.
If wood is oiled, reapply a small amount of food-safe oil after cleaning.
Air briefly to ensure completely dry before returning to play.
When to Clean Wooden Toys: Timing and Frequency
If your child plays with a toy every day, clean it weekly; less-used items can be wiped down every few weeks or after messy play. Also clean toys after illness, outdoor use, or spills.
Increase frequency for teething toys and items mouthed often. For group or daycare settings, sanitize more often—daily or between users.
Seasonal deep cleans (every few months) help remove buildup. Keep a simple schedule or checklist so you won’t forget.
Inspect toys during cleaning to decide if more frequent care is needed. Trust your judgment: frequency should match use, exposure, and the child’s health risks.
Check Finish and Wood Type Before Washing
You’ve set a cleaning rhythm, but before you reach for water or a spray bottle, check the toy’s finish and wood type to avoid damage. Look for varnish, oil, paint, or raw wood. If it’s sealed, you can use a lightly damp cloth; if it’s oiled or unfinished, stick to dry wiping or a barely damp cloth and reapply oil sparingly. Painted toys need spot checks for chips. When unsure, test a hidden area. Use the table to guide decisions quickly.
| Finish | Wood Type | Recommended Action |
|---|---|---|
| Varnished | Hardwood | Damp cloth |
| Oiled | Softwood | Dry/wipe lightly |
| Painted | Any | Spot test |
Why Water and Harsh Cleaners Damage Wooden Toys
You shouldn’t soak wooden toys because water makes the wood swell, warp, and weaken the joints.
You also shouldn’t use harsh cleaners that strip protective finishes and leave the bare wood exposed.
Instead, clean gently so the finish and shape stay intact.
Water Causes Swelling
When wood soaks up water, its fibers swell and warp, and that changes the toy’s shape and fit; you’ll notice joints tighten, pegs stick, and painted surfaces crack as moisture alters grain alignment.
Repeated wetting and drying cycles force tiny splits that widen over time, letting dirt and bacteria lodge in crevices.
You should avoid soaking or leaving toys damp; instead, wipe spills immediately and dry thoroughly.
For deeper cleaning, use minimal liquid and a barely damp cloth, then air-dry completely.
Preventing prolonged moisture keeps pieces moving smoothly and preserves structural integrity, appearance, and safety for play.
Harsh Cleaners Strip Finish
Although water itself can be harmless in small amounts, harsh chemical cleaners and repeated wetting strip protective finishes and wear away natural oils that seal wooden toys. You’ll notice dullness, roughness, and faster wear when finishes break down.
Avoid bleach, ammonia, and strong detergents; they leach pigments and damage sealants. Instead, spot-clean with a damp cloth and mild soap, dry promptly, and reapply a child-safe oil or wax when needed to restore protection.
- Bleach and ammonia remove sealants
- Repeated soaking softens glue joints
- Strong soaps dull paint and stain
- Damaged finish invites moisture ingress
- Renew oils to prolong life
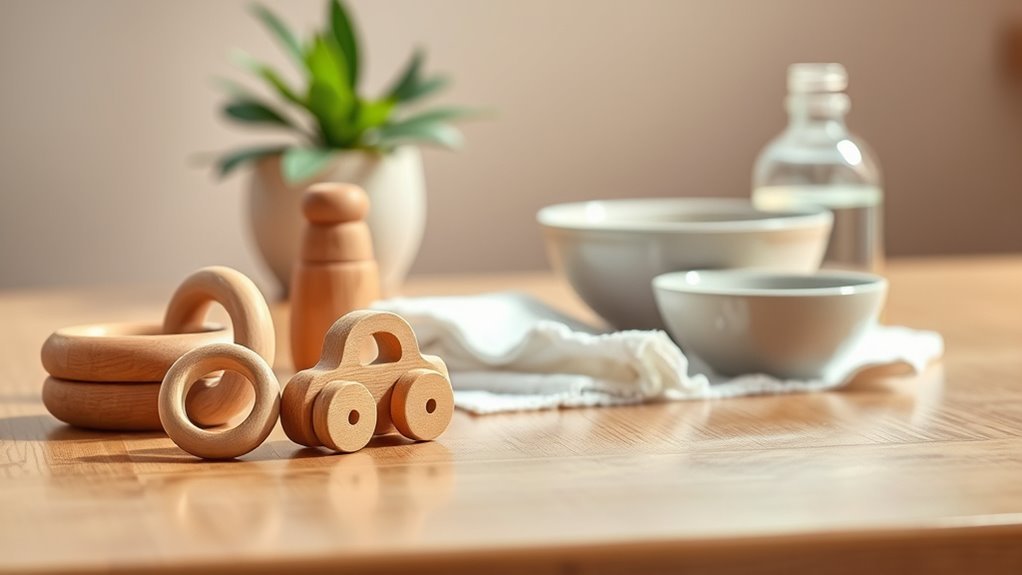
What Supplies You’ll Need to Wash Wooden Toys
Before you start, gather a few gentle, effective supplies so cleaning goes quickly and safely: a soft cloth or sponge, mild dish soap, distilled white vinegar (diluted for tougher grime), a toothbrush for crevices, a bowl of warm water, and a clean towel for drying.
Add a small spray bottle for controlled misting, cotton swabs for tight spots, and a soft-bristled brush for textured surfaces.
Use a shallow basin to avoid soaking, and have a drying rack or protected surface ready.
Keep gloves if you prefer, and a notebook to note finishes or repairs for future care.
Gentle Cleaners Safe for Wooden Toys and Kids
If you want cleaners that’re effective but safe for kids and wood, stick to mild, pH-neutral options and simple household solutions you can rinse or wipe away easily. You’ll avoid harsh chemicals that strip finishes or leave residues kids might lick.
Test any cleaner on an inconspicuous spot first, use minimal moisture, and dry thoroughly. Choose products labeled non-toxic and fragrance-free when possible.
For everyday soil and sticky spots, use gentle solutions you can control and dilute.
- Diluted white vinegar (mild, short contact)
- Mild dish soap, rinsed well
- Castile soap solution
- Baking soda paste (spot clean)
- Olive oil + lemon wipe (conditioning)
Household Cleaners You Can Use on Wooden Toys
Now that you know which gentle options work and why, here are specific household cleaners you can safely use on wooden toys.
Use mild dish soap diluted in warm water for everyday grime; apply with a soft cloth, then wipe with a damp cloth and dry immediately.
For everyday grime, clean wooden toys with mild dish soap diluted in warm water; wipe damp, then dry immediately.
White vinegar diluted half-and-half with water disinfects; don’t soak.
Rubbing alcohol on a cloth works for small sticky spots and evaporates quickly.
Baking soda paste removes stains—apply briefly, then rinse and dry.
Mineral oil or food-grade beeswax polish restores finish after cleaning.
Always test a hidden area first and air-dry fully.
Remove Dust and Sand From Wooden Toys Safely
Because dust and sand can scratch finishes and hide in crevices, you’ll want to remove them gently and promptly. Use soft tools and dry methods first so moisture doesn’t swell the wood. Turn pieces to access joints and insides. Work over a towel or tray to catch particles. Inspect after cleaning and repeat if needed.
- Use a soft-bristled brush to loosen grit.
- Vacuum with a soft brush attachment on low.
- Wipe with a microfiber cloth to lift remaining dust.
- Use compressed air for tight crevices, short bursts only.
- Let toys air fully before storing.
Wipe-Clean Method for Light Messes on Wooden Toys
For small spills or smudges, you can usually just wipe the surface with a damp cloth for a quick surface wipe.
If the mess needs more cleaning, mix a few drops of mild soap with water and wipe again, then rinse the cloth and remove any soap residue.
Let the toy air-dry completely before putting it away.
Quick Surface Wipe
Looking for a fast way to freshen wooden toys between deeper cleans? You can remove crumbs and smudges in seconds.
Use a soft, lint-free cloth slightly dampened with plain water, wrung well so it’s not dripping. Wipe along the grain, avoid soaking joints, and dry immediately with a second cloth.
For sticky spots, gently rub until residue lifts. Let toys air completely before storing.
- Soft lint-free cloth
- Lukewarm water only
- Wring cloth thoroughly
- Wipe with the grain
- Dry immediately and air
This keeps finish and joints safe while maintaining hygiene.
Mild Soap Option
Want something a bit stronger than plain water but still gentle on wood? Mix a few drops of mild dish soap into warm water.
Dampen a soft cloth—don’t soak it—and wring thoroughly so it’s just slightly damp. Wipe the toy’s surface, following the grain, to lift dirt, sticky spots, and fingerprints.
Rinse the cloth, wring again, and wipe to remove soap residue.
Dry immediately with a clean towel and let the toy air dry fully before returning it to play.
For painted or sealed toys, test a hidden spot first to guarantee the finish won’t soften.
Spot-Clean Sticky or Food-Stained Areas on Wooden Toys
Need to remove a sticky spot fast? Use a damp cloth with a drop of mild dish soap to gently rub the area, then wipe with a clean damp cloth and dry immediately.
For stubborn residue, try a bit of white vinegar on the cloth, test a hidden spot first, and buff dry.
Don’t soak wood or use bleach.
- Blot excess food before cleaning
- Use gentle circular motions
- Rinse cloth frequently to avoid grit
- Dry promptly to prevent swelling
- Repeat only if stain persists
These steps remove sticky messes without harming finish or sealing.
How to Hand-Wash Wooden Toys for Deeper Cleaning
When toys need more than a quick spot clean, hand-washing by hand lets you remove grime without damaging the wood or finish. Fill a bowl with warm water and a mild soap; avoid soaking the toy.
When toys need more than a quick wipe, gently hand-wash with warm water and mild soap—never soak.
Dip a soft cloth or sponge, wring thoroughly, and wipe all surfaces following the grain. Use a soft toothbrush for crevices.
Rinse the cloth in clean water and wipe away soap residue. Dry immediately with a towel, then air-dry standing in a well-ventilated spot, avoiding direct heat or sunlight.
Reapply a small amount of food-safe oil only if the wood looks dry.
Using Diluted Vinegar Safely on Wooden Toys
If you’ve finished a gentle hand wash but want a natural disinfectant for wooden toys, diluted white vinegar can help without harming most sealed wood. Mix one part white vinegar with four parts water, test a hidden spot, and wipe with a soft cloth.
Don’t soak toys; rinse lightly with a damp cloth and dry upright. Reapply finish if wood looks dull.
- Use 1:4 vinegar-to-water ratio
- Spot-test before treating the whole toy
- Avoid raw or unfinished wood
- Wipe, don’t soak, and dry promptly
- Refinish if sealant seems worn
When to Sanitize vs. Just Clean Wooden Toys
Decide to sanitize only when there’s a clear risk—like illness in the household, contact with bodily fluids, or a child who puts everything in their mouth—and otherwise stick to routine cleaning to preserve the wood’s finish. You should clean after everyday play, food contact, or outdoor use with mild soap and a damp cloth. Sanitize when someone’s sick, after vomit or blood contact, or if a high-risk child is involved. Test any method on a hidden spot. Dry thoroughly. Replace or repair cracked toys.
| Situation | Action | Frequency |
|---|---|---|
| Everyday dirt | Clean | Daily |
| Food smears | Clean | After use |
| High risk exposure | Sanitize | As needed |
| Bodily fluids | Sanitize | Immediately |
How to Disinfect Wooden Toys After Illness Exposure
You’ll want to move from routine cleaning to targeted disinfection after illness exposure to reduce germ spread while protecting the wood finish. Start by removing loose debris with a soft brush, then wipe with a mild soap solution.
Use a diluted disinfectant safe for wood—3% hydrogen peroxide or a 70% isopropyl wipe applied sparingly—testing a small area first.
Avoid soaking or harsh chemicals that strip sealant. Rinse lightly with a damp cloth if needed, then air in a clean area.
Store toys only after they’re fully dry and cool.
- Test disinfectant on hidden spot
- Use minimal liquid
- Follow product contact time
- Avoid bleach
- Sanitize frequently touched pieces
Drying Methods That Prevent Warping and Cracks
Because wood warps and cracks when it dries unevenly, you should control both airflow and moisture during the drying phase. Pat toys with a clean towel to remove surface water, then air-dry them flat on a rack in a well-ventilated room away from direct heat or sunlight.
Rotate pieces periodically so all sides dry evenly. For thicker items, stand them on edge to expose more surface area. Avoid hair dryers, radiators, or sealed containers that trap humidity.
Once completely dry, check for stiffness or splitting before storing. Proper drying preserves shape and prevents future cracking.
Treat Seams, Holes, and Painted Details Gently
When seams, small holes, or painted details are present, handle them with extra care to avoid loosening glue, widening gaps, or chipping paint. You’ll work slowly, testing a hidden spot first.
Use a soft brush or cloth to remove dirt; avoid soaking. For crevices, apply a damp cotton swab and blot dry immediately.
If paint flakes, stop and consult a conservator or use minimal touch-up with compatible, non-toxic paint.
For loose seams, clamp gently after applying a tiny amount of wood-safe glue; wipe excess at once.
- Test hidden areas first
- Use minimal moisture
- Blot, don’t rub
- Avoid harsh solvents
- Clamp gently when repairing
Cleaning Wooden Toys With Fabric or Plush Parts
If a toy combines wood with fabric or plush, treat each material according to its needs and avoid soaking the wooden parts.
Remove detachable fabric pieces when possible and launder them per their care label or hand-wash with mild detergent and cool water.
For fixed fabric, spot-clean stains with a damp cloth and mild soap; blot rather than rub to protect fibers and underlying wood.
Keep moisture away from seams and joints—work quickly and use minimal water.
Dry thoroughly: air-dry fabric parts and wipe wood with a dry cloth, then let the toy sit in a well-ventilated area until completely dry.
Caring for Unfinished vs. Sealed Wooden Toys
After handling mixed-material toys carefully, you’ll want to treat purely wooden pieces based on their finish: unfinished wood soaks up cleaners and moisture, while sealed wood resists liquids and wipes cleaner.
You should spot-test any cleaner, avoid soaking unfinished pieces, and use a damp cloth for sealed toys.
Let unfinished items air-dry fully to prevent warping.
If paint is chipped, sand lightly and keep kids away until repaired.
- Unfinished: no water immersion
- Sealed: wipe with mild soap and damp cloth
- Spot-test before cleaning
- Dry flat and completely
- Repair damaged finishes before reuse
Refresh Oil-Finished Toys With Food-Safe Oils
If your wooden toys have an oil finish, choose a food-safe oil like mineral oil or fractionated coconut oil to keep them safe for little hands.
Apply a thin coat with a soft cloth, let it soak in a few minutes, then buff off any excess.
Repeat as needed to restore luster and protect the wood.
Choose Food-Safe Oils
1 simple rule will keep wooden toys safe and looking great: use only food‑safe oils for revitalizing oil finishes. You’ll protect children and preserve wood by choosing oils that’re non-toxic, odorless when cured, and labeled food‑safe.
- Use mineral oil (USP) for bland, reliable protection
- Choose fractionated coconut oil for longer shelf life
- Consider walnut oil if no nut allergies exist
Avoid vegetable oils that go rancid (like olive). Look for beeswax blends labeled food‑safe for added durability.
Check labels, buy reputable brands, and keep containers sealed. You’ll reapply as needed, ensuring toys stay safe and nourished.
Apply And Buff In
When the wood looks dry or a toy’s finish feels dull, apply a thin coat of your chosen food‑safe oil with a soft cloth or brush, working along the grain so the oil soaks in evenly. Let it penetrate for 10–20 minutes, then wipe off excess to prevent sticky buildup. After drying, buff with a clean cloth to restore sheen and remove residue. Repeat sparingly—over‑oiling can darken wood. Store oiled toys in a dry place and reapply as needed.
| Step | Tip |
|---|---|
| Apply | Thin coat |
| Wait | 10–20 min |
| Remove | Wipe excess |
| Buff | Clean cloth |
| Repeat | Sparingly |
What to Avoid: Cleaners, Tools, and Practices That Damage Wood
Although gentle soap and water work well for most wooden toys, you should steer clear of harsh cleaners, abrasive tools, and moisture-heavy methods that can warp, strip finishes, or roughen surfaces. Don’t use bleach, ammonia, or solvent-based sprays; they degrade wood and finishes.
Skip steel wool, scouring pads, and coarse brushes that scratch grain and expose fibers. Avoid soaking, immersion, or steam cleaning that swells joints and delaminates glued parts.
Don’t apply oil-heavy furniture polishes that attract dust or leave sticky residues kids lick. Refrain from sanding aggressively; save that for controlled repairs, not routine cleaning.
- Bleach or ammonia cleaners
- Steel wool/scouring pads
- Soaking/steam cleaning
- Oil-based polishes
- Aggressive sanding
Fix Water Damage, Swelling, or Surface Roughness
First, check the toy for soft spots, raised grain, or persistent dampness so you can gauge how deep the damage is.
If the wood is swollen, let it dry slowly at room temperature and avoid heat that can crack it.
Once dry, sand any rough areas lightly and reapply a child-safe finish to restore smoothness.
Assess Moisture Damage
If your wooden toy looks discolored, warped, or feels rough, check for moisture damage right away so you can stop further deterioration and plan repairs.
Inspect joints, seams, and painted areas for soft spots or flaking.
Smell for mildew; a musty odor signals hidden dampness.
Press gently to detect swelling or spongy wood.
Note any paint lift or bubbling that indicates trapped moisture.
Document affected areas and severity before cleaning or drying so you know if professional repair is needed.
Drying and treatment choices depend on this assessment; don’t skip a careful evaluation.
- Check joints and seams
- Smell for mildew
- Press for sponginess
- Note paint bubbling
- Photograph damage
Restore Surface Smoothness
When water has raised the grain or left the wood feeling rough, gently restoring smoothness will both improve appearance and prevent further damage. You’ll want to remove swollen fibers, even out the surface, and protect it from future moisture.
Start by drying the toy completely in a warm, ventilated spot.
Lightly sand raised areas with fine-grit (220–400) sandpaper, always sanding with the grain to avoid scratches.
Remove dust with a tack cloth.
If swelling is severe, repeat drying and sanding in stages.
Finish with a food-safe oil or wax, applying thin coats and buffing to seal and restore a smooth, resilient surface.
Remove Mold or Mildew From Wooden Toys Safely
Because mold and mildew can damage wood and pose health risks, you’ll want to remove them promptly and carefully using gentle cleaners and soft tools.
First, take the toy outside and brush loose spores with a soft brush.
Wipe affected areas with a cloth dampened in a mild vinegar solution (1 part white vinegar to 4 parts water), then rinse with a clean damp cloth.
Dry immediately in sunlight or a well-ventilated spot.
If stains persist, lightly sand and refinish with a child-safe oil.
- Brush loose spores outdoors
- Use diluted white vinegar
- Rinse with clean water
- Dry thoroughly
- Sand and refinish if needed
Storage Tips to Keep Wooden Toys Clean Longer
While you’re not using them, store wooden toys in a dry, well-ventilated spot away from direct sunlight and damp, which prevents warping, cracking, and mold.
Keep toys elevated on shelves or in breathable bins—cotton bags, wicker baskets, or open crates work well. Avoid plastic airtight containers that trap moisture.
Separate dirty toys until they’re cleaned to stop cross-contamination. Wrap delicate pieces in soft cloth to prevent scratches and finish damage.
Rotate toys to limit long-term exposure to dust and light. Check storage periodically for pests, damp spots, or finish wear so you can address issues promptly.
Travel and Outdoor Tips: Clean Wooden Toys on the Go
When you’re out and about, keep a stash of unscented baby wipes or a microfiber cloth for quick wipes between uses.
Pack a small portable cleaning kit—think a spray bottle with diluted mild soap or vinegar solution, a soft brush, and a spare towel—in a zip pouch.
Those two habits let you handle spills and grime fast so toys stay safe and ready to play.
Quick Wipes Routine
If you’re out and about with wooden toys, keep a small pouch of non-abrasive, dampened wipes and a dry microfiber cloth handy so you can quickly remove dirt and sticky messes before they settle into the grain.
When a spill happens, blot gently with a wipe—don’t rub hard—then dry immediately with the cloth to prevent swelling or staining. Focus on seams and painted areas.
Rotate wipes so you’re using clean surfaces, and dispose of used wipes responsibly. Quick attention prevents deeper cleaning later and preserves finishes.
- Blot, don’t scrub
- Dry right away
- Use gentle wipes
- Target crevices
- Replace if soiled
Portable Cleaning Kit
Because spills and grime can strike anywhere, keep a compact cleaning kit in your bag so you can quickly care for wooden toys on the go. Pack a small spray bottle with diluted mild soap, a microfiber cloth, a soft-bristle travel brush, and a resealable bag for damp items. Use gentle sprays, wipe dry immediately, and air out toys fully before storing. Replace cleaning solution weekly. This lightweight kit lets you handle sticky hands, mud, and crumbs without harming finishes.
| Item | Purpose |
|---|---|
| Spray bottle | Gentle cleaning |
| Cloth/brush | Wipe and scrub |
Cleaning Wooden Puzzles, Blocks, and Building Sets
Though wooden puzzles, blocks, and building sets can withstand playday grime, you’ll want to clean them gently to preserve finish and fit. Wipe pieces with a soft cloth dampened in mild soapy water, avoiding saturation. Use a toothbrush for grooves, then dry immediately.
Sanitize sparingly with a 70% isopropyl wipe or a vinegar solution sprayed on cloth. Check for loose parts and sand rough edges lightly. Oil unfinished wood occasionally with food-safe oil, wipe excess, and let cure fully before play.
- Spot-clean stains promptly
- Avoid soaking pieces
- Keep joints dry
- Store in a ventilated box
- Inspect regularly for damage
Wash Painted or Stickered Wooden Toys Without Stripping Art
When you clean painted or stickered wooden toys, use only gentle methods like a soft cloth dampened with mild soap and water to avoid lifting paint or stickers.
Pat surfaces dry and air-dry toys flat in a well-ventilated spot to prevent moisture from seeping under artwork.
Avoid soaking or scrubbing hard so the finish and stickers stay intact.
Gentle Cleaning Methods
If your wooden toys have painted surfaces, decals, or stickers, clean them with gentle, nonabrasive methods to preserve the artwork and finish. Wipe dust with a soft, dry cloth.
For sticky spots, dampen a microfiber cloth with a mixture of mild dish soap and water, wrung nearly dry, then blot—don’t scrub. Use cotton swabs for crevices and edges near decals.
Rinse the cloth, remove soap residue with a barely damp pass, and dry immediately with a soft towel to avoid moisture seeping into seams.
- Soft microfiber cloths
- Mild dish soap diluted
- Cotton swabs for detail
- Light blotting, not scrubbing
- Immediate towel drying
Protective Drying Techniques
How do you dry painted or stickered wooden toys so the finish and artwork stay intact? Pat toys gently with a soft, lint-free cloth to remove surface moisture without rubbing paint or edges.
Air-dry horizontally on a towel in a shaded, well-ventilated spot; avoid direct sunlight or heaters that warp wood or fade colors.
For layered pieces, stand them on edges to let airflow reach crevices.
If stickers lift, press edges down with a dry cloth after drying.
Don’t tumble-dry or soak.
Once fully dry, apply a thin coat of food-safe oil to unfinished wood only, avoiding painted areas.
When to Repair : and When to Replace : a Wooden Toy
Sometimes a few quick fixes will make a toy safe and usable again, but you should replace any piece that’s cracked through, has loose small parts, or shows deep water damage that sanding and sealing won’t fix.
Sometimes quick fixes restore a toy, but replace any piece cracked through, with loose parts, or deep water damage
Inspect joints, finish, and hardware. If glue bonds hold and surfaces are smooth, repair: reglue, clamp, sand, and recoat with food-safe finish.
Replace when structural integrity is compromised, small parts present choking hazards, or mold has penetrated grain.
Keep records of repairs and age limits. Trust your judgment—safety and durability matter more than sentiment.
- Check for cracks and splinters
- Test glued joints
- Look for mold or rot
- Assess finish wear
- Evaluate small parts safety
Weekly Maintenance Checklist for Busy Parents
While you’re juggling work, errands, and playtime, a short weekly checklist keeps your child’s wooden toys safe and ready to use. Inspect for cracks, splinters, loose parts, and broken paint; remove or repair damaged pieces immediately.
Wipe toys with a damp cloth and mild soap, then dry thoroughly to prevent moisture damage. Lightly sand any rough spots and reapply a child-safe oil or wax to restore protection.
Check joints and strings for wear, tighten as needed. Store toys in a dry, ventilated bin away from direct sunlight.
Note any recurring issues to address before they worsen.
Troubleshoot Warping, Finish Loss, Odor, and Sticky Residue
If your wooden toys start to warp, lose their finish, smell odd, or feel sticky, you can usually fix the problem with a few targeted steps. Act quickly: dry warped pieces flat, weigh them down, and let them acclimate.
Remove gummy residue with a damp cloth and mild soap; rinse and dry.
Restore finish with food-safe oil or beeswax paste.
Neutralize odors by airing outdoors, then wiping with a vinegar solution and drying thoroughly.
Inspect for mold; discard if persistent.
- Dry flat and weight down
- Clean sticky areas gently
- Use food-safe refinishing
- Air and vinegar for smells
- Toss moldy items
Frequently Asked Questions
Can I Wash Wooden Teethers in a Dishwasher?
No, you shouldn’t run wooden teethers in a dishwasher because heat, water and detergent will warp, crack and strip finishes. Instead, you’ll wipe them with a damp cloth, mild soap, rinse quickly, dry thoroughly, and oil occasionally.
Are Antimicrobial Finishes Safe for Baby Toys?
They can be safe if the finish’s ingredients are non-toxic, fully cured, and certified for toys; you’ll want to check labels, avoid heavy metals or formaldehyde, and wash according to manufacturer guidance to protect baby health.
How Do I Clean Wooden Toys With Metal Parts?
You clean wooden toys with metal parts by spot-wiping wood with a damp cloth and mild soap, drying thoroughly, then disinfecting metal with a dilute alcohol wipe, avoiding soaking, and oiling wood edges to protect the finish.
Can Essential Oils Be Used to Freshen Wooden Toys?
Yes, you can use essential oils sparingly to freshen wooden toys, but you shouldn’t apply them undiluted. Dilute a drop in a carrier oil or water-based spray, test on a hidden spot, and avoid oils toxic to children.
How to Remove Permanent Marker From Finished Wood?
You can remove permanent marker from finished wood by gently rubbing with isopropyl alcohol or a baking soda paste, testing first on an inconspicuous spot; don’t scrub hard, then wipe dry and reapply polish if needed.
Conclusion
You’ve got simple, safe steps to keep wooden toys clean without wrecking finishes or art. Check the wood and finish first, wipe or spot-clean with mild soap, dry thoroughly, and oil or wax when needed. Tackle repairs for cracks or loose parts, replace toys with persistent warping or mold, and do quick weekly checks to catch problems early. With gentle care and regular maintenance, wooden toys stay beautiful and safe for play.